Amigurumi seahorse projects hold a prominent position across the fiber arts community, serving as a staple subject across modern needlecraft platforms. This comprehensive tutorial details ten distinct crochet seahorse concepts, outlining the exact yarn selections, hook sizes, dimensional shaping principles, and assembly techniques required to create durable, heirloom-quality marine figures. Readers will learn how to build contoured serpentine trunks, manipulate coronet ridges, install safety hardware securely, and execute prehensile tail coils that hold their spiral shape. Learning these specialized techniques enables makers to transform basic cylinder stitches into lifelike, sculptural ocean art that balances anatomical character with stylized charm. Beyond visual beauty, handmade textile seahorses offer wide practical utility, functioning effortlessly as baby nursery mobiles, interactive tactile rattles, summer coastal accents, and wearable bag charms. By mastering the step by step fabrication methods presented throughout this guide, crafters of any skill level can transition smoothly from basic spherical shapes to advanced curved-form construction. Developing a practical understanding of stitch density, fiber resilience, and internal armature placement ensures that every completed marine piece retains its structural balance over years of display and handling.
Why This Idea Is Trending or Useful
The enduring appeal of crochet seahorses across contemporary design boards stems from their unique combination of organic curves, segmented textures, and coastal aesthetic versatility. In modern home decor, these textured nautical creatures complement coastal cottage, Scandinavian nursery, and minimalist style interiors that prioritize soft pastel tones and tactile craftsmanship. Their visual appeal relies on seafoam green, soft coral, blush pink, lavender, and muted sand yarns that blend effortlessly into modern color palettes. From a practical DIY perspective, seahorse designs provide immense educational value for beginner and intermediate crocheters alike. Unlike standard quadrupeds with repetitive limb construction, seahorses teach crafters how to shape arched necks using asymmetric short-row turns, craft prehensile tails through deliberate directional increases, and build raised dorsal fins using shell stitches. These compact pieces require modest yardage, allowing makers to utilize leftover skeins from larger blankets without purchasing expensive specialty supplies. These combined qualities establish the amigurumi seahorse as a budget-conscious, visually striking, and rewarding creative project that continues to captivate fiber artists around the world.
Materials and Preparation
Achieving smooth, defined results in three-dimensional marine crochet requires systematic material selection and disciplined workspace preparation before casting on. Recommended fibers include mercerized cotton, sturdy cotton-linen blends, and high-twist acrylics; cotton is particularly advantageous because its tight plies provide sharp stitch definition along dorsal ridges without fuzzing under continuous handling. Essential hardware includes locking plastic stitch markers, solid black safety eyes with reinforced washers, bent-tip tapestry needles, and rust-proof craft wire for optional poseable armatures. Select an ergonomic aluminum crochet hook one to two sizes smaller than the manufacturer recommendation on the yarn label to maintain tight, non-porous tension that prevents internal polyester stuffing from showing. Preparation begins with measuring gauge swatches to verify stitch density prior to constructing the main components. Crafters should also inspect internal materials, choosing high-density, hypoallergenic polyester cluster stuffing to prevent clumping during long-term handling. Pre-sorting yarn weights, reading through pattern notes, and organizing small notions into dedicated craft trays establishes a streamlined assembly workflow, ensuring each component meets proportional balance before final stitching begins.
1. Classic Ribbed Dorsal Ridge Seahorse
Step-by-Step Guide
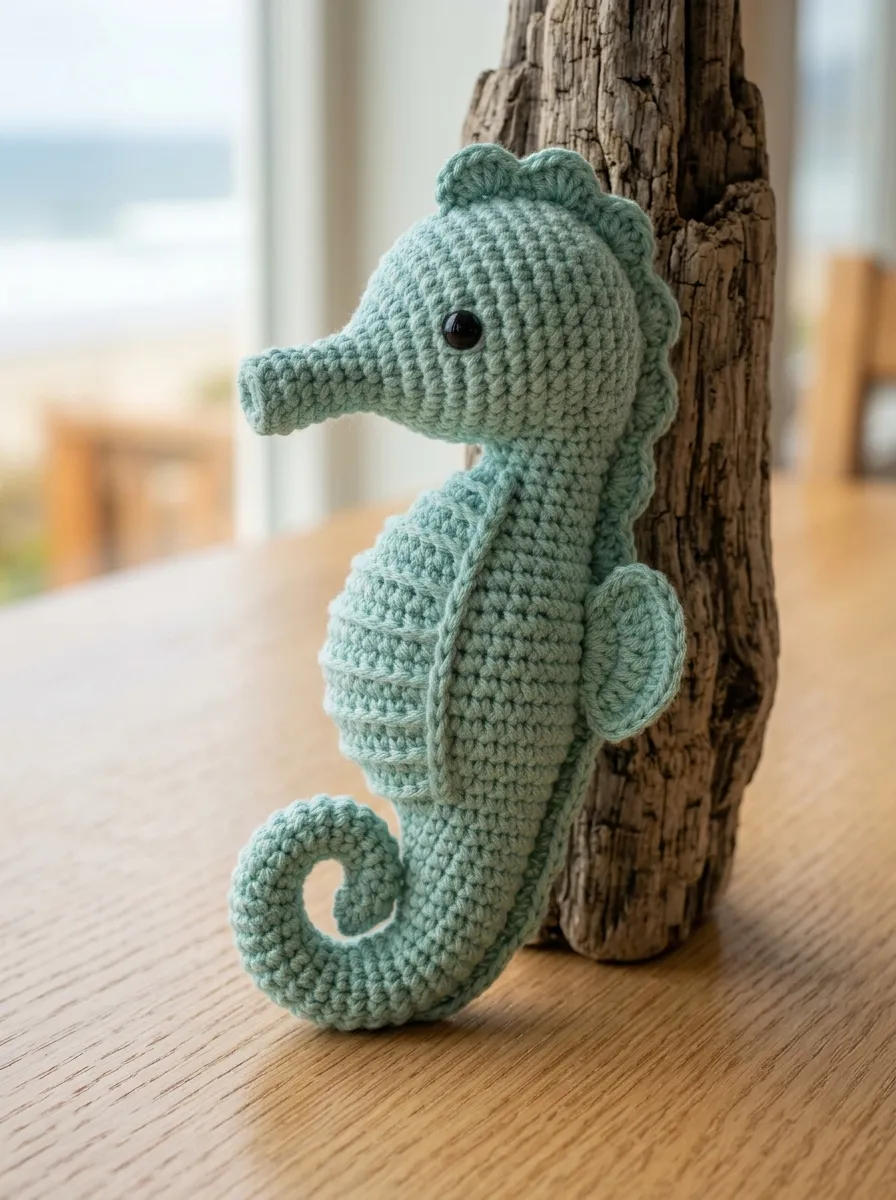
The classic ribbed dorsal ridge seahorse captures the recognizable ocean silhouette through a balanced combination of an elongated snout, a rounded belly shelf, and a continuous segmented back crest. This concept utilizes clean single crochet rounds that expand gradually along the chest before narrowing into a curled tail. The defining structural element is the dorsal fin and spine crest, which is worked along the back seam using alternating slip stitches and picot points to mimic the natural armor plates of wild syngnathids. Soft coastal tones like seafoam green, mist blue, or warm cream highlight the sculptural ridges without overwhelming the piece with high-contrast color shifts. Slender side fins frame the neck transition, giving the figure an alert, upright posture that sits comfortably on display stands or hanging cords. This project serves as an ideal foundation for crafters wanting an authentic marine design with clean, classical lines.
Begin by working the narrow tubular snout with six single crochets in an adjustable ring using medium-weight cotton yarn and a 2.5-millimeter hook. Work four even rounds, then introduce asymmetric increases along the upper forehead to form the curved cranial crown and coronet ridge. Install eight-millimeter black safety eyes between rounds nine and ten, spacing them five stitches apart, and firmly pack the snout with fiberfill using a narrow dowel. Continue downward into the arched neck, alternating slip stitches along the inner curve with half-double crochets along the outer curve to bend the neck forward naturally. Expand the chest with rapid increases, work five even rounds, then taper down into a slender sixty-stitch tail tube. Curve the tail by working three slip stitches into the inner edge every third round, forcing the tube into a tight spiral. Surface crochet the dorsal fin down the center back using a sequence of single crochet, chain two, and double crochet shells.
2. Minimalist Nordic Hanging Seahorse Mobile
Read This:
How to Create
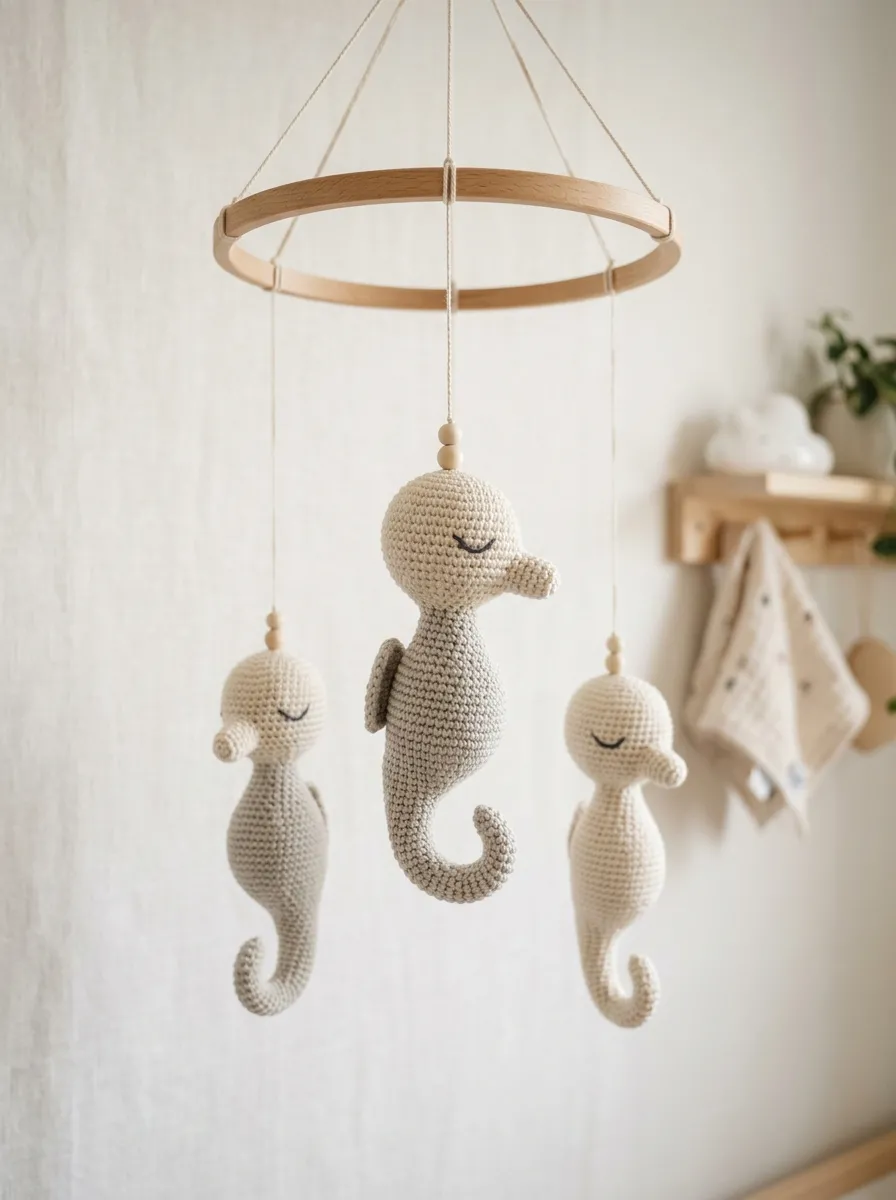
The minimalist Nordic hanging seahorse mobile focuses on clean lines, reduced visual clutter, and gentle geometric forms designed for serene nursery spaces. Inspired by Scandinavian design principles, this concept simplifies complex aquatic anatomy into smooth teardrop bodies and gentle tail curves. The color palette relies on unbleached natural cotton, pale stone grey, and soft oatmeal tones, creating an understated visual presence that harmonizes with light wood nursery furniture. The traditional ribbed spine is replaced with subtle textured seed stitches, providing tactile interest while keeping the outer silhouette smooth and calm. The face remains intentionally quiet, using fine dark embroidery floss for sleepy closed eyes rather than plastic safety hardware. This streamlined approach minimizes assembly steps, making it an accessible option for beginners working on smooth single crochet continuous spirals.
Start by working the head in a continuous spiral using unbleached natural cotton yarn, maintaining firm, uniform tension across all rounds to produce a dense, non-porous fabric. Increase steadily over six rounds to thirty stitches, work five rounds even, then decrease evenly toward the neck opening, lightly stuffing the form with hypoallergenic polyester fiberfill. Construct the torso by expanding downward into an elongated teardrop shape, keeping the front belly smooth while working back-loop-only stitches along the spine to create a faint vertical seam line. Embroider the sleepy eye arcs using two strands of charcoal embroidery floss, positioning them along round eight with a gentle downward curve. Crochet a simple prehensile tail that curves inward at a loose, gentle ninety-degree angle, fastening the tip securely to the lower belly with a hidden whip stitch. Connect three finished seahorses to an untreated natural beechwood embroidery hoop using neutral linen thread to complete the mobile.
3. Pocket-Sized Amigurumi Seahorse Keychain
Execution Process
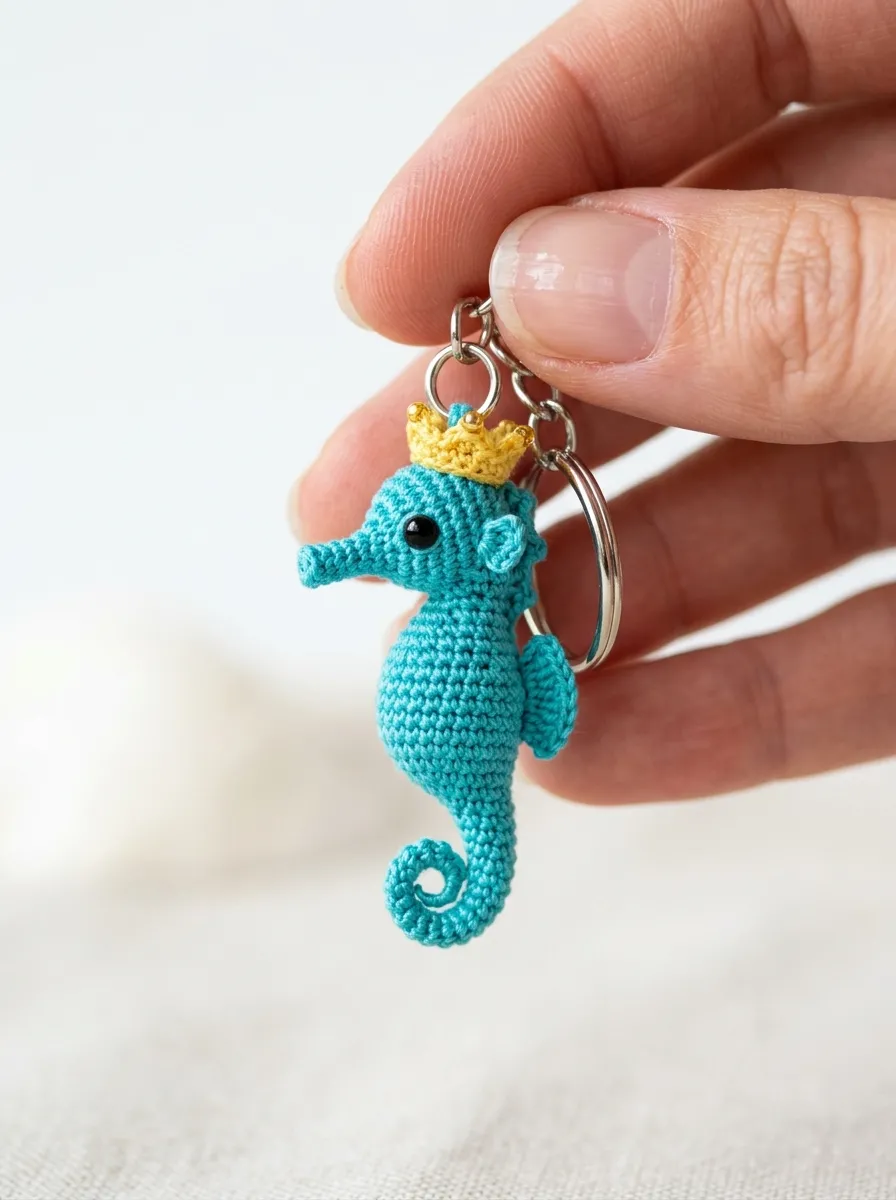
The pocket-sized seahorse keychain condenses the defining anatomical characteristics of a marine creature into an ultra-compact format measuring under three inches in height. This micro-scale project requires fine sport-weight or fingering yarn paired with a small gauge hook, creating a dense, firm stitch pattern capable of holding its shape without distortion during daily handling. The design features an integrated head-and-torso construction, eliminating the primary neck seam to maximize physical durability when attached to bags, keys, or zipper pulls. Slender coronet points, a tiny tubular snout, and an embroidered eye detail preserve the recognizable seahorse profile without adding unnecessary bulk. The project serves as an ideal scrap-busting exercise, requiring very little yarn and under an hour of active production time. Its portable dimensions and quick completion make it an accessible option for crafters assembling batches for gifts or markets.
Using a two-millimeter hook and fine turquoise cotton thread, begin with five single crochet stitches in an adjustable magic ring to form the snout. Increase symmetrically over three rounds to reach eighteen stitches, working three even rounds to establish the cranial volume. Insert five-millimeter black safety eyes between rounds five and six, spacing them four stitches apart. Work two decrease rounds down to ten stitches to shape the slender neck, then immediately increase outward across two rounds to form the compact belly cavity. Stuff the small chamber firmly using tiny tufts of fiberfill pushed into place with the back of a crochet hook. Continue downward into a twelve-stitch tapered tail, decreasing by one stitch every two rounds until four stitches remain. Curl the tiny tail inward and anchor the tip with a single interior stitch. Secure a sturdy stainless steel jump ring and split keyring directly through the coronet stitches at the top of the head.
4. Textured Bobble Belly Pastel Seahorse

Setup Method
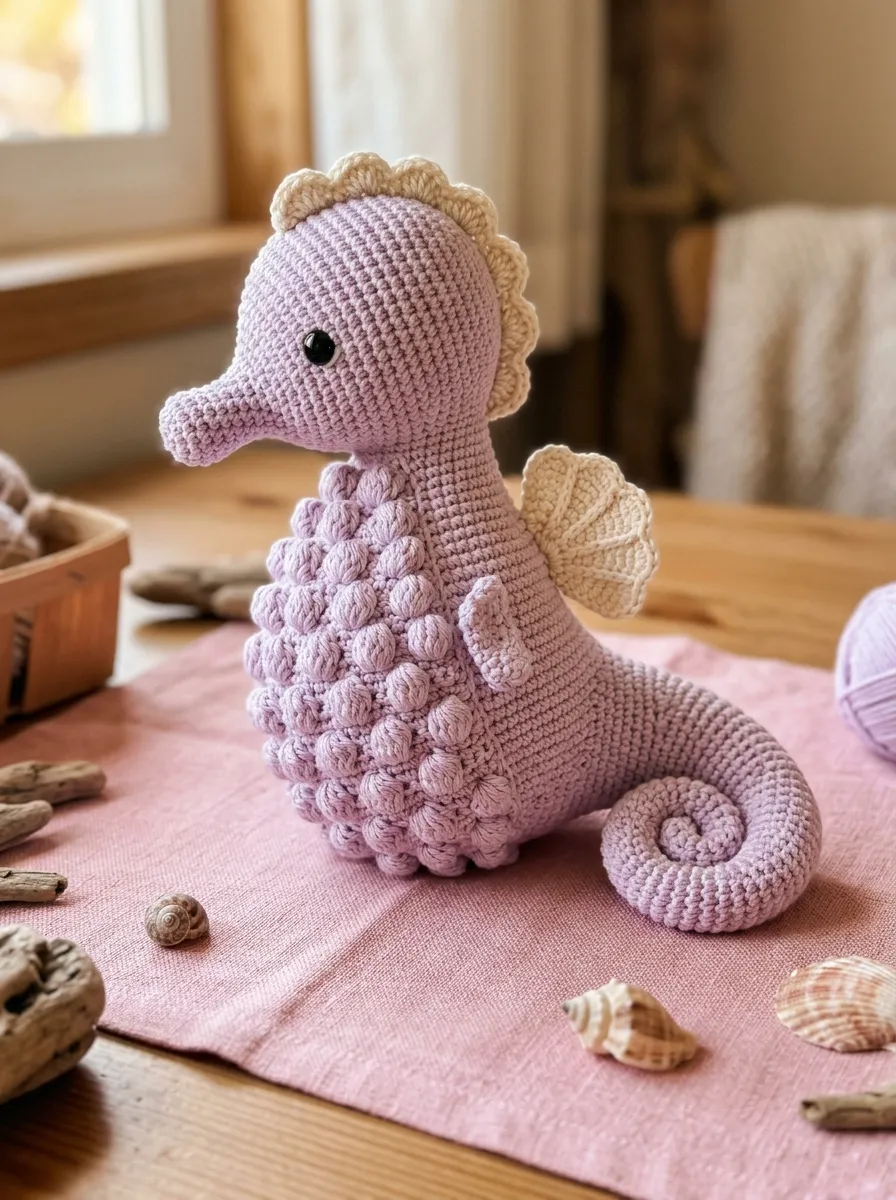
The textured bobble belly pastel seahorse blends classic marine shaping with raised surface textures, turning the front abdomen into a tactile centerpiece. The front panel of the belly features a raised grid of dense, three-dimensional bobble stitches, while the back and sides remain smooth single crochet to maintain clean geometric structure. This contrast adds dimensional depth, catching natural light across the raised yarn clusters while highlighting the smooth curve of the back. Worked in soft pastel shades such as lilac, peach, or buttercup yellow, this design fits naturally into playful ocean themes and children’s sensory toy collections. The bobbles introduce makers to cluster-stitch manipulation, multi-stitch tension control, and textured shaping within three-dimensional amigurumi forms.
Begin by working the snout and crown in smooth single crochet rounds using soft lilac DK-weight acrylic yarn and a 2.75-millimeter hook. Transition down into the neck, increasing stitches symmetrically across the front quadrant to establish the upper chest. On the next four rounds, work an alternating sequence of one four-loop bobble stitch followed by two plain single crochet stitches across the front eight stitches only, keeping all rear and side stitches in standard single crochet. Push each completed bobble cluster outward with your fingertip so it pops distinctly on the right side of the fabric. Pack the cavity firmly with fiberfill, ensuring stuffing fills the hollows between internal bobble bases without stretching the outer stitches apart. Taper the lower body down into a prehensile tail, finishing with a small dorsal fin worked in delicate scallop shells along the lower back curve.
5. Coral Reef Seahorse with Branching Coronet
Step-by-Step Guide
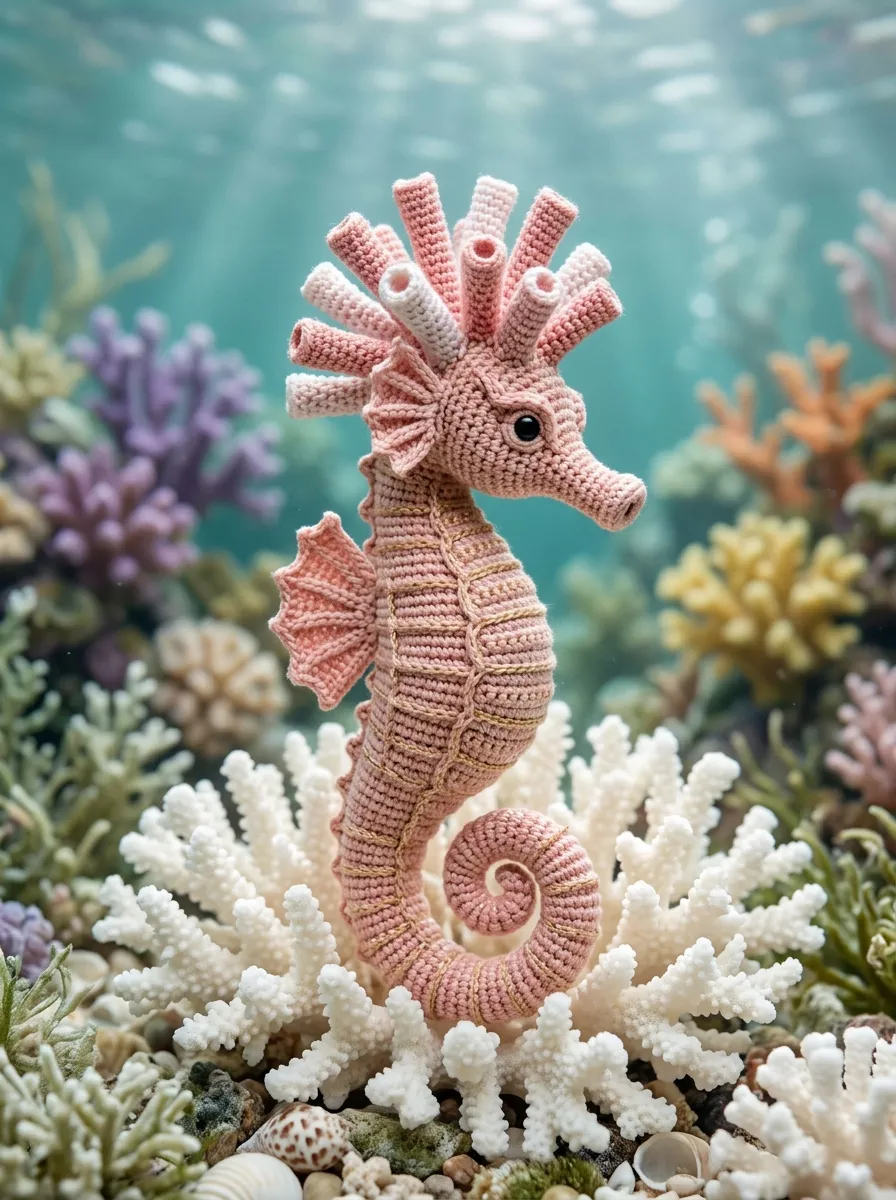
The coral reef seahorse draws inspiration from tropical reef habitats, featuring an elaborate branching coronet that mimics wild horn corals and marine vegetation. The body is worked in rich coral and blush tones, accented by golden metallic thread running through the crest. The standout feature is the crown atop the head, which replaces standard bumps with delicate, multi-branched tubular spires that reach upward. The chest ruff incorporates subtle picot edging, adding textural detail that balances the dramatic coronet above. Slender pectoral fins flare outward beside the cheeks, giving the creature an alert, inquisitive expression. This design introduces crafters to branching micro-tubes, wire-reinforced detailing, and multi-piece surface joins, making it a favorite for intermediate makers seeking a decorative statement piece.
Work the head using blush pink cotton yarn, shaping a sharp snout and an arched brow with deliberate single crochet increases. Form the branching coronet separately by chaining six, working slip stitches back down the chain, and branching into two smaller three-chain spurs to create an antler-like coral formation. Stuff each miniature coral spire lightly using a blunt tapestry needle before sewing the base securely across the crown between rounds ten and eleven. Construct the arched torso in matching blush yarn, adding a contrasting gold embroidery thread border along the chest plates using surface slip stitches. Shape the tail with continuous inner decreases to form a natural spiral curl. Assemble two rounded pectoral fins and sew them flat against the side jawline. Finish by stitching a wide, ruffled dorsal fin along the spine using double crochet clusters separated by chain-one spaces.
6. Chunky Chenille Velvet Seahorse Plush
How to Create
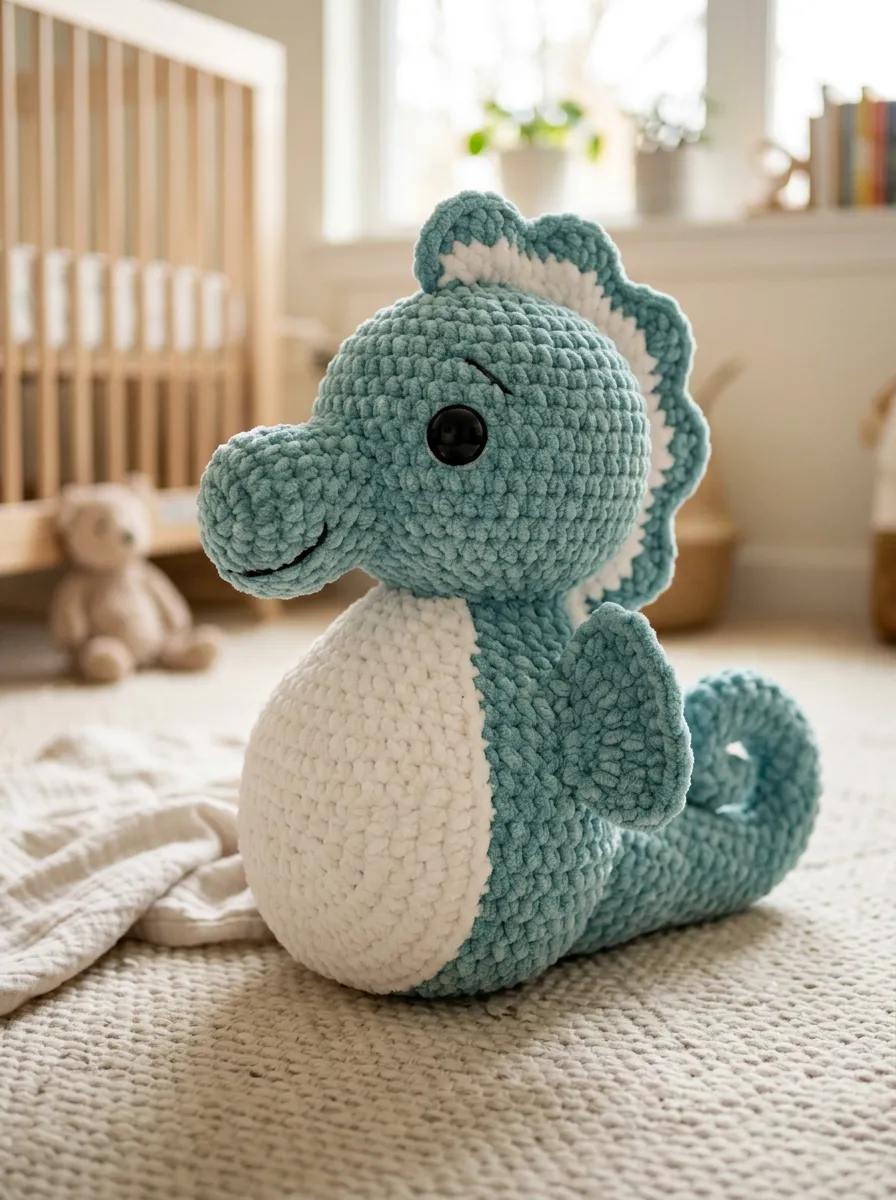
The chunky chenille velvet seahorse plush prioritizes tactile softness and large-scale huggability, utilizing thick plush chenille yarn to produce a dense, pillowy companion toy. The finished structure relies entirely on simple single crochet stitches, as the microfiber velvet texture naturally obscures individual stitch ridges to create a seamless, cohesive surface. This design features a wide, rounded belly, oversized snout, and a thick tail that curves gently around the base. Chenille yarn creates a thick, pillowy fabric that requires minimal internal tension to generate substantial physical volume. Ocean tones like dusty turquoise, seafoam, and soft white work together cleanly, providing clear contrast between the belly panel and the outer body. This construction method reduces production time significantly, as the heavy yarn weight yields a plush toy over twelve inches tall in relatively few rounds.
Start by working with a 6.5-millimeter ergonomic hook to maintain comfortable hand tension without damaging the delicate inner core thread of the chenille yarn. Form the wide head and snout using continuous spiral increases until reaching thirty-six stitches, working six plain rounds to establish vertical depth before tapering toward the neck. Take care when decreasing; use invisible decrease methods to eliminate surface gaps where white polyfill could show through the stitches. Construct the wide torso with continuous increases across the front half to form a rounded belly, stuffing the chamber generously with high-density polyester fiberfill. Work the tail downward over eighteen rounds, tapering gradually while curling the tip inward with slip stitches. Crochet an oversized wavy dorsal fin directly onto the back using tall treble crochet clusters, securing large twenty-millimeter safety eyes on the head to complete the friendly, plush aesthetic.
7. Poseable Wire-Armature Seahorse Figurine
Execution Process
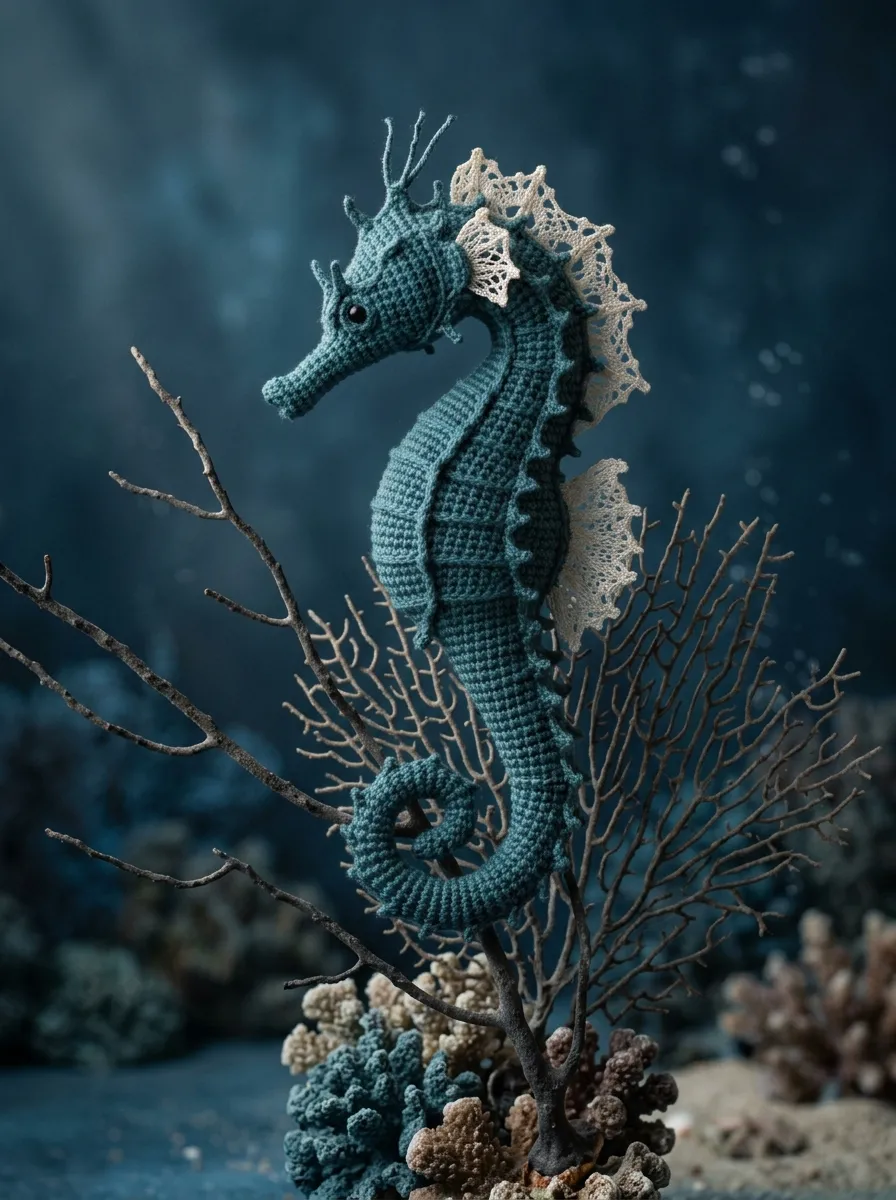
The poseable wire-armature seahorse emphasizes sculptural precision and lifelike positioning, featuring a flexible internal skeleton that allows the body, neck, and tail to bend into varied poses. The exterior is crocheted in deep heather-teal or bronze cotton yarn with fine stitch definition, while an internal plastic-coated craft wire core runs from the snout tip through the end of the tail. This internal support allows the seahorse to grasp thin wooden dowels, wrap its tail around real sea fans, or stand upright on flat surfaces without tipping over. The design incorporates sharp geometric ridges along the body plates, achieved through back-loop stitching and surface ridges. This project is well-suited for advanced intermediate crocheters who want to incorporate craft hardware and wirework to achieve authentic, display-grade marine positioning.
Construct an internal wire skeleton using eighteen-gauge plastic-coated copper craft wire, cutting an eighteen-inch length and looping both ends into tight safety spirals wrapped in electrical tape. Crochet the tubular snout and head, sliding the wrapped wire end into the center of the head cavity before adding dense polyester fiberfill around the wire core. Continue crocheting the neck and torso around the wire spine, keeping the metal centered within the internal stuffing as you progress. Work the long, tapering tail as a narrow hollow cylinder over the wire, packing small pinches of stuffing with a thin dowel until reaching the tail tip. Once the crochet body is fully closed, gently bend the wire into an S-shaped serpentine curve along the neck and wrap the tail into an authentic spiral coil. Attach delicate translucent organza or fine-lace crochet fins along the dorsal spine to complete the piece.
8. Woodland Kelp Forest Seahorse with Leafy Fins
Read This:
Setup Method
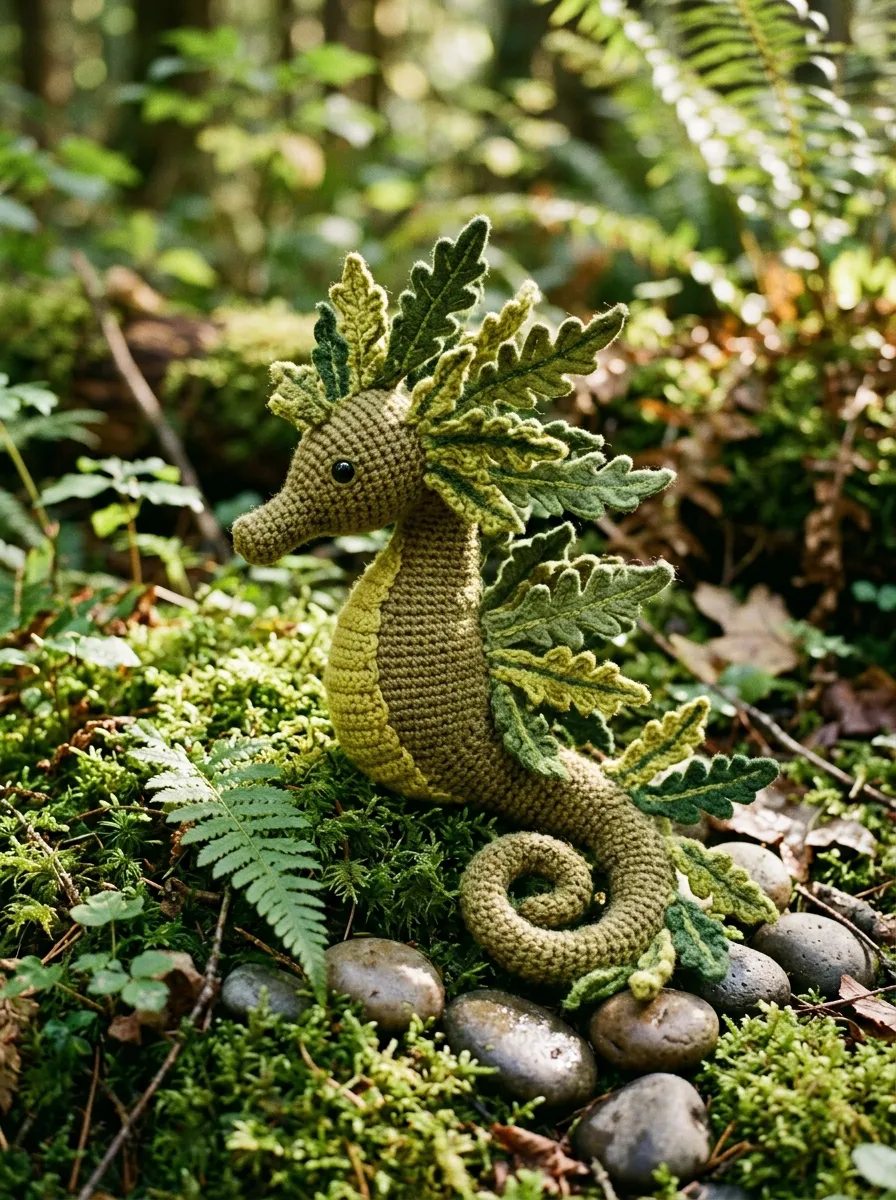
The woodland kelp forest seahorse combines traditional marine amigurumi with botanical fantasy elements, depicting a camouflaged sea creature adorned with leafy, seaweed-like appendages. The seahorse is worked in earthy olive-green and moss tones, blending the animal’s natural form with the appearance of marine plants. Instead of standard geometric fins, this design features elongated, serrated leaf fins along the spine, head, and tail, mimicking the natural camouflage of wild leafy seadragons. The snout features small leafy spurs, and the tail terminates in a soft, leaf-shaped tip. This mixed-media design introduces crafters to botanical leaf shaping, picot-serrated borders, and organic multi-piece assembly, creating a storytelling piece that functions equally well as an imaginative play toy or a coastal decor accent.
Crochet the seahorse body in olive-green worsted acrylic yarn, using firm tension to ensure the neck and tail maintain clean structural curves without internal wire. For the leafy appendages, switch to a 2.5-millimeter hook and variegated sage-and-moss cotton yarn, working flat leaf shapes with foundation chains of varied lengths. Shape the leaves by working single crochets, double crochets, and picot points along both sides of the chain, tapering each leaf to a sharp tip. Sew three large leafy fins along the dorsal ridge, spacing them evenly from the neck down to the mid-back. Attach two smaller leaf fins beside the cheeks to serve as pectoral fins, and stitch two tiny leaf spurs along the bridge of the snout. Weave in all yarn tails securely inside the body cavity, ensuring all leaf points remain free to flutter naturally with handling.
9. Geometric Low-Poly Styled Seahorse Figurine
How to Create
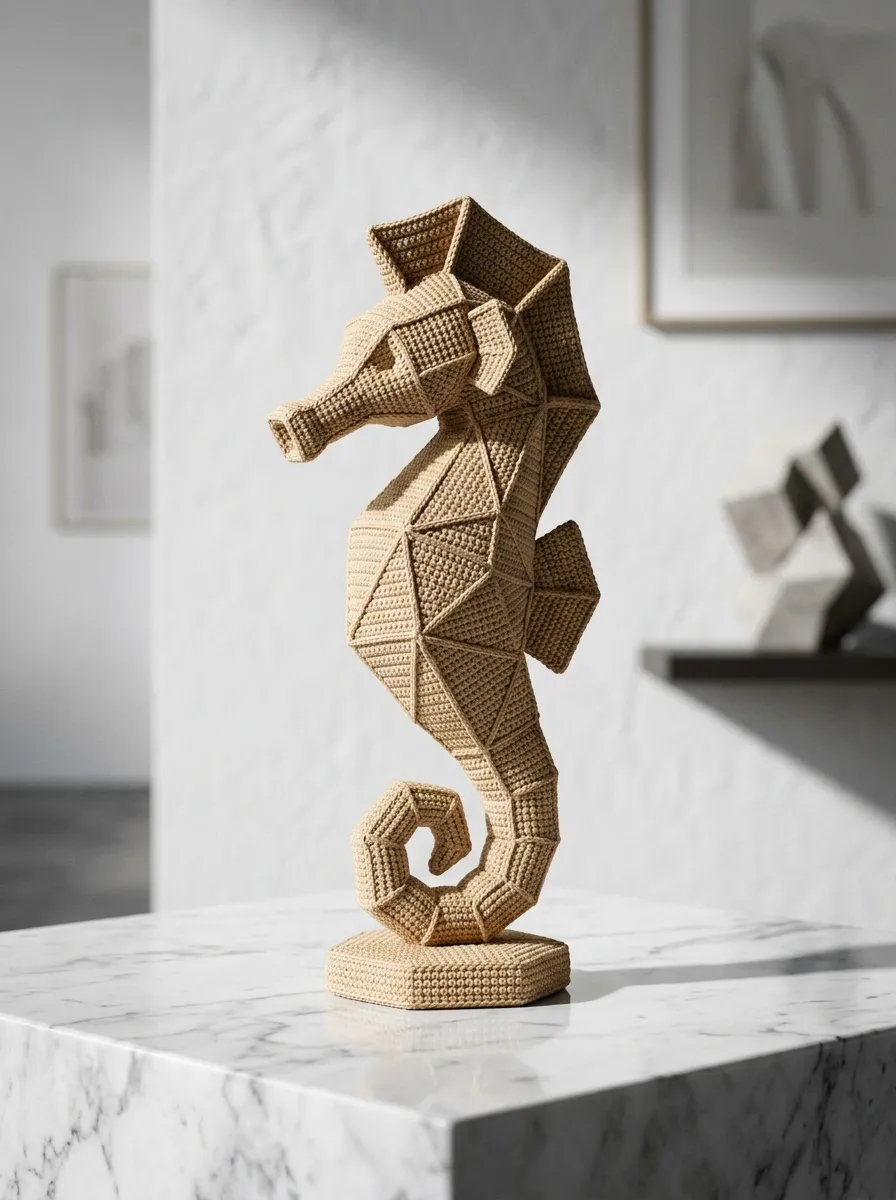
The geometric low-poly styled seahorse figurine reinterprets classic amigurumi curves through sharp angular facets and clean straight planes, taking inspiration from digital 3D wireframe models. Instead of smooth spherical increases, this design uses sharp corners created by clustering increases and decreases along specific ridge lines. The resulting faceted surface reflects light at distinct angles, giving the finished piece a modern, chiseled appearance. Rendered in monochromatic tones such as concrete grey, pale sand, or matte basalt black, this project fits comfortably within modern minimalist interiors and contemporary desk spaces. The construction demands strict stitch accuracy, as a single misplaced increase shifts the alignment of the geometric facets across the entire figure.
Construct the faceted head by working in joined rounds rather than continuous spirals, using slip stitches and chain-one turnings to establish defined edge ridges. Concentrate three single crochet increases into specific single corner stitches along rounds three, six, and nine to form sharp jaw angles and a squared snout profile. Lightly insert small pre-cut cardstock template facets against the interior walls before adding stuffing; this helps support the flat planes and preserves the crisp geometric profile from the inside. Build the torso as a faceted polygon, using sharp decrease lines that mirror the angular contours of the head. Assemble a flat-folded, triangular dorsal crest along the upper spine, creasing its center sharply with a tapestry needle. Fasten an angular geometric tail to the lower faceted base, checking that the piece stands firmly on flat surfaces with clean geometric stability.
10. Amigurumi Seahorse Baby Rattle and Teether
Read This:

Step-by-Step Guide
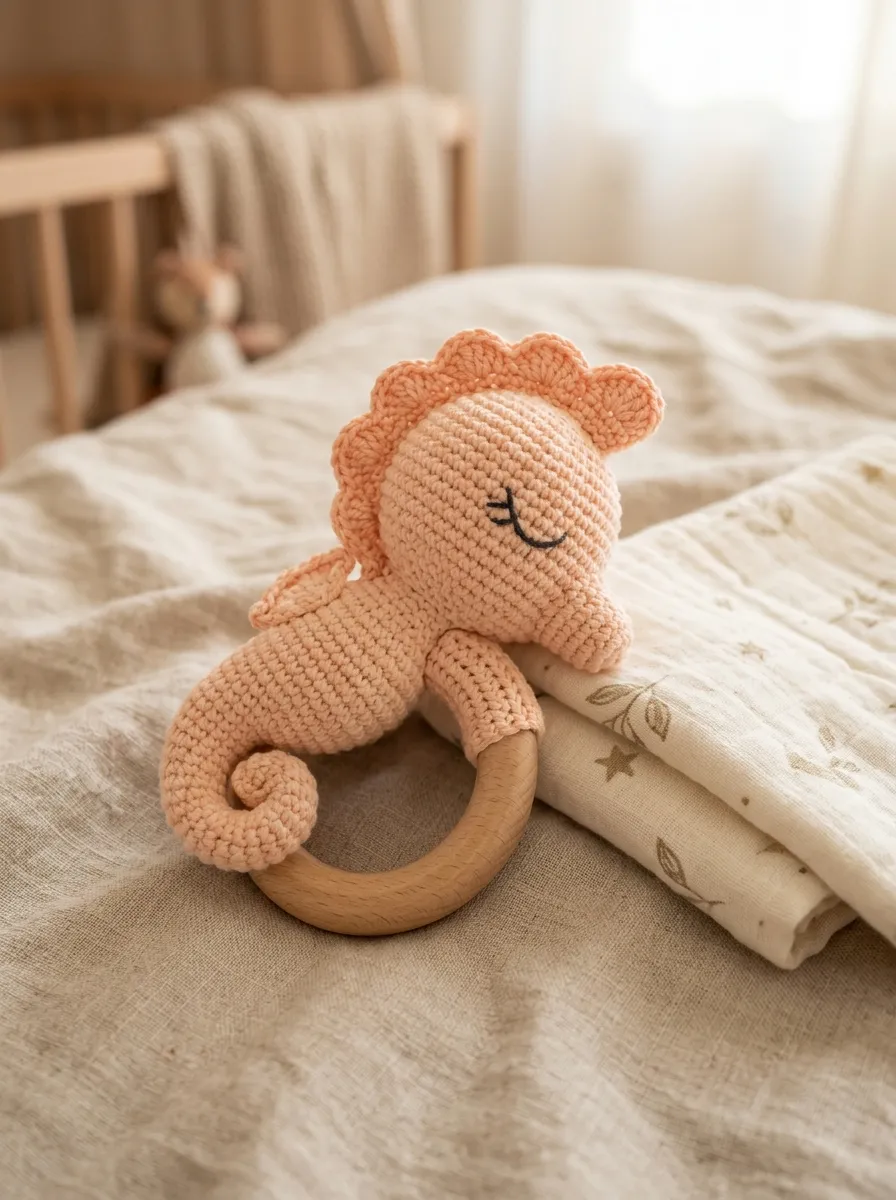
The amigurumi seahorse baby rattle combines functional infant hardware with gentle textile handcraft, designed specifically to meet safety and sensory play needs. The design features a smooth cotton seahorse head and torso mounted onto an internal rattle insert, securely anchored to a natural, untreated hardwood ring. The texture is achieved using tight, smooth single crochet in organic combed cotton, providing a safe, non-shedding surface for infant handling that is easy to spot-clean and dry. To maintain infant safety, all facial features must be embroidered directly onto the fabric, avoiding plastic safety eyes or small external buttons that could pose a choking hazard. The internal rattle module is enclosed within dense polyester filling inside the head cavity, producing a gentle chime when moved. The combination of cool hardwood and soft textured cotton offers engaging tactile and sensory variety for early development.
Begin by selecting a seventy-millimeter organic beechwood ring sanded smooth without chemical varnishes or stains. Using a 2.25-millimeter hook and combed mercerized cotton yarn, crochet an arched seahorse head and upper torso, working in continuous spiral rounds to avoid weak seam points. Once half of the head is worked, insert a sealed plastic rattle insert, packing high-density, hypoallergenic polyfill firmly around all sides to center the insert and buffer the sound. Securely embroider sleepy curved eyes and subtle gill markings using split-resistant dark embroidery thread, tying off all interior ends with double knots inside the stuffing. Crochet a flat rectangular sleeve six stitches wide and sixteen rows long, wrap it tightly around the wooden ring, and whipstitch the edges together using high-tensile cotton yarn. Finally, sew the base of the seahorse torso directly onto this fabric sleeve, using double-pass ladder stitches around the entire perimeter to ensure the components remain firmly joined during active play.
Common Beginner Mistakes and How to Avoid Them
A frequent issue in amigurumi seahorse construction involves using an incorrect hook size relative to the chosen yarn weight. Selecting the hook size listed on the commercial yarn label often produces loose, open stitches that allow white polyester fiberfill to show through the fabric. Crafters should consistently use an ergonomic hook one to two sizes smaller than the manufacturer recommendation, creating a dense, non-porous fabric that keeps the filling fully hidden inside. Another common problem is a limp, uncoiled tail that fails to hold its spiral form. Seahorse tails require deliberate shaping, achieved either through asymmetric slip stitches along the inner curve, tight tension, or a light internal wire core; under-stuffing the tail allows it to hang flat and lifeless. Beginners also frequently attach safety eyes too late in the assembly process, discovering that closed heads prevent access to the interior locking washers. Always install safety eyes and secure their washer backings firmly before beginning the final decrease rounds of the head. Finally, attaching fins and coronets without first pinning them in place often leads to crooked, asymmetrical figures; always secure all appendages with long pearl-head pins and verify alignment from the front before sewing the final stitches.
Practical Tips for Better Results
To achieve clean, professional results in amigurumi, crafters should master the invisible decrease technique. Unlike the standard single crochet decrease, the invisible decrease works only through the front loops of two consecutive stitches, creating a smooth transition that blends seamlessly with surrounding stitches. Maintaining consistent, firm yarn tension throughout the project is equally important; resting hands regularly prevents fatigue, which can otherwise cause looser stitches as the project progresses. When embroidering facial details, use stranded cotton floss separated into two or three strands rather than heavy yarn, as finer threads allow for cleaner curves and subtle expressions. Tracing planned eye, fin, and crest placements with removable water-soluble fabric markers before stitching helps ensure accurate, symmetrical positioning. When joining components together, leave a yarn tail three times the length of the seam perimeter, and use a bent-tip tapestry needle to slide smoothly under the fabric loops. Finally, lightly rolling the completed head and body components between clean palms helps distribute the internal fiberfill evenly, smoothing out minor surface bumps and refining the finished shape.
Styling, Presentation, or Organization Ideas
Handmade amigurumi seahorses offer versatile styling possibilities that enhance home decor across living rooms, creative workspaces, and nurseries. In modern minimalist interiors, arranging a seahorse alongside bleached coral branches and smooth sea glass on a light oak floating shelf creates a balanced, coastal display that draws the eye. Pairing textured cotton seahorses with ceramic planters, dried sea lavender, and woven seagrass baskets adds to a calm, modern nautical aesthetic. In nursery spaces, suspending three or four lightweight pastel seahorses alongside felted starfish and wooden beads from a circular embroidery hoop creates a gentle mobile that introduces subtle movement above a crib. For workspace organization, attaching a small weighted seahorse to a desk serves as both a soft paperweight and a practical, tactile desk accessory that brightens the room. Crafters presenting these items as gifts can wrap them in unbleached kraft paper tied with natural cotton twine, tucking a small sprig of dried sea oats behind the ribbon to complement the ocean character of the handmade animal.
Budget or Time Planning
Completing an amigurumi seahorse project efficiently requires realistic time planning and smart material sourcing. A standard small to medium seahorse generally requires three to five hours of active crochet time, which can be divided into focused sessions: one for the head and facial embroidery, one for the textured body and tail coil, and a final session for fin shaping, coronet assembly, and finishing. Crafters working on tighter budgets can use durable acrylic yarns, which offer an affordable alternative to pure wool while providing easy machine-washable care. Maximizing material efficiency involves using leftover yarn scraps from larger home projects to fill small fin, coronet, and tail components, reserving full skeins for the main body and head. Sourcing safety eyes, metal keychain hardware, and fiberfill stuffing in bulk packs from craft suppliers substantially lowers the cost per piece compared to buying single kits. Creating a simple, repeatable project checklist helps crafters track their assembly steps systematically, preventing missed rounds and saving valuable time during construction.
Creative Expansion and Advanced Inspiration
Once the foundational shaping and assembly techniques are mastered, crafters can explore advanced customizations to expand their amigurumi designs. Advanced makers can incorporate wire armatures—such as plastic-coated craft wire—inside the slender tail and spine, allowing the seahorse to be dynamically posed wrapping around driftwood branches or coral perches. Experimenting with surface tinting using diluted fabric dyes or dry soft pastels applied with a soft makeup brush adds realistic shading around the eye rings, belly plates, and fin edges. Crafters can also combine fiber arts by needle-felting raw wool roving directly onto a smooth crocheted surface, creating an organic, blended color gradient across the dorsal crest. Incorporating seasonal accessories—such as miniature crocheted sailor collars, tiny floral crowns, or holiday scarves—adds narrative charm and seasonal versatility. These creative variations allow crafters to transform a standard seahorse pattern into a wide range of personalized characters, custom gifts, and unique collectible art pieces.