Crochet enthusiasts and modern crafters consistently seek charming, tactile projects that bring warmth and character into living spaces. Amigurumi, the Japanese art of knitting or crocheting small, stuffed yarn creatures, represents one of the most celebrated creative ideas across digital craft communities today. This comprehensive tutorial explores ten delightful amigurumi animal patterns designed to expand your handmade portfolio while reinforcing essential technical skills. You will discover practical methods for building three-dimensional sculptural forms, mastering stitch tension, and refining assembly techniques that ensure lasting structural integrity. Learning these projects allows makers of all skill levels to transform simple skeins of yarn into expressive keepsake figures, heirloom nursery gifts, and elegant shelf accents. Beyond technical practice, these projects provide a grounding creative outlet that encourages mindfulness, spatial problem-solving, and disciplined crafting routines. By examining each animal profile from initial foundation loops to final embroidered details, you will gain the confidence to interpret complex charts, manipulate fiber weights, and personalize every finished figure. Whether your goal is producing charming handmade gifts or curating cohesive home decor accents, mastering these foundational animal projects provides an enduring framework for all future fiber arts endeavors.
Why This Idea Is Trending or Useful
Sculptural yarn crafts have captured modern attention because they merge sustainable handmade ethics with accessible, tactile home decoration. Within contemporary design circles, minimalist style interiors often rely on textured, organic accents to soften clean architectural lines and neutral color palettes. Amigurumi figures offer the perfect decorative bridge, introducing gentle silhouettes, tactile comfort, and subtle artisan charm into curated living rooms, book nooks, and children’s spaces. From a practical DIY perspective, these projects require minimal storage space, modest initial financial investment, and basic portable equipment that fits effortlessly into an everyday tote bag. Beginners appreciate how quickly a three-dimensional form materializes from a few standard single crochet stitches, providing immediate creative satisfaction without requiring months of sustained labor. Furthermore, the modern aesthetic favors timeless fiber craft over mass-produced plastic novelties, making small yarn figures highly desirable for thoughtful gifting, seasonal displays, and personalized nursery themes. As digital lifestyle communities place greater emphasis on intentional living and analog hobbies, creating these adorable creatures offers a deeply restorative, screen-free routine that yields functional, decorative keepsakes capable of lasting across generations.

Materials and Preparation
Achieving uniform, durable amigurumi figures requires deliberate planning and the right selection of materials before beginning your first stitch. The foundation of any successful project begins with selecting an appropriate yarn; smooth mercerized cotton or sturdy cotton-blend sport yarns work best because they offer crisp stitch definition without splitting or excessive fuzziness. Choose an ergonomic crochet hook that is one or two sizes smaller than recommended on the yarn label, typically between 2.25 mm and 3.5 mm, which guarantees tight, dense fabric that conceals inner batting completely. Essential notions include a collection of locking stitch markers to track continuous spiral rounds, a pair of sharp embroidery scissors, blunt tapestry needles with large eyes for seam assembly, and hypoallergenic polyester fiberfill for firm interior stuffing. Prepare your workspace by organizing materials in designated shallow trays, ensuring strong directional lighting, and winding skeins into stable center-pull cakes to prevent yarn tangles during continuous stitching. Establishing accurate gauge through a small test swatch prevents sizing discrepancies and verifies that your chosen hook and tension produce an opaque, gap-free fabric capable of holding its three-dimensional form.
Idea 1: Classic Garden Bunny with Long Floppy Ears
Execution Process
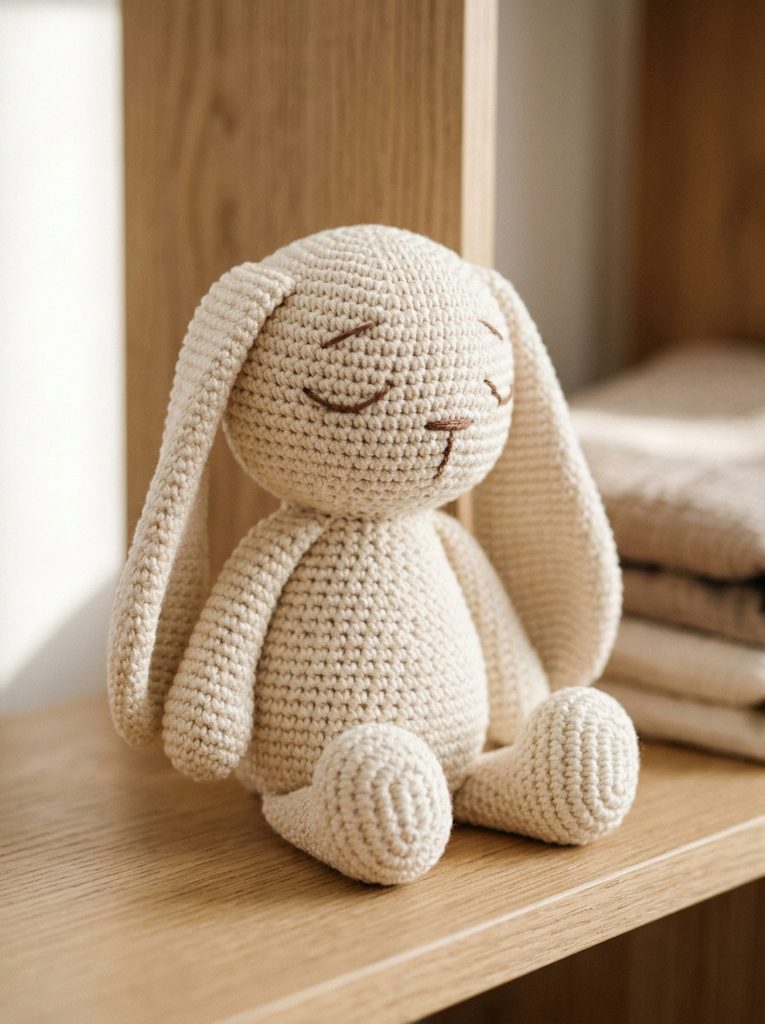
The classic garden bunny remains a cornerstone of contemporary handmade nursery decoration, combining slender elongated limbs with a soft, rounded torso. This design utilizes a balanced teardrop silhouette that allows the rabbit to sit upright without internal armature, making it completely safe for small children and effortless to position along display shelves. The defining visual feature is a pair of generous, gently curved ears that drape naturally alongside the cheeks, framed by a soft pastel or neutral oatmeal fiber palette. Choosing a matte worsted cotton yarn enhances the geometric definition of each single crochet row, providing a modern minimalist aesthetic that pairs beautifully with Scandinavian-inspired interior furnishings. Minimalist facial accents, such as a subtle hand-sewn satin stitch nose and sleepy thread eyes, keep the visual focus entirely on the sculptural proportions of the head and torso. Crafting this rabbit builds foundational confidence in managing gradual increases and symmetric decreases across smooth continuous rounds, providing an approachable template that easily adapts into various seasonal gift collections.

Begin by working six single crochet stitches into an adjustable magic ring using your primary cream or taupe yarn, expanding evenly outward until you achieve thirty-six stitches along the widest cranial diameter. Work several even rounds to build cranial depth before tapering down toward the neck, pausing to insert safety eyes between rounds twelve and thirteen spaced roughly eight stitches apart. Stuff the cranial cavity firmly with clean synthetic fiberfill, packing the batting toward the exterior walls to create an unblemished, smooth perimeter free from visible lumps. For the elongated ears, create a narrow oval foundation using minimal increases, maintaining slender proportions for twenty-two consecutive rounds before pinching the base flat and securing it to the crown using mattress stitches. Construct the lower torso by expanding outward to forty-two stitches, adding dense stuffing to the base to establish a weighted, self-supporting center of gravity. Fasten off with an invisible seamless finish, then stitch the limbs flush against the lower body quadrant using a blunt tapestry needle, ensuring all yarn tails are buried securely within the interior stuffing cavity.
Idea 2: Playful Little Red Fox with Bushy Tail
Step-by-Step Guide
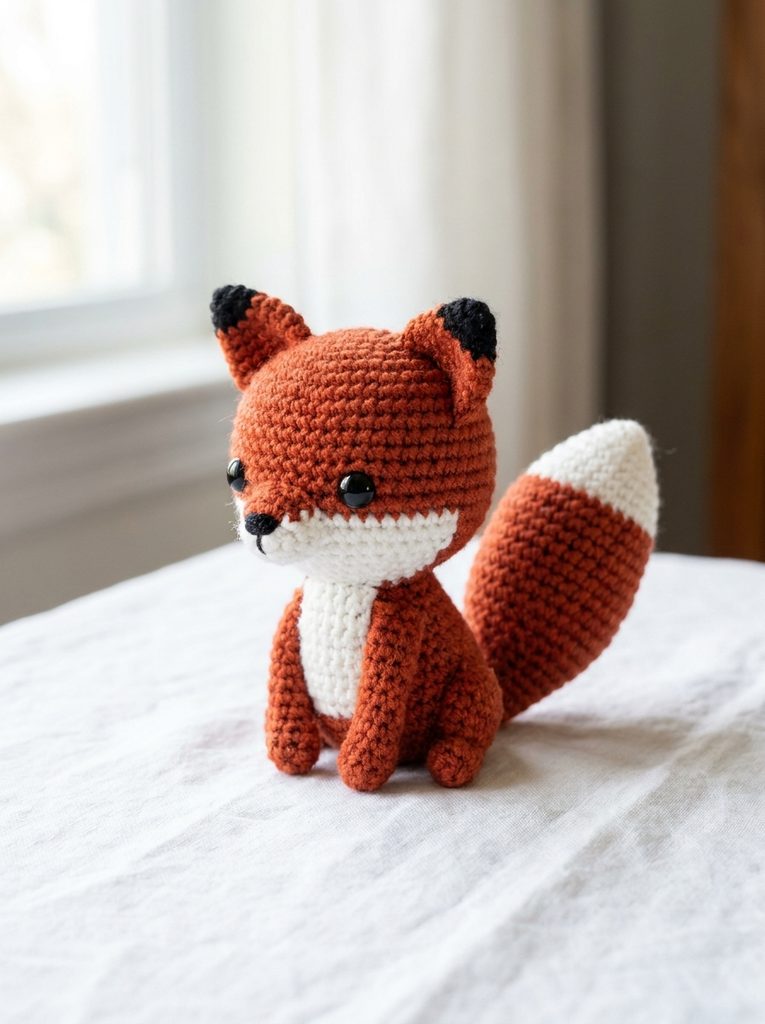
Capturing woodland charm within a compact fiber sculpture, the playful red fox emphasizes dynamic color transitions and sharp, triangular facial geometry. The design features a warm terracotta or burnt-orange body accented by a pristine white muzzle, crisp ear linings, and a sweeping tail tip that serves as a counterweight for balanced shelf display. Because woodland motifs integrate seamlessly into rustic, bohemian, and modern children’s nurseries, this fox serves as both an engaging educational toy and an expressive decor accent. The head features a gently tapered wedge profile created through strategic lateral increases rather than uniform spherical shaping, echoing the natural anatomy of small forest canines. Maintaining crisp boundaries between contrasting yarn colors represents the primary artistic objective of this pattern, encouraging makers to master seamless color-change mechanics while working in continuous spiral rounds. The final piece balances lively warmth with artisan precision, providing an engaging intermediate project for makers ready to advance beyond simple monochrome spheres.

Construct the wedge-shaped muzzle starting with pure white sport-weight yarn, transitioning into warm rust orange along round seven by pulling the new shade through the final two loops of the preceding stitch. Maintain continuous spiral rounds across the cranium, utilizing locking stitch markers at the lateral increase points to guarantee bilateral facial symmetry. Shape the prominent triangular ears by working short graduated rounds with black tipping, sewing them along the upper diagonal crest of the crown with slight forward curvature. For the signature bushy tail, initiate the piece in white yarn, expanding to twenty-four stitches before switching back to terracotta yarn across a sharp zigzag color transition, stuffing the lower two-thirds lightly while leaving the final rounds empty for fluid movement. Assemble the cylindrical torso, anchoring the front and rear paws securely along the ventral surface so the fox rests in an alert seated posture. Conclude the assembly by joining the tail along the lower spine, embroidering delicate black whisker pads, and weaving all yarn ends inward to preserve structural neatness.
Idea 3: Sleepy Brown Bear with Textured Fur Stitching
How to Create
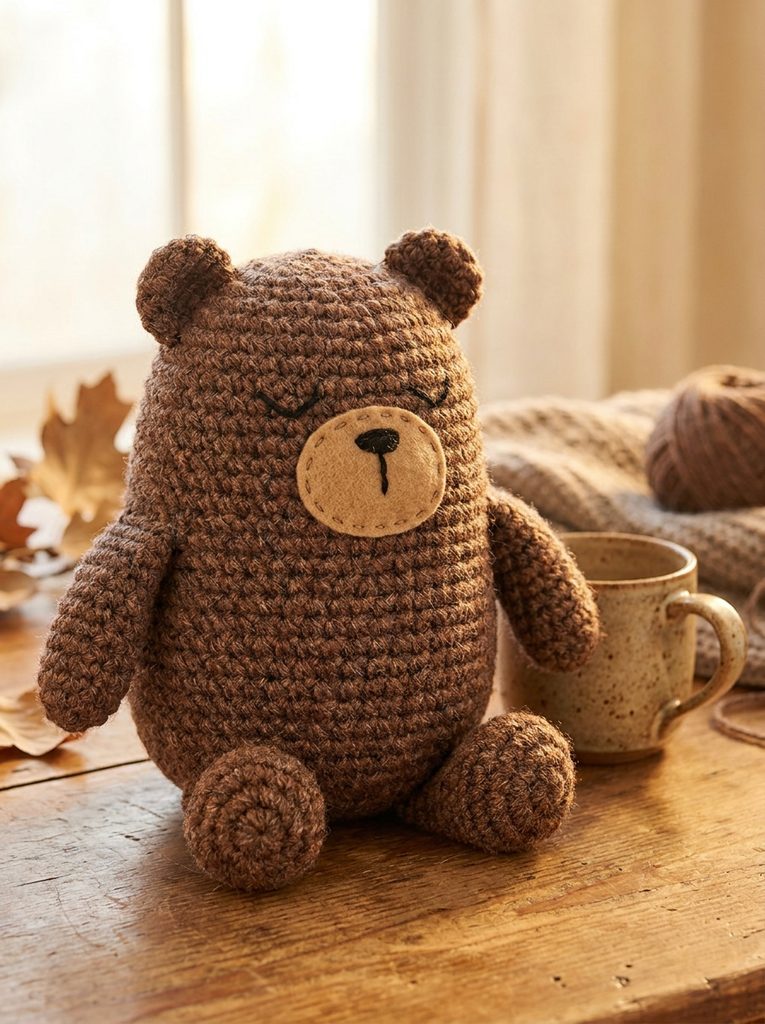
The sleepy brown bear brings grounded warmth and tactile substance to any handmade fiber collection, drawing inspiration from heritage wooden toys and vintage stuffed animals. This pattern relies on a solid, barrel-shaped body, stout limbs, and a wide, friendly face that exudes comfort, quiet companionship, and understated elegance. Rather than relying solely on smooth single crochet, this design incorporates subtle front-post stitches or light loop texturing around the upper shoulders and collar to simulate the dense, cozy appearance of natural fur. Earthy yarn selections, such as deep chestnut, raw umber, or heathered caramel wool blends, lend the completed bear an heirloom quality well suited for fireside displays or cozy bedroom vignettes. The muzzle utilizes an offset oval construction sewn directly onto the lower facial plane, allowing custom thread embroidery to establish a tranquil, closed-eye expression. Its sturdy proportions make this bear exceptionally durable, capable of withstanding years of gentle handling while retaining its original sculptural density.
Initiate the skull with deep brown worsted yarn, working in single crochet to forty-eight stitches to establish an expansive, slightly flattened sphere that evokes a relaxed posture. Introduce a contrasting tan oval muzzle worked from a short center foundation chain, sewing it between rounds ten and sixteen before anchoring horizontal embroidery stitches in dark brown perle cotton for the sleeping eye arches. Form two compact hemisphere ears using twelve single crochet stitches each, pressing the opening flat and securing them symmetrically along the top sides of the head without internal batting. Build the torso with gradual waist increases, packing the polyester stuffing incrementally after every four rounds to maintain uniform resistance across the entire body core. Fabricate thick, rounded paws with short foundation lengths, pausing to insert a small disc of dense cardboard or plastic craft canvas into the sole to create flat, sturdy resting surfaces. Secure all four limbs against the torso using a durable through-body jointing technique, knotting the interior tension cords firmly and sinking the remaining thread trails into the core.
Idea 4: Sweet Miniature Panda with Bamboo Leaf Accessory
How to Make
The sweet miniature panda introduces striking visual impact through stark monochrome color blocking and gentle, endearing proportions. This design features a distinctive round head adorned with dark tear-drop eye patches, jet-black rounded ears, and a contrasting shoulder saddle that offsets a creamy white belly. Including a vibrant emerald-green bamboo shoot accessory injects a pop of lively color, transforming a classic animal sculpture into an imaginative visual story suited for desktop decoration or modern craft gifting. Working with high-contrast fibers demands precise stitch execution, as uneven tension between white and black yarns can easily compromise the clean appearance of the figure. The miniature scale of this project makes it remarkably fast to produce, allowing crafters to complete an entire character in a single afternoon while practicing fine-gauge tension control. The resulting figure offers exceptional versatility, functioning equally well as a nursery mobile centerpiece, a charming shelf ornament, or a decorative bag charm.

Begin by crocheting the spherical white cranium using a 2.5 mm hook to ensure dense, impermeable stitches that fully enclose the interior polyester stuffing. Fashion two separate oval eye patches using fine black embroidery floss or lightweight cotton, sewing them diagonally across the mid-face before affixing plastic safety pupils directly through both fabric layers. Crochet the dark ear discs and attach them high upon the cranial curvature, curving the outer rims inward slightly to emphasize an attentive, inquisitive posture. For the torso, start in pristine white yarn before introducing jet black across the upper chest band, maintaining even tension across the color transition to avoid structural distortion. Assemble four stubby black limbs, stuffing the rounded paws firmly while tapering the upper margins to permit flat, tidy attachment against the shoulder saddle. Crochet the small bamboo accessory by working a narrow tube of deep green cotton with alternating slip-stitch leaves, securing the finished foliage firmly between the panda’s front paws using hidden tacking stitches.

Idea 5: Gentle Meadow Lamb with Curly Bobble Wool
Setup Method
Evoking pastoral nostalgia and springtime softness, the gentle meadow lamb relies on dimensional bobble stitches to recreate the dense, crimped texture of natural sheep fleece. This project creates an engaging sensory contrast by pairing an intensely textured torso and fleece cap with smooth, matte stocking-stitch limbs and facial contours. Utilizing soft ecru, warm ivory, or unbleached linen yarn preserves an organic, minimalist style that harmonizes with contemporary home decor palettes. The face features a delicate tapered profile punctuated by gently drooping ears that convey a calm, serene demeanor. Because bobble stitches consume more yarn and produce a naturally thicker, heavier fabric, this design demonstrates how structural density can be used creatively to establish durable standing or reclining postures. The finished lamb functions as an exquisite heirloom gift for infant celebrations, spring festival centerpieces, or peaceful additions to curated bedside collections.
Work the cranial foundation starting at the smooth muzzle using soft fawn-colored cotton, expanding gradually across eight rounds before transitioning into the dimensional fleece section. Execute the fleece rounds by alternating one standard single crochet with a five-loop yarn-over bobble stitch, ensuring all bobbles pop distinctly toward the exterior surface of the fabric. Insert safety eyes between the smooth muzzle rows and the textured fleece margin, pushing interior washer backings deep into the fiberfill cavity before completing the crown. Create the slender, leaf-shaped ears using flat single crochet rows with a tiny central pinch seam, mounting them directly behind the bobble crown at a downward angle. Construct the torso entirely in repeating bobble clusters, ensuring consistent internal tension to avoid gaps where the white polyester fiberfill might show through the textured ridges. Shape four slender legs in smooth fawn yarn, weighting the base of each hoof with a pinch of clean plastic poly-pellets before stitching them securely underneath the textured body.

Idea 6: Cheerful Yellow Duckling with Wide Orange Beak
How to Create
Radiating playful optimism, the cheerful yellow duckling captures bold, graphic styling through simple rounded shapes and bright, sunshine-inspired tones. This design utilizes a classic dual-sphere construction where a generous head perches over a compact, tapered body adorned with swept-back paddle wings. The primary visual anchor is a broad, flattened orange bill that gives the duckling an expressive, inquisitive personality ideal for cheerful shelf styling or bath-themed infant gifts. Utilizing buttery pastel yellow or rich marigold yarn produces immediate visual warmth, making this project an uplifting endeavor that brightens any work table or craft display. The compact, self-contained architecture lacks fragile protruding limbs, resulting in a durable, travel-friendly plush object that easily survives enthusiastic everyday play. Mastering the broad, horizontal muzzle attachments and subtle tail flare provides invaluable experience in creating asymmetrical forms and sculptural balance without using rigid wire armatures.
Begin the head by forming a magic ring with vibrant yellow cotton yarn, working continuous increases up to thirty-six stitches to form an unblemished, round sphere. Fasten glossy black safety eyes along round eleven, spacing them seven visible stitches apart to yield an open, friendly facial balance before sealing the head cavity with synthetic fill. Craft the distinctive duck bill using rich pumpkin-orange yarn, beginning with a short chain foundation and working in continuous rounds around both sides of the chain to create an oblong, flattened tube. Flatten the beak, pinch the lateral edges, and whipstitch it securely along the lower central quadrant of the face, aligning it precisely between the lower ocular line. Shape the body with a slight rearward taper, utilizing concentrated back-loop increases on the posterior edge to produce an upturned tail wedge that supports the duckling in a stable upright posture. Attach two teardrop-shaped paddle wings flat along the lateral flanks, leaving the trailing tips unstitched to preserve a light, energetic silhouette.

Idea 7: Wise Little Forest Owl with Wing Feather Details
Execution Process
The wise little forest owl offers an enchanting blend of clean geometric design and intricate surface detailing, making it an enduring favorite among modern fiber crafters. Unlike conventional four-legged animal designs, this project features a stable upright cylindrical body with an integrated head, minimizing complex assembly steps while offering a broad canvas for surface embellishment. Earthy forest hues such as slate grey, moss green, deep taupe, and creamy birch bark allow the maker to craft sophisticated decorative figures that blend effortlessly into rustic bookshelves or cozy study corners. The owl’s personality emerges through oversized layered felt or crocheted eye rosettes framed by small feathery ear tufts and an embroidered breast featuring delicate V-shaped feather markings. Constructing this character provides excellent practice in working flat round motifs, managing layered surface attachments, and mastering structural balance along a broad, self-supporting pedestal base.
Crochet the primary body column using heathered grey wool-blend yarn, expanding from an initial magic ring to forty-two stitches and working upward in continuous rounds to establish a sturdy, upright cylinder. Shape the upper facial brow by inserting subtle lateral decreases, pinching the top opening flat and working slip stitches across the crest to form two natural, pointed ear tufts at the outer corners. Prepare two layered eye rosettes by crocheting flat circles in cream yarn, mounting black safety eyes through the center, and securing the layered circles flat against the upper third of the body. Embroider a small diamond-shaped beak between the ocular frames using sharp mustard-yellow yarn, following with alternating columns of dark grey straight stitches across the lower abdomen to suggest layered breast plumage. Construct two curved teardrop wings featuring subtle back-loop ridges, stitching the leading edges along the upper torso flanks while leaving the lower feather tips unattached. Fill the lower third of the body with washed river gravel or glass crafting beads encased in a nylon pouch to ensure the owl perches securely on flat surfaces.

Idea 8: Friendly Little Elephant with Curved Trunk
Step-by-Step Guide
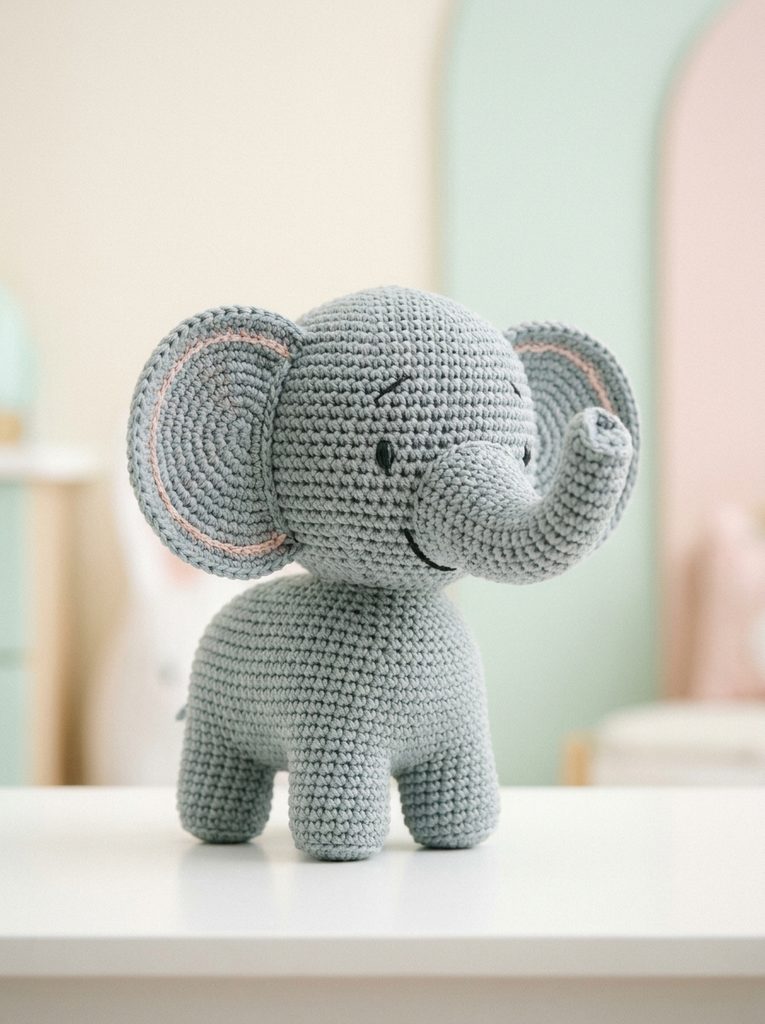
Embodying gentle strength and graceful curves, the friendly little elephant features an expressive swept-up trunk, broad fan-shaped ears, and sturdy, column-like legs. The design balances soft slate-grey or misty-blue body contours with crisp blush-pink accents tucked into the inner ear folds, achieving a modern aesthetic that works harmoniously within contemporary nursery spaces. The defining artistic challenge lies in crocheting the seamless, upward-curving trunk, which relies on asymmetric rows of slip stitches and single crochets to generate natural curvature without using wire inserts. The oversized, flexible ears frame the face beautifully, providing an inviting, tactile softness that encourages quiet comfort and affectionate play. Because of its broad four-legged stance, this elephant stands securely on flat surfaces, serving as an attractive decorative accent across book collections, windowsills, and display cabinets. Crafting this figure deepens your understanding of anatomical weight distribution and directional crochet manipulation.
Form the head starting from the tip of the trunk using cool grey yarn, expanding through continuous tight rounds while working concentrated slip stitches along the inner curve and extended stitches along the outer spine. Continue building the trunk directly into the cranial sphere, expanding symmetrically across the forehead until reaching an outer circumference of forty-two stitches. Anchor deep black safety eyes on either side of the trunk base, packing the cranial core firmly while keeping the trunk interior lightly stuffed to retain organic flexibility. Crochet two large, flat disc ears by working concentric circles in grey yarn edged with soft rose-pink highlights, pinching the top seams and fastening them along the lateral sides of the skull. Build an oblong horizontal torso, incorporating four wide cylindrical legs with flat, disc-reinforced footpads that support the weight of the torso evenly. Align the assembled head slightly forward along the anterior torso, securing the perimeter with dense ladder stitches and adding a tiny braided yarn tail at the rear spine.
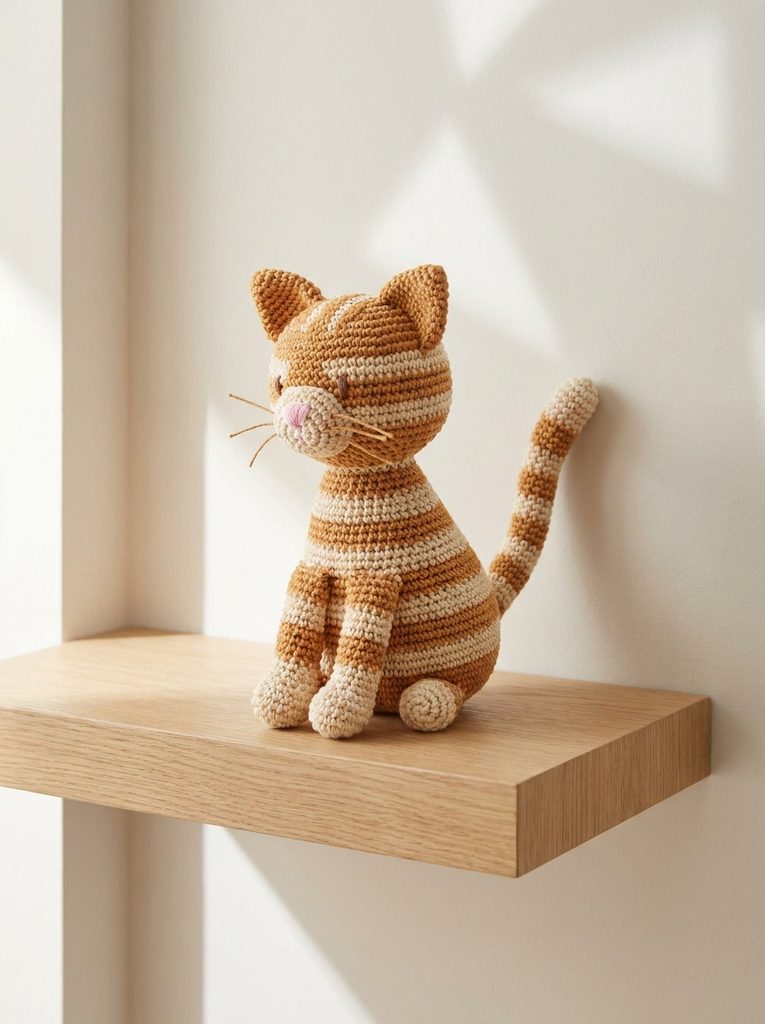
Idea 9: Curious Tabby Cat with Long Striped Tail
How to Make
The curious tabby cat captures feline agility and playful poise through slender proportions, pert triangular ears, and a gracefully arched silhouette. This project features subtle, balanced color striping across the torso and tail, offering an inspiring canvas for crafters to replicate their favorite domestic pet coats using warm ginger, charcoal, or classic silver-tabby yarn combinations. The facial expression emphasizes quiet alertness, achieved through almond-shaped safety eyes, fine monofilament or thread whiskers, and a delicate triangular nose embroidered in dusty pink floss. The cat’s elongated, graceful limbs give it an agile presence that can be styled curled in a resting posture or poised attentively on a high floating shelf. Working with multiple narrow color stripes in continuous spiral rounds trains the maker to execute clean, jogless yarn carries and manage tension across frequent fiber transitions. The finished cat provides an elegant, expressive handmade gift that resonates deeply with companion animal lovers and modern design collectors alike.
Begin the head using warm caramel cotton yarn, shaping a slightly broad, horizontally oval sphere across twenty-four rounds to capture a sweet, realistic feline cheek structure. Embed translucent green or amber safety eyes between rounds twelve and thirteen, anchoring a small pink satin-stitch nose precisely centered between the eyes. Construct two hollow, pointed ears by working short graduated rounds, shaping the base to contour cleanly against the cranial curvature before stitching them upright along the crown. Assemble the slender torso by alternating two rounds of caramel yarn with two rounds of soft cream, keeping the inactive yarn strands carried neatly along the interior wall to prevent excessive bulk. Build four slim legs, introducing white yarn at the paws to simulate clean markings, and stuff the lower halves firmly while leaving the upper joints supple for easy posing. Create an elongated, flexible tail featuring repeating two-round stripes, attaching it to the lower rear hip and sewing all components together using strong, invisible ladder stitches.
Idea 10: Happy Pocket Penguin with Contrast Wings
Setup Method
The happy pocket penguin is an adorable, compact fiber figure designed with clean Scandinavian minimalism and balanced geometric color blocking. The front features a crisp, heart-shaped white tummy insert nestled within a deep midnight-black or navy-blue body silhouette, punctuated by tiny saffron-yellow flippers and a vibrant triangular beak. Its compact, egg-shaped body makes this penguin exceptionally sturdy, highly portable, and remarkably fast to complete, making it ideal for market crafting, festive holiday ornaments, or cheerful stocking stuffers. The low center of gravity allows the completed bird to rest steadily on any level surface without tipping, serving as a charming desk companion or seasonal winter table accent. By focusing on clean circular shaping, precise facial placement, and symmetrical color panel assembly, this pattern provides an approachable, highly rewarding project that boosts beginner confidence while producing a polished, professional outcome.
Crochet the main body using charcoal-black or deep navy sport-weight yarn, expanding from an adjustable loop outward to thirty-six stitches to form a smooth, rounded egg shape that tapers toward the top. Pause at round fourteen to work the contrasting white belly panel, which can be crocheted as an integrated colorwork segment or crafted as a separate flat oval sewn onto the front surface. Mount small, glossy black safety eyes along the upper margin of the white breast panel, fixing an embroidered or crocheted golden-yellow triangular beak directly between them. Stuff the interior thoroughly with synthetic polyfill, adding a weighted fabric pellet bag at the very bottom before closing the foundation rounds with a smooth, invisible finish. Fashion two small, flat black teardrop flippers, edging the tips with a clean slip stitch and sewing them diagonally along the lateral body lines so they rest flush against the belly. Add two flat, heart-shaped orange feet along the bottom perimeter to complete a stable, self-supporting base, weaving in all yarn tails neatly through the interior core.

Common Beginner Mistakes and How to Avoid Them
Crafting three-dimensional animal sculptures introduces unique physical variables that differ substantially from flat scarf or blanket crochet. A frequent mistake among beginners is selecting a crochet hook that is too large for the chosen yarn weight, which produces loose, stretchy stitches that permit the synthetic polyester stuffing to show through the fabric. To prevent this unsightly problem, always select an ergonomic hook that is one to two sizes smaller than the label indicates, ensuring firm, opaque stitches that fully enclose the inner batting. Another common issue is uneven internal stuffing, which results in lumpy contours, asymmetrical faces, and unstable, wobbly figures that cannot sit upright on a flat shelf. Solve this by inserting fiberfill in small, teased tufts rather than large, dense wads, pressing the fibers outward against the walls using the smooth handle of a wooden spoon to build a uniform, resilient core. Additionally, failing to track the start of continuous spiral rounds often causes irregular row counts and distorted facial features. Always position a locking plastic stitch marker in the final loop of every round, moving it upward systematically as you work to preserve geometric balance, accurate counts, and symmetric assembly.
Practical Tips for Better Results
Elevating your amigurumi work from a basic craft project to an exquisite artisan piece relies on refining your finishing techniques and maintaining consistent mechanical discipline. Always utilize the invisible decrease method when shaping cranial tapers and limb terminals, which involves working exclusively through the front loops of two consecutive stitches before completing the single crochet. This technique eliminates the bulky, uneven bars created by standard decreases, yielding a smooth, uninterrupted fabric surface that mimics high-end manufacturing. When joining separate appendages to the main body torso, pin every component firmly in place using long pearl-headed dressmaker pins, checking bilateral symmetry from multiple angles before stitching a single permanent seam. Employ seamless ladder stitches with a blunt tapestry needle, catching one stitch from the limb and one stitch from the body alternately to form an invisible, structural join capable of enduring long-term handling. Finally, gently brush finished details, such as animal muzzles or textured ear linings, using a clean, soft-bristle toothbrush to blend the fiber surface subtly, softening stitch transitions and lending your handmade animal figures a charming, professional finish.
Styling, Presentation, or Organization Ideas
Handmade amigurumi animals possess an organic, timeless quality that integrates effortlessly into contemporary interior styling when arranged with deliberate artistic care. For a modern, minimalist look, group three finished woodland figures of varying heights on a floating natural oak shelf, balancing the yarn textures with small potted succulents, turned wooden bowls, or ceramic bud vases. In children’s rooms or nursery settings, hang a curated cluster of miniature pastel animals from a circular bamboo hoop using natural unbleached cotton twill tape, producing an elegant, heirloom-quality mobile that gently captures moving air. If you craft animal figures for seasonal market stalls or boutique retail displays, arrange them inside shallow raw-wood crates lined with crisp neutral linen cloth, grouping characters by cohesive color stories rather than random hues. Photographing your finished projects for online lifestyle boards requires soft, indirect morning daylight positioned near a north-facing window, setting the figures against neutral linen backgrounds, textured ceramic trays, or warm wooden surfaces to showcase delicate stitch definition, authentic proportions, and artisan craftsmanship without harsh photographic shadows.
Budget or Time Planning
Executing amigurumi projects efficiently requires thoughtful resource allocation, smart material choices, and intentional scheduling that protects your hands while keeping productivity high. A single 100-gram skein of premium cotton yarn typically yields two to three compact animal figures, making this one of the most cost-effective and rewarding fiber arts hobbies available today. To minimize unnecessary expenses, invest in a core collection of neutral yarns—such as unbleached ecru, soft slate, warm camel, and deep espresso—which serve as versatile body tones across dozens of diverse animal designs. Organize your crafting schedule into distinct, focused production phases: spend an evening completing all spherical cranial components, dedicate the next session to producing symmetrical limbs and muzzles, and reserve a final quiet morning for stuffing, pinning, and final assembly. Working in deliberate stages prevents mental fatigue, maintains consistent stitch tension across matching limbs, and keeps your work table tidy and functional. Furthermore, scheduling brief fifteen-minute rest intervals every hour protects your wrists and fingers from repetitive strain, ensuring your crafting sessions remain comfortable, restorative, and productive for years to come.
Creative Expansion and Advanced Inspiration
Once you feel comfortable executing the foundational animal structures detailed in this guide, consider exploring advanced modifications that elevate your personal artistic expression. Experiment by blending different fiber types within a single project, pairing crisp mercerized cotton faces with brushed mohair or alpaca ear linings to generate striking, multi-sensory contrasts. You can also explore internal mechanical supports, inserting coated copper craft wire or plastic doll ball-and-socket armatures inside limbs and spines to create fully poseable figures capable of holding small accessories or balancing gracefully on display edges. Expand your visual storytelling by designing custom wardrobes for your animal figures, crocheting tiny removable coats, textured waffle scarves, miniature backpacks, and whimsical floral crowns that reflect seasonal holidays or whimsical personal narratives. Advanced makers can also experiment with scale manipulation, using the exact same pattern with fine lace-weight silk and a 0.75 mm hook to yield delicate micro-amigurumi jewelry charms, or scaling up to thick chenille yarn and an 8.0 mm hook to create oversized, ultra-soft cuddle companions. These versatile creative paths ensure that your fiber journey continues to expand, offering endless opportunities for thoughtful design, artistic growth, and personal discovery.