Crocheting three-dimensional marine life brings the quiet beauty of coastal ecosystems directly into modern textile crafting. This detailed guide covers ten original amigurumi sea creature designs, providing practical instructions to help crafters build sculptural fiber pieces with precision. Readers will learn the essential mechanics of spiral single crochet, continuous round shaping, seamless decrease joins, and balanced polyester fiberfill distribution. Discover how to sculpt curved whale flukes, ruffled octopus tentacles, textured sea turtle carapaces, and flat manta ray wings using accessible tools. Learning these techniques allows makers to produce long-lasting handmade soft toys, nursery mobiles, and coastal decorative accents with confidence. Each highlighted concept focuses on clear structural principles, ensuring that beginners and experienced crocheters alike can achieve consistent results without stitch distortion. By working through these ten marine projects, you will expand your crochet vocabulary, master anatomical yarn shaping, and create a complete underwater collection suitable for thoughtful gifting, functional keychains, or contemporary home styling.
Why Handcrafted Marine Amigurumi Continues to Trend
Marine-themed crochet projects remain prominent on creative visual boards because they merge organic oceanic shapes with the cozy charm of modern yarn design. Modern interior design frequently incorporates soft coastal aesthetics, muted nautical accents, and natural textures, making miniature marine creatures ideal accents for bedrooms, shelves, and nursery spaces. The widespread appeal of these patterns lies in their self-contained geometry, as most aquatic figures rely on smooth domes, teardrop bodies, and curving appendages that work up rapidly. Crafters appreciate that these small projects require minimal skeins, produce almost zero textile waste, and fit easily into portable project bags. For newcomers, circular spiral crochet provides immediate feedback on tension control while demystifying anatomical increases and decreases through rhythmic, predictable repetitions. Experienced fiber artists enjoy the endless opportunities for customization, from muted seafoam and slate blue palettes to tactile boucle and chenille yarn applications. These oceanic designs deliver quick creative satisfaction and result in durable, display-ready textile art that feels both playful and refined.
Essential Materials and Preparation for Underwater Crochet Projects
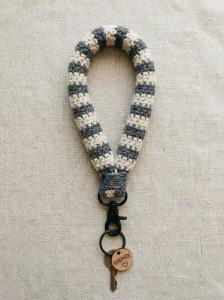
Proper preparation and deliberate material selection form the foundation of durable, clean amigurumi figures. Select a tightly spun, non-splitting yarn, such as four-ply mercerized cotton or a balanced cotton-acrylic blend. Mercerized cotton produces crisp stitch definition that keeps your shaping visible, while cotton blends offer soft elasticity that eases hand strain during repetitive work. Pair your yarn with an ergonomic aluminum hook that is one to two full sizes smaller than the size stated on the yarn band; this deliberate down-sizing creates a tight, dense fabric that keeps internal polyester stuffing invisible and secure. Gather necessary secondary notions, including locking plastic stitch markers to designate the start of each continuous round, sharp bent-tip tapestry needles for seamless seaming, durable dressmaker pins, and safety eyes fitted with secure metal or plastic washers. Fluff your polyester fiberfill before inserting it into your shapes, pulling dense clumps apart into airy tufts to prevent uneven bulges. Prepare your working surface with clean notions trays and verify stitch tension using a small circular swatch before starting your selected project.
Idea 1: The Cascading Tentacle Baby Octopus
Step-by-Step Guide
The miniature octopus relies on a clean, spherical mantle that transitions directly into eight self-curling tentacles, creating a classic silhouette that rests flat on horizontal surfaces. The primary design element is the spiral tension of the tentacles, which is achieved by working multiple stitches into a foundation chain rather than relying on manual curling or internal wires. This construction gives the piece a flexible, kinetic appeal that works well for tactile infant toys, sensory desk ornaments, or bag charms. The dome is kept completely smooth through evenly spaced single crochet increases, ensuring the rounded head retains structural firmness when packed with fiberfill. Selecting calm nautical tones, such as washed periwinkle, dusty sage, or soft ocean mist, gives this classic sea creature a minimalist presence suitable for curated nursery shelves. The continuous one-piece build between the lower mantle and the tentacle bases reduces seaming work, making it an efficient foundational pattern for practicing circular mechanics.

Begin by working six single crochet stitches into an adjustable magic loop, expanding outward with six increases per round until the mantle reaches thirty stitches in circumference. Work six straight rounds without increases to establish the vertical height of the head, and install eight-millimeter safety eyes between rounds nine and ten, leaving five visible stitches between them. To form the lower skirt and curling tentacles without breaking the yarn, work a slip stitch into the front loop of the next stitch, chain twenty-five, and place three single crochet stitches into each chain loop working back toward the mantle base. Repeat this chain-and-increase sequence eight times around the perimeter, anchoring each tentacle with a slip stitch into the mantle rim. Stuff the head firmly with separated fiberfill, taking care not to stretch the open stitches, then crochet a flat circular base disc separately using the back loops of the lower edge. Join the bottom disc to the upper mantle using neat whipstitches, burying all yarn tails inside the central cavity.

Idea 2: The Streamlined Miniature Blue Whale
Execution Process
The miniature blue whale is designed around a clean, tapered horizontal teardrop shape that mimics the streamlined profile of baleen whales. This horizontal silhouette features an integrated white underbelly plate and a pair of flat side flippers, balanced by a symmetrical horizontal tail fluke. The design emphasizes continuous horizontal shaping, requiring well-placed decreases toward the posterior end to establish an authentic tail stock without causing fabric bumps. Using soft slate blue or charcoal yarn for the dorsal shell alongside a crisp cream shade for the ventral plate creates clean visual contrast that highlights the creature’s natural countershading. Because the body rests horizontally, internal weight distribution must remain even so the figure does not roll onto its side when displayed on a desk or shelf. This pattern helps makers develop precision when working linear decreases and sewing flat, unstuffed fins onto curved surfaces.
Work the dorsal body from the rounded snout toward the tail using continuous rounds of single crochet, initiating six stitches in an adjustable ring and widening over seven rounds to thirty-six stitches. Work ten rounds straight, placing small safety eyes low along round eight, then introduce paired lateral decreases on every second round until the tail stock narrows down to eight stitches. Form the horizontal fluke by chaining two separate leaf-shaped fins, slip-stitching them together along their narrow ends, and joining the unit directly across the final tail opening with firm whipstitches. Next, crochet a flat oval panel in cream cotton to serve as the ribbed ventral plate, utilizing back-loop-only single crochet rows to suggest natural throat pleats. Pin this ribbed piece along the bottom midline of the stuffed whale body, securing the edges with a concealed blind stitch. Complete the project by crocheting two small paddle-shaped pectoral flippers, sewing them symmetrically along round twelve directly above the ventral border line.

Idea 3: The Domed Shell Hatchling Sea Turtle
Setup Method
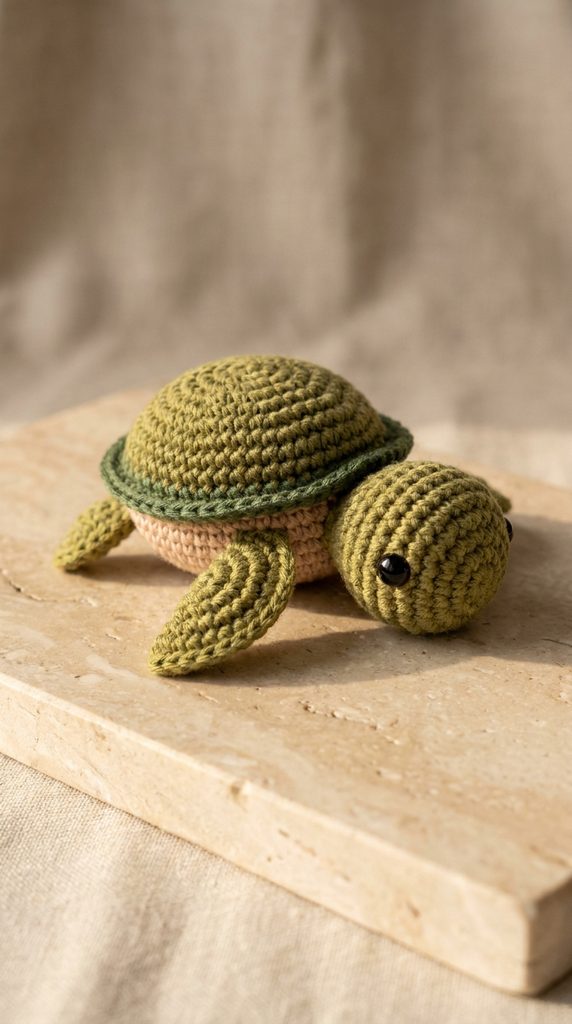
The hatchling sea turtle highlights structural layering through a separate, firm hexagonal shell fitted over a rounded body core. The upper carapace features clean edge ribbing produced by working through front loops, while the elongated front flippers curve backward in an authentic hydrodynamic swimming stroke. This design relies on contrasting textures: the carapace uses firm, tight stitches to replicate a protective shell, while the head, paddle flippers, and underbelly remain soft and flexible. Earthy tones such as moss green, olive, sandy beige, and warm walnut enhance the natural, organic look of the reptile, making it an attractive addition to woodland or ocean-inspired displays. The physical balance of this pattern depends on precise flipper alignment, ensuring that the wider front paddles extend outward at slight angles while the shorter hind flippers lay flat behind the shell margin.
Crochet the domed carapace first by increasing over five rounds to thirty stitches, followed by two rounds worked straight to build vertical shell depth. Execute a final border round consisting of alternating single crochet and slip stitches worked exclusively in the front loops, creating a raised rim around the base of the shell. Switch to cream or soft tan yarn to construct the flat plastron underbelly, working outward to match the circumference of the upper shell before pausing. In green yarn, construct the rounded head, four flat paddle flippers, and a tiny pointed tail, leaving long seaming tails on each piece without adding internal fiberfill. Pin the head and tail along the front and rear midlines of the plastron, and angle the long front paddles forward at forty-five degrees. Secure the limbs to the plastron edges with firm running stitches, pack the domed upper carapace with dense fiberfill, and join the carapace to the underbelly disc using a continuous whipstitch around the interior loops.
Idea 4: The Flared Wing Manta Ray
How to Create
The manta ray pattern translates the broad, diamond-shaped geometry of oceanic pelagic rays into flat, graceful crochet panels. Unlike traditional spherical amigurumi figures, this design relies on continuous row-by-row expansion to create wide, sweeping pectoral wings that taper naturally toward the wingtips. The central spine incorporates subtle dome shaping to house a small amount of fiberfill, while the expansive wings remain entirely unpadded to allow for a soft, natural drape. A long, slender whip tail anchors the back of the figure, balancing the two small cephalic fins that project forward from the mouth. Working this piece in deep charcoal or midnight navy with a pure white underside captures the distinct look of a manta ray gliding through open water. This project helps makers transition smoothly between working in continuous rounds and flat rows, offering practical practice with wide-angle triangular increases.
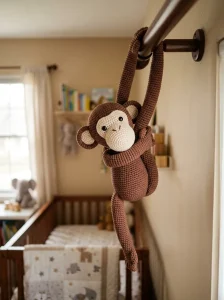
Begin at the center of the dorsal body, working six single crochet stitches in an adjustable ring and expanding outward through directional increases concentrated along the lateral edges. To form the broad pectoral wings, transition from circular rounds into flat back-and-forth rows, using graduated slip stitches, single crochets, and half-double crochets to establish sharp, triangular tips. Replicate this exact shaping with white yarn to construct the matching ventral under-panel, keeping tension consistent so both halves align cleanly. Place five-millimeter black glass or safety eyes on the outer dorsal corners, just behind the forward head margin. Align the dorsal and ventral panels with wrong sides facing inward, inserting a light layer of fiberfill into the central cranial pocket while leaving the wing areas empty. Join the two layers together using a tidy slip stitch border around the entire outer perimeter, chaining twenty stitches at the rear center point to form the slender whip tail before tying off.

Idea 5: The Upright Coral Reef Seahorse
Step-by-Step Guide
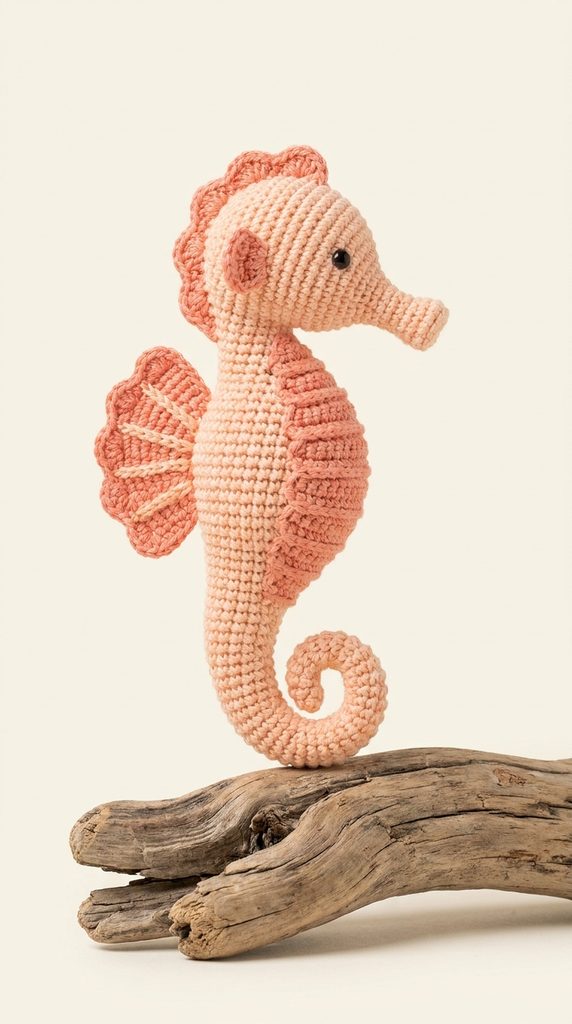
The upright seahorse amigurumi captures the distinctive, architectural posture of syngnathid fishes, featuring a crowned coronet head, a curved snout, and a tightly curled tail. The primary design feature is the segmented body, which uses alternating raised ridges to mimic the protective bony plates found on living seahorses. The tail uses progressive decreases paired with tight single crochet stitches along one side, pulling the piece into a permanent, spring-like inward curl without needing interior wire. Soft pastel colors—such as peach, pale coral, buttercup yellow, or lavender—complement the delicate, whimsical silhouette of this reef inhabitant. The finished figure works beautifully when hung as a suspended nursery accent or mounted onto a piece of driftwood for coastal wall decor. This project offers intermediate practice with short-row shaping, asymmetric increases, and fine detail assembly.
Start at the tip of the narrow snout by crocheting six single crochet stitches, working three rounds straight before expanding rapidly into the rounded head cavity over four rounds of increases. Work four rounds straight to build cranial volume, position small safety eyes securely along round seven, and decrease the neck down to twelve stitches. To create the characteristic arched belly, work three slip stitches across the back while placing three increases across the front chest wall for five consecutive rounds. Continue down into the slender tail, working single crochet decreases along the inner edge while maintaining regular stitches on the outer curve to set the inward spiral. Pack small tufts of fiberfill into the head and arched chest using the blunt end of a wooden skewer, leaving the narrow tail tip unstuffed. Finish by crocheting a tiny dorsal fin using alternating chain arches, sewing it along the upper back ridge, and stitching a small three-point coronet crown onto the top of the head.
Idea 6: The Soft Bell Moon Jellyfish
Execution Process
The moon jellyfish amigurumi emphasizes airy textures and fluid movement, using an open, hemispherical bell layered with flowing, mixed-stitch oral arms. The design pairs a firm, rounded upper cap with a delicate, ruffled underside that supports varied hanging strands. Incorporating different stitch heights—from basic single crochets to tall treble crochet clusters—produces ruffled ribbons that move naturally when the piece is handled or hung. Using translucent pastel tones, such as pale aqua, soft lilac, or unbleached natural white, captures the ethereal, light-filtering quality of true pelagic jellyfish. This hanging figure is well suited for modern crib mobiles, vertical wall hangings, or ceiling displays in creative study spaces. The pattern helps crocheters master differential stitch heights and gather techniques to build structural ruffles without complicated pattern adjustments.
Crochet the upper bell dome by working eight single crochet stitches into an adjustable ring, widening uniformly to forty stitches over eight rounds, then working five straight rounds to establish the downward-curving rim. Work a final rim round using a repeat pattern of one single crochet, one half-double crochet, two double crochets in the next stitch, and a slip stitch to create a gentle scalloped edge, then bind off cleanly. Next, construct a flat inner disc in matching yarn, stopping at thirty-two stitches, and use this panel to anchor the central oral arms. To make the ruffled arms, chain thirty stitches, work three double crochets into each chain link to form a twisting corkscrew strand, and fasten it directly into the center of the inner disc. Repeat this process to create four ruffled center arms and several simple chain strands. Lightly stuff the upper dome with fiberfill, position the inner disc inside the bell rim, and join the two elements together with hidden mattress stitches.

Idea 7: The Kawaii Clotted Cream Sea Otter
How to Make
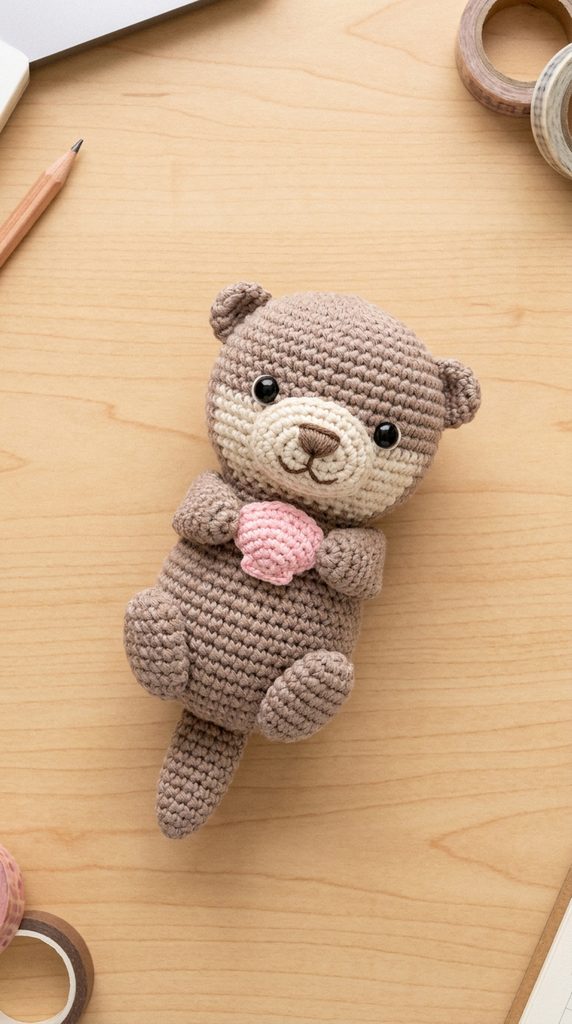
The floating sea otter design portrays the animal resting comfortably on its back, featuring a rounded head, small flattened ears, and tiny paws folded neatly over the chest. A small, separate accessory—such as a dark green textured kelp leaf or a smooth pink clam shell—is sewn securely between the paws to add character and visual interest. The body uses a rounded, oblong form worked in warm, earthy shades like chocolate, taupe, and clotted cream, with the lighter tone defining the muzzle and chest. Placing small safety eyes low and wide across the face enhances the sweet, friendly expression associated with contemporary Japanese character amigurumi. The balanced posture allows the otter to rest flat on its back on a shelf, desk, or bedside table. This project helps makers practice clean oval base starts, two-tone facial colorwork, and the secure attachment of small three-dimensional accessories.
Begin by working an oval base for the body, chaining eight stitches and working around both sides of the foundation chain to form a wide, rounded cylinder. Increase gradually to thirty-six stitches, working twelve rounds straight in rich taupe yarn to establish the elongated torso before working symmetric decreases to form the base. Work the muzzle separately using cream-colored cotton yarn, embroidering a small black triangular nose and split mouth line across the center with stranded embroidery floss. Install six-millimeter safety eyes directly above the muzzle line, then pack the torso firmly with fiberfill, keeping the stomach area slightly flattened so the figure rests steadily on its back. Crochet four small stubby limbs and two flat circular ear discs, stitching the ears flush against rounds four and five of the head. Assemble a simple clam shell using ribbed half-double crochet stitches, tuck it between the front paws, and secure the paws over the shell with firm tacking stitches.
Idea 8: The Mottled Sandbar Stingray
Setup Method
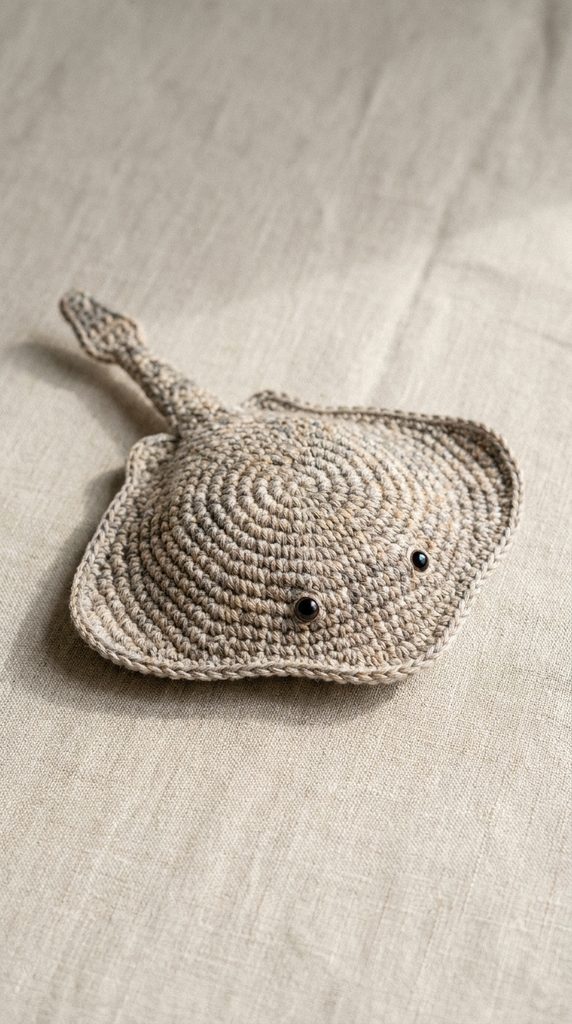
The sandbar stingray amigurumi features a broad, flattened disc body with subtle camouflage texturing, reflecting the relaxed look of bottom-dwelling elasmobranchs. The design utilizes variegated earth-toned yarn or simple surface slip-stitch embroidery to mimic the mottled patterns found on natural sandy seabeds. The central body disc remains relatively flat, transitioning into wide, sweeping lateral margins that frame a low-profile head and wide-set safety eyes. A long, tapered tail extends straight out behind the body, complete with a tiny dorsal barb detail for realistic anatomy. Muted tones—such as warm taupe, soft sandstone, driftwood grey, and cream—give this piece a grounded, organic aesthetic that fits well in rustic or coastal living rooms. This project is ideal for developing controlled, flat-circle expansion, teaching crafters how to manage increase intervals to keep large discs completely flat without rippling or cupping.
Crochet the upper disc using an eight-point increase system, placing eight single crochet stitches into a magic ring and widening over ten rounds to eighty stitches, which keeps the circular surface flat. On rounds eleven and twelve, work directional clusters of half-double and double crochets along the sides to reshape the circle into an authentic rounded diamond profile. Install small black safety eyes onto the upper surface along round five, spacing them four stitches apart to recreate the wide-set look of real stingrays. Construct an identical bottom panel in cream yarn, ensuring your stitch tension matches the top disc so the edges align properly. Pin the two panels together with wrong sides touching, slide a flat disc of craft felt or a thin layer of fiberfill between them, and seal the edges with a firm single crochet border. Join a smooth, tapered tail cord worked in continuous four-stitch rounds to the rear point, anchoring it with reinforced whipstitches.
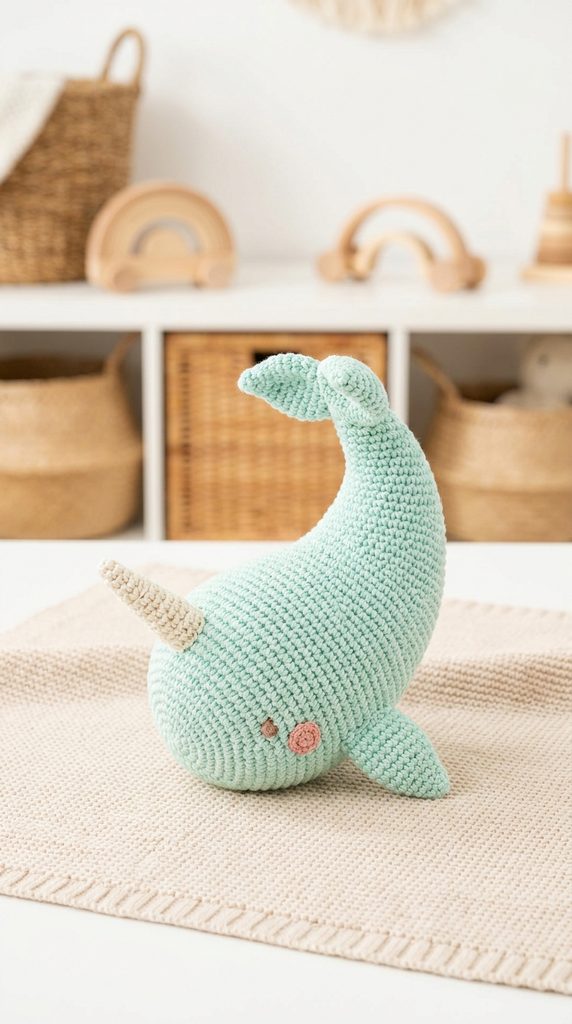
Idea 9: The Whimsical Pastel Narwhal
Execution Process
The narwhal amigurumi brings an imaginative, whimsical element to Arctic marine life, pairing an aquatic whale body with a spiral-textured ivory tusk. The body uses a smooth, elongated teardrop shape that curves upward slightly toward the tail flukes, giving the figure an energetic, swimming posture. The defining feature is the slender frontal horn, which is crocheted with firm back-loop stitches to produce a defined spiral ridge. Working the creature in soft pastel shades—such as mint green, lilac, ice blue, or blush pink—complements the mythical quality of the unicorn of the sea while remaining suitable for modern nursery spaces. The design balances a thick cranial cavity with a slender rear tail stock, requiring balanced internal stuffing to maintain the gentle curve of the spine. This pattern provides practical experience in sculpting directional bends through stacked short rows and attaching narrow, firm accessories to curved amigurumi surfaces.
Start the body at the forehead using ice-blue yarn, working six stitches into an adjustable loop and expanding outward to thirty-six stitches across six rounds. On rounds ten through twelve, work three single crochet decreases along the lower belly while placing three slip stitches along the upper spine to create a natural, upward-curving body arch. Place seven-millimeter safety eyes along round eight, embroider simple blush lines beneath each eye with pink floss, and stuff the cranial cavity firmly with prepared fiberfill. Crochet the tusk separately using fine ivory cotton thread and a two-millimeter hook, working back-loop single crochets in continuous spirals to build a stiff, textured cone. Stuff the horn firmly with small tufts of fiberfill using a metal tapestry needle, then pin it directly to the center forehead between rounds three and four. Stitch the horn base securely to the head, sew two flat paddle flippers to the sides, and attach a symmetrical two-lobed tail fluke to the tapered rear tip.
Idea 10: The Textured Spiral Hermit Crab
How to Create
The hermit crab amigurumi highlights contrasting structural elements by pairing a soft, jointed crustacean body with a rigid, asymmetrical spiral shell. The shell is crocheted as an expanding, coiled cone that curves around itself, mimicking the natural spiral architecture of discarded marine gastropod shells. The crab inside features a rounded head, two black eye stalks, walking legs, and a pair of asymmetric front claws with one claw noticeably larger than the other. Combining a structured, neutral shell in linen or taupe with a vibrant orange or coral crab creates rich visual contrast. The shell can be sewn permanently to the crab or left as a removable, pocket-like cover for interactive play. This advanced design helps crocheters build structural shells using asymmetric increases and wire-free stabilization techniques.
Begin the shell by working four single crochet stitches into an adjustable ring, using continuous rounds with increases focused along the outer edge to force the expanding tube into a natural spiral coil. Once the shell reaches thirty-six stitches in diameter, flare the final opening outward with a round of half-double crochets, stuff the spiral firmly with dense fiberfill, and set it aside. To make the crab, crochet a compact head-and-torso oval in burnt orange yarn, attaching two tall, narrow eye stalks fitted with four-millimeter safety eyes to the upper front ridge. Crochet two distinct front claws—one small and pointed, the other wide and rounded—along with six small, tubular walking legs. Sew the legs symmetrically along the lower sides of the orange torso, and mount the claws directly beneath the eye stalks. Insert the posterior half of the crab body into the open mouth of the shell, securing the two pieces together with hidden whipstitches around the inner lip.

Common Beginner Mistakes and How to Avoid Them
One of the most frequent challenges in amigurumi crafting is uneven stitch tension, which allows internal white fiberfill to show through the stitches. This problem usually happens when crafters use the standard hook size recommended on the yarn label; always choose a crochet hook that is one or two sizes smaller to produce a tight, dense fabric weave. Another common mistake is miscounting rounds in continuous spirals, which leads to asymmetrical limbs, uneven safety eye placement, and misshapen bodies. You can prevent this by placing a locking plastic stitch marker into the very first stitch of every round, moving it upward as you progress. Additionally, beginners often overstuff their shapes in a single attempt, creating hard lumps and stretching the fabric out of shape. Instead, add small, fluffed clouds of fiberfill gradually, pressing the stuffing outward against the interior walls to create smooth, supportive contours. Finally, take care to secure safety eye washers firmly against the back of the fabric, pressing until you hear a clear click before closing the surrounding crochet body.
Practical Tips for Clean, Professional Results
Mastering a few specialized finishing techniques will elevate your marine amigurumi from simple crafts to polished, professional-grade textile pieces. Use the invisible decrease method whenever shaping curved heads and bodies: insert your hook only through the front loops of the two designated stitches before pulling your yarn through, creating a smooth reduction that eliminates holes and surface bumps. When attaching separate appendages—such as flippers, fins, and shells—pin every piece securely in place with steel ball-headed pins to check symmetry from all angles before sewing. Use the yarn tails left on your pieces to seam them with clean mattress stitches, passing the needle through one stitch of the body and one stitch of the appendage alternately. If your project includes flat elements like manta ray wings or turtle flippers, block them lightly with cool steam before assembly to relax the fibers and keep them lying flat. Taking the time to work clean decreases, maintain balanced tension, and pin your pieces carefully will ensure your finished sea creatures look neat, durable, and well-proportioned.
Styling, Presentation, and Display Ideas
Handmade amigurumi sea creatures offer versatile decorative accents that bring texture and personality to varied interior spaces. In modern nurseries, hang several lightweight marine figures—such as the moon jellyfish, baby octopus, and blue whale—from a natural hoop to create a custom, ocean-themed crib mobile. You can also display firm, flat-bottomed pieces like the hatchling sea turtle, sandbar stingray, or clotted cream sea otter on floating shelves alongside sea glass, smooth river stones, or potted air plants. For desk or bookshelf styling, set a single amigurumi figure atop a stack of linen-bound books or inside an open shadow box to add a quiet, coastal accent to your workspace. If you photograph your creations for an online portfolio or shop, shoot your pieces in soft, indirect daylight against plain backgrounds like light birch plywood, neutral linen, or white painted brick. Keep your compositions simple and free of clutter, letting the fine stitch definition, soft pastel colors, and sculptural shapes take center stage.
Practical Time and Resource Planning
Organizing your crochet projects thoughtfully helps you make efficient use of your crafting time while keeping material expenses low. Most marine amigurumi patterns require less than fifty grams of yarn per creature, making them an excellent, economical way to use up leftover cotton skeins from larger home decor projects. To keep costs predictable, invest in large skeins of neutral staple shades—such as off-white, soft taupe, and slate grey—and buy smaller, budget-friendly skeins for colorful accent details. You can streamline your assembly time by batching your work into focused stages: crochet all the heads, bodies, and appendages during one sitting, and save safety eye placement, stuffing, and final assembly for the next. Splitting your workflow into dedicated steps builds muscle memory, reduces repetitive tool switching, and speeds up your total assembly time. Most small to medium marine figures take between two and four hours of focused work, making them satisfying weekend creative projects that deliver high-quality handmade results without requiring expensive equipment or prolonged commitments.
Creative Expansion and Advanced Techniques
Once you master foundational marine amigurumi construction, you can explore creative modifications that introduce new textures, functions, and interactive features to your pieces. Experiment with different yarn weights and fiber types, such as swapping smooth mercerized cotton for a fluffy boucle, brushed alpaca, or thick chenille yarn to give sea creatures a cozy, plush feel. You can also scale patterns up or down simply by changing your hook and yarn pairings, turning a small two-inch keychain octopus into a large sofa accent pillow without changing the underlying stitch counts. For nursery items, insert small chime bells or rattle inserts inside the stuffed head cavities before sealing them, transforming decorative fiber sculptures into gentle sensory toys for babies. You might also build complete oceanic scenes by crocheting small coral branches, textured sea sponges, and ribbed seashells to frame your swimming figures. The structural versatility of amigurumi allows for endless artistic exploration, welcoming creative experiments with surface embroidery, natural color palettes, and mixed-media accents.