Handcrafted amigurumi monkeys offer a delightful, expressive avenue for fiber artists and crafters to turn modest skeins of cotton yarn into dynamic, three-dimensional plush characters. Crocheting miniature primates allows makers to experiment with expressive facial construction, curved limbs, prehensile tails, and whimsical accessory sets using foundational stitches. This comprehensive tutorial details ten unique amigurumi monkey ideas, ranging from classic long-limbed canopy swingers and banana-clutching foals to cottagecore dungaree wearers, cozy scarf mascots, and baby-safe sensory rattles. Readers will discover practical mechanics for seamless spiral crocheting, internal wire armatures, secure button-joint assembly, facial muzzle embroidery, and dense fiberfill shaping. Crafting your own textile monkeys eliminates reliance on mass-produced plastic novelties, giving makers complete control over fiber safety, color coordination, and structural longevity. In addition to creating beloved childhood keepsakes, mastering these versatile amigurumi techniques builds fundamental three-dimensional sculpting skills that translate directly into nursery home decor, seasonal mantelpiece vignettes, and functional curtain tiebacks. By applying accessible techniques such as adjustable magic rings, single crochet increases, and invisible decreases, crafters of any experience level can achieve clean, boutique-grade results. The upcoming sections outline essential preparation workflows, material inventories, ten structured two-paragraph project breakdowns, and practical project planning strategies.
Why This Idea Is Trending or Useful
Handmade monkey figures continue to capture widespread popularity across digital craft communities and Pinterest ideas because they balance playful kinetic character with functional home utility. Modern nursery and playroom interiors frequently embrace playful safari and jungle themes to introduce tactile warmth and organic character into minimalist style living environments. The elongated limbs, curved tails, and grasping paws of amigurumi monkeys offer exceptional practical value, allowing these charming characters to function as functional curtain tiebacks, bedpost hangers, stroller companions, and cheerful desk mascots. As a rewarding DIY creative project, assembling a small monkey requires minimal dedicated craft space, making steady progress easy to achieve during evening relaxation hours or daily commutes. Because basic primate amigurumi patterns rely primarily on foundational single crochet stitches worked in continuous rounds, this craft serves as an exceptionally beginner friendly entry point into three-dimensional fiber arts. Designing custom monkeys also delivers dependable budget ideas, transforming small scraps of brown, beige, cream, and mustard yarn from larger blanket projects into high-value handmade keepsakes at minimal cost. Furthermore, these durable fiber toys resist rough everyday handling, serving as cherished developmental playthings that retain their expressive charm for years.
Materials and Preparation
Thorough planning and disciplined supply acquisition form the essential foundation for producing durable, well-shaped amigurumi monkeys that maintain their structure through active play. The primary fiber selection should focus on sport-weight or DK-weight mercerized cotton yarn, as smooth cotton fibers provide crisp stitch definition, resist fuzzy pilling, and wash cleanly without stretching. Match this yarn with an ergonomic aluminum crochet hook sized between 2.0 mm and 2.5 mm to create a tight, dense fabric that prevents internal polyester fiberfill from migrating outward. Essential assembly tools include blunt steel tapestry needles, micro locking stitch markers, sharp embroidery snips, certified baby-safe rattle inserts, flexible aluminum craft wire, and premium hypoallergenic polyester stuffing. For child safety and long-term durability, use colorfast cotton embroidery floss to embroider peaceful sleeping eyes or French knots rather than plastic safety eyes that might detach under stress. Preparation begins by verifying your stitch gauge on a small sample sphere to confirm that the fabric remains completely opaque under light tension. Pre-wind your yarn scraps into center-pull cakes to prevent tangles, and set up an organized work tray equipped with locking markers to track your round counts accurately throughout construction.
1. Classic Long-Limbed Hanging Chimpanzee with Grasping Paws
Step-by-Step Guide
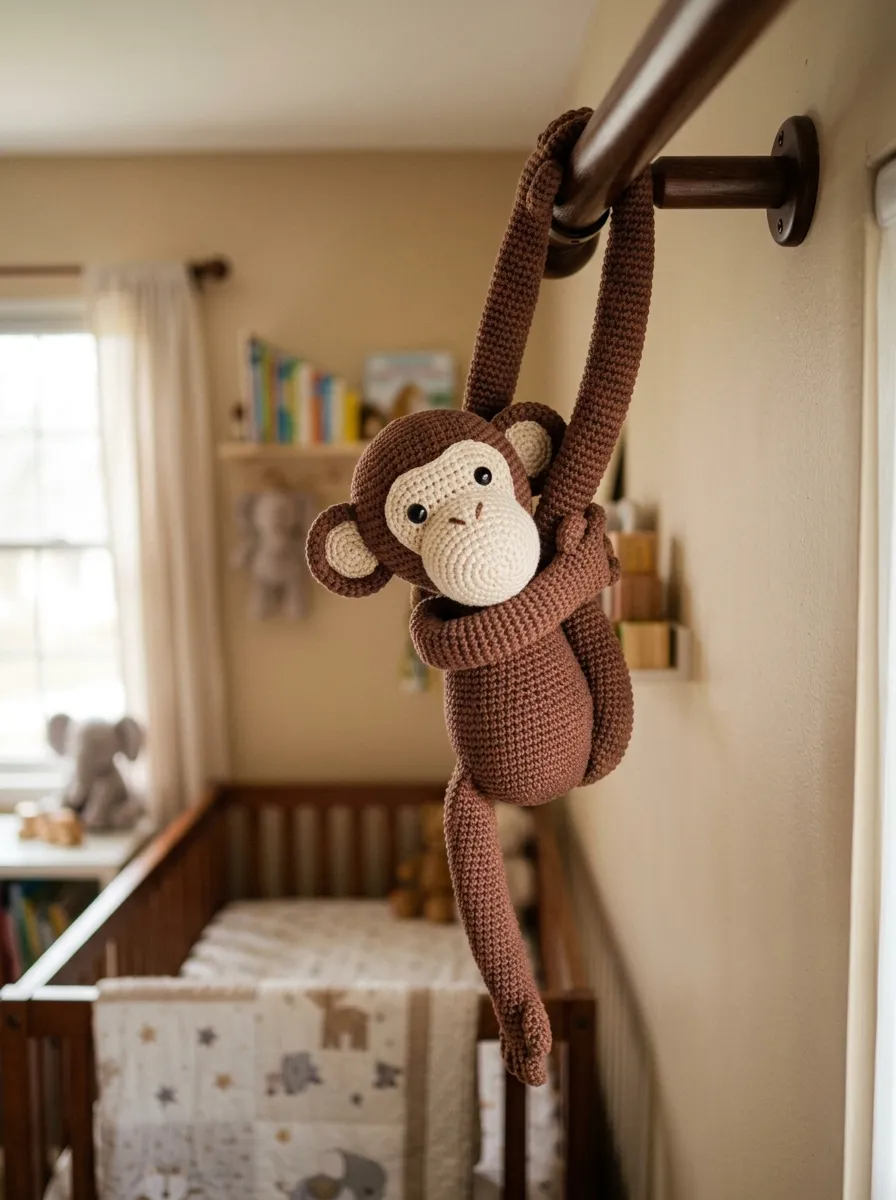
The classic long-limbed chimpanzee design captures authentic arboreal grace through elongated, flexible extremities, curved grasping paws, and an alert facial expression. This project features a slender cocoa-brown body worked in continuous single crochet rounds, contrasted by an oval, unbleached cream muzzle and two prominent C-shaped cup ears. The defining physical attribute of this figure is its extra-long arms and legs, which measure twice the length of the torso to allow the monkey to link its hands together. The flexible limbs give the toy kinetic movement, enabling it to hang playfully from nursery curtain rods, wooden crib rails, or indoor plant trellises. Dense cotton stitches provide structural integrity, preventing the elongated arms from sagging over time. The warm cocoa and cream palette introduces an organic, earthy feel that complements vintage nursery furniture, wicker storage baskets, and modern botanical room accents.
To construct this hanging chimpanzee, begin at the muzzle with cream cotton yarn, chaining six stitches and working in an oval expansion over four rounds to twenty-four stitches. Switch to rich cocoa-brown yarn to build the rounded skull over eight continuous rounds before tapering downward into the torso, packing the head cavity firmly with dense polyester fiberfill. To create the elongated arms, crochet two slender tubes of six stitches each across thirty rounds, inserting a flexible length of plastic craft wire into the center before closing the paws to allow poseable grasping. Assemble four-round flat disc ears in cocoa brown, folding the bottom edges slightly to create cupped contours before stitching them symmetrically to the head sides. Join the arms and legs to the torso using reinforced whip stitches, placing small concealed magnetic snaps inside the front palms to allow the hands to clasp together securely around hanging fixtures.
2. Pocket-Sized Capuchin Monkey Clutching a Ripe Banana

Read This:

Execution Process
Miniature narrative character designs bring whimsical storytelling, bright pop-art color, and delightful sensory charm to children’s toy collections. This design features a compact, palm-sized capuchin monkey worked in soft walnut-brown and sand-beige yarn, clasping a separately crocheted bright yellow banana between its paws. The capuchin features a heart-shaped facial mask in pale sand cotton, framed by a dark brown hood and small rounded ears that give the animal an endearing, curious expression. The bright sunny yellow banana introduces a vibrant focal accent that breaks up the neutral brown palette, providing immediate visual charm on study desks or toy shelves. The compact, ball-like body geometry distributes internal stuffing pressure evenly, preventing the figure from flattening when carried in pockets or backpacks. This charming design functions beautifully as an interactive desk mascot, backpack zipper pull, or cheerful party favor.
Start by working the capuchin head in walnut-brown cotton, expanding a six-stitch magic ring over four rounds to twenty-four stitches and working four rounds even. To construct the pale sand facial plate, crochet two small intersecting circles in beige cotton to form a heart-shaped mask, sewing it flat onto the front face before embroidering two tiny black French-knot eyes. Shape a squat, teardrop-shaped body in walnut brown, stuffing it firmly with polyester batting and securing it beneath the head with a tapestry needle. Crochet a miniature banana by chaining twelve stitches in vibrant yellow cotton, working four rows of single crochet before tapering both ends with invisible decreases and embroidering small brown tips at each end. Stitch the miniature banana securely between the monkey’s front paws, curving the monkey’s long tail into an upward spiral along the back to provide a stable third resting point on flat surfaces.
3. Cottagecore Monkey in Corduroy-Textured Overalls

How to Create
Cottagecore styling celebrates nostalgic pastoral charm, cozy tailored clothing, and vintage handmade aesthetics within modern fiber crafts. This design showcases a gentle, caramel-brown amigurumi monkey outfitted in a removable or integrated pair of miniature overalls worked in textured ribbed stitches. The overalls, rendered in dusty sage green, mustard yellow, or rust orange, feature tiny shoulder straps secured with working miniature wooden buttons. The tailored clothing piece introduces rich surface texture and artisanal detail, elevating the animal plush from a simple toy into a boutique-grade decorative collectible. The seated, flat-bottomed profile ensures the monkey balances comfortably on floating bookshelves, bedside tables, or children’s study desks without rolling over. The combination of warm caramel yarn, soft ribbed clothing, and natural timber buttons brings cozy domestic hygge into modern living spaces.
To assemble this cottagecore monkey, begin with caramel-brown cotton yarn, expanding an adjustable loop over five rounds to thirty stitches to build the spherical head. Shape a broad, rounded muzzle in unbleached cream cotton, stitching it to the lower face and embroidering two delicate curved sleeping eyes using charcoal embroidery floss. Build the torso and limbs using matching caramel yarn, attaching the legs in a forward-facing seated position to form a flat, stable base. To create the textured overalls, join sage-green yarn around the lower torso, working in back-loop-only half-double crochet stitches for eight rounds to create raised vertical corduroy ridges. Crochet two slender shoulder straps by chaining fifteen stitches in green, crossing them over the monkey’s shoulders and anchoring the front ends with tiny wooden buttons sewn through the fabric. Finish by stitching a small acorn or flower applique onto the front bib pocket.
4. Playful Sock-Monkey Inspired Retro Mascot

Read This:
Step-by-Step Guide
Retro toy designs celebrate classic Americana craft heritage, bold red-and-white color blocking, and vintage nursery nostalgia through updated amigurumi techniques. This project reimagines the traditional knit sock monkey as a contemporary crochet amigurumi, worked in speckled heather-gray yarn with iconic cream, red, and chocolate accents. The standout visual element is the wide, horizontal cream muzzle bordered by a bright scarlet-red lips stripe, paired with a matching pom-pom stocking cap perched jaunty over one ear. The textured tweed or marled gray yarn creates an authentic heathered appearance that mimics vintage work socks, while the clean single-crochet stitches provide superior structural firmness. This nostalgic character appeals to collectors, crafters, and parents seeking a durable, modern heirloom that honors classic mid-century folk toys. The relaxed, floppy limb construction allows the monkey to sit casually on chair arms or nursery shelves.
Begin by working the head and body as a continuous piece using heather-gray marled cotton yarn, expanding a six-stitch magic ring to thirty stitches and working thirty continuous rounds downward. Pack the torso firmly with polyfill stuffing, tapering the base closed with invisible decreases. To create the iconic mouth, join cream yarn to crochet a wide horizontal oval, switching to bright scarlet-red yarn along the final round to form the distinctive red lips before sewing the muzzle across the lower face. Attach two small black felt circles or embroidered floss discs above the red muzzle to form expressive eyes. Crochet long, slender arms and legs in heather gray, tipping the paws and feet with cream and red bands to represent sock heels and toes. Complete the vintage styling by crocheting a mini red-and-white striped pointed beanie, topping it with a fluffy white yarn pom-pom and stitching it securely to the crown.
5. Gentle Golden Lion Tamarin with Radiant Sunburst Mane

Execution Process
Wildlife-inspired primate designs introduce vibrant color gradients, exotic naturalist beauty, and rich textural variety into handcrafted toy collections. This project captures the striking appearance of the endangered golden lion tamarin, featuring a slender body crocheted in rich amber and tangerine cotton yarn, framed by an expansive, fluffy golden mane. The defining characteristic is the radiant, brushed-yarn mane that encircles the dark slate-gray face like a blooming lion’s ruff. The brilliant citrus and golden tones inject warmth and joyful energy into modern children’s rooms, serving as an educational conversation piece that celebrates rare rainforest animals. The dense, upright mane provides delightful tactile contrast against the smooth single-crochet stitches of the body. This sculptural figure functions beautifully as a shelf showpiece, nature study companion, or focal mascot for tropical nursery decor.
To construct the golden lion tamarin, begin by crocheting a small, rounded head in dark slate-gray cotton yarn, working an adjustable ring up to eighteen stitches to establish a dark, delicate face. Work three rounds even before switching to vibrant amber-orange yarn, increasing gradually down into an elongated torso over twenty-four rounds. Pack the body firmly with clean polyester batting, inserting a length of floral wire into the extra-long tail so it can curl gracefully upward. To craft the radiant sunburst mane, cut sixty three-inch strands of golden-yellow and orange wool or acrylic yarn, looping them individually around the perimeter of the gray face using a latch-hook method. Brush the attached yarn fringe vigorously with a wire slicker brush until the individual fibers fluff into a continuous, cloud-like golden ruff, trimming the outer edges with sharp shears into a neat circular halo. Embroider tiny dark nostrils and shining catchlights onto the face.
6. Cozy Winter Monkey in Fair Isle Beanie and Scarf
Read This:
How to Create
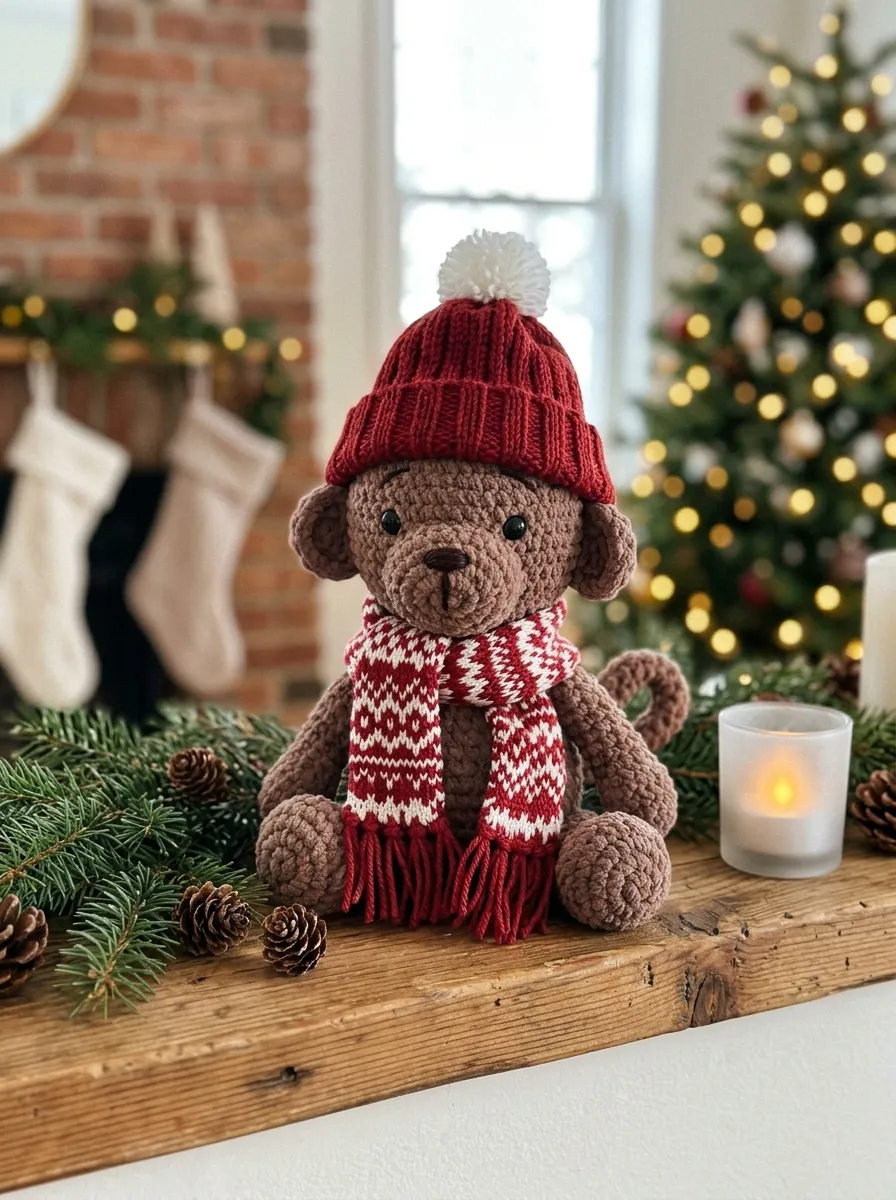
Seasonal winter accessories add rich surface patterning, cozy tactile warmth, and cheerful holiday spirit to simple amigurumi animal forms. This design features a plump cocoa-brown monkey bundled up for cold weather in a miniature folded-brim pom-pom beanie and a long, fringed scarf featuring simple geometric Fair Isle colorwork. The contrast between the smooth single-crochet stitches of the monkey’s body and the detailed knit-look stitches of the winter accessories introduces visual depth and artisanal charm. The long scarf can be wrapped several times around the monkey’s neck, with the fringed ends draping naturally down the chest to add kinetic movement. This design serves as a festive holiday accent for winter mantels, entryway console tables, and seasonal tier-tray displays. The removable accessories also allow the monkey to transition easily from a seasonal holiday decoration into a year-round nursery companion.
Start by assembling the monkey body in rich cocoa-brown cotton yarn, expanding an adjustable loop to twenty-four stitches and working continuous rounds to form a unified head and rounded torso over twenty rounds. Firmly pack the interior with hypoallergenic fiberfill, then decrease to six stitches and pull the yarn tail through the front loops to seal the bottom. Shape a wide, flat muzzle in cream yarn, stitching it firmly between rounds eight and ten, and embroider two peaceful curved eyelashes using charcoal floss. To make the winter beanie, work in back-loop-only single crochets using crimson-red and white yarn to create a stretchy ribbed band, seaming the side and gathering the top tightly beneath a fluffy mini white pom-pom. For the winter scarf, chain forty-five stitches in red and white, working two rows of half-double crochet with simple alternating color flecks. Wrap the scarf snugly around the monkey’s neck, securing the overlap with a hidden stitch.
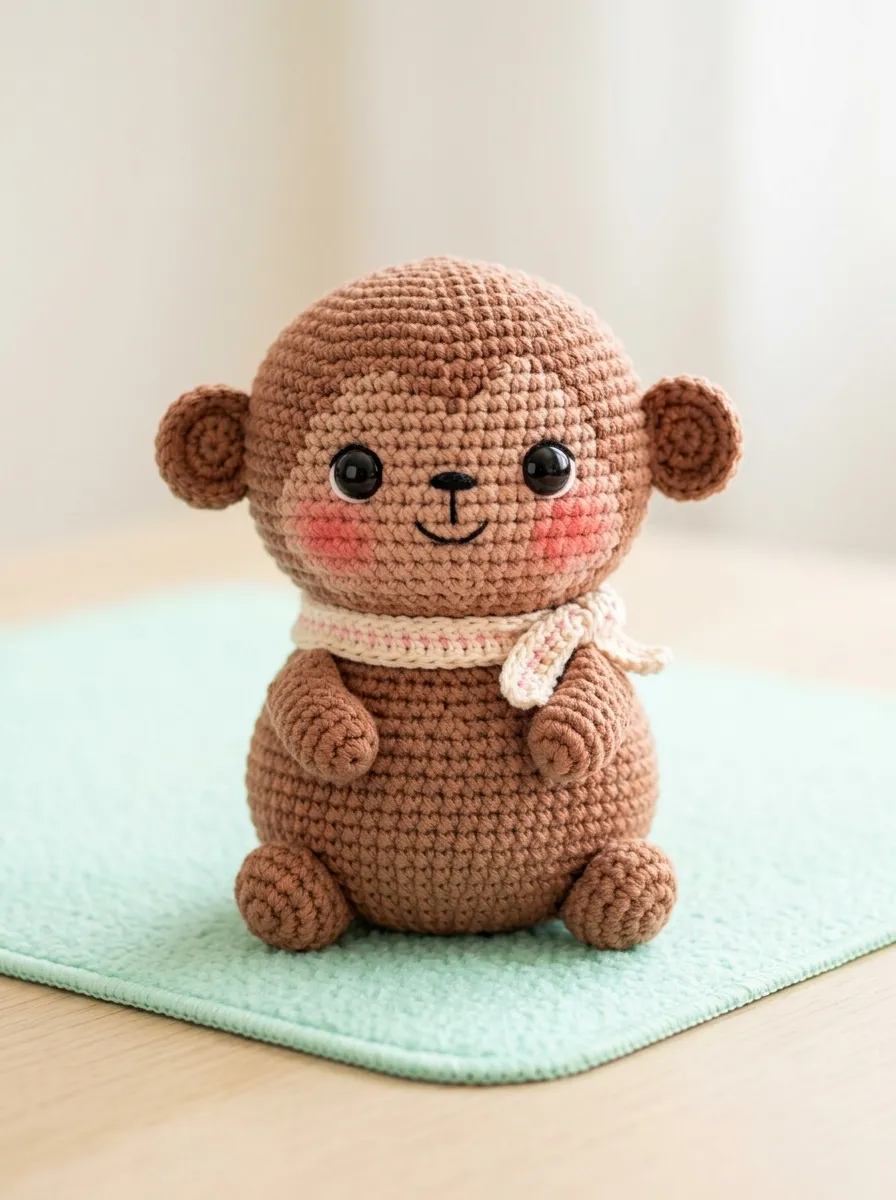
7. Interactive Stacking Ring Monkey Toy for Toddlers

Step-by-Step Guide
Interactive developmental toys combine educational tactile play, motor skill coordination, and charming character aesthetics into a durable fiber playset. This project reimagines the traditional plastic stacking ring tower as an all-textile amigurumi monkey, featuring a weighted cylindrical center post topped with a detachable monkey head. The body is formed from four graduated, hollow donut rings worked in contrasting jungle textures and patterns—including banana yellow, leaf green, warm tan, and textured bobble stripes. Toddlers can slide the soft rings on and off the plush post, practicing size differentiation and hand-eye coordination while enjoying safe, quiet sensory play. The soft cotton construction prevents bruising or floor damage during inevitable nursery drops. Its washable, lint-free fabric makes it a practical, long-lasting developmental tool that doubles as a handsome nursery shelf display when stacked.
To assemble the stacking toy, begin with the stable base, crocheting a wide six-inch flat circular disc in mocha brown cotton, reinforcing the interior with a safe flexible plastic craft insert before working upward into a sturdy four-inch-tall vertical post packed with dense stuffing. For the monkey head topper, crochet a standard monkey head with a hollow, recessed cup built into the lower neck, designed to slide snugly over the top tip of the center post. To construct the four stacking rings, crochet four separate hollow tubes of graduated diameters—ranging from three inches to five inches across—in alternating jungle colorways. Stuff each hollow tube firmly with hypoallergenic polyfill, seaming the circular ends together using invisible mattress stitches to create smooth, uniform donut rings. Insert a baby-safe plastic jingle bell inside the smallest yellow ring before sealing, providing rewarding auditory feedback whenever a child lifts the ring off the stack.
8. Boho Macrame-Tail Monkey Wall Hanging
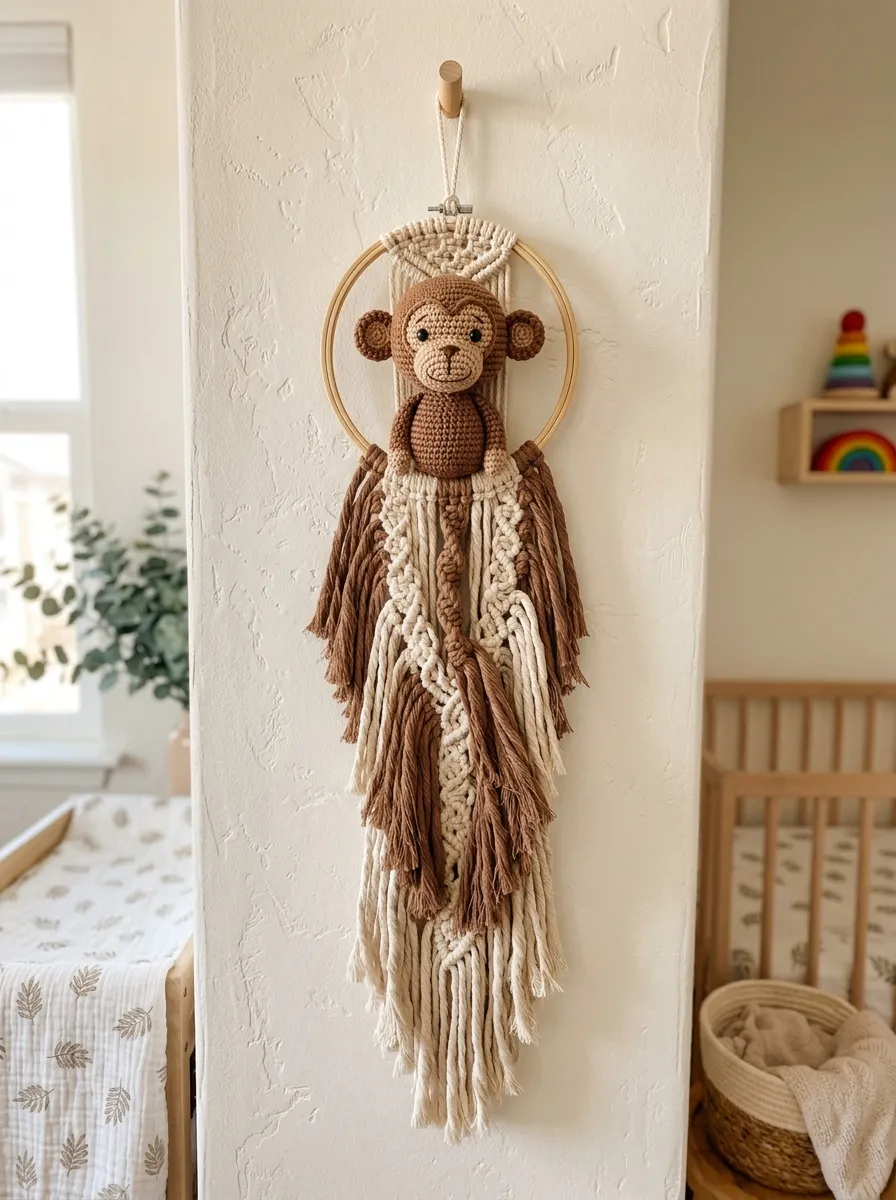

Execution Process
Translating three-dimensional amigurumi sculptures into dimensional wall art brings tactile fiber richness, modern bohemian styling, and vertical visual interest to nursery walls. This mixed-media design mounts a sculpted, flat-backed amigurumi monkey head and torso onto a polished natural wooden embroidery hoop or bamboo ring. The standout feature is an expansive, flowing tail of brushed natural macrame cotton rope that cascades downward from the wooden hoop, forming a fringed wall tapestry. The clean geometric lines of the circular wood frame contrast with the soft, curved contours of the brown monkey head and the flowing fringe below. The playful jungle motif introduces a gender-neutral statement piece that complements modern boho nurseries, macrame plant hangers, and woven rattan furniture. Mounted securely to the wall, this design keeps fiber art safely out of reach of infants while enriching the room’s visual atmosphere.
Begin by selecting an eight-inch natural bamboo embroidery hoop, discarding the outer screw ring to use the smooth inner circular frame as your structural armature. Crochet a three-dimensional monkey head and upper chest in warm walnut-brown cotton, leaving the back of the skull completely open and flat rather than tapered closed. Pack the head firmly with polyfill, then whip-stitch the circular rear perimeter directly around the top upper rim of the bamboo hoop using heavy-duty waxed linen thread. Attach two cupped ears and a central cream muzzle to the face, embroidering large, expressive eyes with black floss. For the flowing boho tail, cut forty ten-inch lengths of three-millimeter unbleached single-strand macrame cotton cord, looping them through the lower half of the bamboo hoop using lark’s head knots. Intersperse strands of brown cotton yarn into the macrame fringe, then brush the hanging cords with a wire pet slicker brush to produce a fluffy, textured tapestry tail.
9. Chubby Kawaii Monkey with Rosy Cheeks and Tiny Ears
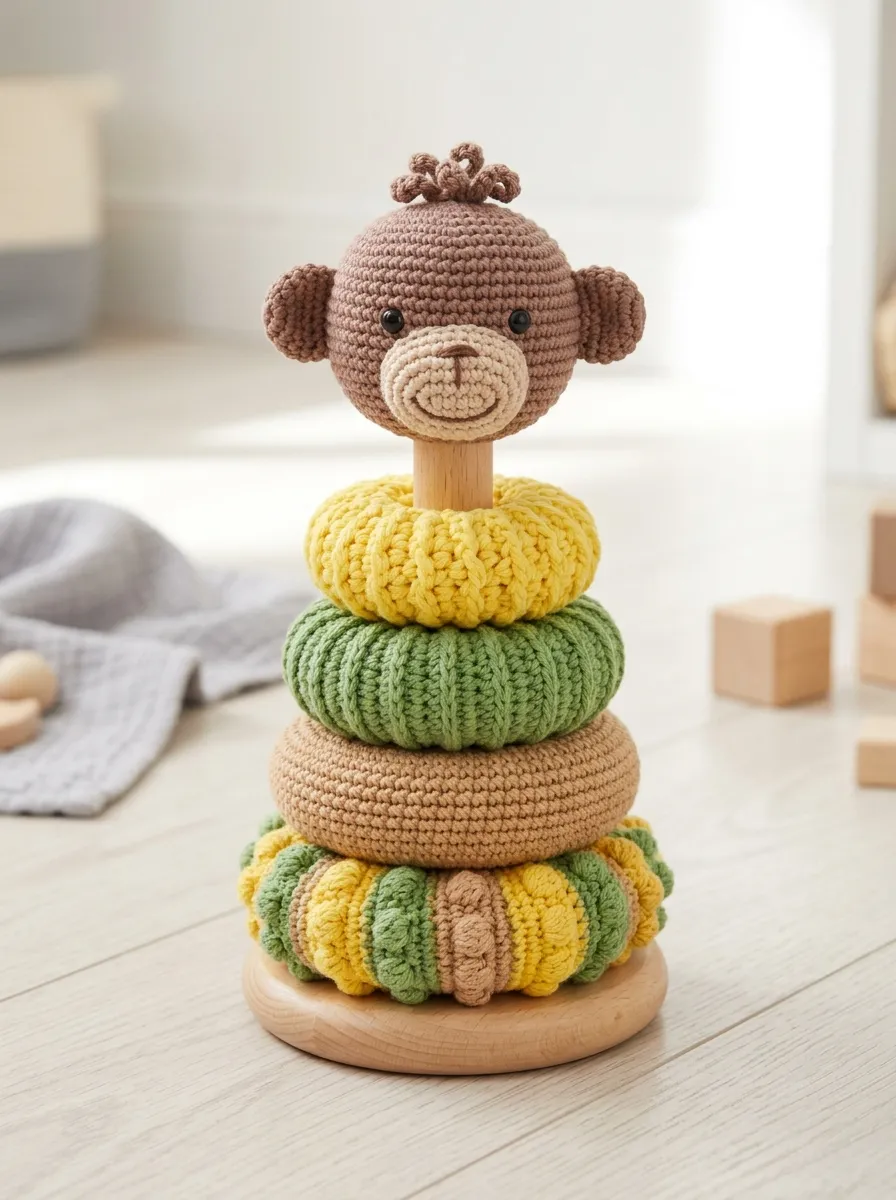
How to Create
Kawaii character styling celebrates youthful innocence, exaggerated rounded proportions, and simplified anatomy to create universally endearing, huggable figures. This design features a spherical, pear-shaped monkey body where the head and torso merge seamlessly into a single chubby teardrop shape. The animal displays oversized, wide-set black eyes positioned low on the face, tiny rounded ears, and miniature stubby paws that poke out playfully from the rounded belly. The defining characteristic is the compact, ball-like silhouette that accentuates the plump, rounded contours without visually cluttering the simple character design. The low, rounded center of gravity makes the toy exceptionally stable, allowing it to sit upright on desks, bedside tables, or computer monitors without tipping over. Its compact, squishable form contains no delicate extremities, ensuring it withstands rough handling during imaginative toddler play.
To create this chubby kawaii monkey, begin with warm milk-chocolate cotton yarn, placing six single crochets into an adjustable magic ring and expanding rapidly over six rounds to thirty-six stitches. Work twelve continuous rounds while shaping a gentle pear-like taper down toward the lower abdomen. Insert safe, hand-embroidered black felt circles or dense satin-stitched floss discs for eyes between rounds ten and twelve, placing them eight stitches apart to achieve an authentic kawaii expression. Pack the plump cavity generously with cloud-soft polyester batting, maintaining a round, squishable volume before cinching the base shut with invisible decreases. Crochet four tiny cylindrical paws measuring only one inch in length using solid brown cotton, sewing them tightly to the lower front and sides of the belly. Finish by embroidering a tiny cream heart-shaped muzzle on the lower face and applying dry pink chalk pastel blush beneath the eyes.
10. Cheeky Stroller Activity Monkey with Teething Ring and Rattle
Read This:
Step-by-Step Guide
Multifunctional infant toys combine interactive sensory stimulation, motor skill development, and comforting character design into a durable travel accessory. This project designs an amigurumi monkey head and torso anchored securely to a smooth, untreated natural beechwood teething ring, complete with an internal rattling element and hanging sensory ribbons. The textured stitches of the cotton monkey body offer varied tactile surfaces for curious infant fingers, while the natural hardwood ring provides safe, non-toxic relief for aching gums during teething phases. A sturdy fabric strap with a snap closure extends from the monkey’s head, allowing parents to clip the toy securely to strollers, car seats, or diaper bags to prevent drops onto dusty sidewalks. The cheerful primate face brings comfort and entertainment to infants during outdoor errands and long family travels.
To assemble this stroller toy, select a three-inch sanded, untreated natural beechwood ring, wiping it clean with a dry cloth. Crochet the monkey head using organic, unmercerized tan cotton yarn, inserting an enclosed plastic rattle disc wrapped in batting into the center core before tapering the neck. Sew a wide cream muzzle and two cupped ears firmly to the head, embroidering all facial features using colorfast cotton embroidery floss with deep internal anchor knots. To join the figure to the wooden ring, crochet a flat rectangular tab of eight single crochet rows extending downward from the base of the monkey’s neck. Wrap this crochet tab tightly around the beechwood ring, seaming the free edge securely to the neck base with double-stitched nylon thread. Attach several two-inch loops of colorful grosgrain ribbon to the side seams, finishing with an upper hanging strap fastened with a heavy-duty plastic snap.
Common Beginner Mistakes and How to Avoid Them
The most critical technical error in amigurumi monkey crafting involves loose stitch tension, which causes the fabric to stretch and allows white polyester stuffing to show through the stitches. Prevent this by selecting an ergonomic crochet hook that is a full millimeter smaller than the yarn manufacturer recommends, maintaining firm, consistent yarn wraps around your fingers throughout every round. Another frequent challenge is the appearance of jagged, stepped color shifts when transitioning between the head and cream muzzle; resolve this by completing the final yarn-over of the previous stitch using the new color strand. Beginners also frequently understuff the neck joint, causing the monkey’s head to wobble, droop, or collapse under its own weight. Pack your figures progressively using small, dense pinches of fiberfill, using a blunt chopstick or wooden stylus to compress the stuffing firmly into the neck cavity, or insert a rolled cylinder of craft foam inside the neck before closing. Additionally, avoid sewing ears and limbs on crookedly by pinning all components in place first with pearl-headed sewing pins, setting the figure on a flat table to verify symmetry from both straight-on and profile angles before stitching. Finally, avoid using plastic safety eyes on toys intended for infants, opting instead for secure, hand-embroidered features using colorfast cotton embroidery floss.
Practical Tips for Better Results
Achieving professional, boutique-quality finishes on amigurumi monkeys relies on disciplined assembly habits and precise finishing techniques. Always utilize the invisible decrease method instead of standard decreases when shaping three-dimensional curves; inserting your hook exclusively through the front loops of two adjacent stitches produces an uninterrupted, smooth surface that mirrors a standard single crochet. Secure locking plastic stitch markers at the start of every round to avoid losing your stitch count during complex shaping sequences. When attaching limbs, ears, and muzzles, leave generous eighteen-inch yarn tails on the components, using these original threads rather than secondary sewing threads to ensure seamless, color-matched joinery. Use high-strength nylon thread or double-stranded cotton when securing heavy bases, key rings, or wooden rings, anchoring the thread ends with internal square knots buried deep within the polyfill core. To give your finished monkeys a polished, professional look, lightly steam the completed cotton fabric using an iron held two inches away; this relaxes the fibers, sets the stitch tension, and creates a clean surface without flattening the three-dimensional volume.
Styling, Presentation, or Organization Ideas
Integrating handmade amigurumi monkeys into your home decor enhances living spaces while showcasing the maker’s care and craftsmanship. Style your collection of themed monkeys on a floating wooden bookshelf, on a nursery changing station, or nestled beside potted indoor ferns to create playful, safari-inspired vignettes. For children’s bedrooms, hang a series of graduated monkey figures from an untreated birch embroidery hoop using natural waxed cotton cords, forming a custom woodland jungle mobile that sways gently with room air currents. If presenting these handmade creations as thoughtful baby shower gifts or birthday favors, place each monkey inside an unbleached kraft paper gift box lined with shredded crinkle paper, tying the exterior with natural baker’s twine and a stamped wooden gift tag. You can also color-code personal belongings by attaching miniature monkey charms to diaper bags, school backpacks, or library totes using sturdy swivel clasps, combining practical identification with handmade charm. When photographing your creations for digital portfolios or inspiration boards, use soft morning daylight, neutral linen backdrops, and raw wood surfaces to highlight the fine stitch definition and natural cotton textures.
Budget or Time Planning
Executing a collection of amigurumi monkeys requires minimal financial investment and structured time management to maximize creative efficiency. Save on supply costs by purchasing multi-color value packs of sport-weight cotton yarn or using leftover remnants from larger projects, as a single two-ounce skein of brown yarn and cream yarn can yield up to three individual small monkeys. Organize your production schedule using a modular assembly-line workflow: dedicate an initial session to winding yarn scraps and prepping hardware; use a second session to crochet all foundational heads, bodies, and limbs; and reserve a final block for embroidery, stuffing, and limb attachment. Simple, unembellished designs like the pocket-sized capuchin or hanging chimpanzee require approximately two to three hours of active stitching, making them ideal high-efficiency weekend projects. Keep your active materials organized by storing hooks, stitch markers, safety pins, and matching yarn tails together inside clear, zippered project pouches. Planning your handmade holiday stocking stuffers and craft fair inventories several weeks in advance ensures a calm, enjoyable crafting experience, yielding beautifully detailed miniature sculptures without the pressure of rushed assembly sessions.
Creative Expansion and Advanced Inspiration
Once you have mastered foundational monkey shaping and assembly techniques, explore creative variations to expand your fiber art designs across wider applications. Adapt your favorite monkey patterns into functional home decor by omitting the bottom decrease rounds and inserting strong ceramic disc magnets or weighted river stones inside the base, turning the figures into decorative refrigerator memo holders or sturdy desk paperweights. You can also translate monkey motifs into seasonal celebration decor by crocheting miniature Santa hats, autumn scarves, or graduation caps to dress your monkeys for various holidays throughout the year. Experiment with botanical, hand-dyed cotton yarns to achieve subtle, variegated color transitions across monkey fur, introducing earthy regional authenticity to your collection. Consider designing cohesive jungle animal families, scaling the base pattern up or down by changing yarn weights from lace-weight cotton to chunky chenille yarn to create an entire troop of graduated monkeys. Document your custom color combinations, stitch counts, and accessory dimensions in a dedicated studio journal, creating a personal design archive that streamlines future creative projects and ensures consistent, professional results across every handmade collection.