Scrap yarn amigurumi offers an inventive, sustainable approach to miniature crochet, transforming discarded fiber remnants into charming three-dimensional soft sculptures. Every active crochet enthusiast accumulates partial skeins, leftover cut ends, and varied fiber weights that often clutter craft storage spaces without a clear decorative purpose. This practical tutorial explores ten complete, beginner friendly scrap-busting projects engineered specifically to consume small yardages of varying yarn types while producing polished, durable results. Readers will learn essential fiber adaptation methods, seamless color-joining mechanics, modular assembly strategies, and proper density control to ensure that small quantities of miscellaneous yarn translate into structured decorative objects. The practical utility of these miniature projects is substantial: they minimize domestic craft waste, eliminate the financial expense of purchasing fresh materials for small items, and yield finished pieces that double as keychains, pin cushions, nursery mobiles, and desk accessories. By understanding how to balance mismatched yarn weights, blend harmonious palettes, and secure dense polyester fiberfill inside tiny crocheted cavities, crafters can repurpose modest yarn lengths into rewarding handmade art. This guide provides clear instructions to turn miscellaneous studio scraps into cohesive, modern soft designs.
Why Scrap Busting Is Trending in Modern Crochet
The growing momentum behind scrap yarn amigurumi across contemporary Pinterest ideas stems from an increased dedication to eco-conscious living, zero-waste crafting, and budget-friendly creative practices. Modern crafters increasingly prioritize sustainable lifestyle choices, seeking practical ways to reduce textile landfill contributions by utilizing every inch of previously purchased fiber. The visual appeal of scrap amigurumi also aligns with trending eclectic and patchwork aesthetics, where deliberate multi-tone color blocking and contrasting textures replace uniform, single-color mass production. From a DIY perspective, scrap projects offer exceptional convenience: because these designs require very small amounts of fiber, makers can finish complete projects in a single evening, providing quick creative satisfaction without a prolonged time commitment. Furthermore, scrap amigurumi serves as an accessible entry point for beginners, who can experiment with shaping, tension control, and spatial decreases without the intimidation of spoiling costly, pristine yarn skeins. The resulting pieces showcase a distinctive handmade charm, making them exceptionally popular for personalized gifts, craft market inventory, and whimsical home decor that celebrates creative resourcefulness.
Essential Materials and Preparation Methods
Embarking on scrap yarn amigurumi requires thoughtful organization, sorting, and preparatory evaluation before casting the initial slip knot. The foundational materials consist of miscellaneous yarn leftovers—predominantly sport, DK, or worsted weights in cotton, wool, or acrylic—sorted into small, manageable color-coordinated bundles. Crafters need ergonomic crochet hooks ranging from 2.0 to 3.5 millimeters; selecting a hook size slightly smaller than the standard recommendation for your thickest scrap yarn ensures tight stitches that prevent internal filling from leaking. Essential secondary tools include sharp yarn snips, locking stitch markers to track continuous rounds, a blunt metal tapestry needle with a generous eye, high-resilience polyester fiberfill, and embroidery floss for safety-conscious facial details. Preparation begins by categorizing yarn scraps by fiber composition and strand thickness, as pairing similar fiber types ensures consistent tension and uniform washing resilience. Crafters should also measure total remnant lengths, winding them into smooth center-pull cakes to avoid tangles during rapid color transitions. Careful planning prevents unexpected fiber shortages mid-project, allowing makers to pair colors intentionally for optimal contrast.
Idea 1: Color-Blocked Miniature Scrap Jellyfish

Step-by-Step Guide
The color-blocked miniature scrap jellyfish maximizes short lengths of leftover yarn by pairing a rounded spherical bell with cascading, multi-toned spiral tentacles. The primary dome utilizes a clean single crochet hemisphere worked in continuous spiral rounds, making it an exceptional canvas for using up two or three complementary remnant shades. The lower perimeter is finished with a flat base disc that seals the cavity, preventing distortion while offering a stable foundation for the hanging tentacles. Beneath the bell, multiple curly tentacles extend outward, each crafted by placing three single crochet stitches into every chain loop of short leftover strands to create organic, corkscrew spirals. This project functions exceptionally well as a decorative rearview mirror charm, a whimsical nursery mobile accent, or a sensory desktop stress reliever. Because each tentacle consumes only two to three yards of yarn, crafters can use up their shortest remnant strands without sacrificing structural stability or visual appeal.
To construct the jellyfish dome, cast six single crochet stitches into a magic ring using a 2.5-millimeter hook and your primary scrap color. Increase evenly across consecutive rounds by working two single crochet stitches into designated loops until reaching twenty-four stitches, switching yarn shades at the start of round four to create a distinct horizontal color block. Work four rounds straight without increases to establish the bell depth, then finish with an invisible slip stitch and fasten off. To make the bottom sealing plate, crochet a separate flat circle of twenty-four stitches using a third scrap color, keeping the edge open for seaming. For the curly tentacles, tie seven individual twenty-stitch foundation chains using varied scrap lengths, working three single crochets into the second chain from the hook and in each chain across to produce tight curls. Stitch the upper tips of the tentacles firmly into the center of the bottom plate, stuff the upper bell firmly with polyester fiberfill, and join the plate to the dome by whip-stitching through both loops.
Idea 2: Patchwork Striped Woodland Acorn

Read This:
How to Create
The patchwork striped woodland acorn translates microscopic yarn leftovers into a charming autumn botanical accent that showcases earthy, rustic textures. The lower nut portion features an elongated egg contour worked in horizontal bands of tan, caramel, and cream scraps, highlighting how subtle color variations can create a layered, organic gradient. The upper textured cap is worked in deep chocolate brown or charcoal wool scraps, incorporating front-post stitches or subtle surface ridges to mimic the rough exterior of a natural acorn cap. A short, sturdy stem crocheted from a three-inch snippet of twisted brown fiber extends from the top crown, providing an authentic botanical finish. These miniature woodland pieces look striking when gathered inside clear glass bowls, arranged along a wooden mantel runner, or strung together as rustic holiday garlands. The small dimensions require less than eight yards of fiber per finished acorn, making this design a practical, high-utility choice for eliminating minor remnant balls.
Begin by shaping the lower nut body using warm caramel scrap yarn, starting with four single crochet stitches into a magic ring. Increase systematically over four rounds until reaching sixteen stitches, then work four straight rounds, changing yarn colors every two rounds by executing the final yarn-over of the previous stitch with the new shade. Drop the previous color without knotting, carrying ends inside the hollow cavity to minimize manual tail weaving. After eight rounds, initiate decrease rounds by single crocheting two stitches together across alternate intervals until eight stitches remain, stuffing the interior firmly with polyester fiberfill before pulling the final loop closed. For the cap, join dark brown textured scrap yarn at the top apex, working eight single crochets into a magic ring and expanding to eighteen stitches over three rounds. Slip the cap over the upper half of the finished nut, tacking it down with neat whip stitches around the rim, then chain four stitches from the cap center to form a standing botanical stem.
Idea 3: Tiny Textured Succulent in a Thimble

Execution Process
The tiny textured succulent repurposes minuscule lengths of green, sage, and dusty rose yarn scraps into an enduring botanical sculpture that fits neatly inside a vintage sewing thimble or bottle cap. This project features a cluster of pointed, overlapping petals worked in alternating back-loop single crochets to generate defined botanical ridges. The center of the rosette uses the shortest thread scraps, transitioning outward to slightly broader leaves that mimic an authentic echeveria succulent. By using mixed fiber contents—such as pairing cotton with acrylic—the varied textures enhance the organic appearance of the miniature desert plant. This creative project offers a zero-maintenance home decor element ideal for decorating home office keyboards, sewing room pegboards, or dollhouse window boxes. It provides beginner crafters with focused practice in miniature shaping, back-loop texturing, and assembling multi-layered botanical components using standard household adhesive and small hardware findings.
To make the succulent base, roll a small pea-sized ball of dark brown scrap yarn, securing it with fabric glue into the interior cavity of a metal thimble or miniature terracotta vessel to simulate potting soil. For the inner foliage ring, use pale mint green scraps to chain four, working one slip stitch, one single crochet, and one half double crochet along the chain to produce a tiny tapered leaf; repeat this sequence five times to form a connected central star. For the outer rosette layer, utilize slightly darker sage green scraps, chaining six and escalating stitch heights from slip stitches up to full double crochets to establish broader petal profiles. Curve the petals upward slightly using gentle fingertip pressure, then stack the smaller inner rosette directly over the larger outer tier using a metal needle and matching scrap thread. Secure the joined succulent assembly directly onto the brown yarn base using a drop of high-tack craft adhesive, adjusting the outer petal tips to flare naturally over the vessel rim.
Idea 4: Colorful Mosaic Hexagon Turtle
Read This:
How to Make
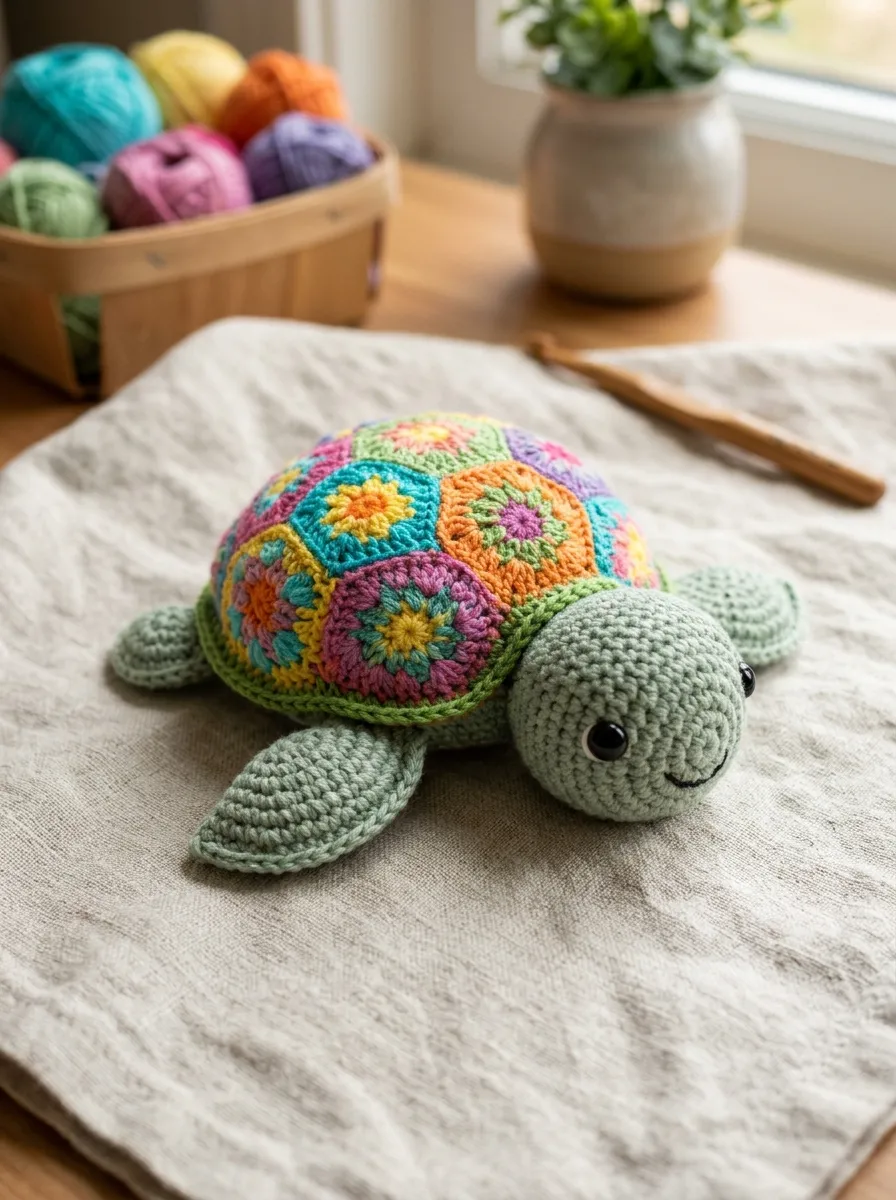
The colorful mosaic hexagon turtle utilizes the geometric discipline of the classic granny hexagon to transform miscellaneous scrap lengths into a plump, decorative reptile carapace. The upper shell is formed from a single multi-colored hexagon motif where each concentric round introduces a completely new yarn scrap, framing varied colors within a uniform geometric perimeter. The underbelly consists of a simple, flat circular disc in a neutral scrap shade, joined securely to the upper dome with a clean perimeter border. Four short flippers, a tapered tail, and an oval head extend outward from the shell perimeter, each constructed from matching or contrasting neutral scraps. This design is exceptionally practical for utilizing short lengths of five to six different colors, as each round of the hexagon requires only three to four yards of fiber. The completed turtle serves as a whimsical pin cushion, a child-safe pocket toy, or a colorful paperweight for studio desks.
Begin by constructing the hexagon shell, working two double crochets, chain one, six times into a magic ring using your first scrap color to establish six distinct sides. Fasten off and join a second scrap shade in any chain-one corner space, working two double crochets, chain one, two double crochets into each corner to expand the geometric boundary. Join a third contrasting scrap color along the outer perimeter, working single crochet stitches evenly around the edges to stabilize the hexagon into a slightly curved dome. For the underbelly, crochet a flat circle of twenty-four single crochet stitches in neutral tan or cream yarn. For the limbs, chain five with green scraps, work single crochets back across the chain, and repeat for all four flippers and the tapered tail. Align the hexagon top over the flat bottom plate, sandwiching the limbs between the layers along the perimeter. Single crochet through both edges simultaneously, inserting dense stuffing through a small opening before completing the final perimeter stitches.
Idea 5: Striped Amigurumi Worry Worm

Setup Method
The striped amigurumi worry worm is an approachable, linear tactile toy designed to consume oddments of yarn while providing calming sensory stimulation through ribbed finger textures. The toy consists of a friendly, rounded character head attached to an undulating, spiral body that twists naturally as it is worked. By joining assorted scraps in rapid succession along the foundation length, crafters can produce a vibrant, multi-colored sensory organism that utilizes even twelve-inch snippets of yarn. The face is kept deliberately simple, using embroidered eyes or child-safe French knots to maintain safety for younger recipients. These small, flexible creations are popular within modern community craft initiatives, frequently distributed as random acts of crochet kindness, classroom focus aids, or colorful pocket companions. The straightforward construction eliminates complex three-dimensional limb assembly, allowing beginners to master stitch multiplication and yarn-over transitions while rapidly clearing out stagnant scrap bins.
Commence by crafting the head using a 3.0-millimeter hook and bright scrap yarn, placing six single crochet stitches into a magic ring and expanding over two rounds to twelve stitches. Work three straight rounds of twelve stitches to build vertical volume, insert two plastic safety eyes between rounds two and three, or embroider sleep stitches using dark thread scraps, then stuff the head lightly with fiberfill. Decrease back down to six stitches across the next round, but do not fasten off; instead, chain thirty stitches extending directly outward from the base of the neck to establish the flexible body axis. Work four double crochet stitches into the second chain from the hook and into every single chain loop down the entire length, changing scrap colors every eight chains to create a multi-tone spiral. The dense concentration of stitches naturally forces the foundation chain to twist into a spring-like helical coil. Slip stitch firmly back into the base of the head, tie all internal ends securely, and weave tails inside the stuffed facial cavity.
Idea 6: Miniature Scrap Citrus Slice Keyrings
Read This:

Step-by-Step Guide
The miniature scrap citrus slice keyring translates colorful yarn remnants into refreshing botanical wedges resembling oranges, lemons, limes, or grapefruits. The core design consists of a flat two-dimensional disc folded in half to create a plump, semi-circular wedge packed with minimal stuffing. The interior segments utilize bright vibrant scraps—such as neon orange, sunny yellow, or ruby red—framed by a fine white pith line and an outer textured rind worked in deep matching rind tones. Surface-embroidered straight stitches run from the outer pith toward the center point, creating distinct segment separations that mimic natural fruit pulp. This creative project requires very little assembly, making it an exceptional option for beginners wanting to practice clean flat circle increases and surface embroidery. The finished citrus slices serve as functional keychains, colorful zipper pulls for backpacks, or decorative accents tied onto homemade gifting packages.
To begin the citrus wedge, cast six single crochet stitches into a magic ring using vibrant fruit-pulp scrap yarn and a 2.75-millimeter hook. Work three rounds of regular increases until reaching eighteen stitches, then switch to crisp white scrap yarn on the final pull-through to create the inner pith ring. Work one round of white single crochets with even increases to achieve twenty-four stitches, then fasten off the white fiber. Join a deep matching rind color—such as forest green or burnt orange—and work one final increase round to reach thirty stitches, utilizing back-loop-only stitches to produce a crisp structural perimeter edge. Using a blunt needle and white scrap thread, embroider six straight lines radiating outward from the center magic ring to the white pith boundary to define the individual fruit segments. Fold the circular disc precisely in half with the segments facing outward, lightly tuck a pinch of fiberfill into the fold, and single crochet the curved outer rind edges together to seal the wedge.
Idea 7: Multi-Colored Patchwork Bird

How to Create
The multi-colored patchwork bird transforms mismatched, varied yarn remnants into an eclectic avian sculpture that pairs expressive color blocks with clean folk-art styling. The design features a continuous teardrop body that tapers from a broad rounded breast down into a narrow caudal tail tip. Crafters can change yarn colors randomly across horizontal rounds, using up short scraps without maintaining rigid stripe symmetry. Two flat, leaf-shaped wings are crocheted separately using contrasting accent scraps, attached symmetrically along the lateral flanks to break up the body stripes. A tiny conical beak worked in mustard yellow or bright orange scrap thread provides an authentic focal point, paired with minimalist embroidered eye dashes. The finished bird stands comfortably on flat surfaces when properly weighted, functioning as a whimsical home decor accent on bookshelves, windowsills, or nested within indoor potted plants.
Begin the bird body by casting six single crochet stitches into a magic ring using any available scrap color, placing a stitch marker in the first stitch. Expand the circle over four rounds to twenty-four stitches, switching colors whenever a scrap yarn end is reached by tying a secure knot on the interior side. Work six continuous rounds even, then start shaping the back taper by placing two decreases along the upper spine every second round while keeping the belly stitches straight. Pack the breast cavity firmly with polyester fiberfill, adding a few clean glass craft marbles at the base to lower the center of gravity and ensure upright stability. Continue tapering down to six stitches, then flatten the tail opening horizontally and slip stitch across both edges to seal the tail. For the wings, chain six with accent scraps, work single, double, and treble stitches around the chain to form an asymmetrical feather contour, then sew the wings flat against the lateral body walls using leftover thread.
Idea 8: Scrap Yarn Miniature Donut Charm
Read This:
Execution Process
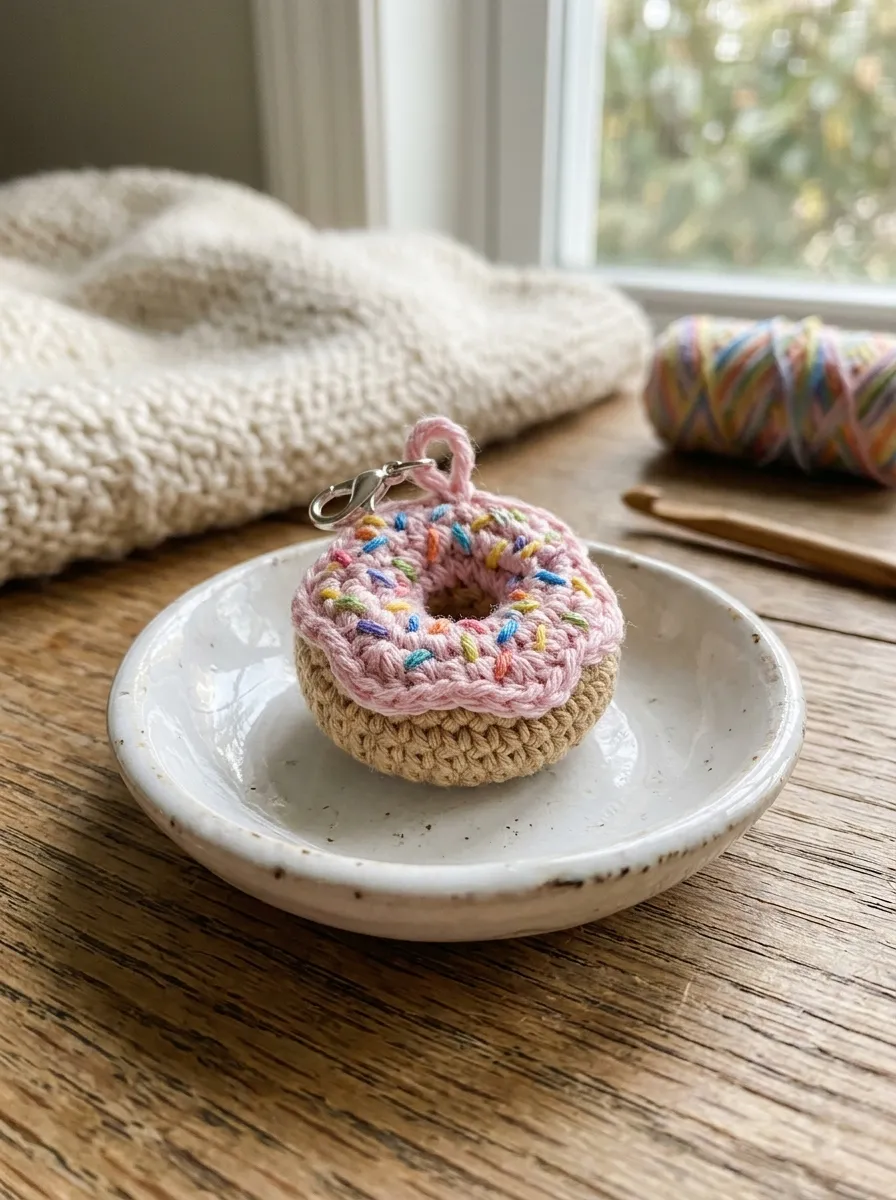
The scrap yarn miniature donut charm offers a creative, confectionary method for clearing out small yards of tan, cream, and colorful novelty yarn scraps. The base of the pastry is constructed as a continuous hollow torus using golden-tan or warm biscuit-colored scrap yarn, providing a plump, realistic dough foundation. The upper surface features a wavy, irregular frosting layer crocheted from pastel pink, chocolate brown, or mint green scraps that mimics poured sugar glaze. Microscopic bits of multi-colored thread remnants are hand-embroidered directly across the frosting surface to represent rainbow sugar sprinkles, using up thread lengths as short as two inches. This project teaches beginners how to manage inner foundation chain loops and curved tube seaming, yielding a compact, tactile novelty item. The finished donut charms function charmingly as pincushions, planner embellishments, doll accessories, or whimsical bag clips.
Start the donut dough by chaining eighteen stitches with tan scrap yarn, joining the ends with a slip stitch to form an unbroken circle without twisting the chain. Work one single crochet into each chain loop, then continue in continuous spiral rounds for eight tiers to form a straight hollow sleeve. To create the icing, switch to a colorful frosting scrap, working two single crochets into alternating stitches for one round to produce a wider circumference, followed by three rounds of mixed single and half double crochets to create an organic, wavy frosting margin. Fasten off with a long sixteen-inch tail for assembly seaming. Thread the tail onto a blunt tapestry needle, bring the starting foundation edge up through the center opening to meet the active frosting rim, and whip stitch the edges together around the inner and outer diameters. Lightly push small tufts of fiberfill into the circular channel as you seam the perimeter. Finish by knotting tiny scrap threads of yellow, blue, and red across the icing to create sprinkles.
Idea 9: Pocket-Sized Friendly Ghost

How to Make
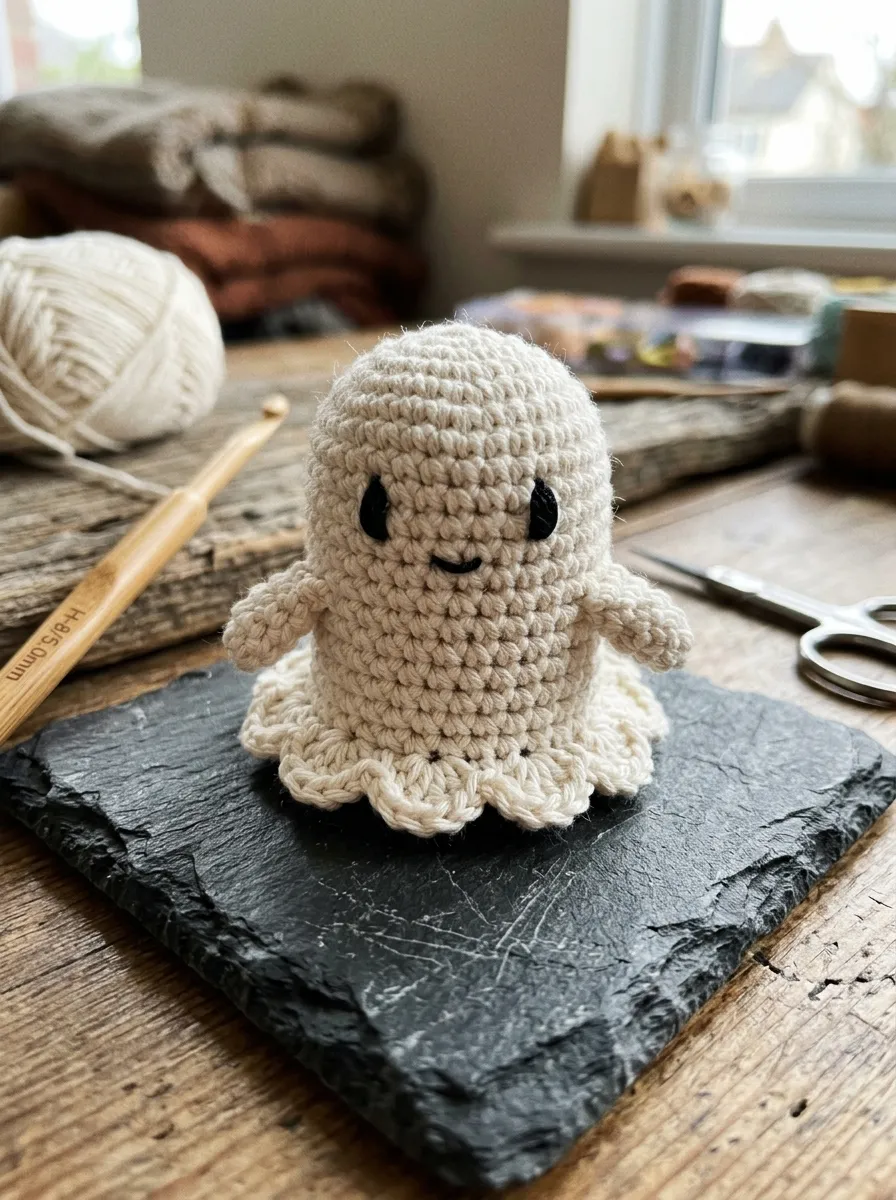
The pocket-sized friendly ghost provides an approachable, highly rewarding project that utilizes leftover lengths of white, cream, or pale gray yarn scraps. The silhouette features a smooth, domed head that transitions directly into an open, bell-shaped body cavity with undulating lower skirt ruffles. The bottom edge is finished with alternating single crochet and double crochet wave clusters that mimic floating fabric folds, eliminating the need for complex foot or leg construction. Two tiny rounded arms project slightly from the chest, worked in quick two-round bubbles that consume less than two yards of scrap fiber each. Simple black thread scraps are used to embroider wide oval eyes and a surprised, open mouth, lending the figurine an expressive, modern character. This design serves as a durable Halloween party favor, a gentle pocket talisman for young children, or a seasonal tree ornament that requires minimal stuffing and less than forty minutes of active crafting time.
To make the ghost body, work six single crochet stitches into a magic ring using pale scrap yarn and a 3.0-millimeter hook, increasing over three rounds to eighteen stitches. Work six rounds straight without increases to establish a smooth, cylindrical torso, inserting twelve-millimeter black safety eyes between rounds four and five, or stitching wide oval eyes using black embroidery remnants. Form the arms by chaining three, working two single crochets back down the chain, and securing them directly into rounds six on either side of the torso. Stuff the upper head firmly with polyester fiberfill, leaving the lower torso relatively soft to maintain drape. To create the ruffled base skirt, work into the front loops only of the next round: execute one single crochet, skip one stitch, work five double crochets into the following loop, skip one stitch, and slip stitch to form a scallop; repeat this shell sequence around the entire bottom perimeter. Fasten off, weave all yarn tails inside the hollow body cavity, and flatten the base so the ghost rests securely upright.
Idea 10: Miniature Patchwork Mushroom Trio
Read This:
Step-by-Step Guide
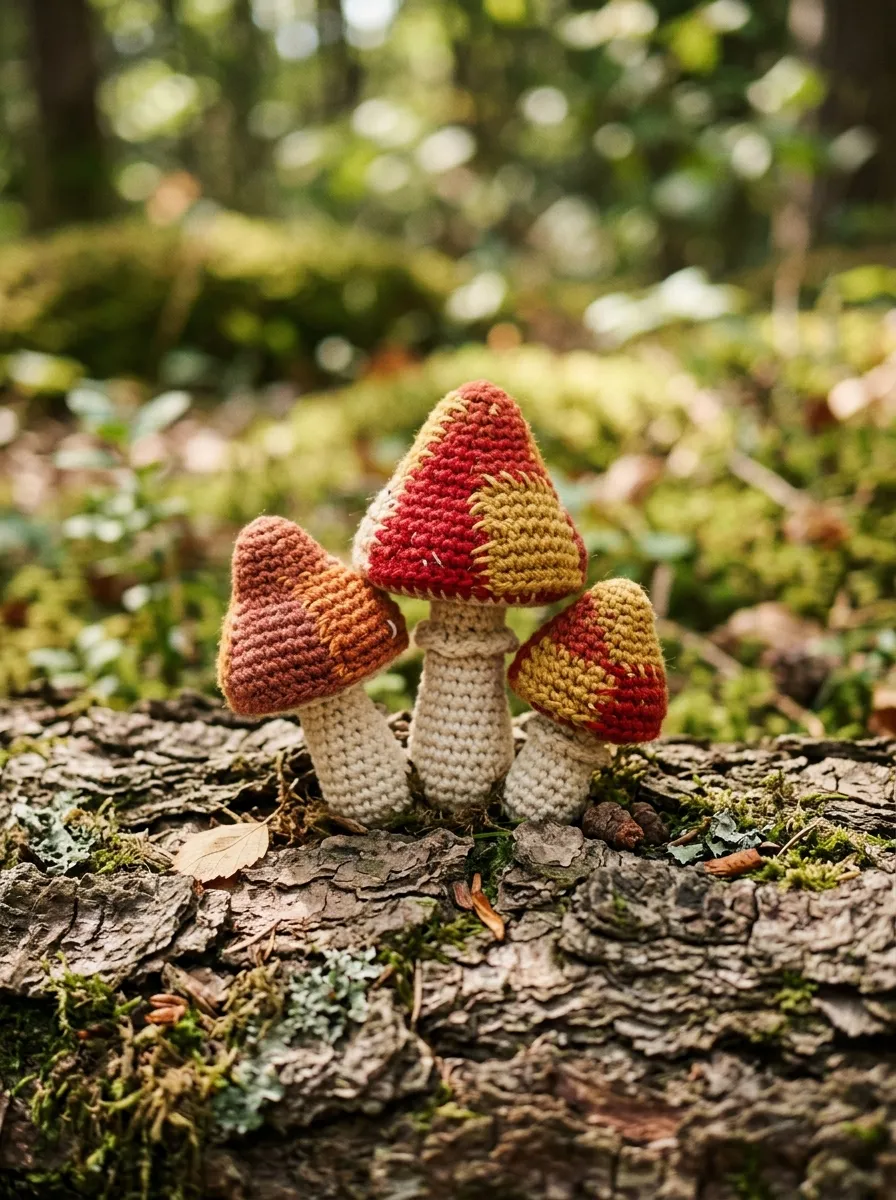
The miniature patchwork mushroom trio transforms short, saturated scraps of red, terracotta, mustard, and ivory into a cluster of charming forest floor botanicals. Each mushroom features an asymmetrical, conical cap that can be worked in solid scrap colors or alternating multi-tone rings, paired with a sturdy cylindrical stem worked in unbleached linen or ivory scraps. The underside of the cap incorporates a flat circular gill plate that conceals internal filling, giving the fungal cap clean architectural definition. By making three mushrooms of varying stem heights and cap diameters, crafters can arrange them as an interlocking decorative cluster anchored to a flat felt or crocheted base. This design is exceptionally practical for using up oddments of earth-toned fibers, requiring only five to ten yards per mushroom. The finished trio functions as a creative needle felt base, a whimsical bookshelf accent, or a delicate autumnal centerpiece component.
Begin by crafting the largest mushroom cap using rich red or mustard scrap yarn, placing four single crochet stitches into a magic ring and expanding gradually over six rounds to twenty-four stitches to form an authentic conical profile. Work one round even, then fasten off. To construct the underside gill plate, use cream scrap yarn to crochet a flat circle of twenty-four stitches, working the final round through the back loops only to create a clean mounting rim. For the stem, cast six stitches into a magic ring with ivory yarn, working upward in continuous rounds for eight tiers, stuffing firmly with fiberfill as you progress to ensure vertical rigidity. Stitch the upper rim of the stem firmly to the center of the cream gill plate, then join the gill plate to the colored cap using continuous single crochet stitches around the matching twenty-four stitch perimeters, tucking fiberfill inside the cap before completing the final stitches. Repeat this process with smaller stitch counts to produce two companion mushrooms of varying sizes.
Common Beginner Mistakes and How to Avoid Them
When crocheting amigurumi from scrap yarn, beginners often encounter technical inconsistencies that can compromise the durability and structural aesthetics of their finished pieces. A frequent mistake is combining disparate yarn weights—such as mixing fingering thread with chunky wool—within a single continuous component, resulting in lumpy, warped shaping and unpredictable tension gaps. Crafters should always group remnants by equivalent weight classifications or hold two strands of finer scrap yarn together to match the gauge of heavier fibers. Another prevalent issue is under-stuffing tiny cavities, which causes miniature sculptures to deflate, wrinkle, or lose their defined contours over time; using small, dense tufts of fiberfill inserted with the back of a crochet hook ensures smooth, firm contours. Additionally, makers often leave loose knots when switching between scrap colors, which can unravel during handling or push through to the exterior surface of the toy. Crafters should join new colors using standard loop pull-through methods, knotting internal tails together securely inside the stuffing cavity where they remain permanently concealed.
Practical Tips for Better Results
Achieving refined, boutique-quality finishes with scrap amigurumi relies on applying specialized technical habits tailored to miniature fiber construction. When working small pieces with tight circumferences, always utilize the invisible decrease technique, which involves inserting the hook exclusively through the front loops of two consecutive stitches before yarning over and pulling through; this approach eliminates the unsightly bumps and gaps created by traditional decreases. To prevent vibrant interior stuffing fibers from showing through open stitches, wrap dark or high-contrast fiberfill inside a matching scrap of pantyhose or thin cotton fabric before placing it inside the crocheted shell. When embroidering delicate facial features with scrap thread, split six-strand embroidery floss down to two or three strands, using a fine sharp needle to achieve clean, expressive facial lines rather than bulky, distorted features. Finally, block your completed miniature amigurumi pieces by giving them a very light mist of clean water and gently shaping the extremities with your fingers, allowing them to air-dry completely to settle the stitches and achieve uniform symmetry.
Styling, Presentation, or Organization Ideas
Miniature scrap yarn amigurumi offers versatile decorative opportunities that introduce whimsical handmade personality into modern living spaces and craft storage organization. Arrange a collection of tiny scrap creatures—such as turtles, acorns, and mushrooms—inside compartmentalized vintage printer drawers, wooden shadow boxes, or tiered jewelry trays to create an eye-catching, organized curiosities display. Crafters can also attach sturdy metal lobster clasps, split key rings, or ball chains to the crowns of small items, transforming them into functional accessories for backpacks, key fobs, or project bag zipper pulls. In modern nursery spaces, suspend an assortment of lightweight scrap creatures—such as jellyfish, birds, and worry worms—from an unadorned wooden embroidery hoop using clear monofilament thread to form an airy, floating ceiling mobile. For memorable gift presentations, nestle a miniature amigurumi piece inside an upcycled cardboard jewelry box lined with shredded kraft paper, tying the exterior with matching scrap yarn strands to create an eco-friendly, artisanal gift package that highlights thoughtful craftsmanship.
Budget or Time Planning
Executing scrap yarn amigurumi represents an exceptionally economical craft practice, effectively reducing project material expenditures to near zero while maximizing creative output. Because these projects consume fiber remnants that have already been paid for from previous large-scale undertakings, the primary investment is personal crafting time rather than money. To maximize productivity, organize your remnant yarns by color families into transparent glass storage jars or clear stacking bins; this setup allows you to assess available materials at a glance, preventing decision fatigue during color selection. Most miniature scrap designs require between thirty and ninety minutes of active crafting time from start to finish, making them ideal for brief evening relaxation sessions or travel crafting. Implement a modular production workflow when making multiple items for seasonal gifts or craft markets: spend one dedicated session crocheting several basic body bases, a second session fabricating small extremities and surface appliques, and a final session completing facial embroidery, internal stuffing, and seaming.
Creative Expansion and Advanced Inspiration
Once you feel confident executing basic miniature scrap designs, you can explore advanced creative variations that introduce mixed-media textures and enhanced functional utility. Experiment with combining textile scraps with non-fiber materials, such as mounting tiny crocheted plants onto polished driftwoods, embedding small neodymium magnets inside the bases of scrap figurines for magnetic memo boards, or incorporating natural turned-wood rings into toy bases to serve as teething grasps. Advanced makers can also experiment with intentional fiber blending, pairing smooth mercerized cotton with fuzzy brushed mohair or metallic novelty thread scraps to create striking textural contrast across multi-tonal body segments. Another sophisticated expansion involves scaling tiny patterns up or down simply by changing yarn weights: work a miniature pattern using fine embroidery floss and a 1.0-millimeter hook to create micro-amigurumi jewelry, or hold three scrap strands together with an 8.0-millimeter hook to produce an oversized, chunky floor cushion version of the exact same character. These expansive possibilities ensure your scrap basket remains an endless source of artistic inspiration.