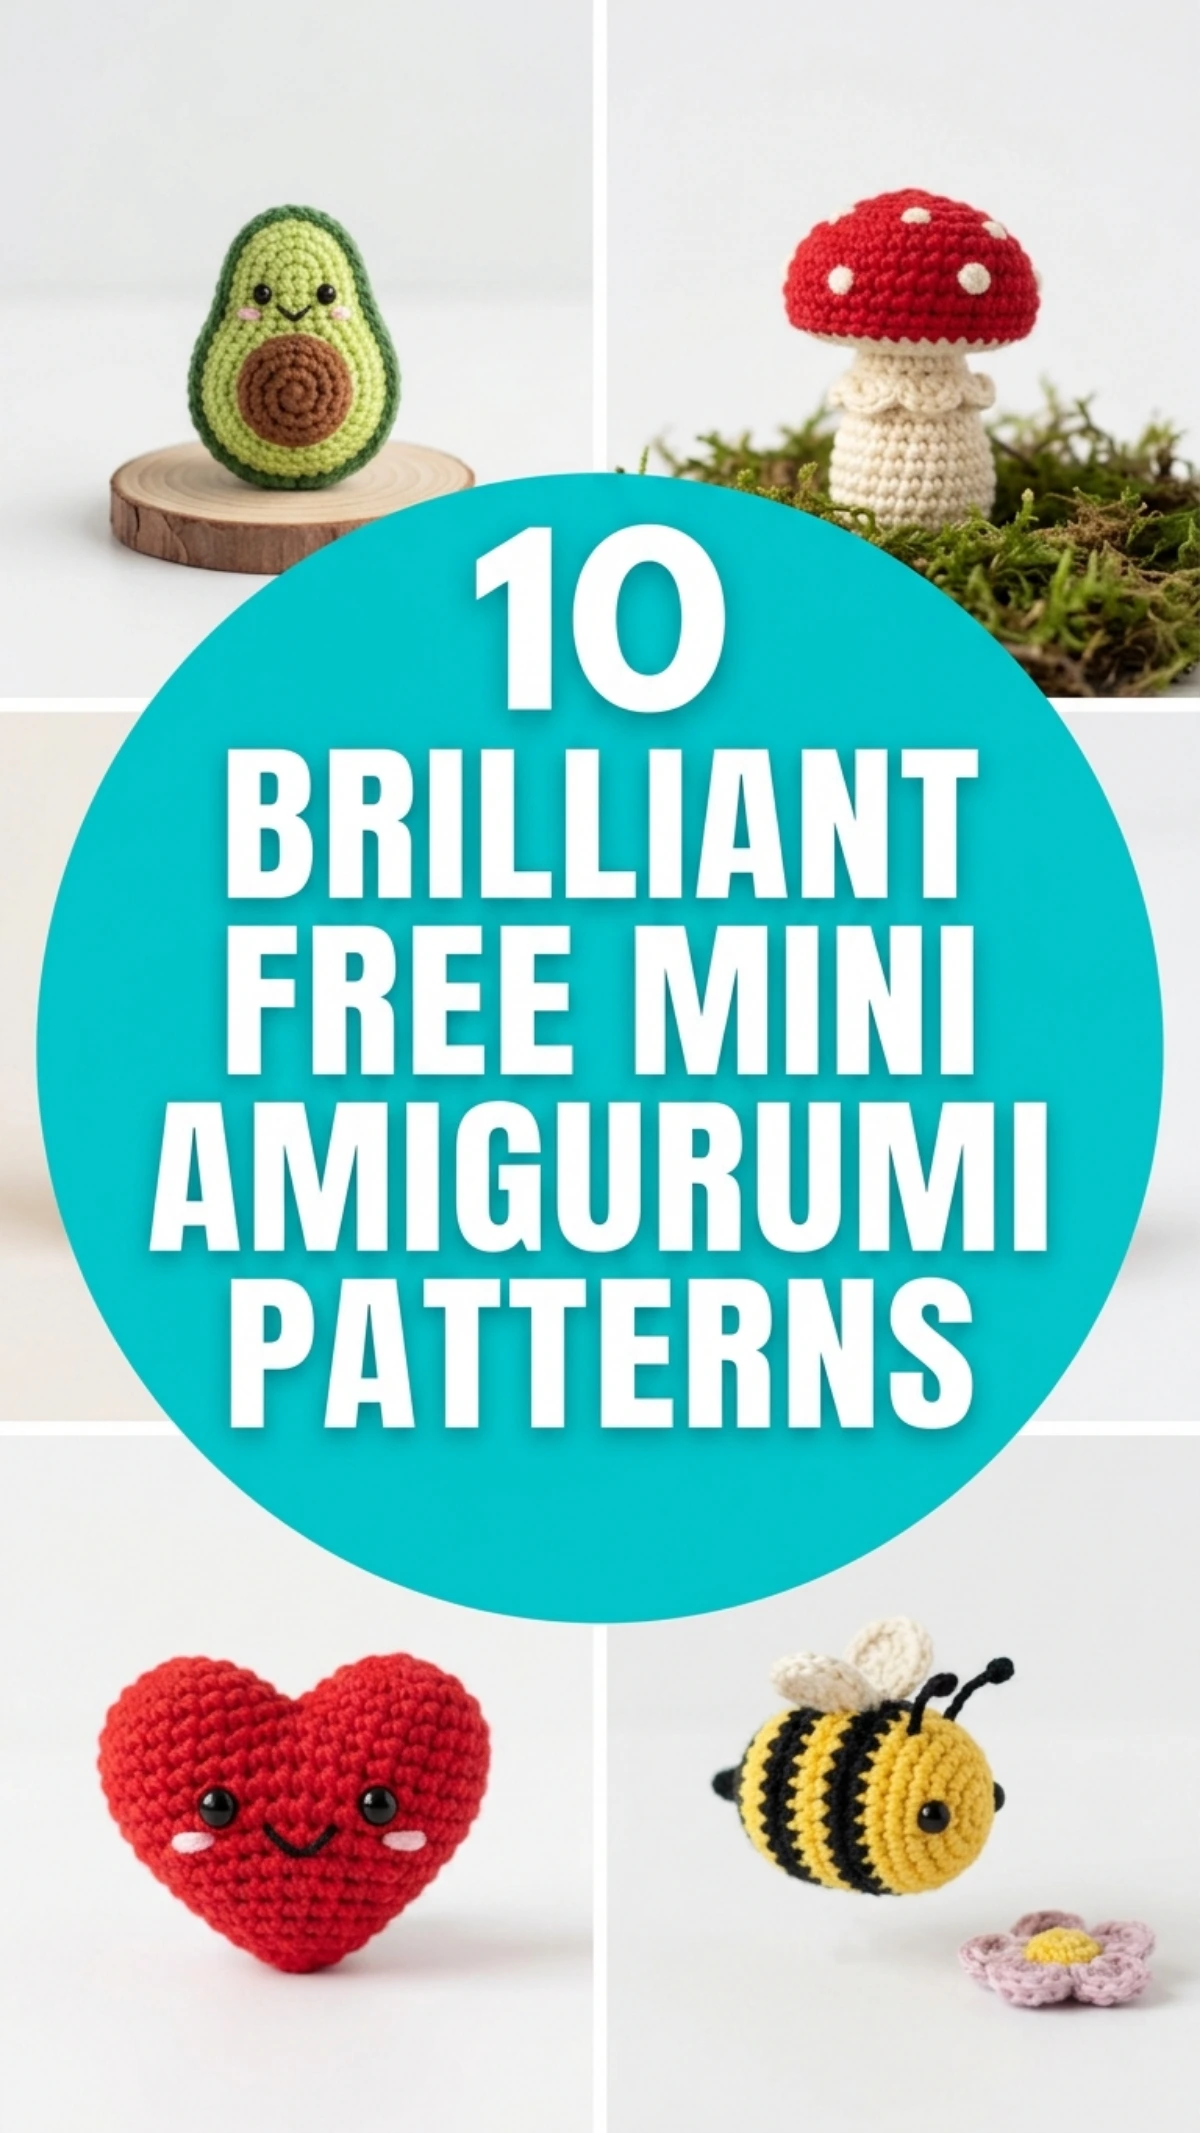
Miniature crochet projects provide a versatile entry point into fiber arts by transforming small scraps of yarn into tactile, three-dimensional characters. Crafting mini amigurumi pieces has become an enduring staple across modern maker spaces, delivering compact artistic satisfaction without extensive time commitments. This comprehensive tutorial provides a structured step by step methodology to help crafters crochet, assemble, and detail ten distinct miniature figures completely from basic stitches. Readers will explore structural shaping principles, precise hook-to-yarn balance, fiberfill control, and clean joinery methods designed to elevate miniature soft sculptures. Unlike large toy patterns that demand multiple skeins and intricate limb attachments, these miniature designs rely on continuous spiral rounds, simple geometric increases, and streamlined seams. These compact items serve practical functions as keychain accents, desk companions, nursery garland elements, or seasonal home decor. By mastering foundational stitch tension, invisible decrease mechanics, and safe facial embroidery, makers can easily build a diverse collection of miniature keepsakes. The clear explanations provided throughout each section equip both beginners and seasoned crocheters with the technical certainty required to achieve consistent, boutique-quality results.
Why This Idea Is Trending or Useful
Miniature handmade fiber figures continuously lead current Pinterest ideas because creative enthusiasts seek low-waste, high-reward DIY projects that fit seamlessly into busy lifestyles. The mini amigurumi format offers incredible practical value by serving as an ideal stash-busting endeavor, allowing makers to utilize leftover remnants from larger blankets or sweaters without buying new materials. From a modern design perspective, these tiny characters embrace a clean, minimalist style that emphasizes essential geometric silhouettes, soft pastel palettes, and gentle facial expressions. For beginners exploring textile crafts, miniature patterns eliminate intimidation: each piece requires only thirty to forty-five minutes of focused work, making the learning curve smooth, enjoyable, and beginner friendly. The tactile charm of tiny stitched sculptures makes them universally appealing as portable gifts, zipper pulls, and personalized charms. Because they require minimal storage space and only basic tools, these patterns represent the ultimate accessible creative project for makers on any budget. The enduring popularity of tiny soft sculptures lies in this seamless balance of rapid gratification, approachable technique, and expressive visual appeal.
Materials and Preparation
Executing clean, well-proportioned mini amigurumi requires thoughtful material preparation and accurate tool calibration prior to casting your foundation ring. Select sport or DK weight mercerized cotton yarn; mercerized cotton fibers maintain sharp stitch definition, eliminate halo fuzz, and resist stretching under internal stuffing pressure. Pair this yarn with an ergonomic crochet hook sized roughly one millimeter smaller than the yarn manufacturer recommends, specifically between 2.0 mm and 2.5 mm, to create tight, opaque stitches that prevent white polyester fiberfill from showing through. Essential supplies include sharp thread snips, a blunt-ended steel tapestry needle, non-snag locking stitch markers, premium cluster-free polyester stuffing, and fine black embroidery thread for facial details. Prepare your crafting space by setting up a clean work surface, winding skein scraps into small center-pull balls, and placing small wooden dowels or tweezers nearby for precise stuffing placement. Planning considerations involve verifying your stitch tension with a small five-round test circle, confirming that your rounds lay flat and firm without puckering. Thorough physical preparation ensures uniform dimensions, seamless color changes, and durable construction across every finished miniature.
Idea 1: Pocket Acorn with Textured Cap
Step-by-Step Guide
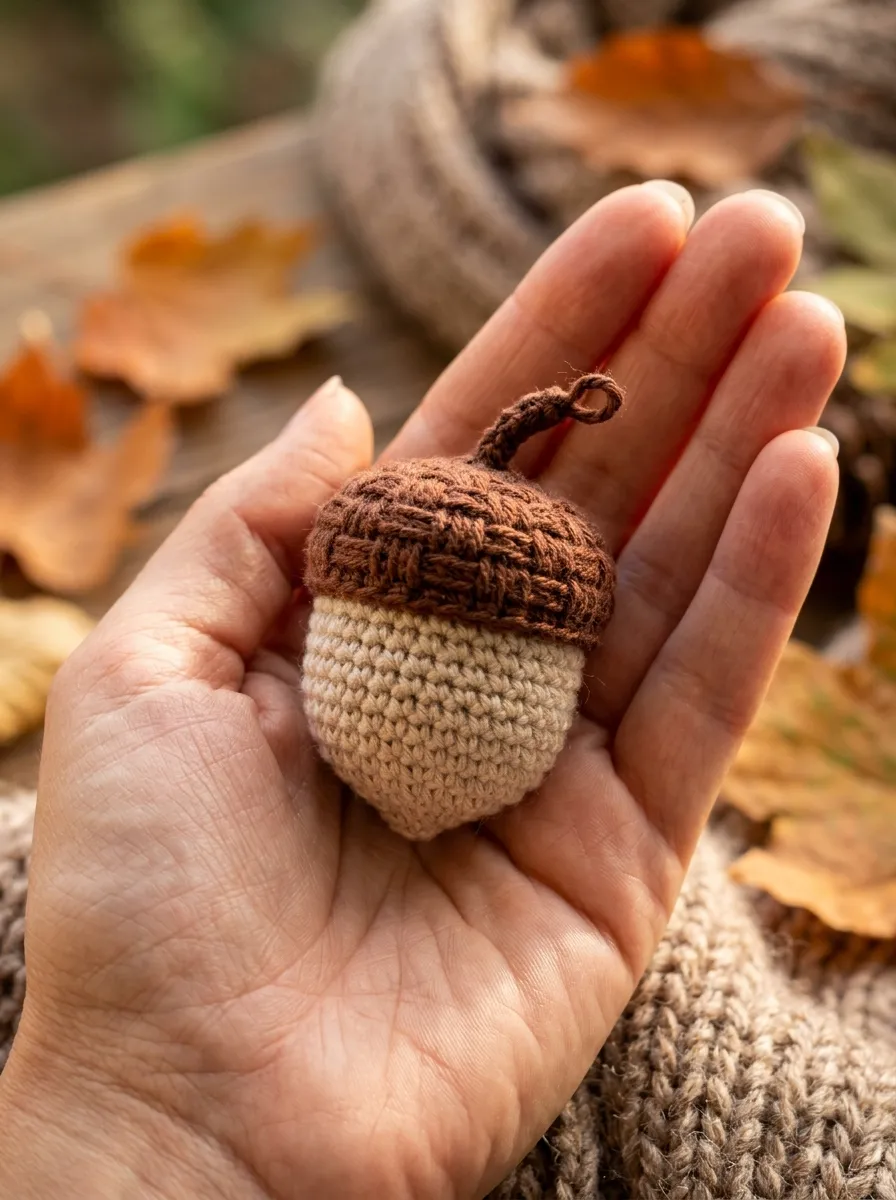
The pocket acorn with a textured cap brings earthy woodland aesthetics into miniature form through an intentional contrast of smooth and raised crochet stitches. This design features a sleek, rounded acorn nut worked in warm oatmeal or honey-gold cotton yarn, crowned by a distinct cap worked in deep chestnut brown using back-loop post ridges. The compact, palm-sized form captures an organic, nature-inspired silhouette that fits effortlessly into autumn home decor bowls, seasonal garlands, or rustic coat keychains. The flat transitions between the body and the cap highlight precise round counts, creating an authentic organic profile. The miniature size keeps the finished piece lightweight, making it an understated decorative accessory that pairs naturally with wooden accents, linen ribbons, and warm seasonal palettes.
To construct this woodland piece, begin with warm oatmeal yarn, working six single crochets into an adjustable magic ring and increasing evenly across three rounds to eighteen stitches to establish the smooth, domed acorn base. Work four straight rounds of eighteen single crochets to build vertical volume, tapering slightly with two symmetrical invisible decreases on the final base round before stuffing the nut cavity firmly with clean fiberfill. Switch cleanly to dark chestnut brown yarn to construct the cap, working one round of single crochets into the front loops only to create a pronounced horizontal lip that overhangs the lighter base. On subsequent cap rounds, work alternating single crochets and front-post half double crochets to generate a raised, basket-weave bark texture while decreasing toward the central apex. Finish the crown by chaining four stitches from the final top decrease, slip-stitching back down the chain to form a miniature upright wooden stem, and weaving the final yarn tail securely inside the cap core.
Idea 2: Minimalist Dumpling Cat Sitter

Execution Process
The minimalist dumpling cat sitter reinterprets feline shapes into a compact, teardrop-shaped desk companion that rests completely flat on horizontal surfaces. This design features an uninterrupted teardrop body worked in soft heather gray, muted ginger, or pure cream, finished with two tiny triangular ears mounted along the upper curve. The wide, circular bottom perimeter is weighted with a flat base, ensuring the figurine stands firmly without tipping on computer stands, bookshelves, or bedside tables. The facial detailing relies on minimalist restraint: two tiny straight-stitched black eyes and a subtle pink nose thread provide gentle personality without visual clutter. The smooth, uninterrupted stitch pattern celebrates continuous spiral crochet, making it a soothing project for beginners learning smooth contour increases.
Begin the fabrication process from the base upward by working six single crochets into an adjustable ring using heather gray cotton yarn, increasing systematically over four rounds to twenty-four stitches to form a flat circular foundation. Work round five entirely in the back loops only to create a crisp ninety-degree bottom rim that helps the cat stand upright on desks. Proceed with six straight rounds of single crochet to build the lower belly, stuffing the lower half firmly with fiberfill and adding a small flat cardboard or plastic disc at the base to maintain a level surface. Work steady decreases across the upper five rounds to form the tapered head, closing the top opening smoothly with an invisible decrease needle finish. Crochet two small triangular ears by working four single crochets around a magic loop, pulling tight without joining, and sew them symmetrically across rounds twelve and thirteen. Embroider two subtle vertical sleeping eye lines and a miniature horizontal nose using black and dusty rose thread.
Idea 3: Tiny Sprout Desk Pebble
How to Create
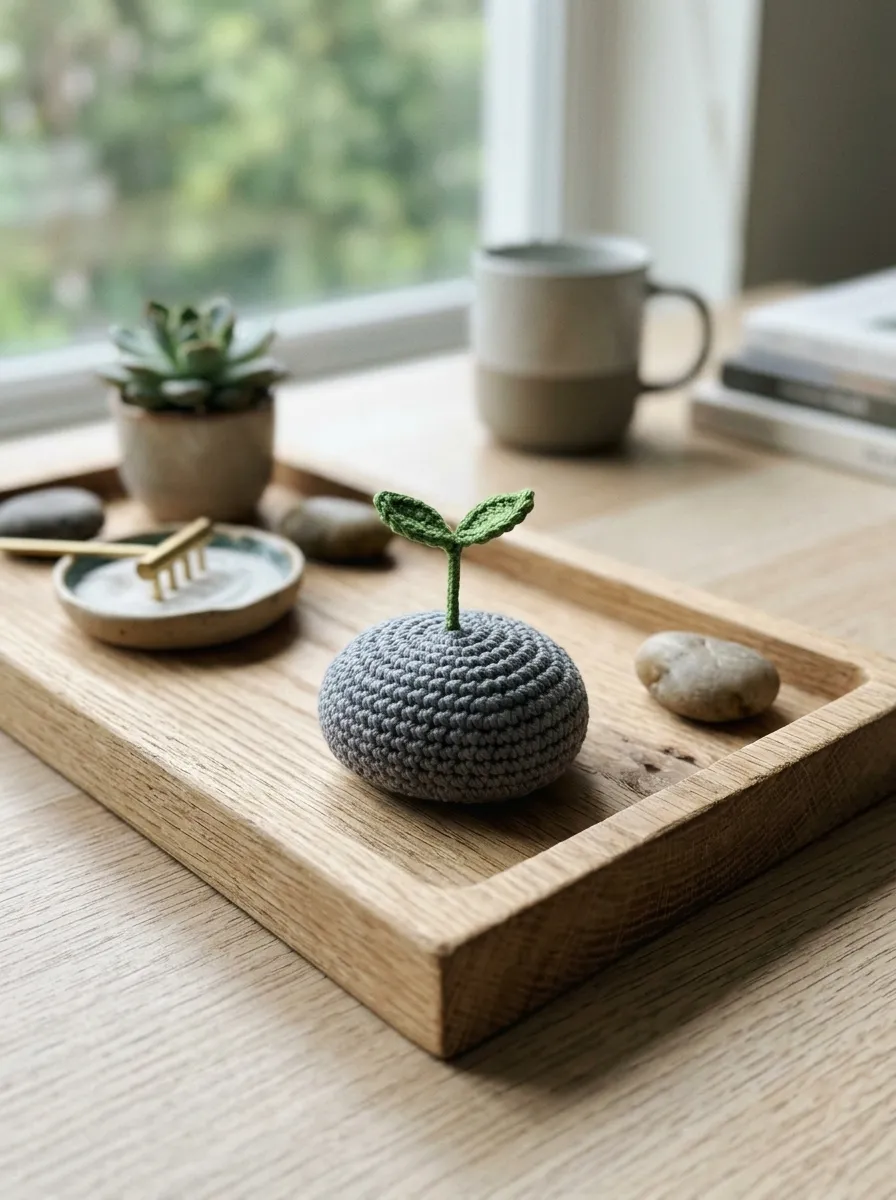
The tiny sprout desk pebble combines modern Japanese stone balancing aesthetics with playful botanical elements, producing a tactile, calming desk ornament. This design showcases a smooth, slightly flattened oval body in river-stone gray or soft slate, topped with an upright, two-leaf green botanical sprout emerging from the center. The pebble base is deliberately shaped with asymmetrical contours to resemble naturally tumbled beach gravel, offering a grounding, earthy feel. The bright emerald or sage green sprout introduces a cheerful vertical accent that contrasts with the muted stone base. This small textile plant requires zero sunlight or watering, making it a charming, everlasting piece of green home decor for home offices, drafting tables, and study cubbies.
To sculpt the stone base, chain six stitches in slate gray cotton yarn, crocheting around both sides of the foundation chain to establish an elongated oval starting base of fourteen stitches. Increase gradually at the outer rounded ends over three rounds to reach twenty-six stitches, keeping the center stitches flat to preserve the elongated stone contour. Work three straight rounds to add depth, then pack the interior with dense polyester fiberfill, shaping the stuffing into a slightly flattened, smooth pebble form. Decrease systematically at the outer ends across two rounds, pulling the final six stitches closed with a tapestry needle. Next, join bright green yarn directly into the top center surface of the stone, chaining six stitches, working slip stitches down the chain, and branching outward into two small five-chain leaf loops with single crochets along the edges. Fasten off with a tight anchor knot, pulling the yarn tails straight down through the gray stone core to lock the upright sprout permanently in place.
Idea 4: Little Coastal Starfish
Read This:
How to Make
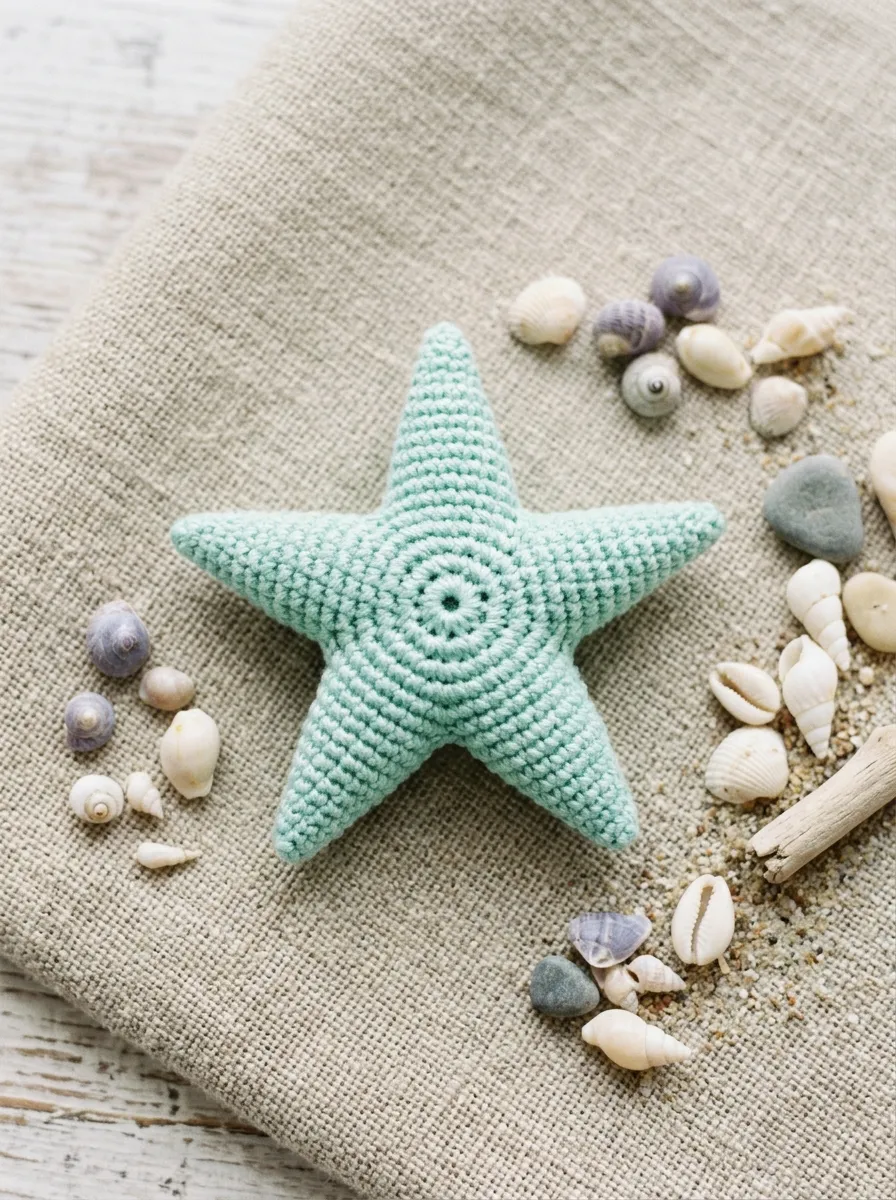
The little coastal starfish captures ocean tranquility through a five-pointed symmetrical layout worked from a central medallion outward into tapered arms. Designed in coastal pastels like soft seafoam, sandy beige, or coral pink, this flat-profile charm brings beachside charm to summer bags and bathroom shelf displays. The continuous, one-piece construction of the five arms eliminates tedious seam sewing, allowing makers to practice directional stitch variations in a single flowing session. The slightly textured surface of dense single crochets resembles the natural exterior of coastal marine life, while the flat profile lays smoothly against bag panels or key rings. This charming seaside project brings lighthearted summer memories into everyday accessories without excessive bulk or fragility.
Start by working ten single crochets into an adjustable magic loop using seafoam green cotton yarn, joining with a slip stitch to form a neat, flat circular center disc. Without breaking the yarn, begin the first starfish arm by chaining five stitches outward from the center, then work back down the chain with a slip stitch in the second chain, a single crochet in the third, a half double crochet in the fourth, and a double crochet in the final base chain to produce a naturally tapered triangular point. Anchor the base of the completed arm by slip-stitching into the next stitch along the center disc, skipping one stitch, and slip-stitching into the subsequent stitch to establish the starting point for the second arm. Repeat this chain-and-taper sequence five times around the disc perimeter to complete all five arms seamlessly. Crochet an identical second starfish panel, place the two shapes back-to-back with matching arm points, and join the outer edges using a round of single crochet stitches worked through both layers, adding a light pinch of stuffing into the central disc before closing.
Idea 5: Sweet Honeycomb Bee
Setup Method
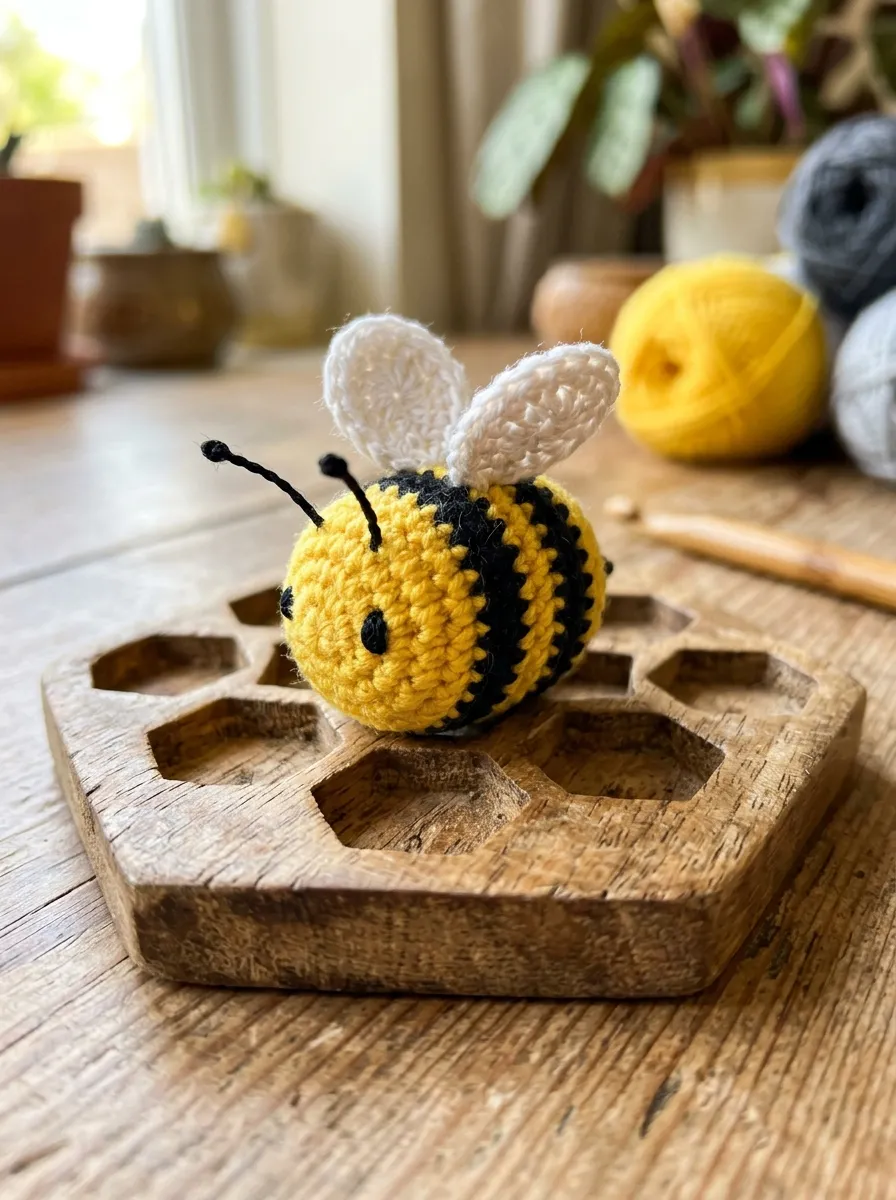
The sweet honeycomb bee presents a classic, cheerful amigurumi character featuring clean horizontal body stripes, tiny rounded flight wings, and gentle stitched antennae. Rendered in bright dandelion yellow, rich charcoal black, and crisp white cotton yarn, this piece provides striking visual contrast that catches the eye immediately. The plump, cylindrical body gives the bee a friendly, chubby appearance that fits comfortably on backpack zippers or key rings. The semi-translucent, flat white wings rest against the upper back, giving the insect a light, hovering silhouette. This easy project helps beginners master seamless color striping, tight jog-free round transitions, and proportional wing placement on small cylindrical forms.
Construct the bee body from the front face backward using bright yellow cotton yarn, working six single crochets into a magic ring and expanding systematically over two rounds of increases to eighteen stitches. Work two straight rounds in yellow, then execute clean yarn transitions by switching to charcoal black for two rounds, back to yellow for two rounds, and returning to black for the final striping sequence, carrying colors neatly along the interior wall. Stuff the cylindrical body cavity firmly with hypoallergenic polyfill, keeping the face rounded and the striped body taut. Taper the back end with continuous invisible decreases in black yarn, drawing the final six stitches tightly closed to form the rear point. Crochet two tiny oval wings in white yarn by working eight half double crochets into an adjustable ring, stitching them symmetrically to the first black stripe along the upper spine. Embroider two simple French-knot eyes on the yellow face using black thread, adding two small straight-stitch antennae to complete the friendly bumblebee.
Idea 6: Kawaii Strawberry Charm
Read This:
Step-by-Step Guide
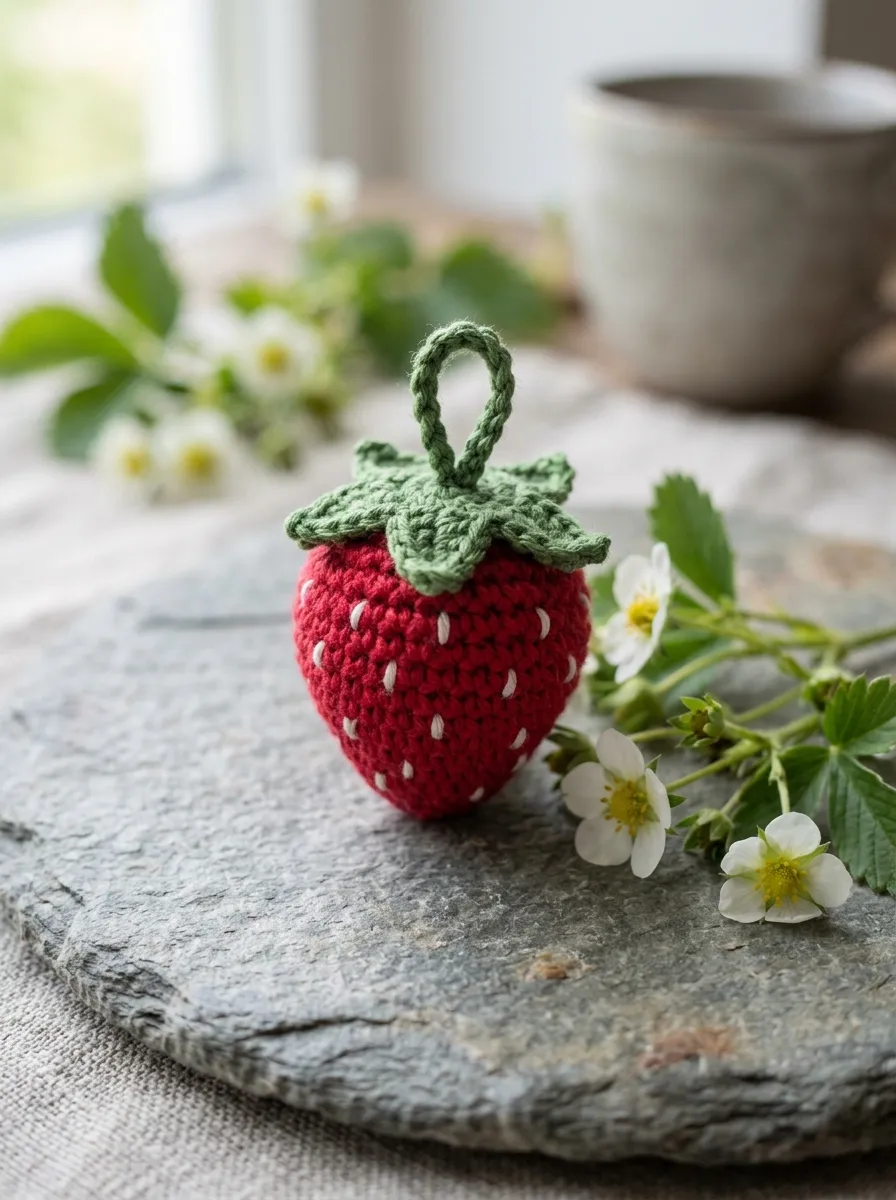
The kawaii strawberry charm pairs bright summer fruit imagery with adorable character styling, making it a popular accent for tote bags, pencil cases, and seasonal decor. This design features a conical red berry base decorated with delicate white seed specks, topped with a five-point star calyx cap in botanical leaf green. The gradual tapering from a broad crown down to a rounded lower tip gives the berry a natural, juicy proportion that looks striking in red, coral, or pastel pink. The flat green leaves sit flush against the top of the fruit, providing an organic anchor for key rings or hanging cords. This beginner friendly project offers an enjoyable way to practice continuous increases and decreases while experimenting with decorative surface embroidery.
Begin at the bottom tip using vibrant crimson cotton yarn, crocheting four single crochets into a magic ring, and working gradual increases of two stitches on every alternating round to shape a natural cone over ten rounds until reaching twenty stitches. Work three straight rounds of single crochet to build the wide upper shoulder of the fruit, stuffing the interior firmly with clean fiberfill to maintain a plump, firm shape under regular handling. Decrease rapidly across the final two rounds by working continuous invisible decreases, pulling the remaining opening closed with a blunt needle. Thread a strand of white embroidery floss through your needle and scatter small horizontal straight stitches across the crimson body to replicate seeds. Crochet the green leafy calyx separately by working five single crochets into a ring, chaining three from each stitch, and slip-stitching down the chains to form five pointed leaves. Stitch the calyx firmly over the closed top of the strawberry, finishing with a small central braided hanging loop.
Idea 7: Baby Blue Whale Pendant
Execution Process
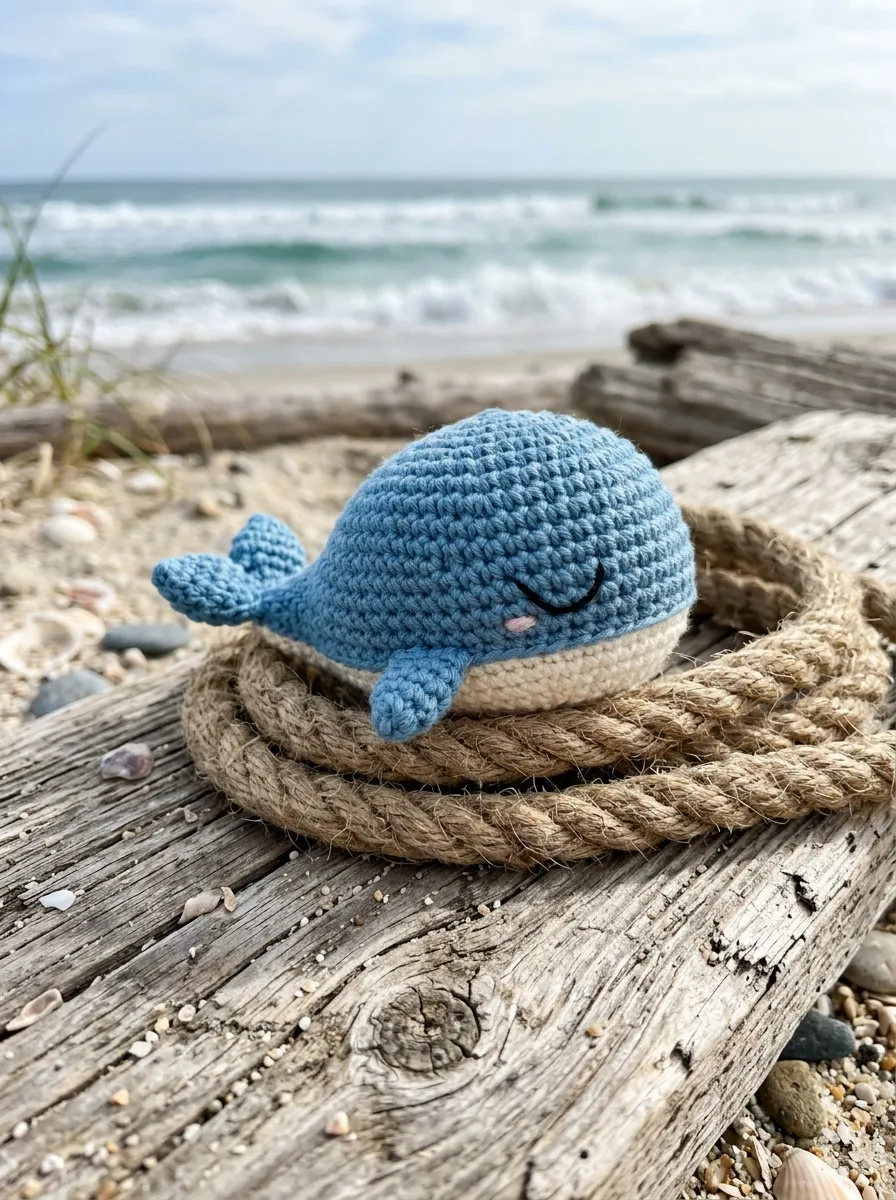
The baby blue whale pendant brings playful nautical charm to miniature fiber arts through a smooth, teardrop-shaped marine silhouette complete with fluked tail fins and side flippers. Styled in soft oceanic blue, slate gray, or gentle mint, this design features a rounded, friendly forehead that tapers into a slender horizontal tail. The flat belly panel provides a natural dividing line between colors, giving makers a chance to practice clean two-tone assembly. The small side flippers stick out softly from the body, adding delicate tactile interest. This compact oceanic piece works wonderfully as a baby shower favor, a coastal nursery mobile accent, or a fun, ocean-inspired bag accessory.
To make the whale, start at the rounded front head with ocean blue yarn, working six single crochets into a magic loop and increasing over three rounds to twenty-one stitches to form a wide, domed forehead. Work five straight rounds to extend the torso, switching the lower third stitches to white yarn if a two-tone belly is desired. Stuff the head and front torso firmly with polyester fiberfill, then taper the back half of the body with steady decreases until eight stitches remain at the tail base. Without breaking the yarn, form the tail fin directly by chaining four, working three double crochets back into the base stitch, chaining three, and slip-stitching down to form the first fluke, repeating the process in the adjacent stitch for the second fluke. Crochet two tiny flippers by chaining three and working two single crochets down the chain, sewing them symmetrically to the lower sides of the blue torso. Embroider two curved sleeping eyes using charcoal embroidery floss on the sides of the head.
Idea 8: Sleepy Little Owl Bauble
Read This:

How to Make
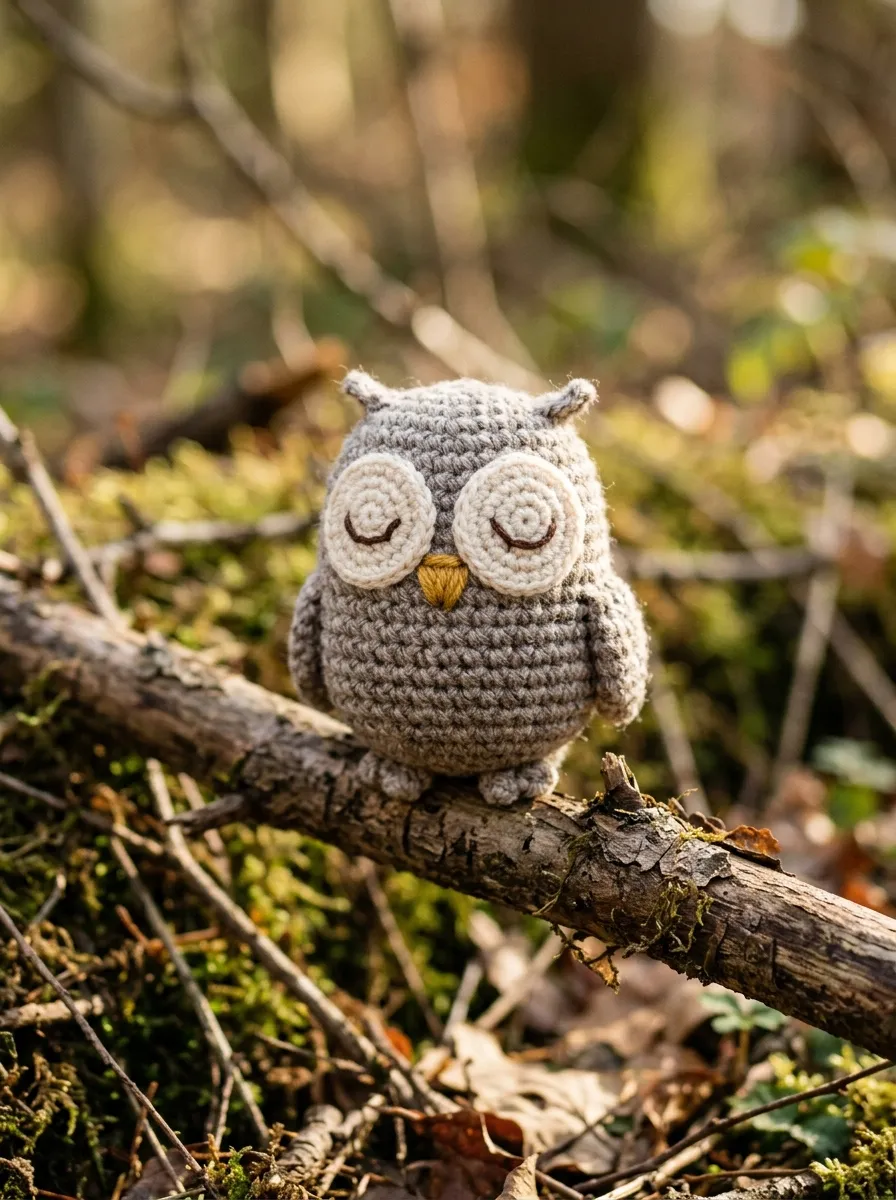
The sleepy little owl bauble features a compact egg-shaped silhouette accented with oversized circular eye patches, tiny pointed ear tufts, and a miniature embroidered beak. Designed in earthy palettes like heather taupe, oatmeal, and soft cream, this project brings cozy storybook warmth to desks, bookshelves, and holiday trees. The large circular felt or crocheted eye patches give the owl a distinctive, charming expression that captures attention instantly. The ear tufts are integrated directly into the upper seam, eliminating separate assembly steps and streamlining the construction process. This pattern serves as an ideal platform for practicing small surface joins, layered detailing, and expressive facial characterization in miniature scale.
Begin by crocheting the egg-shaped body from the base upward in taupe cotton yarn, working six single crochets into a magic ring and expanding over three rounds to eighteen stitches. Work seven straight rounds of single crochet to establish the plump, rounded body height, stuffing the cavity firmly with fiberfill as the work progresses. Taper the upper crown slightly across two decrease rounds, then flatten the top opening horizontally, working single crochets through both opposing sides at once to close the top edge in a straight horizontal seam. Pull small fringe loops of yarn through the extreme outer corners of this top seam, trimming them down to a quarter-inch to form soft, pointed ear tufts. Crochet two small circular eye patches in cream yarn by working six single crochets into a ring, fastening off, and sewing them side-by-side onto the upper torso. Embroider two curved black sleeping eye crescents across the cream patches, adding a small triangular beak in mustard gold thread between the eyes.
Idea 9: Pocket Woodland Mushroom
Setup Method
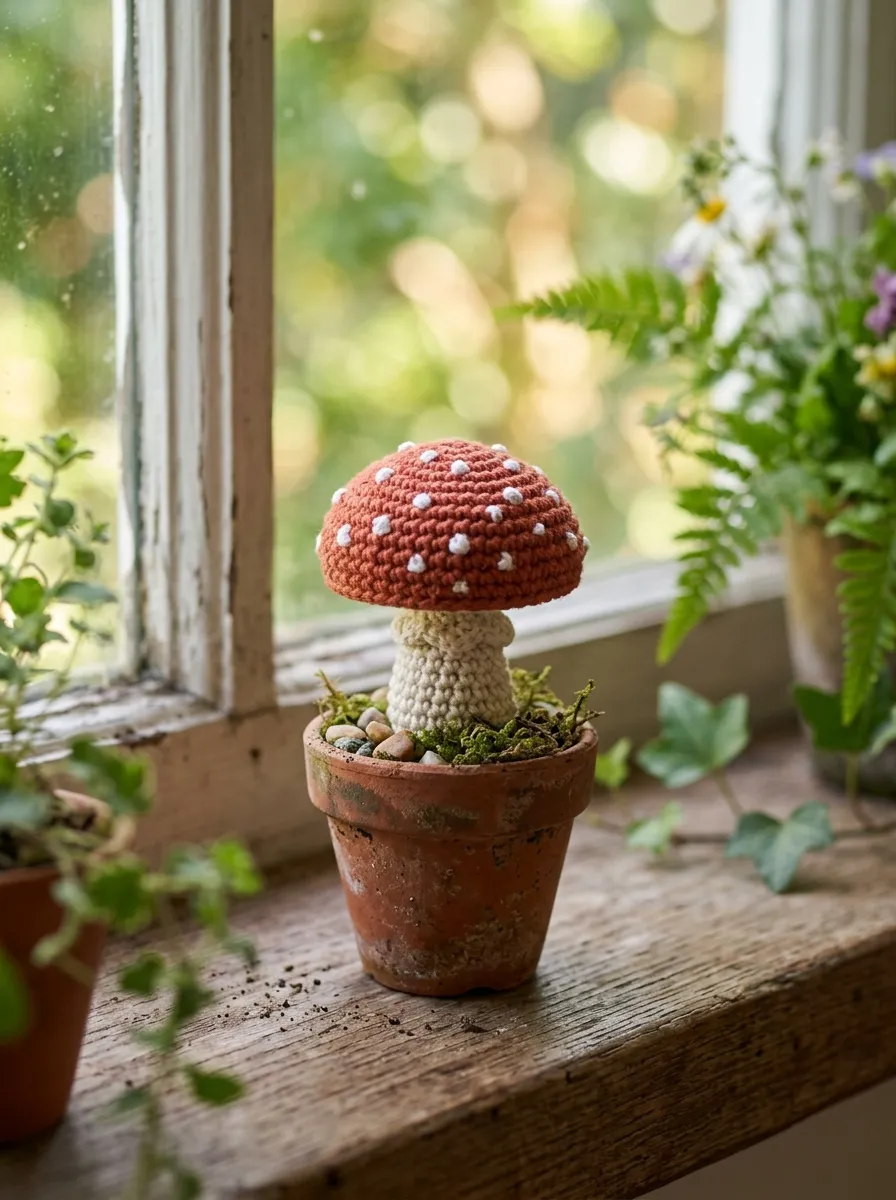
The pocket woodland mushroom charm combines fairytale charm with crisp geometric lines, featuring an umbrella-shaped cap resting on a sturdy cylindrical cream stalk. Styled in rich terracotta red, forest green, or golden ochre, this design showcases a plump, rounded cap dotted with delicate white French knots or tiny embroidered specks. The contrasting cream stalk provides a solid base, allowing the finished mushroom to stand upright on flat desks, terrarium displays, or small decorative trays. The flat bottom disc inside the stalk keeps the figurine balanced, while the domed cap provides a pleasing, rounded shape that crafters love to hold. This classic woodland design brings storybook warmth to plant pots, seasonal nature tables, and cozy reading nooks.
Construct the mushroom cap by working continuous spiral rounds of single crochet in terracotta red yarn, starting with six stitches in a magic ring and increasing over four rounds to twenty-four stitches to form a smooth dome. Work two straight rounds to build the cap depth, then execute one round of back-loop-only single crochets, decreasing systematically toward the center to create a clean, recessed underside before fastening off. Next, crochet the cream stalk starting with a flat circular disc of twelve stitches, working five straight rounds upward to form a firm hollow cylinder, and packing the interior with fiberfill. Align the open top of the stalk with the recessed center of the terracotta cap underside, whipstitching the two components together securely using a tapestry needle and matching cream yarn. Scatter small white embroidered French knots randomly across the red cap surface using cotton floss, and lightly steam-block the cap edge to ensure a crisp, tidy rim.
Idea 10: Chubby Teacup Chick

How to Create
The chubby teacup chick presents an adorable, egg-shaped bird design that radiates cheerful energy through bright yellow yarn, tiny pointed wings, and a bright orange beak. This project focuses on compact, round proportions, featuring a plump circular body that sits comfortably in small teacups or upon open palm hands. The tiny triangular wings rest flat against the sides, adding subtle texture without sticking out awkwardly. The high-contrast combination of buttercup yellow, bright tangerine, and glossy black eyes gives this miniature bird a playful personality that brightens spring wreaths, Easter baskets, or classroom desks. The quick, low-seam construction makes this an ideal pattern for batch-producing gifts or stocking market tables efficiently.
To build the chick, work six single crochets into an adjustable ring using buttercup yellow cotton yarn, increasing evenly across three rounds to eighteen stitches to establish the rounded bottom base. Work six straight rounds of single crochet to build a plump, egg-shaped body, stuffing the interior firmly with clean polyester fiberfill while ensuring the outer surface remains smooth and free of lumps. Decrease systematically across the next two rounds to taper the top of the head, pulling the remaining six stitches securely closed with an invisible finish. Crochet two miniature wings by chaining four stitches, working a slip stitch, single crochet, and half double crochet back down the chain, and stitching them flush against rounds six and seven on the sides of the yellow body. Embroider a tiny triangular beak in bright orange thread directly between rounds four and five on the front face, placing two small French-knot eyes in black thread on either side to complete the cheerful chick.
Common Beginner Mistakes and How to Avoid Them
Crocheting miniature amigurumi presents technical challenges that differ from working on full-sized blankets, clothing, or standard plush toys. The most frequent beginner mistake involves loose stitch tension, which stretches the fabric mesh and allows white polyester stuffing to show through between stitches. Prevent this issue by using a hook that is one to two sizes smaller than the yarn band advises, pulling every working loop snug to produce an opaque, dense fabric. Another common error is using standard single crochet decreases on tight curves, which leaves visible gaps, holes, and bumpy ridges across the piece. Always use the invisible decrease technique; by working solely through the front loops of two consecutive stitches, the decrease lays completely flat and seamlessly matches surrounding single crochets. Additionally, beginners often over-stuff or under-stuff small components, resulting in lumpy shapes or limp, misshapen toys that cannot stand on their own. Avoid this by adding small, fluffed tufts of fiberfill gradually, packing curved edges firmly using the blunt back of a pencil or wooden chopstick to achieve a smooth, uniform surface without stretching the yarn stitches.
Practical Tips for Better Results
Achieving a clean, boutique-ready finish on mini amigurumi requires disciplined yarn handling, precise counting, and thoughtful detailing methods. Always use non-snag locking stitch markers to mark the first stitch of every continuous spiral round; small pieces make it easy to lose your place, and losing track of rounds quickly leads to distorted proportions. When switching between yarn colors for striped elements, complete the final yarn-over of the previous stitch using the new color to create a clean, crisp horizontal transition without stepped jogs. For facial features, avoid plastic craft safety eyes, which can appear bulky and risk popping through the crochet mesh on tiny toys; instead, embroider clean sleeping arcs, French knots, or straight stitches using fine embroidery floss. When joining separate limbs, ears, or caps to a main body, pin the pieces firmly in place with long ball-headed pins before sewing to check symmetry from all angles. Finally, take time to run all loose starting and ending yarn tails through the center of the stuffed toy multiple times, anchoring the fibers internally so they cannot pull loose during regular handling.
Styling, Presentation, or Organization Ideas
A thoughtful presentation enhances the visual appeal of mini amigurumi, whether you are staging photos for social media, assembling craft fair displays, or organizing your personal collection. Group tiny characters inside shallow natural wood bowls, woven seagrass trays, or tiered porcelain dessert stands to highlight their miniature scale and collectible charm. When staging photographs for online inspiration, capture images in soft, indirect morning sunlight against natural, textured backdrops like raw unbleached linen, light oak butcher blocks, or smooth slate tiles. Incorporate miniature props—such as small thimbles, acorn caps, or vintage wooden spools—to provide a clear, instant sense of scale in product photos. For practical everyday use, attach small brass lobster clasps and split rings to the top of each toy to create durable keychains, purse charms, and backpack tags. When gifting these miniature treasures, package each item inside a small clear glassine envelope or an unbleached kraft paper jewelry box lined with shredded crinkle paper, tying the box with baker’s twine and a personalized, hand-stamped card.
Budget or Time Planning
Careful planning helps you optimize your materials and work efficiently, making mini amigurumi an enjoyable, low-stress creative endeavor. Because each miniature figure requires only ten to twenty-five yards of yarn, you can easily produce dozens of complete characters from leftover yarn scraps without spending extra money. Maximize your initial investment by purchasing a versatile neutral cotton palette—such as cream, oatmeal, heather gray, and charcoal—supplementing with single accent skeins in mustard, terracotta, or sage for small details. Organize your crafting sessions into structured, repeatable blocks to maximize productivity during your free time. Dedicate one thirty-minute block to crocheting multiple spherical bases and heads, storing the unfinished pieces in a divided craft tray. Use a second focused session to stuff the shapes, embroider facial details, and seam small ears or caps onto the bodies. Working in structured stages keeps your workspace organized and allows you to complete three to four finished miniature characters in a single relaxing evening of crafting.
Creative Expansion and Advanced Inspiration
Once you master basic miniature spheres, cones, and cylinders, you can explore creative variations that expand the utility and style of your amigurumi collection. Consider stringing a dozen varied miniature characters—such as mushrooms, acorns, and little bees—along a six-foot braided jute cord to create a charming, seasonal garland for nursery walls, mantels, or classroom boards. You can also experiment with scale by working these exact same patterns with chunky blanket yarn and an 8.0 mm hook, transforming miniature pocket toys into oversized, plush huggable pillows. Another engaging approach involves adding subtle sensory elements: insert tiny, sealed plastic rattle bells or dried lavender sachets inside the fiberfill core to create multisensory baby toys or drawer sachets. Alternatively, incorporate natural materials like unfinished raw wooden beads, brass split rings, or leather hanging loops alongside your crochet stitches to create sophisticated, mixed-media accessories. These adaptable design variations keep your crafting fresh, functional, and endlessly rewarding across every season of making.