Amigurumi crochet projects designed for rapid single-day completion have gained substantial traction across modern craft circles, offering needlecrafters an efficient pathway to produce finished, professional-grade textile items without prolonged time commitments. Originating from traditional Japanese plush crafting, amigurumi relies on working dense single crochet stitches in continuous spiral rounds to yield firm, three-dimensional plush forms. This tutorial details ten practical, fully actionable concepts structured specifically to be started, constructed, and completed within a four-to-six-hour working window. Readers will discover technical methods for handling foundational stitches, maintaining uniform yarn tension, executing seamless decreases, and securely anchoring interior fiberfill. Exploring these accessible projects allows makers to build confidence across core geometric shaping formulas without the fatigue associated with large blanket or garment projects. Each concept functions as a functional desk ornament, charming key accessory, thoughtful handmade gift, or modern design accent for living areas. By focusing on streamlined component joins and minimal sewing requirements, these patterns eliminate common roadblocks that stall long-term needlecraft. Learning these structured formulas establishes an enduring technical foundation, enabling crafters to transform modest skeins into polished, decorative pieces that bring character and handmade elegance to personal spaces.
Why This Idea Is Trending or Useful
The persistent visibility of single-day amigurumi across digital craft feeds and modern Pinterest ideas reflects a contemporary lifestyle preference for high-impact, manageable creative projects that fit into busy personal schedules. Many crafters seek out an easy project that delivers immediate visual satisfaction, avoiding the multi-week fatigue often encountered with complex fiber arts. From a practical perspective, single-day designs function as a premier scrap-busting strategy, allowing fiber artists to consume small remnants of worsted or sport-weight yarn left over from larger household undertakings. The minimalist style and aesthetic charm of these miniature creations align seamlessly with current interior design trends, integrating neatly into shelf displays, desk trays, and tiered stands. For beginners, these compact patterns provide an approachable, low-stakes environment to practice essential circular crochet mechanics, stitch counting, and tension regulation. Because the pieces require modest yarn investments and minimal hardware, they present accessible budget ideas for makers crafting seasonal inventory or personalized party favors. Combining straightforward geometric shaping, rapid assembly times, and versatile utility makes these rapid projects an enduringly popular choice for makers seeking dependable inspiration.
Materials and Preparation
Achieving neat, professional results within a single day requires systematic preparation and the selection of reliable, low-friction crafting tools before casting on. Crafters should gather smooth, mercerized cotton or premium anti-pilling acrylic yarn in DK or light worsted weight, as these fibers resist splitting and showcase clean stitch definition. Select an ergonomic crochet hook sized between 2.25 mm and 3.0 mm, which is typically one or two sizes smaller than the yarn manufacturer specifies, to ensure tight stitches that fully conceal the interior stuffing. Essential notions include non-snagging locking stitch markers to mark the initial stitch of continuous spirals, a bent-tip metal tapestry needle for swift seam closures, sharp embroidery snips, and firm hypoallergenic polyester fiberfill. Preparation involves organizing your working skeins into clean, center-pull cakes to prevent yarn tangling while working at a steady pace. Safety considerations require using secure washer-backed safety eyes or black embroidery floss for children’s items to eliminate detachment hazards. Setting up an organized, well-lit workspace with all tools within arm’s reach ensures continuous momentum, allowing you to complete your chosen creative project smoothly in a single afternoon.
Idea 1: Pocket-Sized Citrus Fruit Slice
Step-by-Step Guide
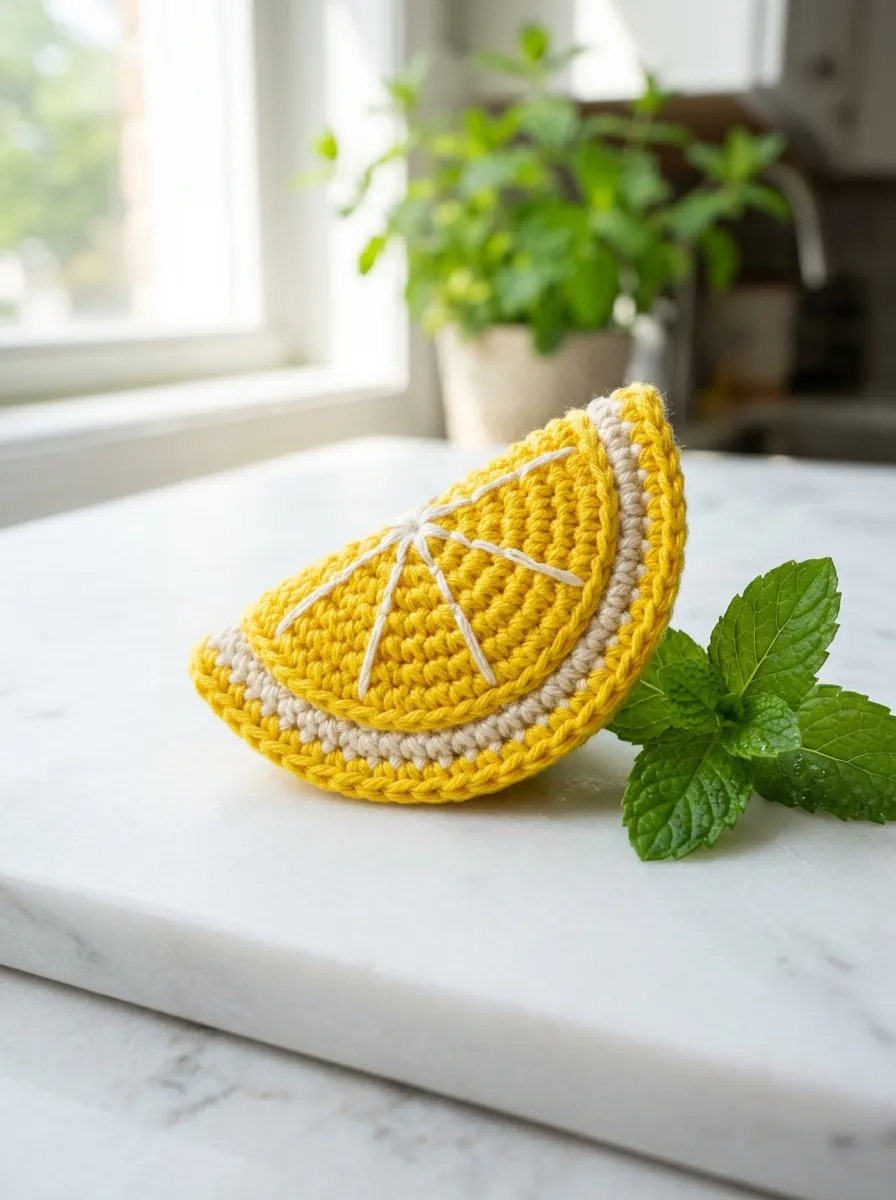
The pocket-sized citrus fruit slice concept explores semicircle geometry by folding a flat circular disc in half, producing a structured, low-profile decorative token that requires zero complex limb attachment. The design features a two-tone color arrangement with vibrant yellow, orange, or ruby-red inner pulp surrounded by a thin white pith and a dark citrus rind. Working in flat concentric circles allows crafters to concentrate on smooth, flat circular increases without managing internal structural armatures. Once the circle reaches approximately four inches in diameter, it is folded over a thin layer of fiberfill and sealed along the straight diameter with single crochet stitches. Surface embroidery accents—such as radiating white backstitches simulating internal fruit segments—give the piece graphic clarity and handmade personality. This model is exceptionally beginner friendly, functioning well as a playful coaster, a cheerful key ring pendant, or a colorful kitchen accent. Its flat silhouette stacks neatly, making it an efficient design for batch production and practical everyday use.
To create the citrus slice, begin with bright yellow cotton yarn, working six single crochets into an adjustable magic ring and increasing by six stitches in each round until round six reaches thirty-six stitches. Switch to off-white yarn on the final yarn-over of round six, working one round of single crochets without increases to form the pale interior pith layer. On round eight, switch to forest green or deep lemon yarn for the outer peel, working forty-two single crochets evenly around the perimeter before fastening off with an invisible slip stitch. Using a tapestry needle threaded with white cotton embroidery floss, stitch six straight radial lines from the center ring out toward the white pith edge to establish the fruit segments. Fold the circular disc precisely in half with the embroidered pulp facing outward, and lightly distribute a small handful of polyester fiberfill inside the crease. Align the outer edges, insert your hook through both layers using peel-colored yarn, and single crochet straight across the curved border, slip stitching into the final stitch to seal the fruit slice.
Idea 2: Minimalist Potted Desk Succulent

Execution Process
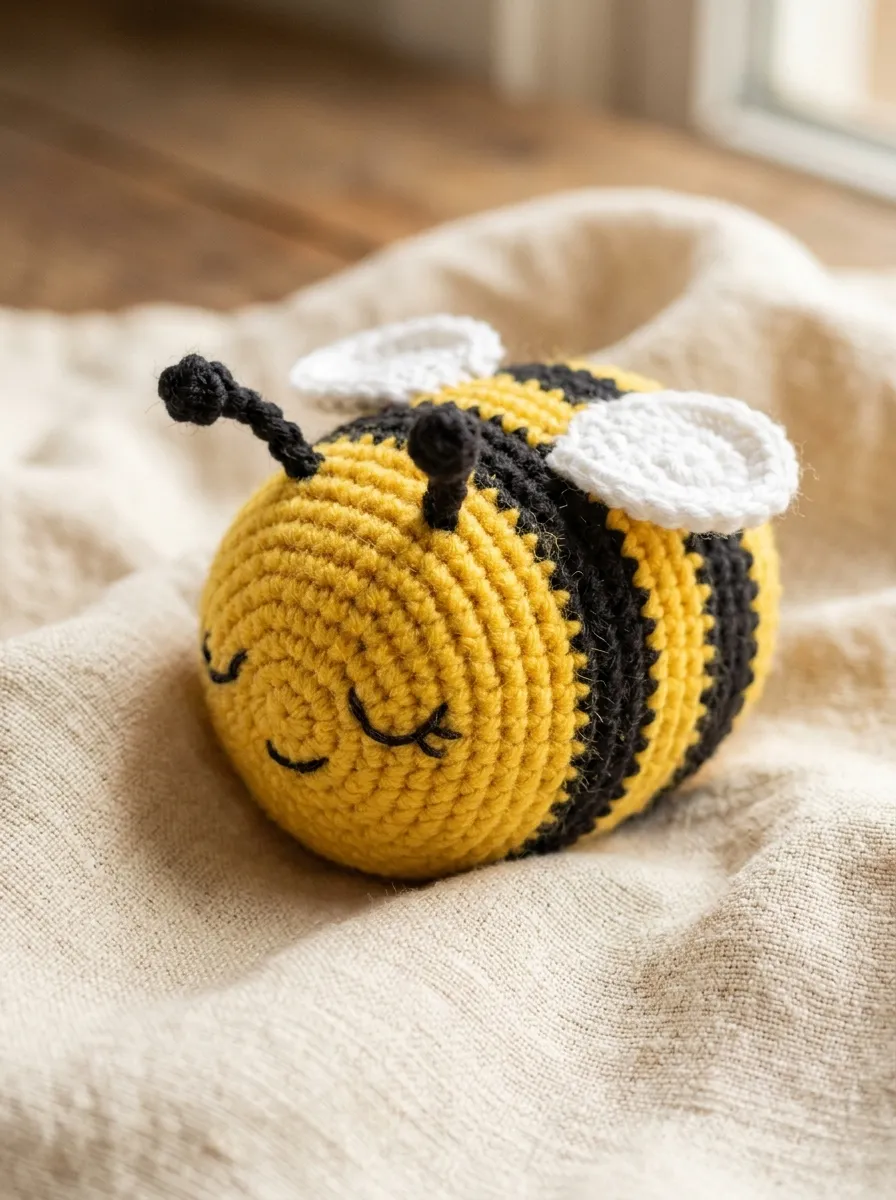
The minimalist potted desk succulent translates architectural botanical forms into a compact, maintenance-free textile accent that fits into small spaces. The design consists of two primary elements: a flat-bottomed cylindrical soil pot worked in warm terracotta or natural beige tones, and a series of overlapping, pointed green rosettes anchored to the upper base. The rigid cylindrical pot provides stability, allowing the finished piece to sit securely on office desks, narrow floating shelves, or bathroom vanities without tipping. Crocheting through the back loops only on transitional rounds creates sharp, right-angle foundation corners that preserve the pot’s clean lines. The rosette petals rely on graduated stitch heights—moving from single crochets to tall treble stitches—to produce natural botanical contours. This project serves as an ideal study in sculptural surface construction, demonstrating how simple fiber manipulations can replicate living plants without demanding tedious assembly stages.
Begin by crocheting the pot base with terracotta DK cotton yarn, placing six single crochets in a magic ring and expanding outward to thirty stitches over five rounds. On round six, work thirty single crochets in the back loops only to establish a sharp ninety-degree vertical rim, and then work eight straight rounds in both loops to build the cylindrical container walls. Insert a round piece of rigid craft plastic cut to size inside the base to keep it flat, pack the container firmly with dense fiberfill, and switch to dark brown yarn to crochet a flat circular lid of thirty stitches that is whipstitched to the inner pot rim. For the succulent leaves, use muted sage green yarn to chain eight stitches, working a single crochet, half double crochet, two double crochets, and a treble crochet back down the chain, finishing with a sharp picot point at the tip. Repeat this petal sequence to produce eight graduated leaves, pin them in overlapping concentric circles on the brown soil surface, and stitch them down securely with matching thread.
Idea 3: Chubby Round Sleepy Bumblebee
How to Create
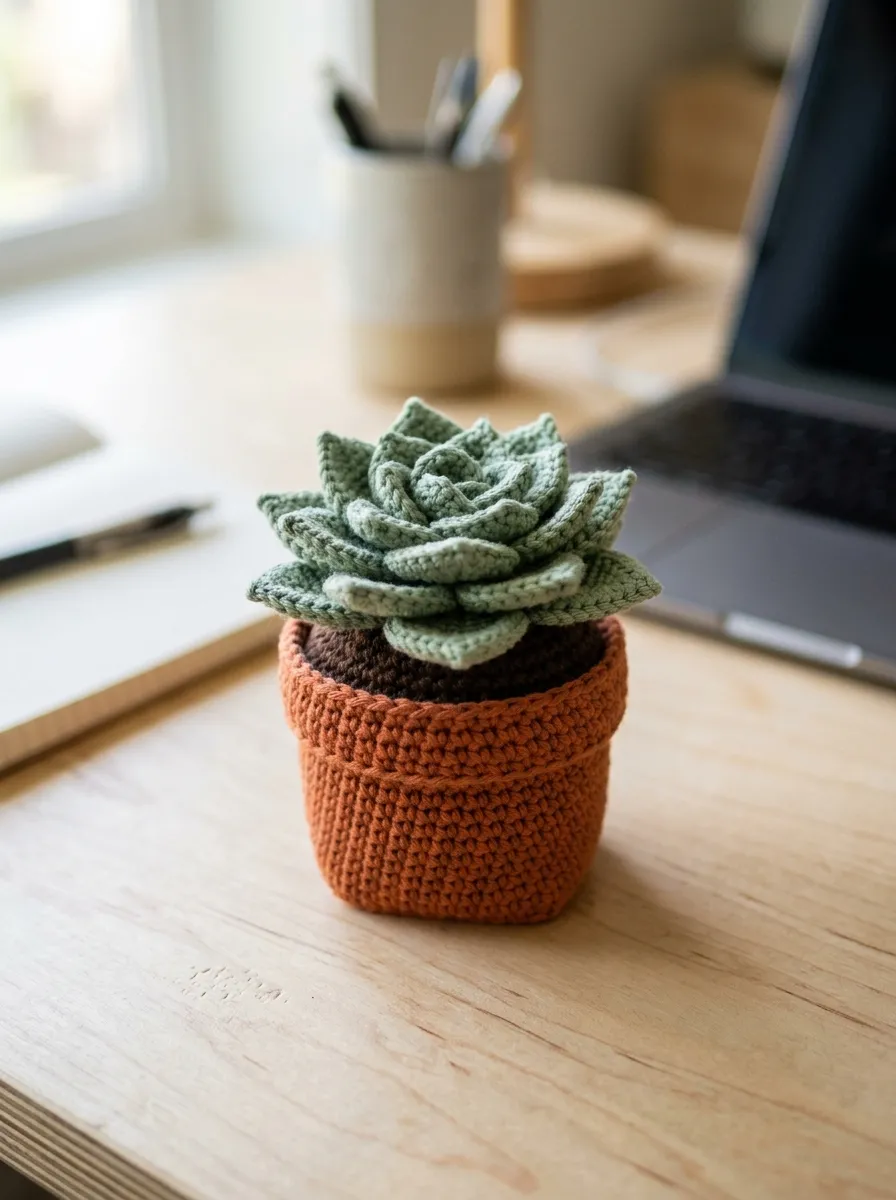
The chubby round sleepy bumblebee simplifies traditional entomological forms into a friendly, egg-shaped plush accented with bold, alternating contrast stripes and delicate translucent wings. The design features a continuous spherical body that transitions between bright sunflower yellow and deep charcoal black, eliminating awkward seam shifts through disciplined color changes. Instead of separate limb components, the toy relies entirely on two small, teardrop-shaped white wings sewn flat against the upper dorsal area, drastically reducing assembly time. The kawaii facial details include sleepy curved eye arches and subtle pink blush spots, creating a gentle expression suitable for baby showers or nursery displays. This project provides practical practice in managing two active yarn strands without tension distortion, teaching crafters how to carry colors neatly or execute clean, invisible round transitions. Its compact shape makes it well-suited for interactive nursery mobiles, playful bag clips, or relaxing stress-relief desk ornaments.
Start at the front face using bright yellow yarn, placing six single crochets into an adjustable loop and expanding outward over five rounds to thirty stitches. Work two straight rounds in yellow, then switch to black yarn for two rounds, returning to yellow for two rounds, and finishing with a final two-round black stripe while keeping your internal yarn floats relaxed. Insert eight-millimeter black safety eyes between rounds seven and eight spaced six stitches apart, or embroider sleepy curved arcs using dark gray thread for child-safe utility. Pack the body firmly with fiberfill, concentrating the stuffing toward the front face to maintain a plump profile, and execute invisible decreases across rounds twelve through fourteen to close the back opening. For the wings, use clean white or pale silver yarn to chain six, work five treble crochets into the third chain from the hook, and slip stitch to the base to create a round petal form. Sew the two wings side by side on the central black stripe, weave all loose tails into the interior, and trim the yarn flush.
Idea 4: Cozy Acorn Cap Keepsake
Step-by-Step Guide
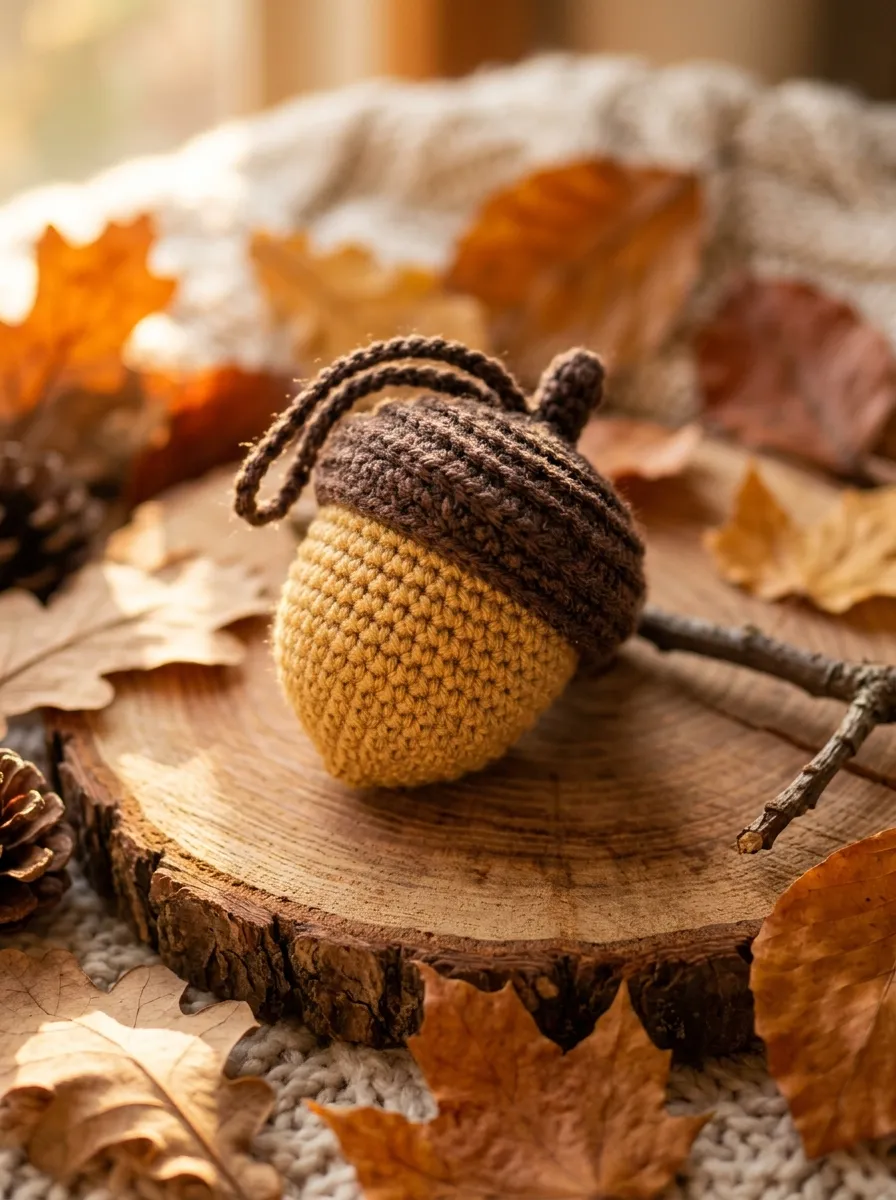
The cozy acorn cap keepsake captures rustic, woodland-inspired aesthetics through the pairing of a smooth, egg-shaped nut body with a textured, deep-toned cupule cap. The lower nut portion is worked in smooth wheat or camel-toned cotton, offering an unadorned surface that highlights even stitch tension. In contrast, the overlapping cap uses rich espresso or bark-brown yarn worked with front-post single crochets or textured slip stitches to mimic the rough, protective surface of natural seedpods. An integrated loop at the cap apex allows the completed piece to function as an organic holiday ornament, a rustic curtain tieback accent, or a sensory zipper pull. The simple, two-piece construction progresses rapidly, making it an excellent beginner project that teaches textural contrast without requiring complex stitch charts. The completed acorn brings warm, earthy character to fall decor trays, seasonal baskets, or woodland-themed nursery shelves.
To construct the nut body, use golden wheat yarn to place six single crochets in a magic ring, expanding steadily across four rounds to twenty-four stitches, then work five rounds straight to build vertical height. Taper the top slightly by working two rounds of distributed single-crochet decreases down to eighteen stitches, pack the interior firmly with dense fiberfill, and fasten off with a clean slip stitch. Next, use espresso brown yarn to construct the textured cap, beginning with six single crochets in a magic ring and expanding to twenty-four stitches over four rounds while working exclusively in the back loops to produce a raised spiral ridge. Work two straight rounds of alternating front-post and back-post single crochets around the cap perimeter to create a tactile, snug lip that fits neatly over the nut. Place a dab of fabric glue or an interior whipstitch to join the cap permanently over the tapered end of the wheat nut body. Chain ten stitches from the top center of the cap to form a sturdy three-inch hanging loop, anchoring the tail securely inside the cap core.
Idea 5: Whimsical Floating Mini Jellyfish
How to Make
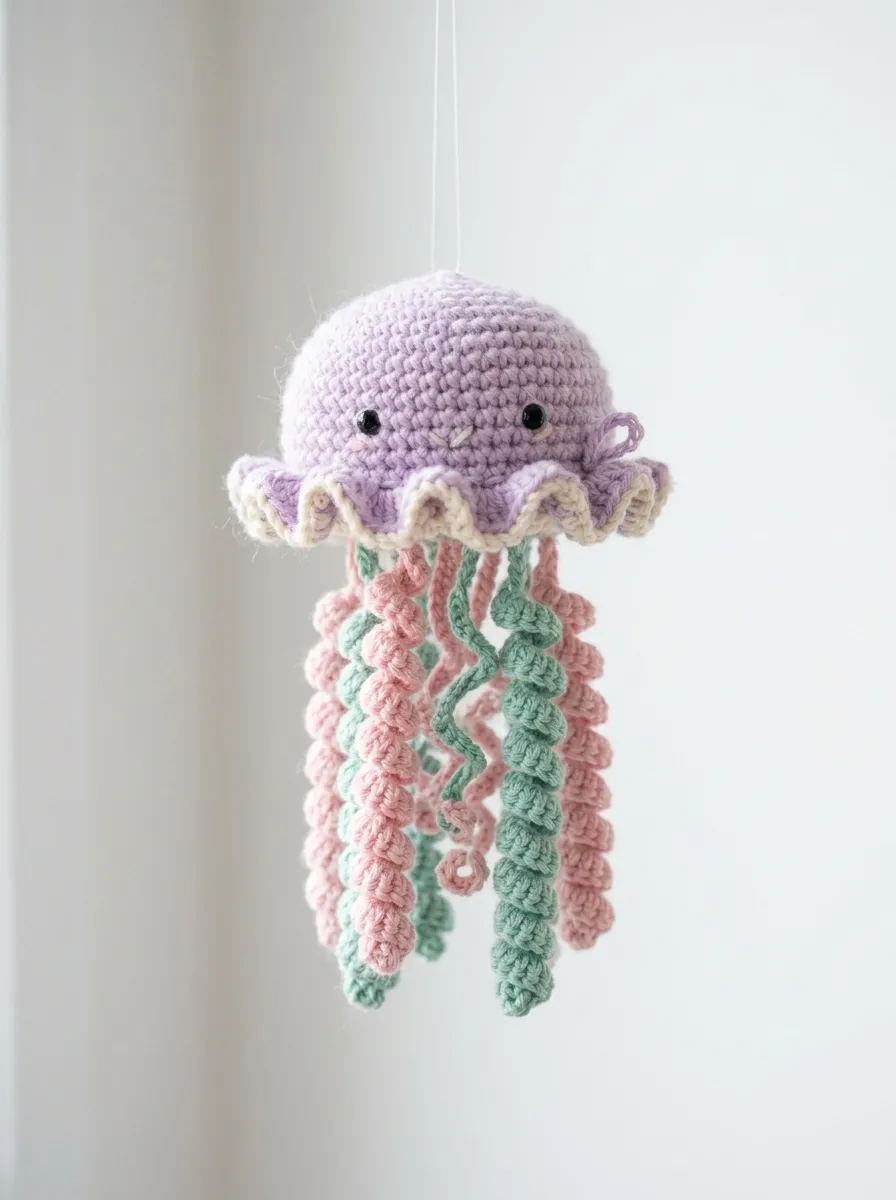
The whimsical floating mini jellyfish pairs an un-stuffed, flowing kinetic lower fringe with a firm, hemispherical bell cap, creating a tactile decorative element that can be completed in under two hours. The dome-shaped cap is worked from the top down, culminating in an undulating, ruffled lower rim produced by working multiple double crochets into every single base stitch. Beneath this decorative canopy, a series of tightly twisted chain tendrils hang freely, spiraling naturally as stitches are worked without requiring separate wire armatures. This project provides practical training in kinetic crochet physics, showing how concentrated stitch increases force straight foundation chains into permanent, spring-like spirals. The piece works exceptionally well suspended from bedroom ceiling fixtures, hung along nursery curtains, or used as a playful car rearview mirror charm. Its small footprint and minimal stuffing requirements make it an efficient scrap-busting pattern that showcases bright, high-contrast yarn choices.
Begin the jellyfish bell with lavender or seafoam green yarn, working six single crochets in a magic ring and increasing outward over four rounds to twenty-four stitches. Work four straight rounds to develop the rounded dome shape, and form the ruffled border on round nine by working three double crochets into every front loop around the entire circumference before fastening off. To make the flat underbelly plate that holds the tentacles, use matching yarn to crochet a flat disc of eighteen stitches, leaving a long assembly tail. Join vibrant contrasting yarn to the outer perimeter of this flat disc, chain thirty stitches, and work two single crochets in each chain link back toward the base to force the strand into a tight corkscrew spiral. Repeat this spiral sequence around the base plate until five cascading tendrils dangle freely. Pack the upper dome with a light puff of fiberfill, align the tentacle base plate inside the bell cavity, whipstitch the two parts together using back loops, and attach an overhead monofilament thread for display.
Idea 6: Kawaii Frosted Sugar Donut
Read This:
Execution Process
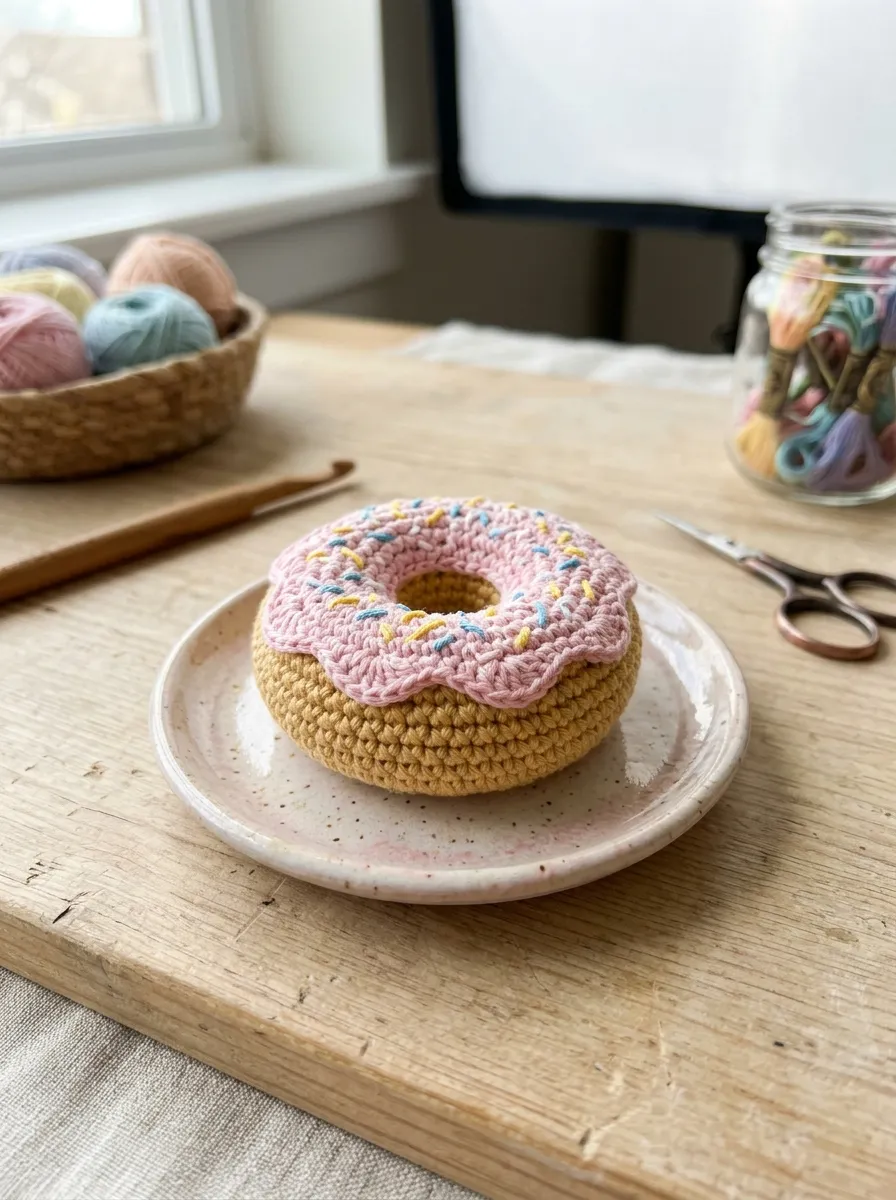
The kawaii frosted sugar donut concept explores toroidal geometry by assembling an open, hollow ring that curves seamlessly back onto itself, crowned with an irregular wavy frosting layer. The base donut dough is crocheted in golden tan cotton yarn, using an initial foundation chain joined in a circle to establish the inner hole before building outward volume. The upper frosting plate uses pastel pink, chocolate, or mint yarn, detailed with asymmetrical ruffled edges that mimic real confectionery glaze pooling over pastry. Tiny, colorful straight stitches embroidered across the frosting surface represent confectionery sprinkles, bringing bold color variety without requiring separate yarn purchases. This design teaches open circular foundation mechanics, helping crafters understand how inner and outer circumferences interact to create three-dimensional hollow forms. The finished pastry works well as a charming pincushion, a whimsical food play prop, or an eye-catching keychain pendant that brightens everyday routines.
To construct the pastry base, use warm tan yarn to chain twenty-four stitches, join into a non-twisting ring with a slip stitch, and work twenty-four single crochets in the round. Expand the outer circumference by increasing evenly across rounds two through four to forty-eight stitches, work four straight rounds to build outer volume, and decrease back down to twenty-four stitches along the interior edge. Fasten off leaving a long joining tail, roll the tube inward around a circular rope of polyester fiberfill, and whipstitch the initial chain loops to the final decrease loops to seal the inner ring hole. To create the frosting layer, repeat the foundation chain of twenty-four in pale pink yarn, working outward to forty-eight stitches while finishing the final round with an alternating sequence of slip stitches, half double crochets, and shell stitches to create an organic dripping glaze border. Embroider miniature seed stitches in yellow, blue, and white thread across the pink frosting, then pin and sew the frosting layer flat against the top surface of the stuffed donut base.
Idea 7: Prismatic Worry Stone Pebble
Step-by-Step Guide
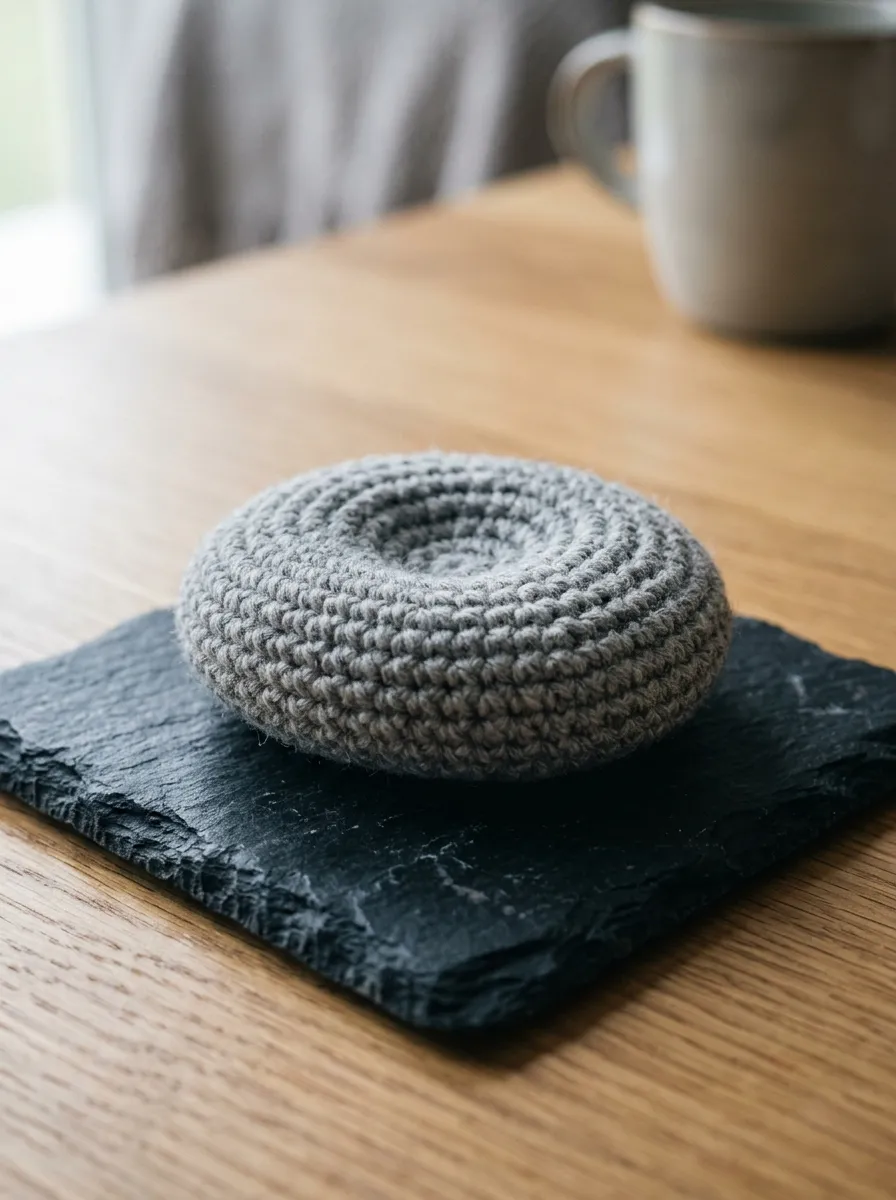
The prismatic worry stone pebble transforms smooth, tactile river rock forms into a soothing, palm-sized textile sensory tool that can be finished in just ninety minutes. The pebble features a gently flattened, asymmetrical oval shape designed to rest comfortably within an adult palm, incorporating an indented thumb groove in the center. By varying stitch heights—using single crochets along narrow curves and taller half-double crochets on broad shoulders—the pattern produces an organic, non-mechanical silhouette that feels natural in the hand. The dense, tight crochet fabric provides grounding sensory texture, which can be further enhanced by incorporating a smooth, weighted glass cabochon or ceramic disc inside the core along with firm fiberfill. This minimalist style design functions as an unobtrusive anxiety relief tool, a contemporary desk stone, or an understated gift for colleagues. Crafters can explore heathered wool-blend yarns or soft cotton-linen mixes to achieve a muted, stone-like aesthetic.
Begin with slate gray or soft river-stone taupe yarn, chaining eight stitches, and work in continuous oval rounds around both sides of the foundation chain to establish an elongated base. Increase at the two turning corners across three rounds until reaching thirty-two stitches around the perimeter, then work three straight rounds to build a low, rounded side profile. On the upper surface, work a concentrated sequence of six slip stitches across the center four stitches, pulling each stitch firmly to create a shallow, concave indentation that serves as a thumb rest. Insert a flat, thirty-millimeter glass crafting bead wrapped in a thin layer of batting into the center base to provide comforting weight and structure. Pack the remaining interior space with firm fiberfill, ensuring the central thumb depression remains distinct and stable. Complete two rapid decrease rounds along the underside perimeter, cinch the remaining six stitches closed using a tapestry needle inserted through the front loops, and bury the tail deep inside the stone core.
Idea 8: Playful Mushroom Cap Desk Companion

How to Create
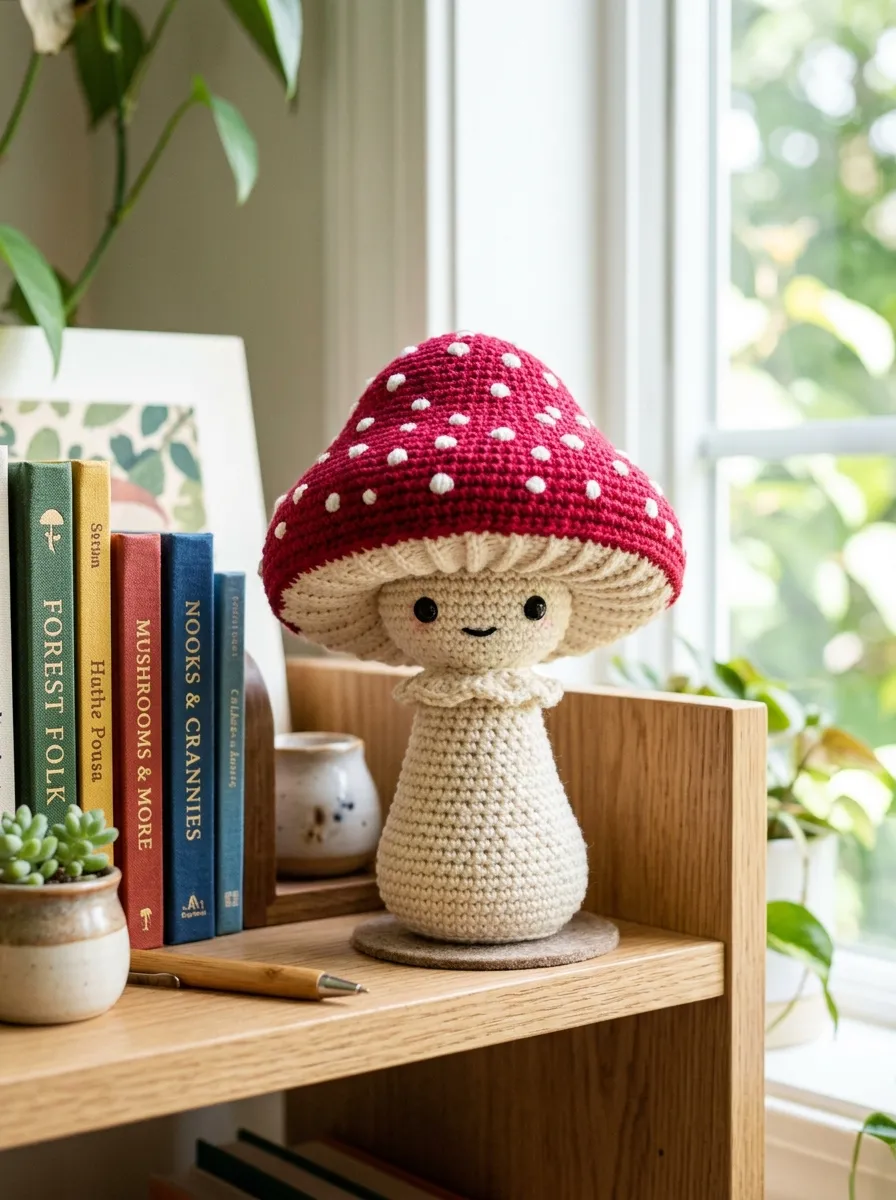
The playful mushroom cap desk companion combines woodland cottage-core aesthetics with clean, modern design elements, assembling a broad, parasol-shaped cap atop a sturdy cylindrical stem. The vibrant crimson cap is shaped like a wide dome, detailed with small, circular white spots that can be embroidered directly or crocheted as separate micro-appliques. Underneath the cap, a flat white gill plate covers the internal stuffing, while a weighted, flared stalk ensures the mushroom stands upright on bookshelves or windowsills. This project teaches crafters how to manage dramatic diameter shifts, showing how rapid expansion rounds create broad, flat silhouettes that maintain structural stability without collapsing. The contrast between the bright red cap, crisp white details, and soft cream stalk makes it an eye-catching handmade decoration that brings playful personality to modern workspaces. Its rapid construction and modular assembly make it an accessible project for afternoon craft sessions.
Crochet the mushroom cap with bright scarlet yarn, starting with six single crochets in a magic ring and expanding over six rounds to thirty-six stitches, followed by three straight rounds to produce a steep, bell-shaped dome. Fasten off and switch to clean white yarn to crochet a flat circular disc of thirty-six stitches, which will form the lower gill plate of the cap. For the mushroom stem, use off-white or unbleached cream yarn to work thirty-six stitches around an adjustable loop, decreasing gradually over eight rounds to eighteen stitches to form a stable, flared trunk. Fill the bottom of the stalk with a small handful of plastic poly-pellets or clean gravel enclosed in a fabric pouch to provide grounding weight, then pack the rest of the stem firmly with fiberfill. Whipstitch the top of the weighted stem to the center of the flat white gill plate, attach the red dome cap over the assembly, and stuff the cap cavity fully before sealing the outer rim with slip stitches. Sew four small white felt dots or crocheted four-stitch circles to the cap to finish the piece.
Idea 9: Graphic Modern Eye Keychain Token
Execution Process
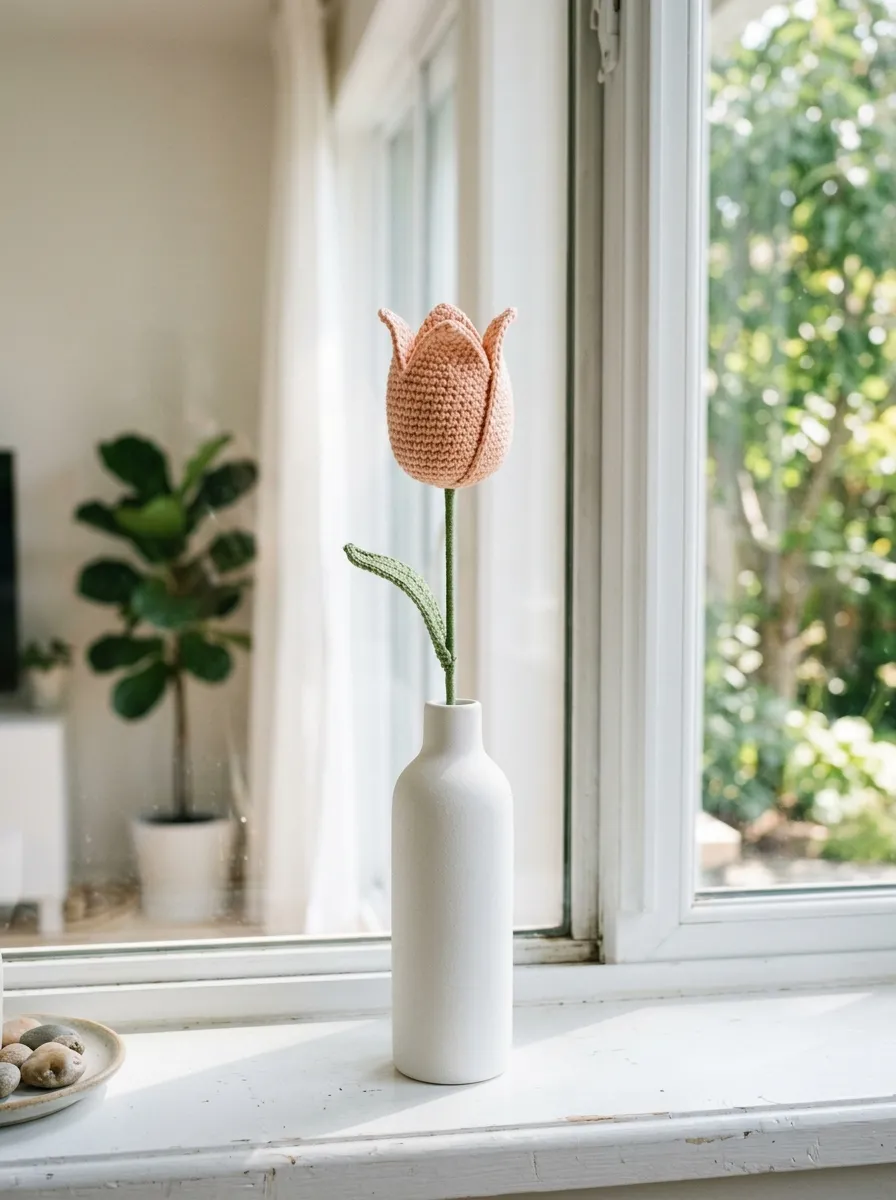
The graphic modern eye keychain token uses stylized, protective talisman motifs, assembling a flat, concentric almond-shaped disc that finishes in under two hours. The design features a bold, high-contrast palette with a central black pupil, vibrant turquoise iris, and crisp white sclera, all framed by an outer band of deep navy or gold yarn. Rather than building a round sphere, this pattern uses concentrated increases and decreases at two opposing lateral points to form sharp, clean corners reminiscent of an almond. This piece serves as a study in sharp geometric transition shaping, demonstrating how stitch placement can transform circular rounds into crisp, angular tokens. The compact, flat profile is designed for everyday durability, resisting snagging when attached to keyrings, backpacks, or gym bags. The graphic design balances traditional folklore symbolism with modern minimalist style aesthetics, delivering an eye-catching, portable accessory that requires minimal materials.
Begin at the center pupil with black yarn, working eight single crochets into a magic circle and slip stitching to the initial stitch to seal the ring. Join bright turquoise or sky-blue yarn, working two single crochets into each stitch around to reach sixteen stitches, and fasten off with an invisible join. Attach pure white yarn to start the almond-shaped sclera: work three single crochets, one half double crochet, and a double crochet-chain one-double crochet combination into the next stitch to create the sharp lateral corner point, mirroring the sequence on the opposite side. Switch to deep navy or camel yarn for the outer border, working single crochets around the perimeter while placing three single crochets directly into each corner chain space to reinforce the angular eye silhouette. Crochet a second, matching eye token in plain navy yarn to act as a durable backing plate. Align the two pieces with wrong sides facing, single crochet their outer borders together with navy yarn, insert a split metal keyring through the corner point, and weave in all yarn ends.
Idea 10: Slender Modern Tulip Blossom
Read This:
Step-by-Step Guide
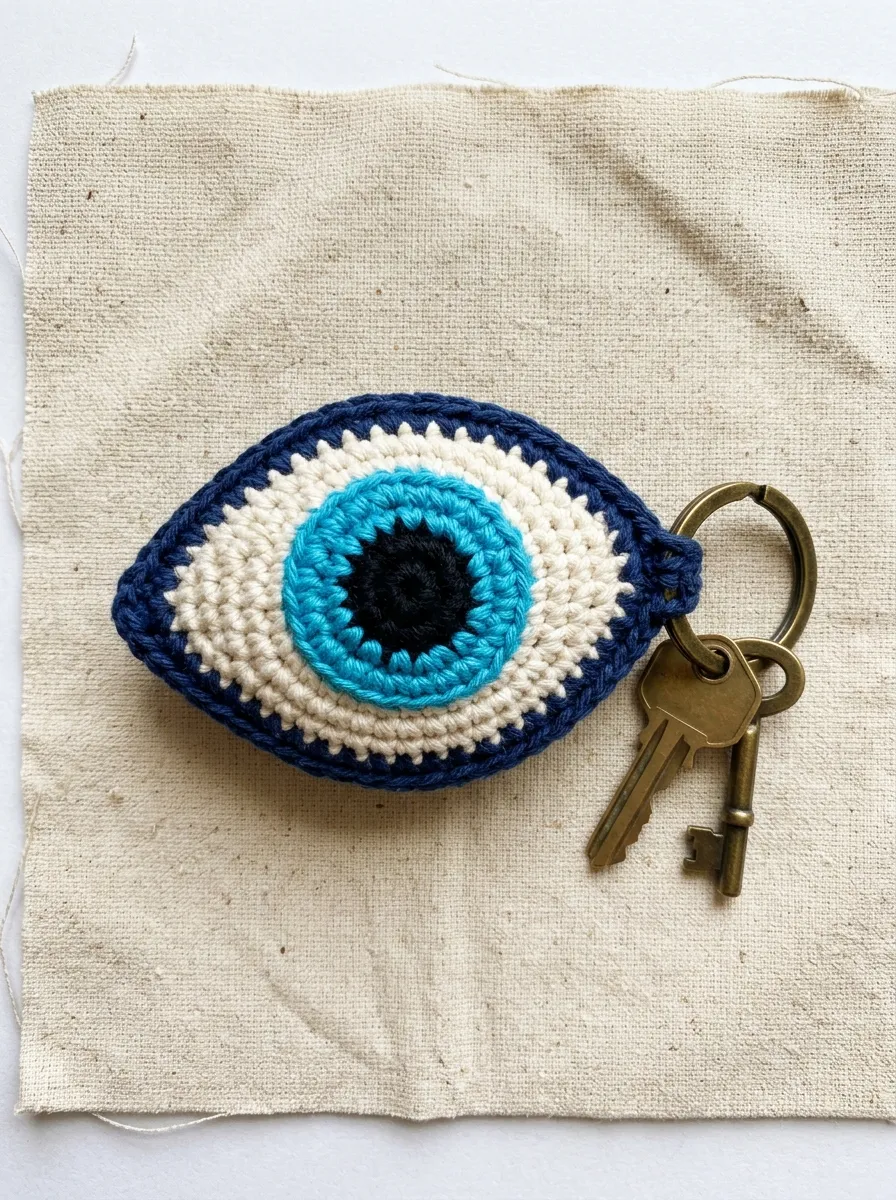
The slender modern tulip blossom translates fresh botanical silhouettes into a modern home decor piece using an open-topped cylindrical pouch pinched into a three-dimensional flower cup. The blossom begins as a straightforward single-crochet cylinder worked in soft apricot, blush pink, or buttery yellow yarn, requiring no complex multi-piece petal joins. Once the cylinder reaches three inches in height, it is stuffed lightly with fiberfill, and the top rim is pinched into an X-shape using two perpendicular needle passes to establish four distinct, upright petals. A wooden floral dowel wrapped in olive-green floral tape or encased in a crocheted sleeve is inserted into the base, providing structural support for display in narrow ceramic vases. This project is beginner friendly, demonstrating how simple finishing folds can transform a plain hollow tube into an elegant floral silhouette. A collection of three or five stems forms an everlasting botanical arrangement that brings fresh handmade warmth to spring dining tables, bedside stands, or entry consoles.
To crochet the blossom, use soft apricot DK yarn to work six single crochets into an adjustable magic circle, expanding outward over four rounds to twenty-four stitches. Work twelve straight rounds in continuous spirals without increases to build an open, upright cylindrical cup, fastening off with a long six-inch assembly tail. Insert a firm puff of fiberfill into the lower two-thirds of the tube, keeping the top half-inch empty so the petals can fold naturally. Thread your tapestry needle with the yarn tail, bring the needle across the open rim to the opposite side, and pull tight to pinch the center closed. Next, take the needle through the remaining two side points, pulling them firmly toward the center cross-point to create an X-shaped indentation that forms four rounded petals. Insert a ten-inch wooden craft dowel coated in craft glue into the bottom base hole, pushing it two inches deep into the internal fiberfill matrix. Wrap the exposed dowel stem in olive green yarn or floral tape, securing the base with a tiny dab of clear adhesive.
Common Beginner Mistakes and How to Avoid Them
A frequent mistake beginners make when attempting quick amigurumi is using a crochet hook that is too large for their chosen yarn weight, resulting in loose stitches that allow the polyester fiberfill to poke through. When stuffing shows through gaps in the fabric, the finished piece loses its clean, professional finish. To prevent this, always select a hook that is one or two sizes smaller than the yarn band suggests, which produces tight, dense single crochet stitches that completely conceal the interior stuffing. Another common issue is losing count of stitches when working in continuous spirals, which can create lopsided shapes and misaligned limbs. Use a locking stitch marker in the final loop of every single round, moving it up with each pass so you can track your position without counting from the beginning. In addition, beginners often over-stuff or under-stuff their projects; under-stuffing leaves toys limp and prone to denting, while over-stuffing stretches the stitches open and distorts the intended silhouette. Add your fiberfill in small, fluffy tufts, packing the core firmly while keeping the outer layer soft to maintain smooth, balanced proportions.
Practical Tips for Better Results
Refining your single-day amigurumi results relies on adopting small, repeatable crafting habits that elevate stitch uniformity and overall structural polish. Use the yarn-under single crochet method—often referred to as the cross-stitch technique—instead of the standard yarn-over method to produce tighter, square-shaped stitches that stack vertically without leaning. When decreasing, use the invisible decrease: insert your hook exclusively through the front loops of the two target stitches before completing your single crochet, which creates a smooth surface transition without gaps or bumps. For embroidery details like eyes, smiles, or sprinkles, use stranded cotton embroidery floss rather than thick working yarn, as fine threads allow for delicate, expressive lines that will not overwhelm miniature plush faces. When joining separate components, pin every piece securely in place with long ball-headed quilting pins and inspect the alignment from multiple angles before making your first stitch. Finally, run a garment steamer or a steam iron held several inches away over the completed piece to relax the yarn fibers, evening out stitch tension and giving the toy a clean, polished finish.
Styling, Presentation, or Organization Ideas
Styling your finished miniature amigurumi pieces thoughtfully allows them to integrate naturally into modern home decor themes. Display small botanical designs—such as the desk succulent, tulip blossom, or mushroom cap—inside matte ceramic egg cups, miniature terracotta planters, or low wooden trays to create an intentional, organized vignette. Setting these handmade pieces against neutral backdrops, such as pale oak floating shelves, natural linen runners, or minimalist white desks, lets their rich textures and colors take center stage. For functional, wearable items like the citrus slice, eye token, or sleepy bee, attach antique brass swivel clasps or leather lanyard straps, turning small plush toys into elevated accents for canvas totes, backpacks, and keychains. If you are preparing a collection of small amigurumi as gifts, package each item inside a small Kraft paper gift box cushioned with unbleached crinkled paper, and tie the box with matching cotton yarn scraps. This natural, understated presentation highlights the handmade care behind the piece while keeping your finished creations organized and gift-ready.
Budget or Time Planning
Completing amigurumi projects within a single day requires organized time management and smart material planning to maintain steady momentum. Divide your crafting session into three distinct blocks: spend thirty minutes winding yarn and preparing tools, two to three hours crocheting the primary body components, and a final hour handling stuffing, facial embroidery, and seam closures. To keep material costs low, build a core stash of budget-friendly cotton or acrylic yarn in primary neutrals like cream, slate gray, and camel, using small leftover scrap balls for colorful accents like sprinkles, fruit pulp, and petals. Purchasing notions like stitch markers, metal tapestry needles, and safety eyes in multi-piece bulk sets keeps per-project costs negligible. Working in small batches—such as crocheting three succulent bases or four acorn nuts in a single sitting—streamlines your workflow, as your hands quickly adapt to the repeating stitch rhythm. Sticking to this structured schedule helps you finish a complete, charming amigurumi project in a single afternoon without creative fatigue or material waste.
Creative Expansion and Advanced Inspiration
Once you master these ten introductory single-day patterns, you can easily adapt the foundational shapes into more complex, personalized fiber art projects. Experiment with dramatic scale variations simply by changing your materials: use fine embroidery floss and a 1.0 mm steel hook to create miniature dollhouse charms, or switch to super-bulky blanket yarn with an 8.0 mm hook to turn small handheld designs into oversized, huggable floor pillows. You can also incorporate varied sensory elements into the core cavities, such as sealed plastic rattle inserts, pleasant lavender sachets, or crinkle paper sewn inside ears and wings to produce engaging sensory toys. Advanced crafters can introduce textured surface techniques, such as working loop stitches to simulate animal fleece, or blending two contrasting yarn strands together for a heathered, tweed-like effect. As you gain confidence with geometric shaping formulas, you can begin sketching and drafting your own original character designs, using basic spheres, cylinders, and cones to build an expressive, custom amigurumi collection.