
Crochet fruit charms have become essential miniature handmade accessories across modern lifestyle boards, bridging traditional yarn craft with practical daily accessories. These compact botanical creations provide a functional way to personalize canvas tote bags, key rings, backpacks, and planners while testing diverse stitch structures. This comprehensive tutorial details practical construction techniques, assembly sequences, and finishing methods to create ten recognizable fruit charms using simple yarn crafts. Readers will learn how to shape three-dimensional spheres, execute seamless color changes, work tight spiral rounds, and secure metallic hardware cleanly. Crafting miniature fruit charms allows fiber artists to utilize small yarn scraps efficiently while mastering fundamental amigurumi shaping principles. Because these items require minimal yarn yardage and assemble quickly, they serve as productive, low-cost creative projects for craft markets, gift sets, and home decor embellishments. By following structured stitch counts and methodical finishing processes, beginners and experienced crafters can produce durable, visually consistent charms that hold their structure through daily handling. The step-by-step instructions below outline how standard mercerized cotton, basic crochet hooks, and neat assembly methods transform simple loops into colorful, realistic miniature fruit designs.
Why Miniature Fruit Charms Continue to Trend
The widespread popularity of crochet fruit charms on creative design boards stems from their blend of tactile charm, portable utility, and playful aesthetics. Modern style favors nostalgic, handcrafted personal items that provide an organic contrast to sleek mass-produced mobile devices, neutral handbags, and minimalist accessories. These miniature fruits offer practical decorative utility as functional zipper pulls, luggage markers, automotive mirror hangers, and seasonal home decor accents. For novice crafters, miniature fruits serve as an accessible entry point to three-dimensional amigurumi because the organic shapes naturally forgive slight tension variations. Each charm requires little yarn, allowing makers to experiment with vibrant color palettes without purchasing costly supplies. Furthermore, the compact size ensures fast project completion, giving beginners the satisfaction of finishing a complete creative project in a single sitting. The blend of everyday functionality, low material commitments, and vibrant retro appeal makes miniature fruit charms an enduring favorite for handmade gifting, craft fair inventory, and casual creative exploration.
Materials, Tools, and Structural Preparation
Constructing durable crochet charms requires specific yarn selections, appropriate hook gauges, and specialized finishing hardware. Mercerized sport-weight or fingering-weight cotton yarn provides the ideal medium, as tightly spun cotton prevents fiber pilling, preserves sharp stitch definition, and withstands friction. Pair this yarn with an ergonomic aluminum hook sized between two and two and a half millimeters to ensure tight, uniform single crochet stitches that conceal internal stuffing. Essential auxiliary tools include high-density polyester fiberfill, a blunt metal tapestry needle, fine sewing scissors, stitch markers, metal jump rings, lobster claw clasps, and needle-nose jewelry pliers. Before beginning your charm, examine your tension by working a small circular swatch to verify that the fabric remains dense and gap-free when stretched. Keep fiberfill separated into tiny, marble-sized portions, which enables smooth, even stuffing without creating exterior lumps. Prepare your workspace by laying out findings and pre-cutting embroidery threads for surface details, ensuring that each step proceeds smoothly from initial magic ring to final metal attachment.
Idea 1: Classic Seeded Strawberry Pendant
Step-by-Step Guide
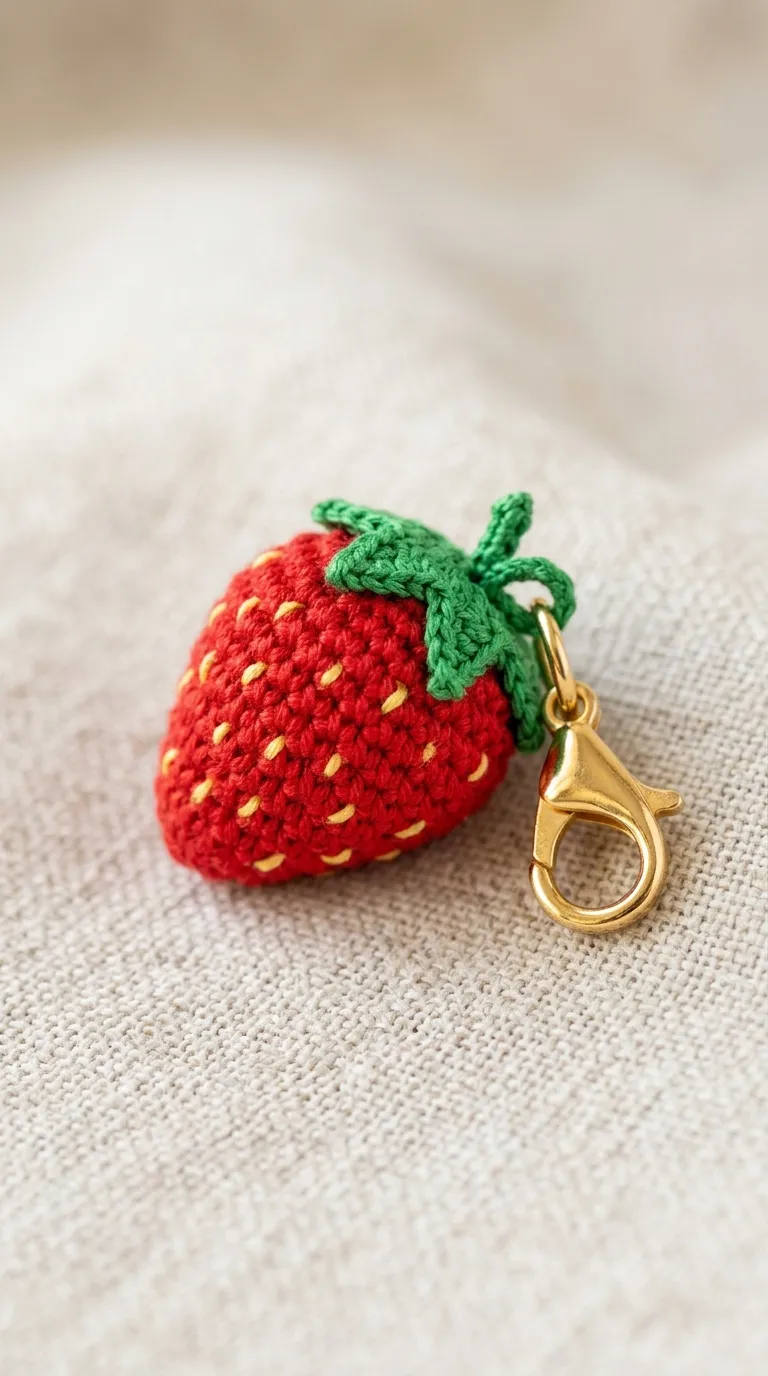
The classic strawberry charm relies on an inverted conical form that tapers from a rounded base to a defined bottom tip. This design mimics the natural geometry of ripe berries, utilizing continuous spiral rounds of single crochet to build a seamless outer shell. Surface detailing with contrasting embroidery thread creates the look of embedded seeds without interrupting the structural integrity of the main crochet piece. A multi-pointed star calyx crowns the top opening, masking the final closure stitches while offering a natural anchoring point for metal keyrings or cords. This project functions as an ideal beginner-friendly introduction to amigurumi shaping, as the gradual decreases teach precise tension management without complex stitch patterns. The bright red cotton contrasted against deep forest green foliage delivers an eye-catching aesthetic suitable for summer purse clips, planner dangles, or colorful zipper pulls on children’s backpacks.
Begin by working six single crochet stitches into an adjustable magic ring using bright red mercerized cotton yarn. Work continuous spiral rounds, placing a stitch marker in the first stitch of each round to track your progression accurately. Increase gradually across rounds two through six by working two single crochet stitches into designated stitches until reaching eighteen stitches in circumference. Work three even rounds of eighteen stitches to build the fruit’s body height before initiating subtle single crochet decrease rounds down toward the bottom point. Lightly pack the interior with small tufts of polyester fiberfill, using the blunt end of a pencil to push the stuffing into the lower tip without stretching the stitches. Fasten off with a long tail, weave the yarn through the front loops of the remaining six stitches, and cinch the bottom tightly closed. Crochet a five-point calyx in green yarn by chaining three and slip stitching back down each spoke, securing the foliage to the top with neat whip stitches before embroidering tiny yellow seed flecks across the red surface.
Idea 2: Ripe Meyer Lemon with Foliage
Read This:
How to Make
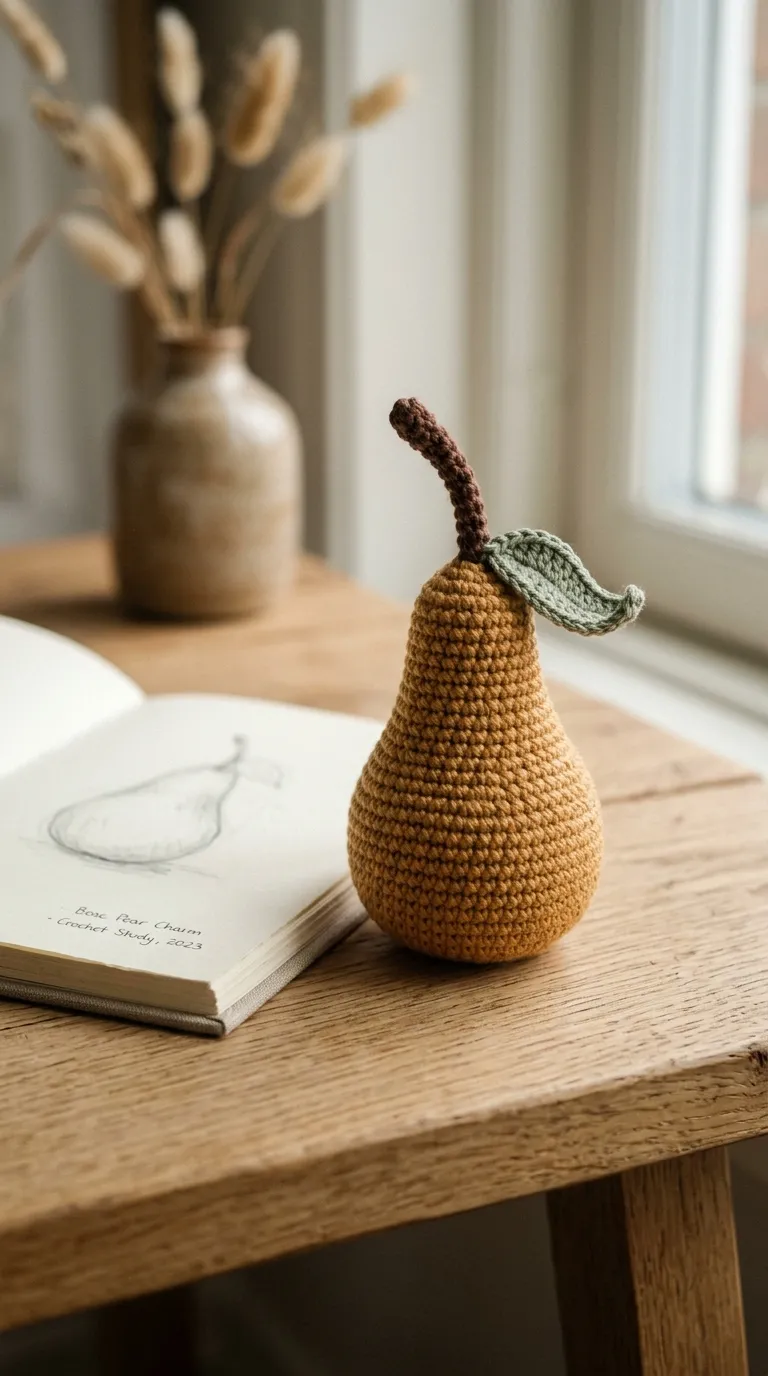
The Meyer lemon charm captures botanical realism through symmetrical shaping, featuring distinct conical nubs at both the top and bottom poles. This vibrant citrus accessory utilizes bright canary yellow yarn worked in tight single crochet stitches, transitioning from narrow pointed ends to a wide, rounded center. A single deep green ovate leaf attached to a short stem provides balanced contrast while stabilizing the upper hardware connection. This design provides practical value as an easy project for learning mirrored increases and decreases, reinforcing how stitch mathematics dictates three-dimensional forms. The elongated oval silhouette withstands everyday friction when attached to keys or travel bags, retaining its structure without flattening. Its clean lines and cheerful palette make it an adaptable accent for spring tote bags, kitchen wall hooks, or summer gift wrap accents, bringing a touch of handmade charm to daily utilitarian objects.
Start by chaining two with vibrant yellow cotton yarn, working four single crochet stitches into the second chain from the hook to form the small bottom tip. Expand the shape across rounds two through seven by working systematic increases at four equidistant points around the circumference until you establish a diameter of twenty-four stitches. Crochet five consecutive rounds without increases to define the central cylindrical section of the fruit. Begin decreasing symmetrically by working single crochet two together across the next four rounds, pausing to insert firm portions of fiberfill when eight stitches remain open. Continue decreasing until four stitches remain, then thread the yarn tail through the remaining loops and pull firmly to shape the matching top nub. To create the leaf, chain eight in dark green yarn, working single crochet, half double crochet, and double crochet stitches along the foundation chain to create a tapered oval edge. Fasten the leaf directly over the top stem nub and secure an eight-millimeter metal jump ring through the base of the leaf join.
Idea 3: Plump Rainier Cherry Twin Cluster

Execution Process
The twin cherry charm pairs two plump spherical fruits connected by realistic crocheted stems and a central leaf join. Each individual cherry relies on a simple sphere construction that curves inward slightly at the upper stem insertion point, mimicking natural stone fruits. Deep ruby or bright cherry red cotton yarn provides high visual impact, while slender dark olive green cords unite the pair into a balanced, dynamic accessory. This two-part charm drapes naturally over handbag straps, steering wheels, or decorative door knobs, swinging freely without straining the underlying stitches. Crafters learn how to produce clean indented tops and link separate amigurumi elements into a cohesive single unit. The compact size of each cherry makes this an efficient scrap-busting pattern, requiring only small lengths of red and green yarn to produce a polished finished product suitable for keychains or charm bracelets.
To make the first cherry, cast six single crochet stitches into a magic ring using ruby red cotton yarn. Double your stitch count to twelve on round two by increasing in every stitch, and continue expanding systematically to eighteen stitches on round three. Work four rounds straight to build the spherical walls, then execute invisible decrease rounds until six stitches remain open. Stuff the sphere firmly with fiberfill, cut the yarn leaving a twelve-inch tail, and draw the opening closed. Thread the tail through the center of the sphere from the bottom through to the top indentation, pulling gently to create the characteristic dimple at the top of the fruit before knotting securely. Repeat this process to create the second identical cherry sphere. Using olive green yarn, chain twenty-two stitches to form the connecting stem, slip stitching the ends into the top dimples of both cherries. Join green yarn at the exact center of the double stem, crochet a seven-chain pointed leaf, and attach a swivel lobster clasp to the top central loop.
Idea 4: Segmented Honey Clementine


How to Create
The segmented clementine charm introduces surface-shaping techniques that transform a basic orange sphere into realistic citrus sections. Using warm tangerine-colored yarn, the base pattern creates a slightly flattened, squat sphere that serves as the foundation for structural yarn sculpting. By wrapping a long matching yarn tail around the stuffed body and pulling it taut against the crochet fabric, the maker creates deep vertical indentations that clearly define eight individual fruit segments. A miniature brown stem and flat circular green leaf finish the upper pole, offering an organic cover for the anchoring knot. This piece teaches essential needle-sculpting skills that expand a crafter’s technical repertoire beyond basic single crochet stitches. The textured profile provides a pleasing tactile feel, making the charm ideal for sensory accessories, zipper pulls, or seasonal autumn market items.
Create the flattened sphere using tangerine cotton yarn, beginning with six single crochet stitches inside an adjustable ring. Increase evenly over four rounds until reaching twenty-four stitches, work four straight rounds of twenty-four stitches to build height, and then decrease back to six stitches over three rounds. Pack the sphere with generous amounts of polyester fiberfill, ensuring the stuffing remains firm enough to maintain resistance against surface sculpting threads. Cinch the remaining six stitches closed, knotting the yarn firmly while leaving a thirty-inch working tail attached to your tapestry needle. Bring the needle up through the center of the base to the top center, wrapping the working yarn down the exterior wall and back up through the base. Pull the yarn firmly to compress the sphere and form a deep groove, repeating this wrapping process eight times around the circumference to create symmetrical segments. Secure the sculpting thread at the top base, then crochet a tiny green leaf using a chain-five sequence and sew it flat over the central knot along with a split keyring.
Idea 5: Fuzzy Golden Kiwi Slice
Setup Method
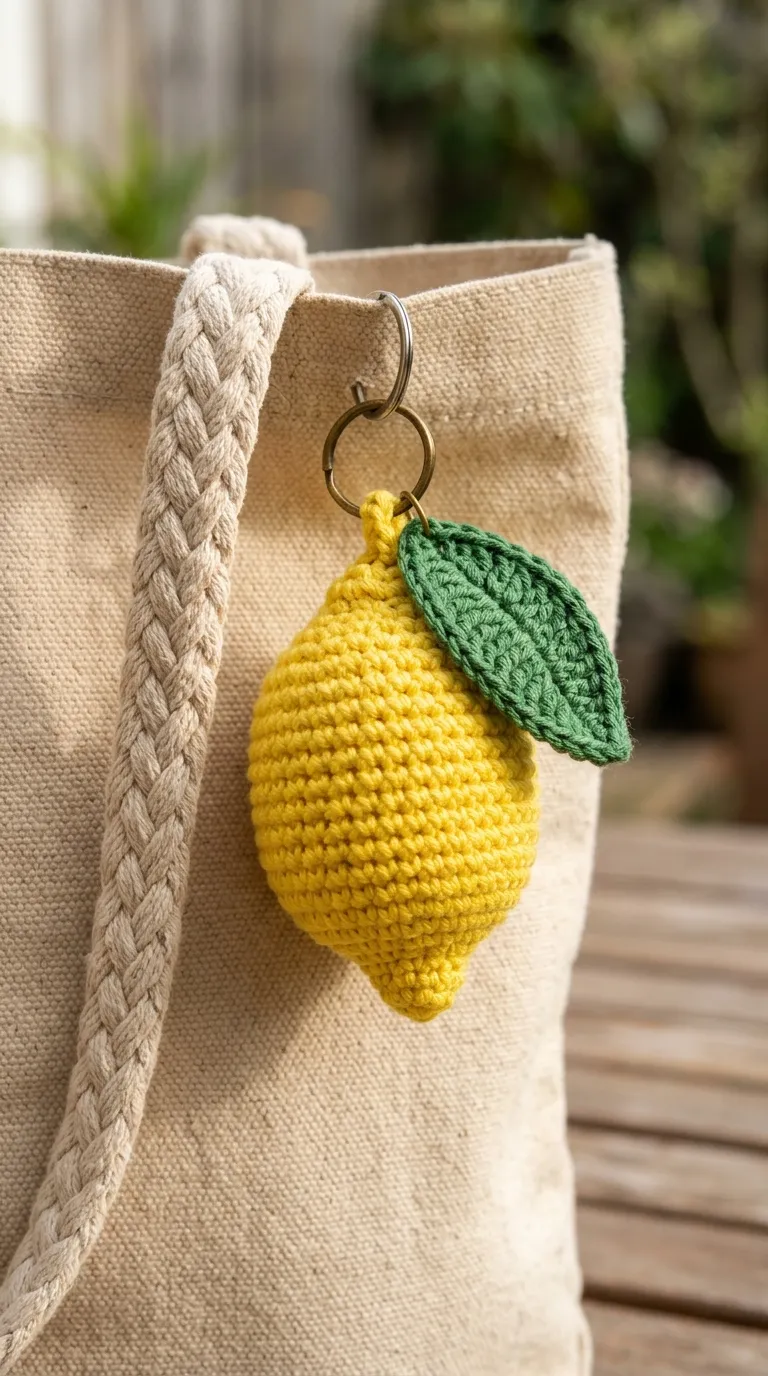
The golden kiwi charm showcases flat circular shaping techniques, depicting an exposed fruit cross-section rather than an enclosed sphere. This design uses concentric rings of varied colors to represent the cream core, black seeds, golden-yellow flesh, and fibrous brown skin. Working flat rounds teaches clean color transitions and accurate circle geometry, ensuring the finished slice stays flat without curling at the outer edge. Simple straight-stitch surface embroidery creates tiny radiating seeds, adding contrast without creating excessive physical bulk. The flat silhouette makes this charm lightweight and comfortable against delicate items, serving as an exceptional bookmark charm, phone case dangle, or flat organizational bag tag. The combination of varied yarn colors offers a productive way to use short lengths of neutral and bright yarn from previous creative projects.
Begin at the center using cream-colored sport cotton, working six single crochet stitches into a magic ring and joining with a slip stitch. Change to golden-yellow yarn on round two, increasing in every stitch to reach twelve single crochet stitches while working over your yarn tails to hide them. Expand the circle across rounds three and four by spacing increases evenly, reaching twenty-four stitches by the end of round four. Fasten off the yellow yarn and switch to rich chocolate brown cotton, working one final round of twenty-four back-loop-only single crochet stitches to create a distinct textured rim that represents the fuzzy outer skin. Weave all loose ends neatly into the back of the flat disc with a tapestry needle. Using two strands of black embroidery floss, stitch twelve tiny straight seeds radiating outward around the cream center. Thread a five-millimeter brass jump ring directly through the back loop of any outer brown stitch, using needle-nose pliers to secure a petite swivel snap clasp.
Idea 6: Minimalist Bosc Pear

Read This:
Step-by-Step Guide
The Bosc pear charm features an elongated, graceful silhouette that transitions smoothly from a wide, weighted bottom to an elegant slender neck. Crocheted in warm caramel, ochre, or olive yarn, this project relies on continuous rounds of single crochet with asymmetrical, gradual decrease intervals. The natural balance of the pear provides an organic aesthetic that complements neutral accessories, canvas book bags, and minimalist home decor arrangements. Crafters practice subtle shaping by spacing single crochet decreases across several rounds, creating a gentle slope rather than abrupt structural angles. Adding a firm, short brown yarn stem and a slightly curled leaf reinforces the botanical accuracy of the miniature design. The pear’s stable, broad base allows the finished piece to sit upright on flat surfaces, enabling it to function as a compact desk charm or small home accent when not used as a mobile accessory.
Using ochre-colored mercerized cotton, initiate the broad base by working six single crochet stitches into an adjustable loop. Increase methodically across rounds two through five until the circle expands to twenty-four stitches, establishing the widest point of the fruit’s base. Work three straight rounds of twenty-four stitches to build the bottom curve before initiating subtle, spaced decrease rounds to form the tapering upper neck. Decrease two stitches per round across rounds nine through twelve until twelve stitches remain, then work two straight rounds to define the elongated neck. Pack the wider bottom section firmly with fiberfill, keeping the upper neck lightly stuffed to prevent the stitches from stretching open. Close the top opening by decreasing down to six stitches and cinching the hole closed. Join dark brown yarn to the top center, chain four, and slip stitch back down the chain to form a rigid stem, attaching a small six-chain green leaf to the base of the stem alongside a secure lobster clasp.
Idea 7: Texturized Black Raspberry Drop
How to Make
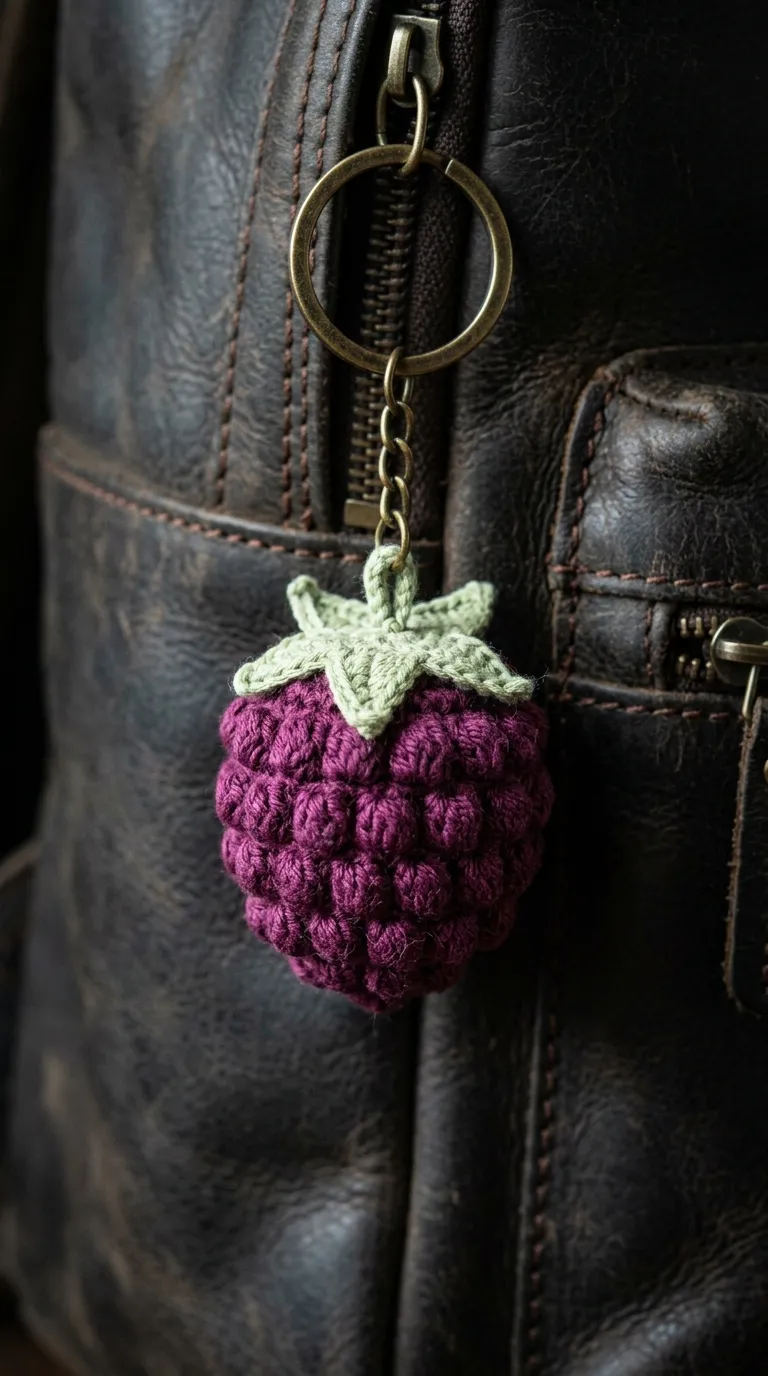
The black raspberry charm uses specialized textured crochet stitches to replicate the individual, juicy drupelets of fresh bramble fruits. Rather than relying solely on smooth single crochet, this pattern incorporates alternating rounds of miniature bobble or popcorn stitches that push dense yarn loops toward the outside. Using deep midnight purple or rich obsidian yarn, the textured surface catches ambient light, producing a rich dimensional look that stands out against flat fabric surfaces. This design introduces crafters to intermediate texture-building techniques while maintaining simple underlying round counts. The dense, bobbled fabric conceals internal fiberfill completely, eliminating any risk of white stuffing showing through the dark stitches. This tactile charm works well on dark leather backpacks, key fobs, or winter purse straps, offering an elevated, artisanal finish that highlights detailed fiber craftsmanship.
Commence by working five single crochet stitches into a magic ring using deep plum or charcoal-purple cotton yarn. In round two, alternate between one single crochet and one miniature bobble stitch—worked as a four-part half-double crochet cluster closed together—increasing to eight stitches around. Continue alternating single crochet stabilizing rounds with textured bobble rounds, expanding the circumference to twelve bobbles around the midsection across rounds three through five. Work the bobbles firmly, using your fingertip to press the rounded clusters outward toward the right side of the fabric. Insert a small amount of polyester fiberfill into the central core, ensuring the stuffing remains centered without distorting the surrounding bobbles. Work a final decrease round using single crochet stitches to draw the top edge inward to six stitches. Fasten off, cinch the top opening closed with your tapestry needle, and top the berry with a pale green star calyx crafted from five chain loops, stitching an antiqued bronze keyring into the center.
Idea 8: Crimson Pomegranate Half

Read This:
Execution Process
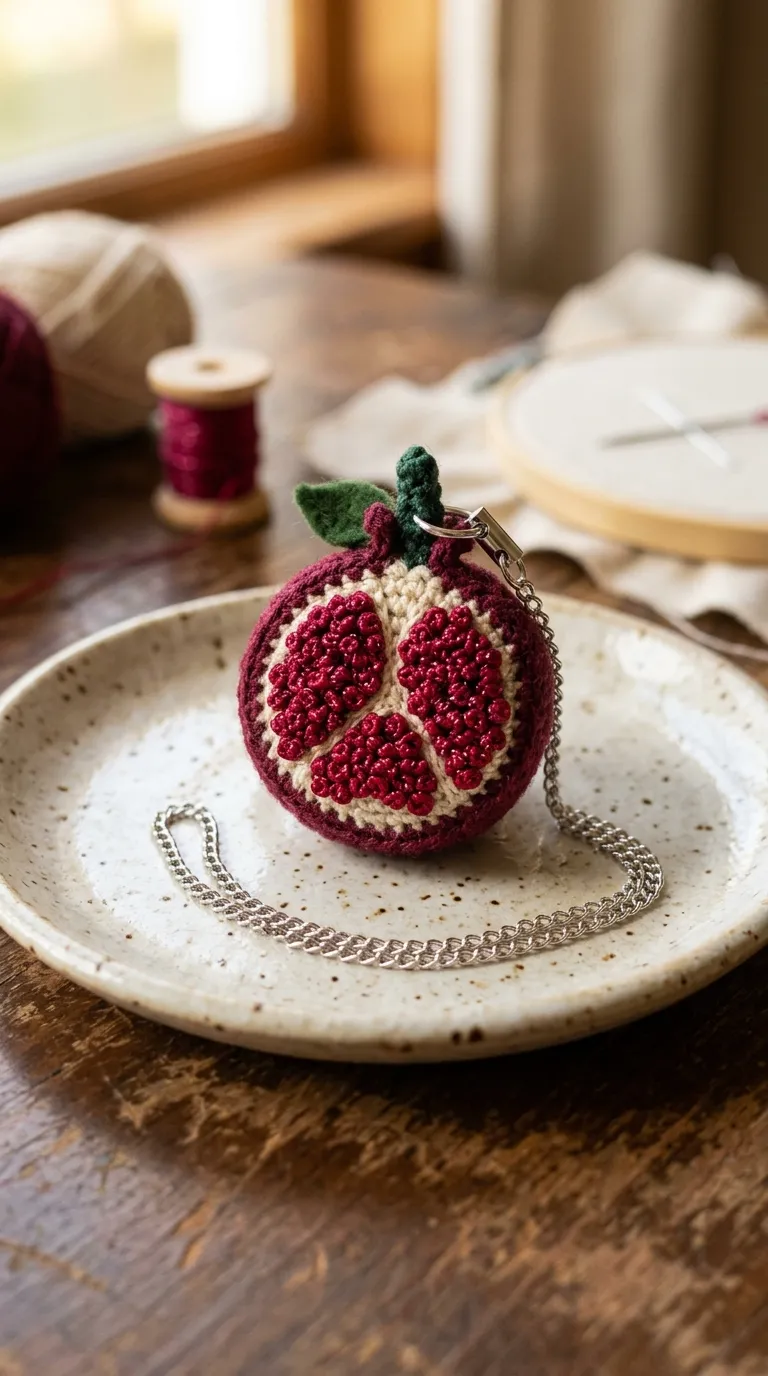
The pomegranate charm captures the striking internal geometry of sliced fruit by pairing a smooth exterior rind with an intricate, seed-filled interior. Using deep garnet and cream cotton yarn, this project combines flat round crochet with simple three-dimensional border construction. The flat front surface features dense groupings of tiny French knots or bead-like puff stitches in bright crimson to represent juicy arils nestled within the cream-colored pith. A curved, rigid exterior wall crocheted in rich burgundy wraps around the back, giving the slice physical depth and structure. This project challenges crafters to manage multiple colors and layered construction techniques within a small scale. The rich, royal color palette makes it an appealing accessory for autumnal styling, festive holiday gifting, or sophisticated purse accents that celebrate unique botanical designs.
Begin the front face with cream yarn, working six single crochet stitches into a magic loop and expanding the flat disc over three rounds to eighteen stitches. Fasten off the cream yarn, join deep burgundy yarn, and work one round of eighteen single crochet stitches through the back loops only to establish a raised exterior rim. Work two rounds of eighteen single crochet stitches straight up to create the vertical depth of the fruit’s outer rind. Cut a circular piece of lightweight craft plastic to match the diameter of the face, placing it flat inside the cup to keep the front surface crisp. Insert a light layer of fiberfill behind the plastic insert, then work invisible decreases across two rounds to close the back of the pomegranate half. Using a tapestry needle and bright ruby red embroidery floss, work dozens of close-set French knots across the cream face to simulate glistening seeds, finishing the piece by sewing a delicate pointed crown calyx to one side of the outer rind.
Idea 9: Crisp Granny Smith Apple

How to Create
The Granny Smith apple charm showcases classic amigurumi sculpting, capturing the iconic indented top and bottom poles of fresh orchard apples. Crocheted in bright lime or chartreuse yarn, the spherical body requires precise internal tensioning to create deep top and bottom dimples. A slender brown stem paired with a crisp leaf anchors the top hollow, giving the miniature fruit its instantly recognizable profile. This project serves as an essential exercise in amigurumi needle sculpting, teaching makers how to alter basic spherical shapes without complicated stitch modifications. The smooth, clean surface highlights uniform single crochet stitches, making it a wonderful display piece for demonstrating neat tension and clean technique. The cheerful green hue adds an energetic pop of color to tote bags, camera straps, teacher gift baskets, or school bag zipper pulls.
Using vibrant lime green cotton yarn, work six single crochet stitches into an adjustable magic ring, keeping your initial loop snug. Expand the circle methodically by increasing in every stitch on round two, followed by alternating increase rounds until reaching thirty stitches in circumference. Work six rounds without increases to build the vertical center walls of the apple before beginning gradual decrease rounds. When the top opening narrows to twelve stitches, pack the interior firmly with polyester fiberfill, making sure the stuffing supports the rounded outer cheeks. Decrease to six stitches, fasten off, and leave an eighteen-inch yarn tail. Thread the tail onto a blunt tapestry needle, insert the needle straight down through the center of the apple, exit through the base, and pull firmly to collapse both poles inward into deep dimples. Knot the sculptured thread securely at the base, then sew a small brown chain-stitch stem and an emerald green leaf directly into the top depression, attaching a silver split ring to the leaf’s stem.
Idea 10: Kawaii Sweet Peach
Read This:
Setup Method
The sweet peach charm pairs soft pastel coloring with subtle surface shaping to replicate the gentle cleft of fresh stone fruits. Using delicate peach or soft coral yarn, this design uses vertical needle indentation to create the characteristic longitudinal seam running down one side of the fruit. A pair of soft mint green leaves decorates the top, providing a pleasant pastel contrast that fits modern aesthetic color schemes. This project teaches crafters how to apply asymmetrical surface sculpting to create organic, non-uniform shapes. The soft contours and warm tones make this charm popular for pastel keychains, decorative phone straps, and spring accessory collections. The compact, rounded shape resists catching on pocket seams or bag linings, ensuring that the charm remains neat and intact during continuous daily use.
Work six single crochet stitches into a magic ring using pale peach cotton yarn, increasing across four rounds until reaching twenty-four stitches. Work five continuous rounds of single crochet to establish the plump, rounded sides of the fruit. Begin decreasing evenly across the next three rounds until six stitches remain, packing the interior with fiberfill until the sphere feels firm and springy. Cinch the remaining stitches closed, leaving a twenty-four-inch tail of peach yarn on your needle. Insert the needle through the bottom closure, bring it up through the top center, and draw the yarn along one exterior side of the sphere. Pull the yarn tail snugly into the crochet fabric to compress a shallow vertical furrow down that single side, anchoring the thread firmly at the base to preserve the peach cleft. Crochet two small mint green leaves using a five-chain foundation sequence, sewing them flat over the top closure alongside a pastel-coordinated ball chain loop.
Preventing Common Beginner Crocheting Errors
The most frequent error when crocheting miniature charms is using a hook that is too large for the chosen yarn weight, which results in loose stitches that expose white internal fiberfill. To maintain a dense, opaque fabric that conceals stuffing, select a hook that is one full millimeter smaller than the size recommended on the yarn label. Another common mistake is uneven stuffing, which causes lumpy surfaces, distorted silhouettes, and misshapen fruit. Avoid inserting large balls of fiberfill at once; instead, build internal volume using marble-sized tufts, packing each piece firmly into the base and sides with the back of a crochet hook. Many beginners also struggle with visible, stepped color transitions that disrupt smooth spiral rounds. Use the invisible color change technique by pulling the new yarn color through the final two loops of the stitch immediately preceding the color shift. Finally, loose finishing tails can unravel under everyday friction when keys or bags are handled. Weave all working ends through internal stitches in multiple directions, securing them with a tiny hidden knot inside the amigurumi body before trimming the thread flush.
Practical Techniques for Professional Finishes
Achieving a clean, high-end look across a collection of crochet fruit charms requires consistent tension and careful finishing habits. Always use a dedicated running stitch marker—such as a contrasting piece of thin thread—to monitor your starting stitch on every continuous spiral round, preventing accidental stitch gains or losses. Master the invisible decrease method, which involves inserting your hook through the front loops only of two consecutive stitches before wrapping the yarn and pulling through. This technique prevents the small gaps and unsightly bumps that standard decreases can leave on curved amigurumi surfaces. When attaching hardware, never secure metal jump rings directly to soft, single-ply yarn loops, as friction will quickly wear through the fibers over time. Instead, crochet a dense, reinforced loop of slip stitches or pass your jump ring through a doubled section of secure stitches to distribute weight evenly. Apply a tiny dot of clear, waterproof fabric glue or clear jewelry cement to internal knots and jump ring seams to prevent hardware from working loose during daily use.
Creative Styling and Accessory Applications
Crochet fruit charms offer versatile styling options that extend well beyond standard keyrings, integrating seamlessly into broader accessory collections. Attach a cluster of coordinating fruits—such as a lemon, strawberry, and cherry pair—to a heavy brass swivel clasp to build an eye-catching statement charm for neutral linen tote bags or canvas backpacks. For home organization, attach individual fruit charms to plain storage baskets or drawer handles, creating a color-coded organizational system for pantries, nurseries, or craft supply bins. Thread several miniature fruits onto a length of natural braided jute cord, spacing them with unfinished wooden beads to build a seasonal fruit garland for kitchen windows, tiered trays, or nursery shelves. In corporate or educational settings, clip petite fruit charms to lanyards, badge reels, or USB drives to personalize everyday work essentials with handmade flair. By adjusting attachment findings—from delicate phone strap cords to heavy-duty carabiners—you can tailor each miniature fruit to match the functional demands of any daily accessory.
Strategic Time Management and Material Planning
Managing your time and materials efficiently allows you to produce crochet charms in high volumes without creative burnout or unnecessary expense. Group your workflow into specialized production stages rather than completing each charm individually from start to finish. Dedicate one crafting session to working all the main fruit bodies, another session to stuffing and closing, and a final session to foliage embroidery and hardware attachment. Sourcing sport-weight mercerized cotton yarn packs containing multiple small skeins provides a broad color spectrum without requiring investment in large individual skeins. Most miniature fruit charms require less than fifteen yards of yarn, making them ideal for using leftover scraps from larger blankets or garment projects. Store prepared findings, clasps, jump rings, and pre-cut embroidery floss in divided plastic hardware boxes to streamline assembly and prevent tangled supplies. Setting up a dedicated, organized workspace cuts overall project times down to roughly thirty to forty-five minutes per charm, supporting steady production for seasonal craft markets or holiday gift preparation.
Creative Expansions and Advanced Variations
Experienced fiber artists can expand upon these core fruit patterns by incorporating new textures, alternative fiber blends, and mixed-media accents. Experiment with varying yarn weights—such as fingering-weight crochet thread for delicate jewelry earrings, or chunky chenille yarn to upscale pocket charms into plush desk cushions. Introduce subtle surface shading by applying dry artist pastels or powdered blush to the cheeks of peaches and apples using a soft blending brush, adding realistic botanical warmth to simple cotton stitches. Incorporate functional accessories into the fruit bodies, such as sewing miniature jingle bells inside the central stuffing or adding drops of essential oils to unfinished wooden accent beads for natural fragrance. You can also explore cross-category hybrid designs, such as transforming hollowed fruit forms into functional coin pouches, measuring tape covers, or air-plant hanging pods. Mastering fundamental miniature fruit construction provides a flexible foundation that encourages endless personal adaptation, artistic experimentation, and functional accessory design.