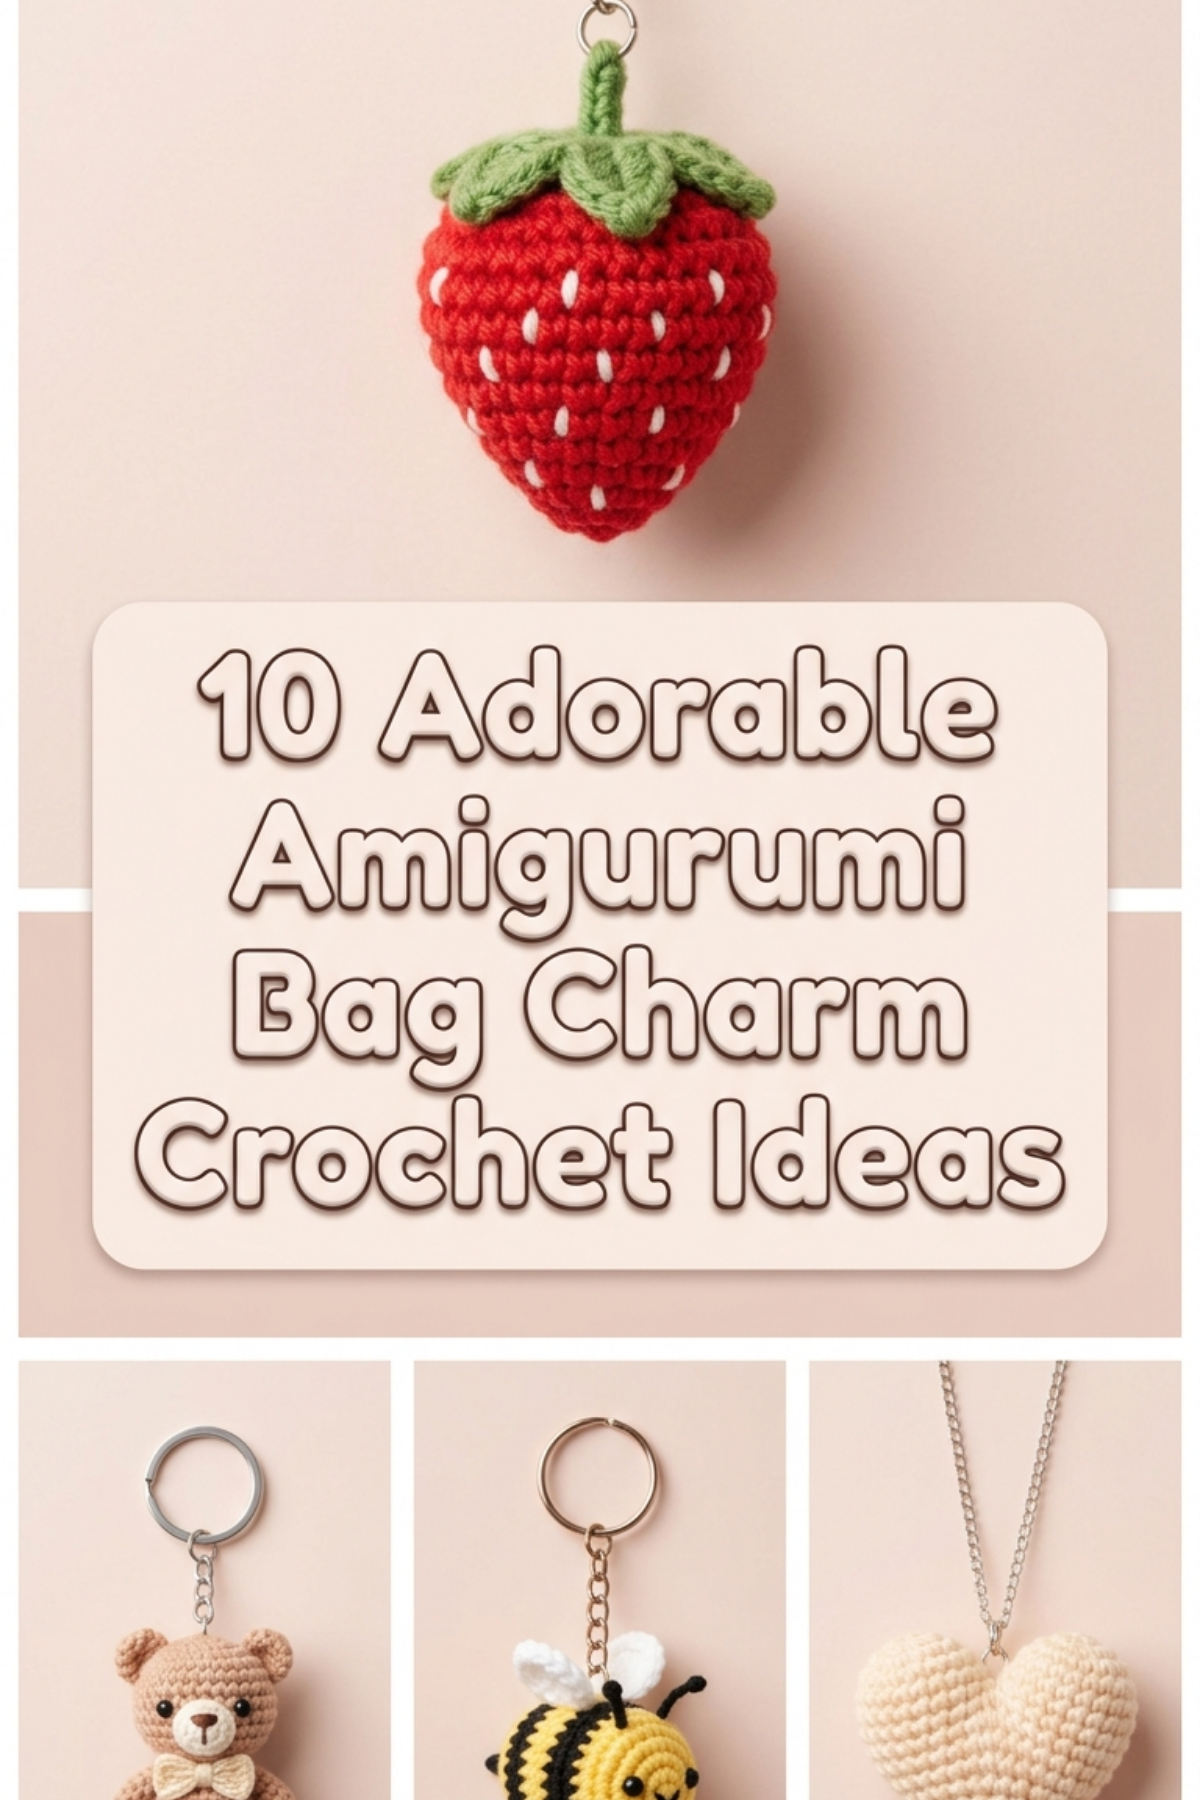
Amigurumi bag charms represent a growing intersection of functional fashion and tactile craftsmanship across modern digital design boards. These miniature crocheted accessories allow makers to personalize everyday totes, backpacks, and cross-body purses with bespoke, three-dimensional textile art. This comprehensive guide details ten distinct miniature crochet projects tailored specifically for personal accessorizing and gifting. Readers will learn the structural mechanics of creating durable, compact yarn figures, the essential hardware required to convert plush sculptures into secure charms, and the fundamental techniques needed to maintain balanced tension. Crocheting miniature charms offers an accessible entry point for crafters seeking high-impact creative ideas that require minimal material investments and short time commitments. By examining a curated sequence of designs ranging from botanical motifs to stylized animal figures, this article establishes clear technical steps for assembling professional-grade accessories. Understanding stitch density, proportional shaping, and structural reinforcement ensures that every completed piece withstands the wear and friction associated with daily travel. Whether you want to refresh a plain handbag or explore modern design principles using yarn scraps, this tutorial provides the foundational blueprint for executing durable, charming, and aesthetically balanced crochet accessories.
Modern style boards feature an abundance of miniature textile charms due to a shift toward tactile personalization and bespoke self-expression in everyday fashion. Amigurumi bag charms offer practical value because they serve as recognizable luggage tags, zipper pulls, and personalized markers for utilitarian items. The design relevance of these accessories stems from the juxtaposition of soft yarn textures against structured leather, heavy canvas, and metallic hardware. Enthusiasts gravitate toward these projects because they offer an achievable DIY experience with immediate visual gratification. A standard bag charm requires only a fraction of the time and yarn demanded by full-scale garments or plush toys, making it an exceptionally beginner friendly endeavor. Digital lifestyle communities actively circulate these miniature designs because they reflect minimalist style through compact, refined profiles rather than overwhelming dimensions. The accessibility of basic crochet stitches, combined with low hardware costs, allows anyone to test trending ideas without financial risk. By blending traditional yarn craft with contemporary aesthetic sensibilities, crocheted charms provide a versatile platform for makers to showcase handmade flair on mass-produced accessories.
Proper preparation directly determines the durability and visual consistency of a miniature amigurumi charm. The core materials consist of mercerized sport-weight or lightweight cotton yarn, which prevents excessive pilling and holds distinct stitch definition under abrasive conditions. A smaller ergonomic hook, typically measuring between two millimeters and two and a half millimeters, is necessary to create a dense fabric that conceals internal polyester stuffing. Essential assembly tools include a bent-tip tapestry needle, stainless steel dressmaker pins for positioning limbs, sharp embroidery scissors, locking stitch markers, and miniature split rings or lobster clasps. Planning considerations begin with structural weight; overly dense charms drag down delicate purse fabrics, whereas excessively loose stitching causes fiber fill to leak over time. Makers must also test hardware attachment points before finishing individual components to ensure the internal yarn fibers support the metal clasps securely. Organizing color palettes beforehand ensures visual harmony across multi-part constructions like fruit leaves or animal limbs. Taking time to select firm, washable polyester fiberfill prevents the finished project from collapsing when exposed to moisture or repeated compression during daily commutes.
The Miniature Ripe Strawberry Charm
Step-by-Step Guide
The miniature strawberry design relies on inverted conical shaping to achieve a balanced, recognizable silhouette suitable for lightweight summer bags. This project uses vibrant crimson yarn paired with an olive or sage crown to provide a natural botanical contrast. The compact dimensions ensure that the finished piece hangs gracefully without snagging on purse zippers or pocket flaps. Small embroidered seed stitches, executed in either pale yellow or natural ecru cotton thread, add textural depth across the entire surface of the fruit. The tapered bottom edge provides structural integrity, resisting flattening when the charm rests against firm surfaces. Utilizing a dense single crochet stitch profile prevents the white stuffing from showing through the red exterior walls. The small scale makes it an ideal scrap-busting exercise for leftover cotton skeins while yielding a polished, giftable accessory. Incorporating an integrated hanging loop directly into the leafy calyx creates a seamless transition between the organic yarn elements and the metallic swivel clasp.

Begin by working six single crochet stitches into an adjustable magic ring using red cotton yarn, placing a locking stitch marker to track continuous spiral rounds. Increase evenly across alternate rounds to expand the conical base until reaching twenty-four stitches at the widest point of the berry body. Maintain this circumference for three plain rounds to establish vertical height before introducing gradual decreases toward the upper opening. Firmly pack the interior with small clusters of polyester stuffing, using the back of your crochet hook to push the fibers into the lower tip. Thread pale yellow thread onto a tapestry needle and work subtle, staggered vertical seed stitches across the surface, pulling the tension snug to indent the yarn slightly. Transition to green yarn to crochet a five-pointed calyx by chaining outward from a central circular base and slip stitching back down each leafy point. Fasten the finished calyx securely across the gathered top opening of the berry, inserting a small metallic jump ring through the central leafy junction to finish the charm.

The Kawaii Onigiri Rice Triangle
How to Create
The onigiri charm showcases clean minimalist style by adapting the geometry of a traditional Japanese rice ball into a soft, pocket-sized bag companion. White mercerized yarn forms a stark, clean triangular canvas accented by a single dark charcoal or black textured strip representing toasted seaweed. This project demonstrates how subtle shifts in stitch placement generate distinct corners without requiring complex internal armatures. The flat front and back planes produce a modern design aesthetic that complements structured leather backpacks and simple cotton market totes. Gentle facial detailing, such as tiny safety eyes set flush against the fabric or fine line embroidery, gives the food motif an approachable character. The proportional width of the dark nori wrapper grounds the brightness of the white body, establishing a balanced focal point. Because the geometric lines are pronounced, maintaining uniform tension throughout the continuous rounds is vital to prevent warping along the outer edges.
Start by chaining two and working three single crochet stitches into the first chain, turning with a turning chain to build a flat triangular panel through methodical edge increases. Once the base measures approximately two inches across, duplicate the process to yield an identical second triangle for the reverse side. Join black cotton yarn across a central six-stitch span along the lower border of each piece, working four short rows to establish the wraps before working single crochets around the exterior perimeter. As you assemble the perimeter by slip stitching the two mirrored triangles together, insert a narrow continuous strip of stuffing along the interior edges to maintain dimensional plumpness without bulging the center. Secure six-millimeter black safety eyes between rows four and five of the front face, fixing the washers tightly inside before sealing the final corner. Attach a silver lobster clasp to the uppermost peak of the triangle using reinforced double-strand whip stitches to ensure complete load-bearing resilience during everyday carry.

The Tiny Sunburst Honeybee
Setup Method
The sunburst honeybee balances vivid alternating stripes with gossamer wings, functioning as an uplifting accent piece for casual canvas totes. Alternating bands of warm mustard yellow and dark slate brown create rhythmic graphic interest around a rounded cylindrical torso. The diminutive size prevents the charm from feeling cumbersome while retaining adequate surface area for tactile stitching. Translucent or pale gray-white wings crocheted from ultra-fine lace yarn are positioned close to the head to preserve a tight, cohesive silhouette. This design relies on neat, jogless color transitions to keep the underside and sides of the bee looking refined from every angle. Small proportions emphasize the roundness of the creature, yielding a cheerful aesthetic that appeals to enthusiasts of modern cottage-inspired fashion. Reinforcing the upper suspension point ensures the bee hangs at a natural forward-facing angle when clipped onto purse hardware.

Construct the head and body in one continuous piece, initiating four single crochet stitches in an adjustable circle using rich mustard yellow yarn. Expand symmetrically over three rounds until reaching eighteen stitches, shifting cleanly to dark brown yarn for two rounds, followed by two rounds of yellow. Execute color shifts by completing the final yarn over of the preceding stitch with the incoming color, keeping internal floats loose to preserve fabric elasticity. Insert miniature safety eyes between rounds two and three, backfilling the compact head firmly with clean polyester pellets or wool stuffing to establish weight. Taper the back end with consecutive invisible decreases down to six stitches, then thread the tail through front loops to draw the posterior closed cleanly. Fabricate two small circular wing discs by chaining four and working double crochet clusters into the initial loop, flattening them against the upper body before securing them with a concealed backstitch. Mount a swivel clasp directly above the wings using heavy-duty thread.

The Minimalist Succulent Rosette
How to Make
The minimalist succulent rosette interprets desert botanical forms through concentric layers of structured, pointed leaves, yielding an architectural bag ornament. Muted sage, eucalyptus, or dusty seafoam green tones emphasize organic geometry, offering an understated alternative to figurative novelty charms. The overlapping petal layers create dynamic shadows and physical depth, maintaining structural interest even without contrasting color changes. This project relies on post stitches and selective front-loop working methods to build graduated tiers directly upon a central domed foundation. The resulting low-profile disc rests smoothly against flat purse panels without catching on stray threads or garment knits. The natural elegance of the succulent motif pairs effectively with neutral linen travel bags and earth-toned leather totes. Its lack of delicate external limbs makes it exceptionally durable, surviving rigorous daily use without losing its fundamental form.

Begin by crocheting an internal hemisphere using sage green yarn, starting with six single crochet stitches in an adjustable ring and expanding to eighteen stitches over three rounds. Fasten off the base structure, leaving the remaining front loops across preceding rows exposed to serve as attachment points for the leaf layers. Working from the center outward, anchor green yarn into the interior front loops, chaining three and working two half-double crochets, a picot point, and a slip stitch to form the smallest central leaves. Progress downward to the subsequent rows, systematically increasing the stitch heights from half-double crochets to double crochets to enlarge the outer petal circumference. Once all three tiers of foliage are completed, gently press the fabric with steam or your fingertips to mold each leafy tier outward in a cupped arrangement. Finish the project by stitching a flat circular backing panel to the underside, embedding a bronze split ring securely beneath the base petals to provide a resilient mounting loop.

The Sleepy Forest Acorn
Execution Process
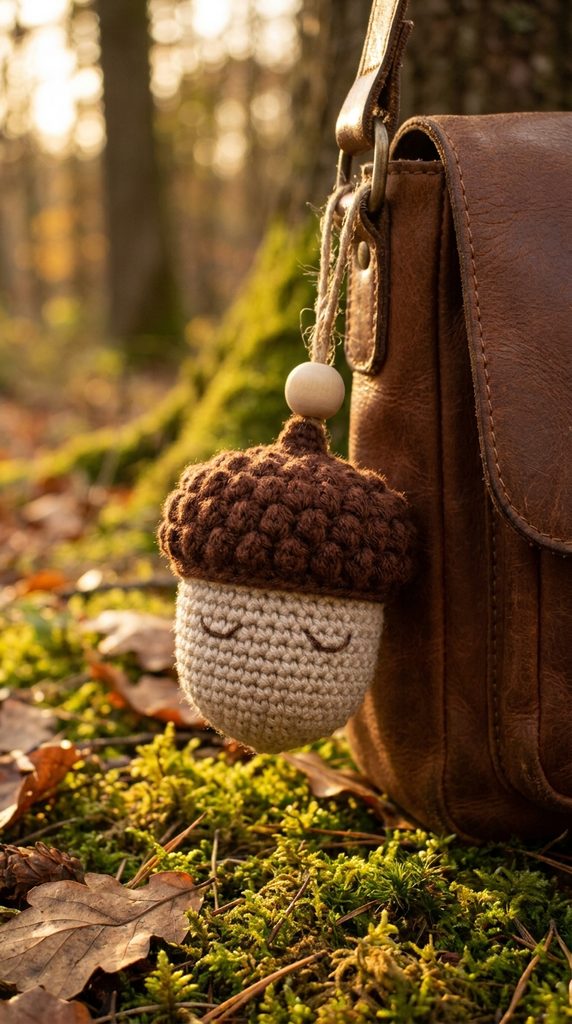
The sleepy forest acorn combines rustic autumnal themes with clean amigurumi engineering, utilizing contrasting textures to replicate natural botanical details. A smooth, rounded base worked in pale oatmeal yarn sits beneath a deeply textured cap rendered in deep umber or chestnut brown. The tactile appeal of this design centers on the structural contrast between the plain single crochet base and the raised textured cap. Using relief stitches or bobbles on the upper dome creates a tactile grip and visual richness reminiscent of natural woodland finds. A subtle embroidered closed-eye arc along the front face introduces an understated character element without compromising the organic simplicity of the design. The compact, oblong shape nestles conveniently beside keys or internal pockets, serving as an unobtrusive yet distinctive identifier. Natural wooden beads or leather cording can be integrated into the suspension hardware to complement the woodland palette.
Commence with the pale oatmeal nut base by working six single crochet stitches into a magic loop, increasing to sixteen stitches across three rounds to establish a soft egg-shaped profile. Work four vertical rows without modification, then taper the neck inward using two balanced decrease stitches before lightly stuffing the hollow shell. Switch to the darker chestnut yarn to fabricate the separate cap, starting from a tiny three-stitch stem loop and expanding into a dome using alternating slip stitches and half-double crochet bobble clusters. The resulting raised bumps simulate the rough, scaled texture of an organic acorn cap while masking yarn transitions. Position the cap directly over the open rim of the nut base, using sewing pins to hold the alignment steady while executing small invisible whip stitches along the perimeter. Anchor an antique brass key ring to the central top stem using reinforced running stitches hidden inside the hollow cap interior.
The Pastel Bobble Cupcake
Step-by-Step Guide
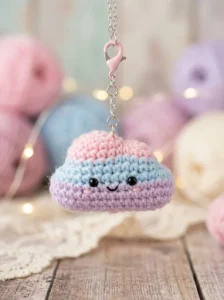
The pastel bobble cupcake charm introduces playful, bakery-inspired craftsmanship to totes and backpacks through stacked textural geometry. A structured, ribbed lower cup crafted in biscuit-tan yarn mimics a fluted baking paper, establishing a solid foundation for the whimsical frosting dome. The upper confection utilizes alternating pastel shades, such as lavender, mint, or pale peach, accented with raised bobble stitches that evoke piped buttercream swirls. This vertical construction creates an eye-catching three-dimensional silhouette that stands out prominently against dark fabric bags. The balanced proportions prevent the cupcake from leaning awkwardly when suspended from a metal carabiner. Hand-stitched French knots scattered across the frosting simulate micro-confectionery sprinkles, adding pinpoint color variance to the top surface. The dense composition of the ribbed base ensures that the charm maintains its upright cylindrical profile throughout prolonged usage.
Form the lower baking cup by working a narrow strip of back-loop-only single crochets in tan yarn for sixteen rows, then slip stitching the short ends together to create a fluted cylinder. Gather the bottom edge tightly using a running stitch with a tapestry needle, securing the knot internally before packing the base with firm polyester fiber. Transition to the frosting section by joining pastel pink yarn around the upper ribbed margin, working continuous rounds enriched with three-stitch bobbles spaced evenly across every other row. As the frosting dome converges toward the center, insert additional stuffing to preserve the round top, decreasing every three stitches until only six stitches remain. For the finishing cherry accent, crochet a miniature sphere of three rounds using deep red thread, securing it directly over the gathered closure. Secure a silver bead-chain loop or swivel clip beneath the red cherry base, running the anchor threads entirely through the core of the charm for maximum durability.

The Geometric Pastel Gemstone
How to Create
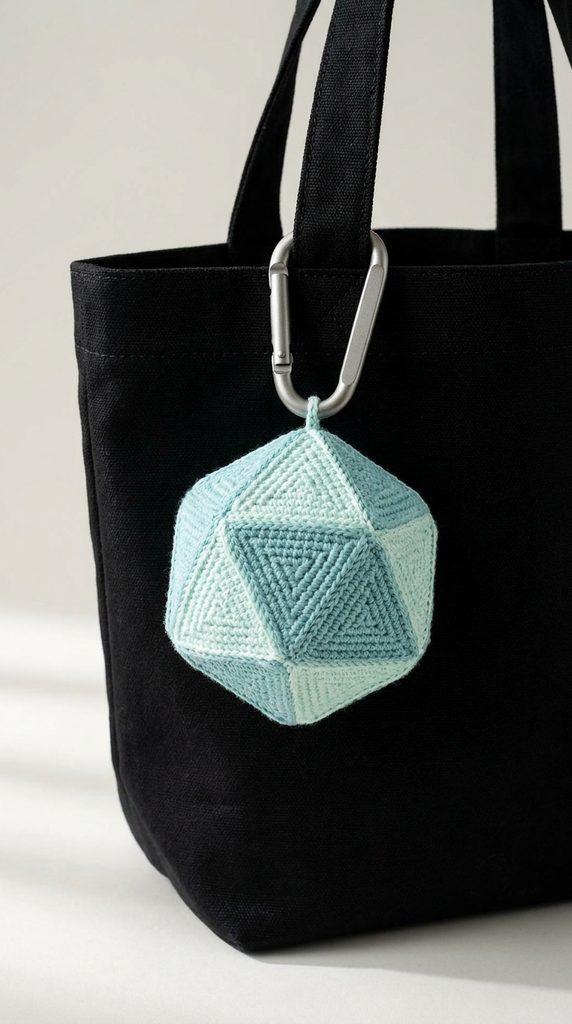
The geometric pastel gemstone charm relies on sharp angled facets and tight decrease angles to build a crystalline amigurumi form. Crocheted in soft mineral shades such as sea-glass mint, soft rose, or icy periwinkle, this design provides a striking modern aesthetic characterized by crisp lines rather than rounded forms. The angular shifts are produced through methodical decreases aligned precisely along designated structural ridges. This faceted surface catches natural light differently across each plane, producing subtle tonal variations from a single monochromatic skein. The gemstone charm fits comfortably within contemporary minimalist accessories, appealing to crafters who favor clean polygonal lines over traditional character figures. Because there are no attached limbs or delicate extremities, this design offers superior structural longevity when subjected to friction against heavy canvas bags. The faceted shell also provides an excellent opportunity to master the invisible decrease technique under tight tension conditions.
Begin at the widest girdle plane of the gemstone by chaining twenty-four stitches, joining in a ring without twisting, and working two plain rounds of single crochet in soft aqua cotton. Begin the upper crown facets by executing pairs of decreases separated by four regular stitches, systematically repeating this reduction over four successive rounds to create four defined planes converging toward a flat table facet. Thread your yarn tail through the remaining eight top stitches, drawing the aperture completely closed and weaving the end securely on the inside. Invert your working angle to tackle the lower pavilion, joining yarn at the starting chain and decreasing rapidly every two stitches to generate a steep, inverted pyramid. Stuff the interior firmly with dense clusters of batting, ensuring the angular corners remain packed and distinct as the lower tip narrows down to four stitches. Close the tip neatly, then loop a flat metal jump ring through the reinforced top plane to connect an industrial-style key carabiner.
The Whimsical Daisy Blossom
Setup Method
The whimsical daisy blossom charm incorporates floral design into bag styling through flat, overlapping petals surrounding a raised central disc. Bright canary yellow yarn forms a tactile center, ringed by creamy white petals that maintain their flattened oval structure through varying stitch heights. The two-sided construction encloses all raw yarn tails internally, ensuring that the flower appears polished regardless of how it spins when hung from a bag handle. This cheerful botanical accent introduces an organic, sunlit aesthetic to structured work bags and monochrome backpacks. The flat profile rests comfortably against fabrics, preventing unwanted bulk while ensuring the charm remains fully visible. Subtle embroidered smiling expressions on the yellow face add a charming, playful personality while keeping the lines clean and uncluttered. Crafters can also customize the petal palette using vibrant ombré or pastel shades to coordinate with specific seasonal bag designs.
Initiate the central floral hub by working six single crochet stitches into a magic ring using yellow sport-weight cotton, expanding symmetrically to twelve stitches across two rounds. Produce a matching second yellow disc for the back, setting it aside while embroidering subtle sleeping eyes or simple minimalist line features across the front face. Align the two discs with wrong sides facing together, joining them by working a border round of single crochets that catches both loops of both discs simultaneously, inserting a light pinch of stuffing before finishing the circle. Anchor white yarn in any exterior loop of the joined disc, chaining five, working a single crochet, two double crochets, and a slip stitch back down the chain to fashion the first elongated petal. Repeat this sequence into each perimeter stitch around the entire yellow core until twelve balanced petals fan outward evenly. Attach a polished gold split ring through the tip of an uppermost petal to connect your chosen clasp hardware.

The Playful Striped Mushroom Cap
How to Make
The playful striped mushroom cap captures whimsical woodland aesthetics through contrasting concentric stripes and a sturdy, supportive white stalk. This design features a wide, domed parasol worked in rich terracotta or brick red yarn accented by thin, wavy bands of natural unbleached cotton. The mushroom stalk functions as an ideal balancing anchor, giving the piece a grounded vertical presence when suspended from bag loops. The flared underside of the cap is finished with a flat gill plate, ensuring that the silhouette holds its distinct umbrella shape without sagging over time. This project relies on disciplined color management and sharp stitch definition to evoke a rustic, handcrafted character. The smooth transition from the curved dome to the textured gill plate demonstrates classic amigurumi sculpting methods. Hanging beside brass hardware, this organic woodland design brings an earthy, artisan feel to everyday leather and canvas bags.
Construct the mushroom cap starting from the top peak, working six single crochet stitches in terracotta yarn and systematically increasing outward through regular increments of six stitches per round. Introduce thin, single-round stripes of ecru yarn at rounds four and seven, carrying the main color loosely along the inside to avoid bulky knots. Once the cap reaches thirty stitches in diameter, switch to working back-loop-only stitches for one round to establish the crisp downward lip of the parasol edge. Crochet an independent circular gill base in pale ecru, stopping at thirty stitches, and assemble the two components together using a round of tight single crochets along the rim while packing the upper dome with fiberfill. Build the thick lower stalk outward from the central gill ring, crocheting six vertical rounds of twelve stitches before tapering outward slightly at the base to suggest a rooted mushroom foot. Secure a vintage bronze lobster clasp to the top crown using a reinforced double loop of cord.

The Stylized Sloth Face
Execution Process
The stylized sloth face charm encapsulates relaxed charm within an ultra-compact circular portrait profile that hangs cleanly from purse straps. Soft heathered taupe yarn forms the foundational disc, accented by an applied mask patch rendered in off-white and dark chocolate brown. By focusing purely on the recognizable facial markings of the sloth rather than a complex multi-limbed body, this project retains a sleek, minimalist profile. The low-profile coin shape fits flatly against tote panels, minimizing friction and preventing the piece from snagging on passing objects during a commute. Subtle surface embroidery for the nose and smiling mouth conveys personality through a few simple stitches. This design offers an ideal template for experimenting with layered crochet appliqués and mixed-fiber textures. The resulting accessory functions as a comforting, tactile touchstone that adds gentle handcrafted humor to utilitarian travel bags.
Crochet the main circular backing disc using heathered taupe yarn, working six single crochet stitches into a magic ring and expanding evenly across four rounds to reach twenty-four stitches. Form the front face plate identically, stopping at twenty-four stitches, and set it aside while constructing the distinctive eye patches using dark brown embroidery floss or fine fingering yarn. For each eye patch, chain four, work three slip stitches along the chain, and fasten off, leaving long yarn tails to anchor them symmetrically across the cream-colored snout area. Fix miniature three-millimeter black safety eyes directly through the dark patches and the front taupe disc, pressing the locking washers down firmly on the reverse side. Stitch a small downward-curving triangular nose between the eyes using matte black thread, then join the front and back taupe discs using a clean slip-stitch border around the outer edge. Thread a flat split key ring through two stitches at the top edge to attach an antique bronze swivel clasp.

Common Beginner Mistakes and How to Avoid Them
The most frequent challenge encountered by newcomers to miniature amigurumi is using a crochet hook that is too large for the chosen yarn weight. When a hook exceeds the optimal diameter, the resulting stitches loosen, allowing the pale polyester stuffing to show through the dark or vibrant exterior fabric. To correct this issue, always downsize your hook by at least one full millimeter relative to the manufacturer recommendation printed on the yarn label. Another persistent error involves losing track of the initial stitch when working in continuous spirals, which distorts structural shaping and misaligns features. Using a dedicated locking stitch marker or a contrasting thread runner on the first stitch of every round prevents unexpected asymmetry. Inconsistent internal stuffing density also causes problems for beginners; packing fiber fill too loosely causes the charm to dent, while overstuffing stretches the stitches open permanently. Crafters should add small, teased tufts of stuffing gradually, smoothing the edges against the internal walls to build an even, resilient core. Finally, failing to knot and anchor facial embroidery threads internally can lead to unraveling after light handling. Securing every yarn tail with multiple split-stitch knots inside the cavity before final closure prevents detailing from shifting over time.
Practical Tips for Better Results
Achieving a clean, professional finish on miniature amigurumi bag charms requires thoughtful attention to stitch architecture and finishing techniques. Employing the invisible decrease method instead of the standard single-crochet-two-together technique eliminates unsightly ridges, resulting in a smooth, uniform surface across tapered sections. When working continuous color transitions, finish the final pull-through of the preceding stitch with the new yarn color to keep stripe boundaries sharp and level. Selecting mercerized cotton yarn over standard acrylic provides superior stitch definition, enhanced structural stability, and better natural resistance to daily friction and fiber pilling. It is also beneficial to use a metal tapestry needle with a slight blunt curve, which allows you to weave yarn ends through dense stuffing cores without piercing external fibers. Lightly steaming finished cotton components with a handheld iron before attaching metal hardware relaxes the yarn twist, settling uneven stitches without crushing dimensional contours. Taking extra time to pin all multi-part attachments securely with pearl-headed pins before sewing ensures balanced alignment and symmetry across the entire piece. Finally, reinforcing the top anchor loop with double-stranded embroidery floss or high-strength bonded nylon thread guarantees that the charm remains safely attached to bags through daily movement.
Styling, Presentation, or Organization Ideas
Amigurumi bag charms offer versatile styling options that go beyond basic keychains, enhancing a wide variety of personal accessories with bespoke, artisanal character. Attaching a small, vibrant charm like the ripe strawberry to the handle base of a natural straw market tote creates a balanced, warm-weather accent. For structured leather briefcases or formal minimalist shoulder bags, neutral geometric pieces like the pastel gemstone provide an understated, modern touch without clashing with tailored attire. When pairing charms with everyday nylon backpacks, combine a stylized animal face with a utility carabiner to create a balanced mix of functional hardware and soft, tactile fiber art. These miniature projects can also be grouped systematically on key rings or hung at varying chain lengths to produce dynamic clustered arrangements on larger duffel bags. For home decor and personal storage organization, attach unique amigurumi food motifs to specific craft pouches, cosmetic kits, or travel organizers to serve as visual categorization tags. If offering finished charms as handmade gifts, pin them securely against heavy-weight kraft paper presentation cards stamped with handwritten fiber care notes and fiber content details. This elevated, boutique-inspired presentation highlights the careful craftsmanship behind the work, transforming simple yarn projects into cherished keepsakes.
Budget and Time Planning
Miniature crochet projects are exceptionally cost-effective, allowing makers to complete satisfying creative projects with minimal financial investment. Because each amigurumi charm consumes between ten and twenty-five grams of lightweight yarn, a single standard hundred-gram skein of mercerized cotton can yield four to six separate designs. Crafters can optimize their budget by utilizing remnant yarn collections, repurposing colorful leftovers from larger garment or blanket endeavors into coordinated miniature accessories. Purchasing multi-packs of essential hardware, such as swivel lobster clasps, split rings, and mini jump rings, directly lowers the unit assembly cost to a fraction of retail prices. From a time-management perspective, most charm designs require between forty-five minutes and two hours of focused work from start to finish. Beginners can streamline their assembly by batching similar steps, such as crocheting all primary base shapes during an evening session before moving on to detailing and hardware attachment the following day. Setting up a dedicated, compact project pouch containing a small pair of thread snips, a hook, two stitch markers, and small yarn balls allows you to crochet during daily commutes or brief breaks. This efficient, low-barrier workflow makes bag charms an ideal option for craft fair preparation or holiday gift production.
Creative Expansion and Advanced Inspiration
Once you master foundational amigurumi shaping, you can expand these miniature designs into more complex, multi-textured creative projects. Consider introducing mixed-media elements, such as adding polished natural wood beads, soft leather hanging straps, or delicate brass bell charms into the top suspension cord. Advanced crafters can experiment with surface embellishments, using fine metallic embroidery thread to add delicate gold or silver accents to simple leaves, wings, or geometric planes. You can also explore scale variations by switching from sport-weight cotton down to fine laceweight thread and a micro-crochet hook, transforming standard bag charms into miniature jewelry pendants or delicate zipper pulls. Alternatively, incorporating textured novelty yarns, like bouclé or brushed alpaca, introduces rich tactile contrast when combined with smooth mercerized cotton surfaces. Another compelling creative path involves designing cohesive multi-charm clusters, such as pairing the miniature forest acorn with an embroidered oak leaf and a tiny toadstool onto a single tiered key ring. By altering facial expressions, varying your color palettes, and combining different finishing techniques, you can continually adapt these foundational patterns into fresh, bespoke accessories tailored to any personal style or seasonal collection.