Amigurumi loveys serve as gentle security blankets that combine a soft plush character with a miniature fabric or crochet blanket. These hybrid comfort items provide sensory stimulation and emotional security for infants while offering crafters a rewarding, beginner friendly creative project. This comprehensive tutorial breaks down the essential construction techniques, safety standards, and styling approaches required to craft durable security blankets from home. Readers will discover ten distinct animal and fantasy characters paired with various blanket shapes, from classic granny squares to multi-point starbursts. Learning to construct an amigurumi lovey allows makers to control fabric purity, tension stability, and assembly durability far beyond commercial nursery offerings. The projects featured throughout this guide require standard crochet supplies and straightforward stitches, ensuring predictable results for novices and seasoned crafters alike. Mastering these foundational methods allows makers to craft tailored baby shower gifts, nursery decor accents, and functional family heirlooms with complete confidence in structural integrity and child safety.
Why Handcrafted Security Blankets Remain Popular
Handcrafted security blankets continue to dominate modern Pinterest ideas because they balance tactile warmth with contemporary nursery aesthetics. Contemporary parents favor artisanal baby accessories made from breathable natural fibers rather than synthetic, mass-produced nursery goods. These small comfort blankets deliver practical sensory stimulation through varying textures, pairing tight three-dimensional crochet stitches on the amigurumi head with the drapey fabric of the blanket base. The compact footprint makes them exceptionally portable, fitting easily into strollers, diaper bags, and car seats without dragging across outdoor pavements. From a crafting standpoint, loveys represent an accessible DIY undertaking because the small blanket portion works up significantly faster than full-sized crib afghans. Crafters can complete a personalized, professional-looking baby gift within several evenings while practicing essential stitch patterns. The enduring popularity of these projects stems from their versatility, functioning seamlessly as developmental soothing aids, charming nursery room accents, and cherished childhood keepsakes.
Essential Supplies and Initial Project Setup
Successful amigurumi construction relies on selecting child-safe materials, ergonomic tools, and proper workflow preparation. Choose tightly spun worsted-weight cotton or bamboo yarn blends that resist pilling, withstand frequent machine washing, and minimize lint accumulation. Match the yarn weight to two distinct crochet hook sizes: a smaller hook measuring 2.5 mm to 3.25 mm for the dense amigurumi head, and a larger hook measuring 4.0 mm to 5.0 mm to produce a flexible, supple blanket base. Essential notions include blunt metal tapestry needles, removable locking stitch markers, hypoallergenic polyester fiberfill, and black cotton embroidery floss for safety-compliant facial detailing. Prepare your workspace by washing hands thoroughly and setting up a clean work area free of stray sewing pins or loose fibers. Pre-wash yarn swatches if combining high-contrast colors like navy and cream to confirm colorfastness before stitching. Outline your production order systematically by completing the head, ears, and limbs before beginning the blanket, ensuring all attachment points are prepared for final assembly.
1. Slumbering Woodland Fawn Security Blanket
Execution Process
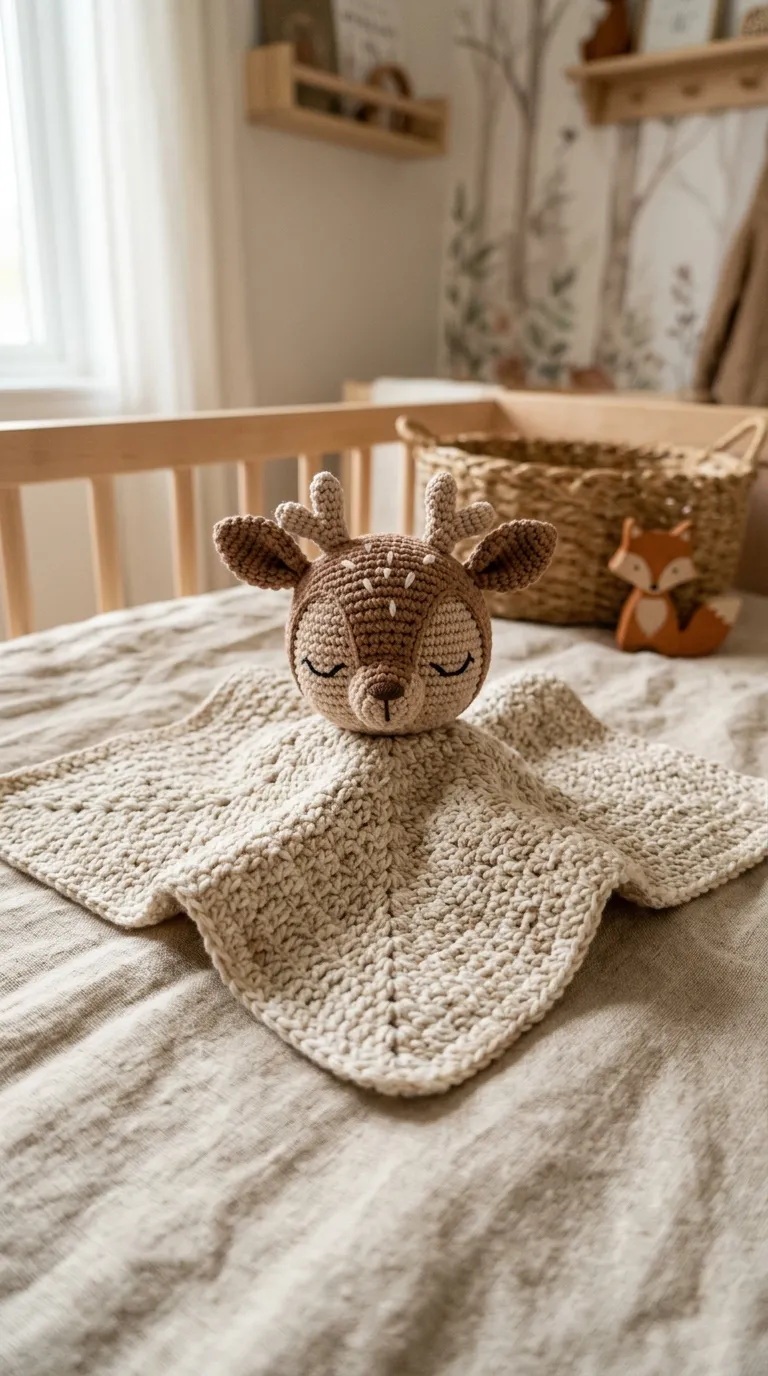
The slumbering woodland fawn lovey introduces a gentle forest aesthetic using soft fawn-brown, ivory, and taupe color palettes. The design features a smooth spherical head with elongated, slightly curved ears and miniature upright antlers that provide distinct tactile points for grasping fingers. Contrasting white spots stitched across the forehead and back of the head provide visual charm while maintaining a flat, snag-free surface. Paired with a muted cream or oatmeal granny square blanket, the fawn evokes classic storybook charm appropriate for gender-neutral woodland nurseries. The low-profile snout features a simple inverted triangle nose worked with flat embroidery floss to keep the surface soft against sensitive skin. This project establishes fundamental amigurumi skills, requiring basic single crochet increases and invisible decreases to create a smooth, spherical base that holds its structure reliably against regular infant handling.
Begin by working the fawn head in continuous spiral rounds using a 3.0 mm hook and brown cotton yarn. Form a magic ring, working six single crochet stitches into the center, and increase evenly over subsequent rounds until reaching thirty-six stitches. Work six even rounds to build cranial height, lightly stuffing the cavity with firm polyester fiberfill as the sphere progresses. Embroider closed, downward-curving sleeping eye arcs using three strands of black embroidery thread across the seventh round, spaced five stitches apart. Decrease the neck circumference down to twelve stitches, fasten off, and leave an eighteen-inch yarn tail for attachment. Work two inner ears, two outer ears, and two miniature branched antlers separately using tight single crochet rounds. Whipstitch the ears and antlers securely to the top cranial curve. Finally, crochet a fifteen-inch square moss-stitch blanket in cream yarn, securing the fawn head firmly to the exact center junction using your long yarn tail.
2. Drowsy Bunny Starburst Comfort Blanket
Read This:

Setup Method
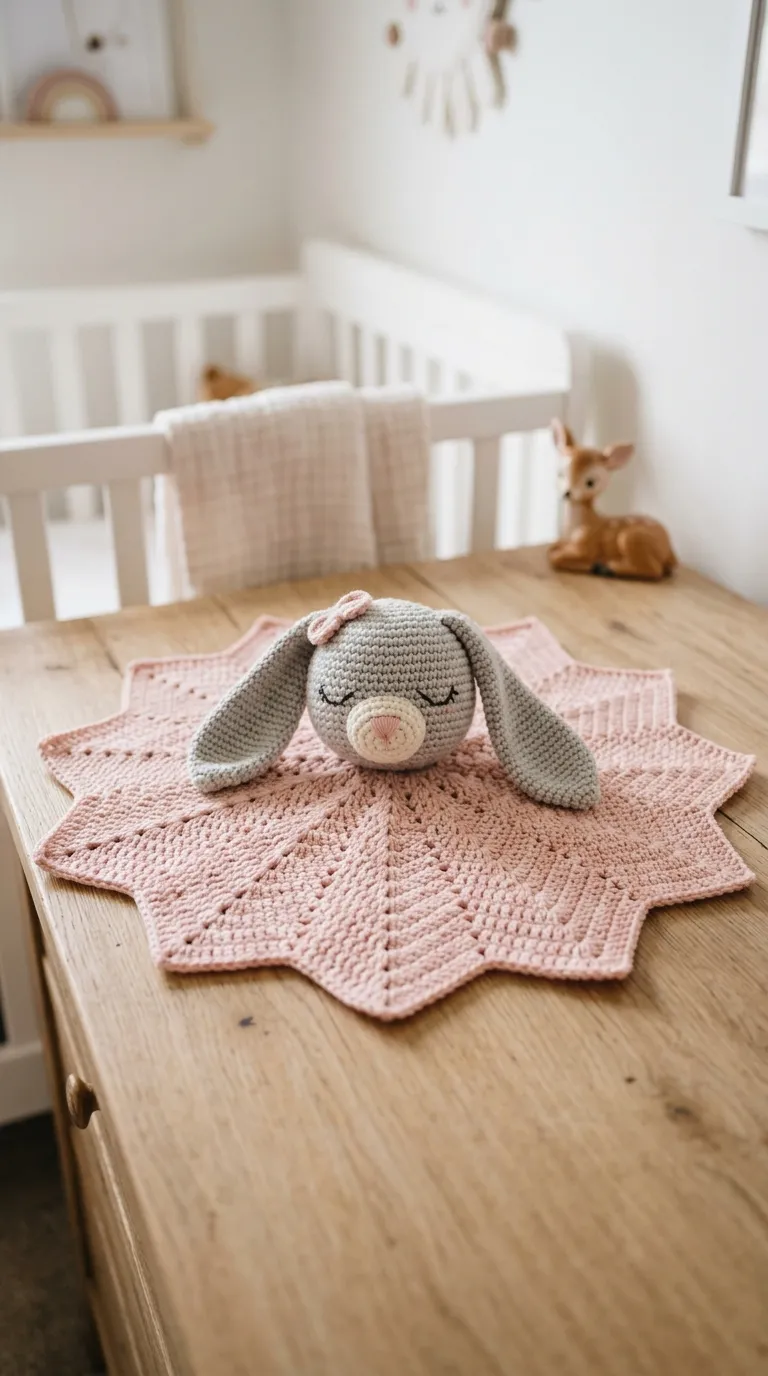
The drowsy bunny starburst lovey blends traditional rabbit ears with a flowing twelve-point starburst blanket foundation. The long, floppy ears drape naturally over the edges of the starburst blanket, encouraging infants to grasp and fiddle with soft textile edges during naptime. Using pale dove gray or muted rose blush for the rabbit creates an understated, modern design that complements minimalist nursery spaces. The starburst blanket radiates outward from the center, using clustered double crochet groups to create fluid ripples that lay flat against changing tables or lap surfaces. The bunny head remains relatively small in proportion to the ears, creating an endearing, top-heavy profile that rests comfortably against the chest. The combination of dense, firm stitches on the rabbit face and the flexible, open structure of the multi-point blanket delivers an engaging sensory contrast for developing hands.
Using pale gray sport-weight yarn and a 2.75 mm crochet hook, start the bunny head with six single crochet stitches in a magic adjustable loop. Increase systematically in rounds to forty-two stitches, insert a locking marker, and complete eight regular rounds without stitch changes. Embroider sleeping crescents between rounds eleven and twelve using charcoal embroidery thread. Crochet two elongated ear tubes measuring twenty rounds in length without stuffing them, allowing the flattened fabric to bend easily. Pinch the base of each ear together and stitch them to rounds four and five of the head. Decrease the base of the head gradually, stuffing the core with hypoallergenic batting until firm. Shift to a 4.5 mm hook and a coordinating blush pink yarn to work the blanket base. Form a twelve-pointed star using radiating double crochet clusters, expanding outward for eighteen rounds until the blanket measures eighteen inches point-to-point. Anchor the completed bunny head through the center hole of the starburst using double-knotted whipstitches.
3. Playful Honey Bear Hexagon Comforter
How to Make
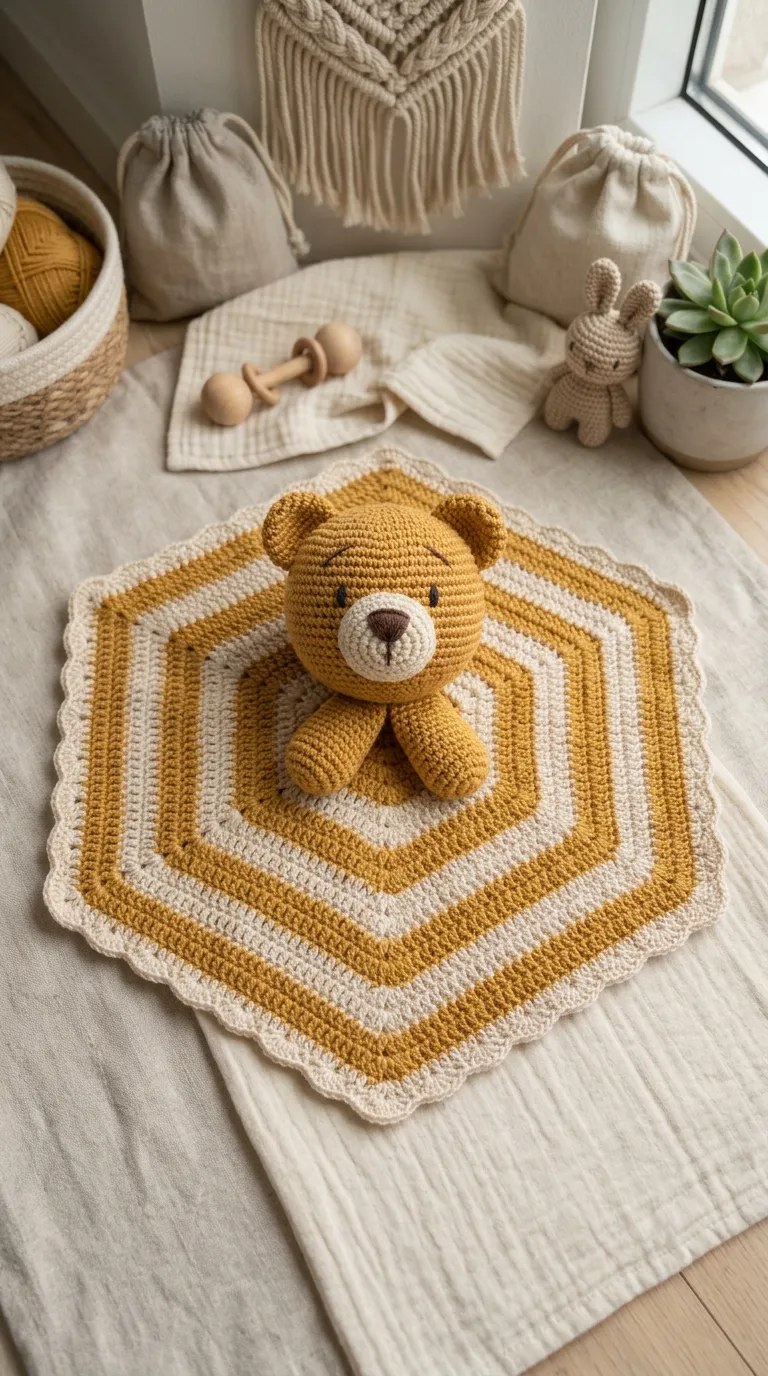
The playful honey bear lovey utilizes warm golden-caramel hues paired with a geometric six-sided crochet blanket. Round, cupped bear ears and a distinct, contrasting cream muzzle define the cheerful facial expression of this woodland companion. The accompanying hexagonal blanket features alternating rows of solid double crochet and open chain spaces, generating visual rhythm that radiates symmetrically from the central bear placement. Honey bear themes remain a popular choice for rustic nursery spaces, pairing effortlessly with modern forest decor, warm wood furniture, and natural woven accents. The sturdy, compact head withstands pulling from active infants, making it a reliable soothing toy during daily strolls. The hexagon format prevents corners from curling, ensuring the blanket rests flat against varied surfaces during tummy time and infant play sessions.
Construct the bear muzzle first by crocheting an oval disc in cream cotton yarn, using chain stitches as a base and working around both sides of the foundation chain. Embroider a satin-stitch brown triangular nose onto the muzzle before attaching it to the main golden-brown bear head. For the head, work in continuous rounds from a magic ring to thirty-six stitches, assembling the spherical form while keeping stitch tension firm to prevent fiberfill from showing. Stitch two semi-circular ears to either side of the head, ensuring both ears sit symmetrical across round four. Crochet two small rounded paw arms and stitch them flat against the lower neck margin. To build the blanket, work outward in rounds using a six-corner double crochet expansion pattern. Alternate golden-brown yarn with natural ecru stripes every three rounds. Fasten off the blanket after twelve rounds, weaving in ends completely before stitching the bear head securely to the central opening.
4. Floating Cloud Pastel Ribbon Lovey
Read This:
How to Create
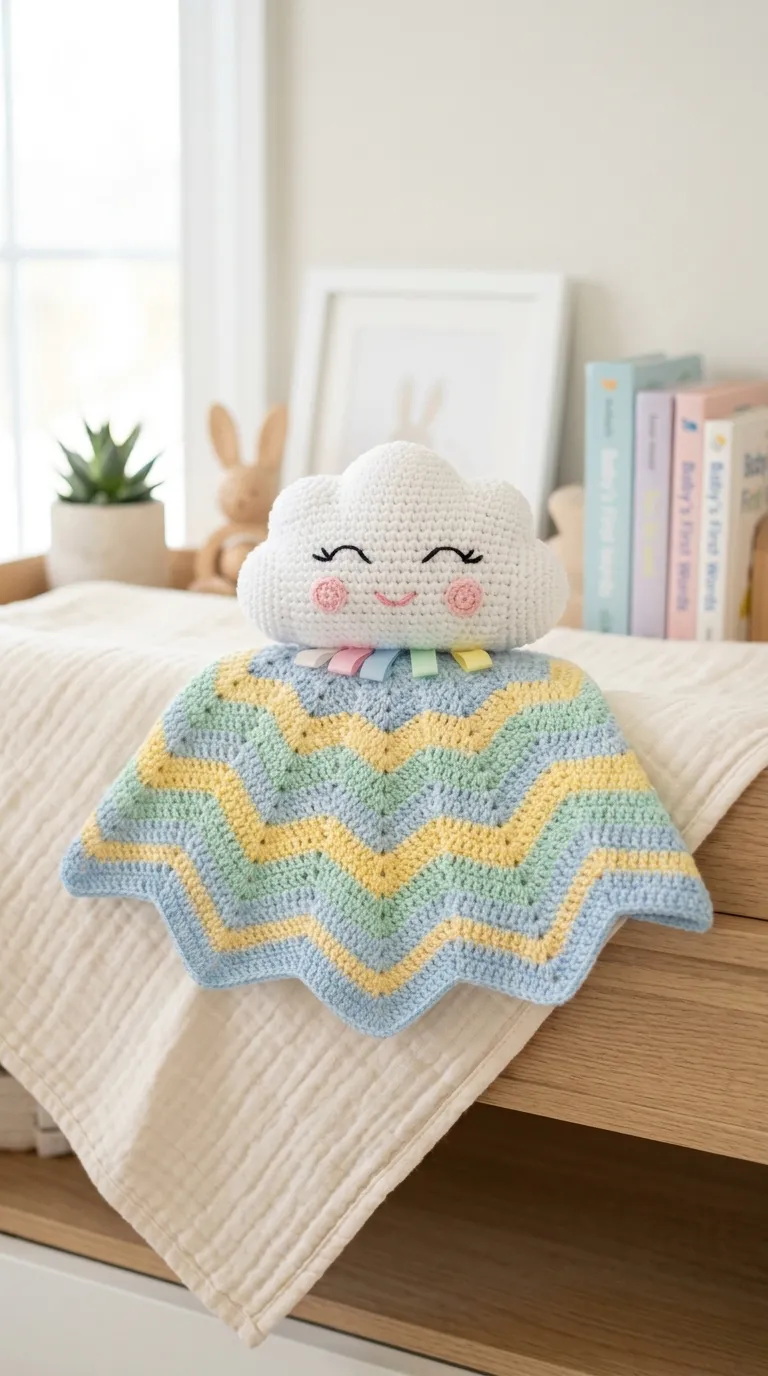
The floating cloud lovey introduces a whimsical sky motif by placing a pillowy, contoured cloud character at the center of an airy pastel blanket. The cloud face features gentle blush cheeks, a subtle smiling mouth, and textured bobble stitches along the top border to mimic natural cloud puff formations. The blanket base uses soft mint, sky blue, or butter yellow yarn worked in a delicate ripple stitch that resembles gentle wind currents. This modern design avoids complex animal limbs, relying on a clean silhouette that fits cloud-themed or minimalist children’s bedrooms. The broad base of the cloud distributes the character weight evenly, preventing the head from flopping awkwardly when the blanket hangs from small hands. The soft contours and textured edges provide tactile variety that helps infants develop fine motor grip skills.
Crochet two matching flat cloud profiles using single crochet rows, working strategic increases and decreases at row margins to generate three distinct rounded cloud mounds across the top. Embroider closed eyes with upward-curving eyelashes onto the front panel using black floss, adding two small pink felt circles or embroidered disks for rosy cheeks. Align the front and back cloud panels, joining them together with a border of single crochet stitches while packing the interior lightly with fiberfill batting before closing the seam. Using a 4.0 mm crochet hook, work a sixteen-inch rectangular blanket using the classic chevron ripple stitch pattern, alternating pale blue and bright white stripes every two rows. Secure the base of the plush cloud across the central ridge of the chevron blanket using a blunt tapestry needle, catching stitches from both panels to create a permanent, child-safe bond.
5. Cozy Cottage Lamb Textured Security Toy
Step-by-Step Guide
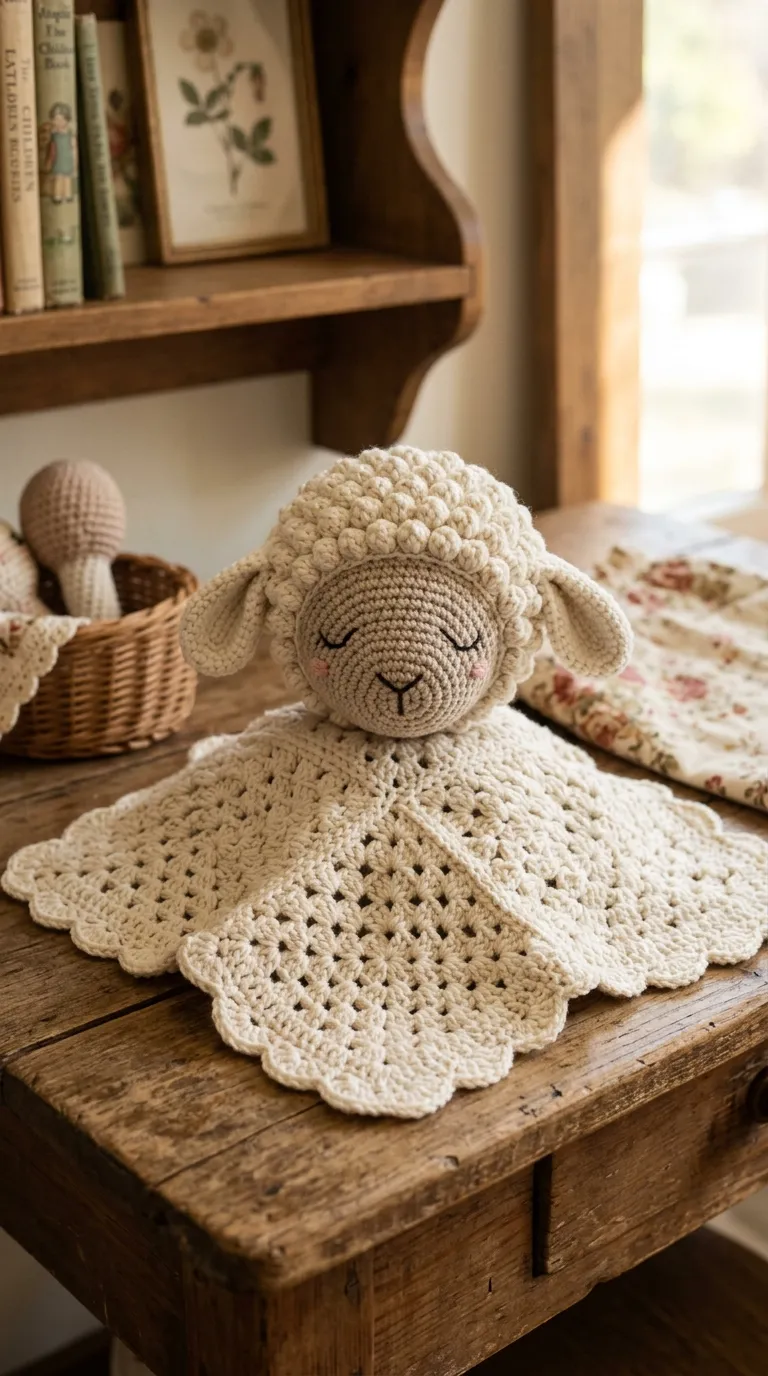
The cozy cottage lamb lovey pairs smooth pastoral colors with rich bobble-stitch textures that mimic natural sheep wool. The crown of the head features dense clusters of small textured puff stitches, contrasting against a smooth single-crochet face and drooping tear-drop ears. The blanket features a traditional solid granny square pattern bordered by a gentle scalloped shell edge, evoking heirloom vintage styling. Soft creams, warm greys, and muted sage greens maintain an understated aesthetic suitable for timeless country nursery decor. The rich textural surface of the lamb fleece provides tactile engagement for infant sensory development, giving curious fingers engaging ridges and bumps to explore. The drooping ears hang flush against the face, allowing easy grasping without placing excessive stress on internal seam attachments.
Create the lamb face by working smooth single crochet rounds in warm cream yarn, expanding outward to thirty stitches before transitioning the crown into alternating rounds of single crochet and four-double-crochet bobble stitches. The bobble stitches pop outward naturally, forming dense wool clusters across the upper head and forehead. Lightly pack the head with polyester fiberfill, taking care not to stretch the open spaces between the bobble stitches. Crochet two flat, petal-shaped ears using soft taupe yarn, pinching the wide ends in half and stitching them directly beneath the bobble border on round eight. For the blanket, work twelve rounds of a classic solid double crochet square, placing two double crochets, two chains, and two double crochets in each corner space. Add a final decorative border of five-double-crochet shell stitches around the perimeter. Center the lamb head onto the blanket and secure it firmly using reinforced whipstitches.
6. Serene Sleeping Fox Chevron Blanket

Execution Process
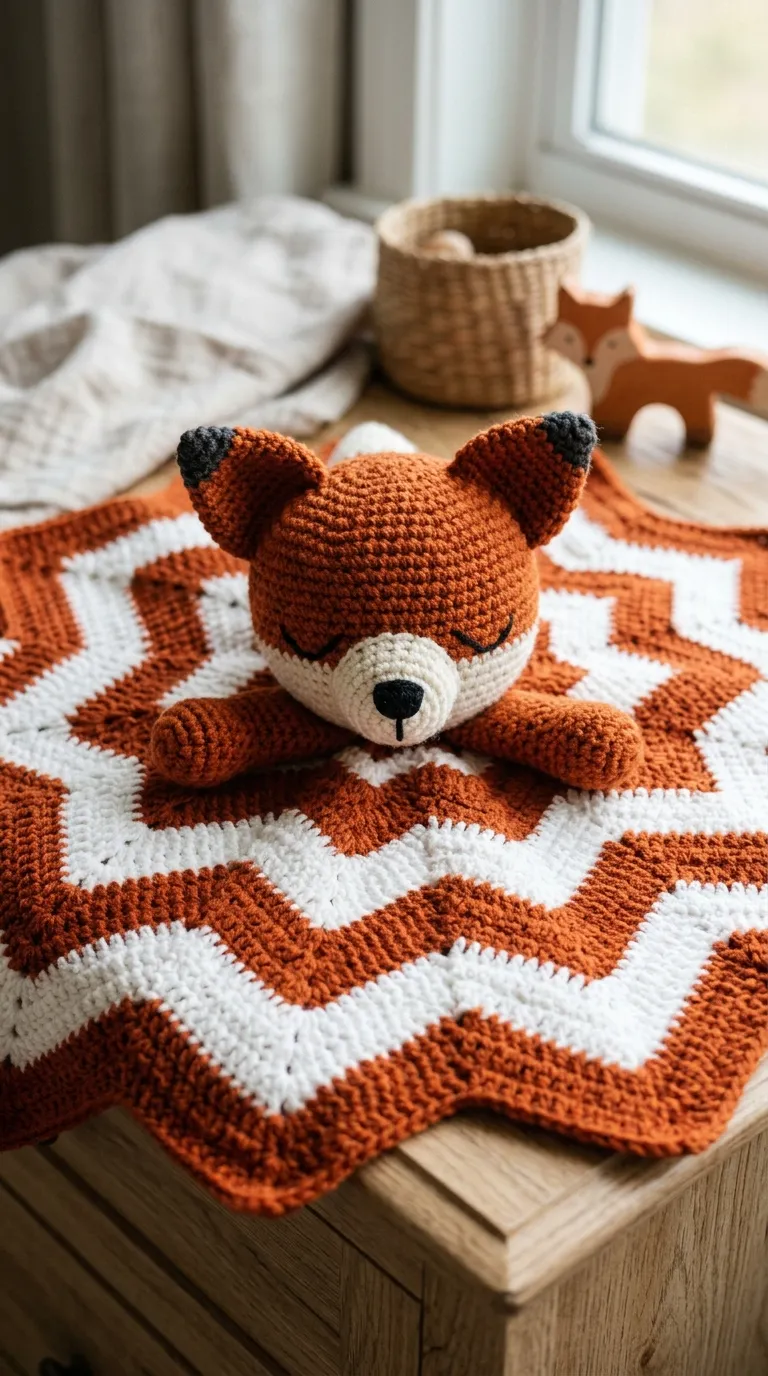
The serene sleeping fox lovey combines rich burnt-orange yarn with crisp white and charcoal accents to form an iconic woodland character. The fox head displays a defined wedge-shaped snout that transitions from an ivory tip into a vibrant rust-orange crown. Prominent triangular ears feature charcoal tips, echoing authentic wildlife markings while maintaining a streamlined amigurumi profile. The accompanying blanket utilizes a sharp, modern chevron or zigzag pattern, alternating between white and burnt-orange bands to reflect modern graphic trends. The contrasting colors capture infant visual interest during early developmental phases, while the sleeping facial expressions maintain a soothing, restful presentation. The angled shape of the fox head rests naturally against crib rails or blanket edges, providing a photogenic nursery focal point that coordinates with modern rustic decor.
Begin the fox head at the nose tip using white cotton yarn, crocheting in continuous rounds and increasing slowly to establish a pointed, conical snout. Transition to burnt-orange yarn across round seven, expanding the head diameter rapidly to thirty-six stitches to form defined cheek arches. Embroider sleeping eye arcs using backstitches along the white-and-orange color transition line. Stuff the head moderately, keeping the snout firm while leaving the back softer. Crochet two flat triangular ears in burnt orange, finishing the top four rounds in charcoal black yarn. Sew the ears atop the head, angling them slightly forward. Construct an eighteen-inch chevron blanket using double crochet stitches, working two stitches together at valleys and placing three stitches into peaks to create crisp zigzag waves. Finish the blanket edges, then stitch the fox head and two small orange paws securely to the top central peak of the blanket.
7. Majestic Little Lion Sunburst Lovey
Setup Method
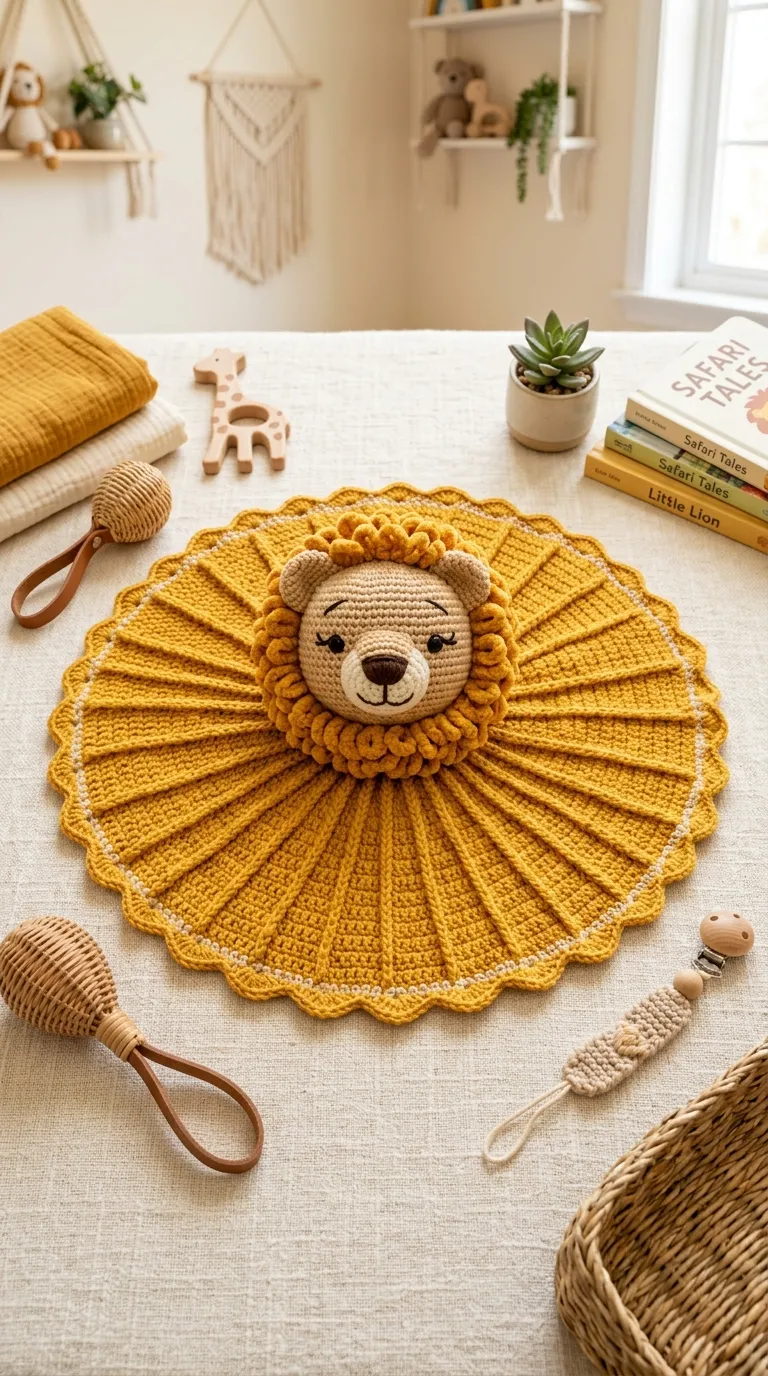
The majestic little lion lovey radiates visual warmth through rich mustard, amber, and golden-sand hues. The lion head is framed by a textured fringe mane created with loop stitches or brushed yarn fibers, producing a soft halo that invites tactile touch. The blanket base is constructed as an expanding sunburst or circular pinwheel, utilizing raised front-post double crochet ribs that radiate outward like golden sunlight. This design fits cheerful, safari-themed or modern bohemian nursery spaces, adding warmth and energy to children’s room furnishings. The lion’s round ears peek out from behind the textured mane, giving the character dimension while maintaining a durable, pull-resistant structure. The circular blanket foundation drapes evenly across strollers and lap spaces, eliminating long corner points that might twist around car seat straps.
Crochet the lion head in golden-sand sport-weight yarn, starting from a magic ring and building up to thirty-six single crochet stitches. On rounds nine through eleven, work loop stitches across the top and side parameters to form an integrated, non-shedding yarn mane, or alternatively, surface-crochet small chain loops around the completed cranial sphere. Embroider two round eyes with black cotton floss, anchoring knots securely inside the head cavity prior to stuffing. Sew two small rounded ears behind the mane line on round six. Transition to a 4.0 mm hook and rich mustard yarn to crochet the circular blanket. Work twelve rounds of expanding circular double crochet, inserting a front-post double crochet every four stitches to establish defined radiating ridges. Finish the outer rim with a reverse single crochet border, then mount the lion head directly to the circular hub using heavy-duty cotton yarn.
8. Gentle Sea Turtle Ripple Comforter
Read This:
How to Make
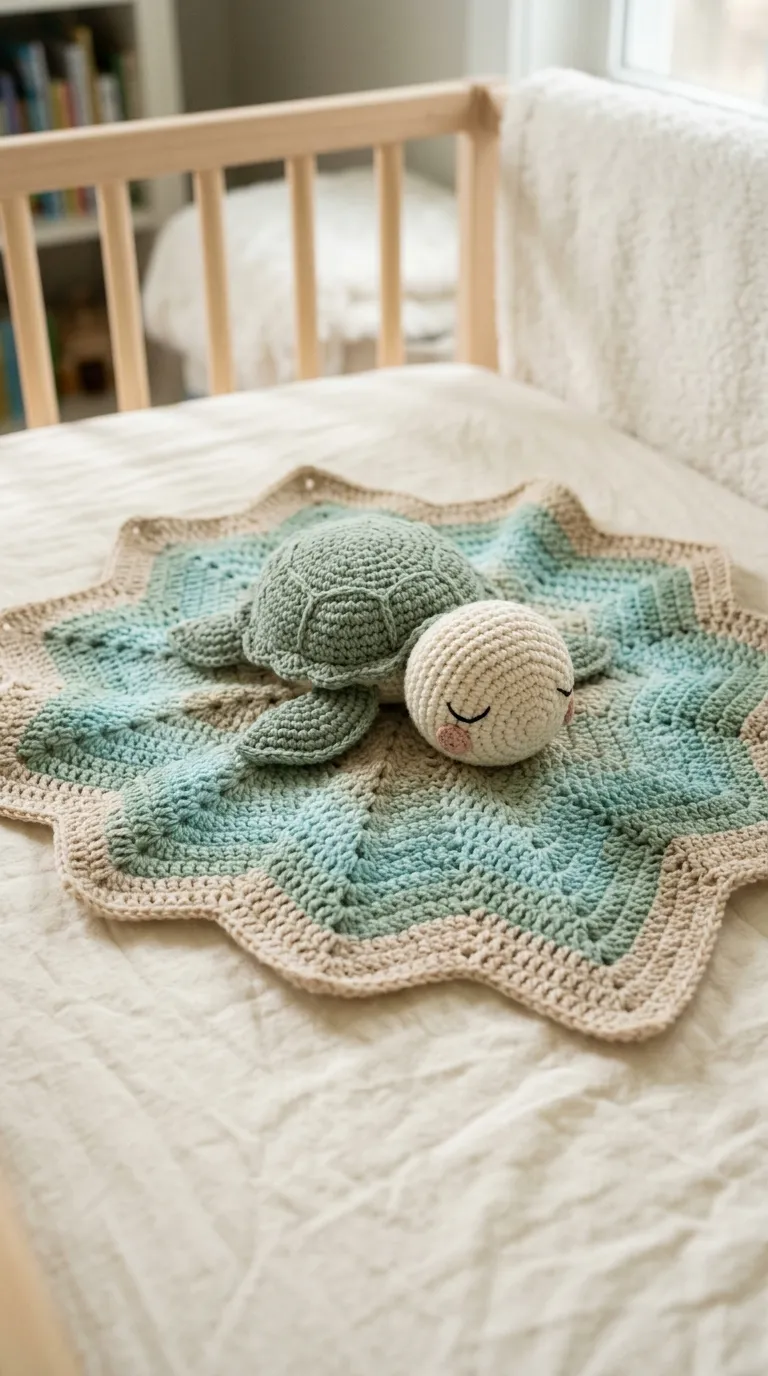
The gentle sea turtle lovey introduces marine nursery inspiration through soft seafoam, sage green, and natural sand colorways. The amigurumi component features a smooth, domed turtle shell paired with an outstretched head, two swimming flippers, and a miniature tail centered on the blanket. The blanket base uses an ocean wave ripple pattern that flows outward in cool marine tones, creating the visual impression of a turtle swimming across calm water. Marine themes fit oceanfront decor, coastal nurseries, and calm neutral spaces focused on blue-green tones. The flattened profile of the turtle body allows the lovey to lay exceptionally flat against playmats and floor blankets, functioning effectively during infant tummy time exercises. The broad flippers provide convenient, durable grasping handles for small fingers developing grip strength.
Crochet the turtle shell as an oval dome using deep sage yarn, working strategic single crochet increases before switching to a flat cream underbelly disc. Stitch the top shell and lower belly together around three-quarters of the perimeter, fill the cavity with fiberfill, and insert the head and two broad flippers into the seam before closing it completely. Embroider sleepy eyelids on the sides of the turtle head using dark green embroidery thread. Shift to seafoam green yarn and a 4.5 mm hook to construct a fourteen-inch ripple blanket, alternating light aqua, soft seafoam, and sand-colored bands every three rows. Use double crochet wave clusters to produce fluid, undulated blanket borders. Position the completed turtle body directly over the center point of the marine blanket, stitching through both the shell underbelly and blanket fabric with reinforced, multi-point anchoring stitches.
9. Dreamy Dragon Fantasy Star Blanket
How to Create
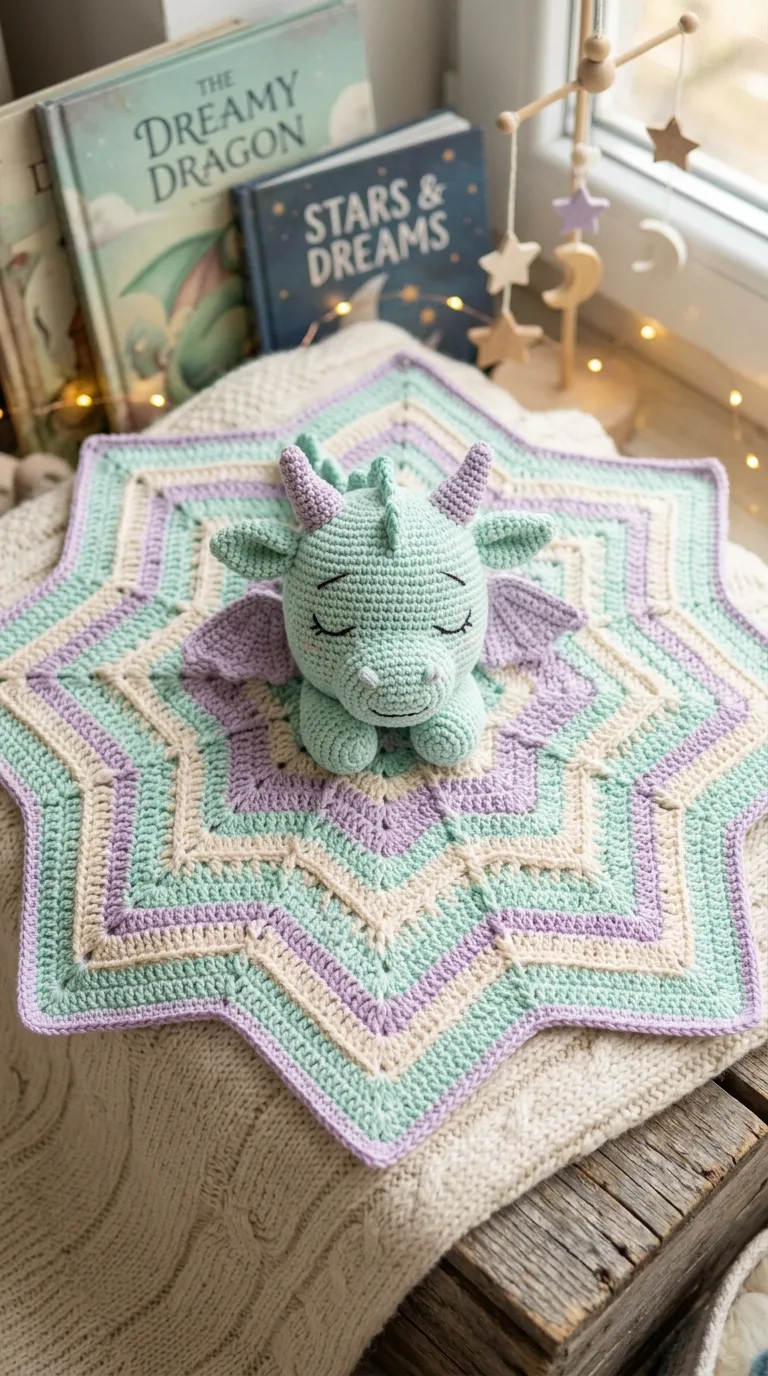
The dreamy dragon fantasy lovey pairs imaginative mythical storytelling with modern pastel aesthetics. Worked in soft mint, lavender, or dusty slate blue, this character features two curved horns, miniature back ridges, and delicate scalloped wings attached behind the shoulders. The companion blanket is shaped like an eight-pointed star or octagon, carrying matching contrasting ridge lines along each diagonal spine. This design provides an alternative to traditional barnyard animal decor, suiting whimsical fantasy nurseries and literary-inspired baby rooms. The various structural details—from the smooth horns to the ridged back scales—offer valuable sensory variety that supports developing tactile perception. Careful construction ensures that all decorative elements, such as wings and horns, remain flat and securely sewn to prevent snagging during sleep.
Crochet the dragon head with mint green cotton yarn, beginning with an oval snout that widens toward the back of the head over twelve continuous rounds. Add a pair of soft lavender horns, crocheting small cones that curve gently backward, and sew them along the fourth cranial round. Embroider resting eyes using curved dark grey thread lines along round eight. Work a line of five miniature triangular back ridges in lavender, sewing them down the back seam of the head. Crochet two small flat wings using back-loop-only single crochet to generate ridged wing textures. For the blanket, work an eight-point star using a 4.0 mm hook and coordinating mint yarn, placing chain-two spaces at each outward point to maintain crisp geometry. Center the dragon head upon the star hub, position the wings flat behind the neck, and secure all components using double-threaded whipstitches.
10. Minimalist Koala Eucalyptus Square Lovey
Read This:
Step-by-Step Guide
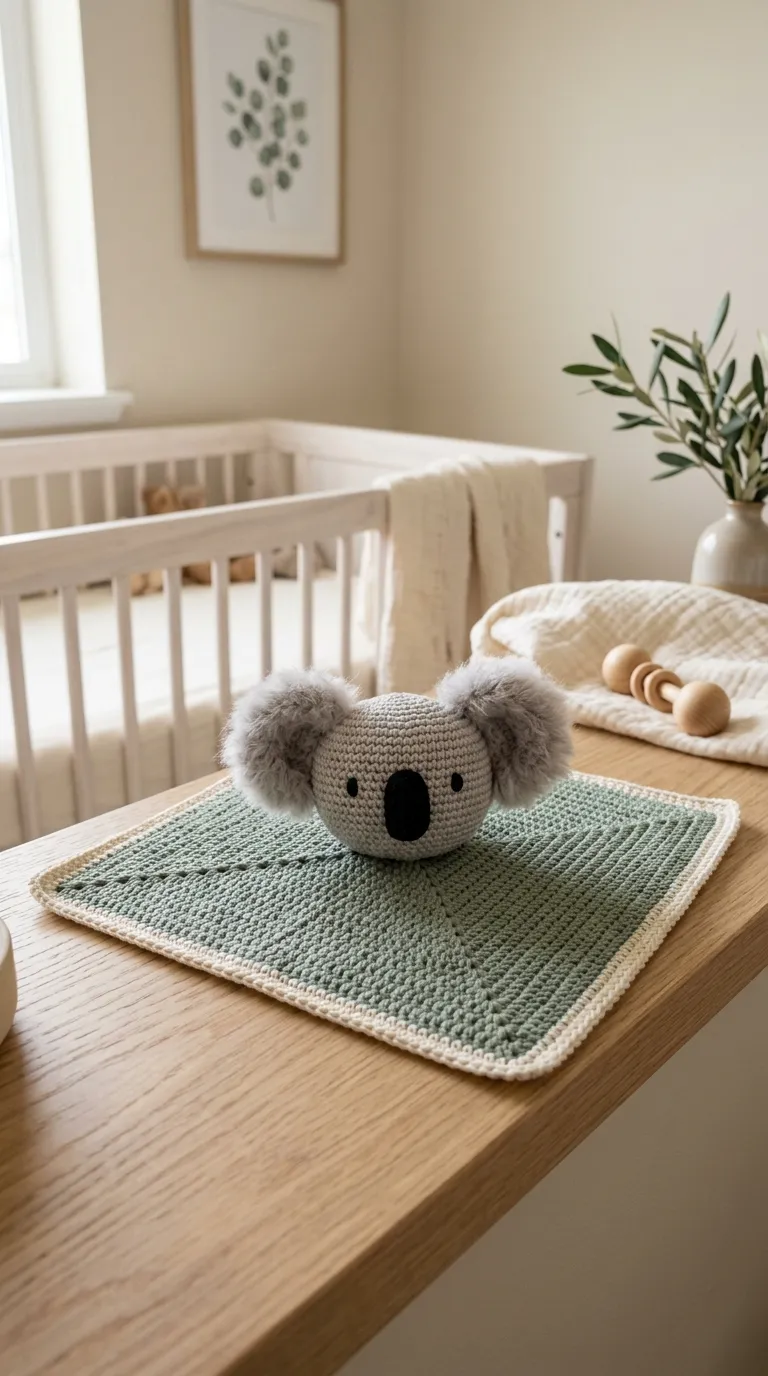
The minimalist koala lovey captures contemporary Scandinavian design principles through neutral dove grey, charcoal, and muted eucalyptus green tones. The koala head is characterized by oversized, fuzzy circular ears and a prominent vertical oval nose worked in smooth black yarn. The blanket base is kept deliberately simple, featuring a modern linen-stitch or moss-stitch square that drapes cleanly without heavy lace openings. This understated design fits modern minimalist nurseries, neutral color palettes, and contemporary living spaces. The broad, textured ears provide exceptional comfort for sensory exploration, while the dense, durable blanket weave prevents tiny fingers from tangling in open lace voids. The balanced visual weight of the round koala head atop the tailored square blanket establishes a sophisticated handmade baby accessory.
Crochet the koala head using dove grey cotton yarn, working thirty-six single crochet stitches in continuous rounds to produce a smooth, spherical base. Embroider an elongated, vertical oval nose across rounds seven through ten using black embroidery floss, filling the shape completely with smooth satin stitches. Construct two large circular ears, working loop stitches or brushing out standard acrylic yarn rounds with a wire pet slicker brush to create a fluffy fur texture. Sew the wide ears firmly to rounds three through six on either side of the head. Switch to muted eucalyptus green yarn and a 4.0 mm hook to work a modern moss-stitch blanket, alternating single crochets and chain-one spaces to create a dense, woven texture. Edge the blanket with a simple single crochet border in natural cream, then fasten the koala head firmly to the center junction using reinforced interior knots.
Navigating Common Assembly Mistakes
Novice lovey makers often encounter issues with structural assembly, safety compliance, and fabric tension balance. A frequent mistake is using hard plastic safety eyes on toys intended for infants; even tightly fastened washers can detach under persistent chewing, creating an unacceptable choking hazard. Facial features must always be hand-embroidered using flat cotton embroidery thread or yarn directly onto the crocheted fabric. Another common issue is mismatched hook tension between the head and blanket components. Using too large a hook for the amigurumi head creates loose stitches that allow polyester fiberfill to poke through, while using too small a hook on the blanket produces a rigid, cardboard-like fabric that fails to drape comfortably. Always drop down one or two hook sizes for the plush character to ensure a tight, dense weave, and increase hook size on the blanket to maintain fluid softness. Finally, creators often under-reinforce the primary neck junction; simply stitching through a few surface loops allows the head to wobble or rip away under tension. Always pass attachment yarn tails through both layers of blanket fabric and deep into the amigurumi head core across several passes.
Professional Techniques for Polished Results
Applying refined finishing techniques elevates simple handmade loveys into professional, heirloom-quality pieces. When working continuous rounds on amigurumi heads, use the invisible decrease method rather than a standard single crochet decrease; working through the front loops only eliminates unsightly gaps and keeps the fabric texture uniform. When embroidering facial expressions, sketch the intended placement first using disappearing fabric ink or positioning pins to verify symmetry before inserting embroidery needles. Block the completed crochet blanket lightly using steam or wet pinning techniques before attaching the amigurumi head; blocking straightens wavy edges, evens out corner points, and displays delicate lace patterns to their best visual advantage. For added durability, leave extra-long yarn tails when finishing the head, using these continuous threads rather than new pieces of yarn to stitch the head, arms, and blanket together. Weave all remaining ends deep into the stuffed amigurumi cavity, reversing direction three times to prevent tails from working loose during machine washing cycles.
Styling and Nursery Organization Ideas
An amigurumi lovey functions as a charming decorative accent within baby rooms when not actively comforting an infant. Drape the lovey over the side rail of a nursery glider, hang it neatly from a wall peg rack, or fold the blanket points cleanly across a display shelf to introduce handmade warmth to the room. When styling a nursery chest or book ledge, sit the plush amigurumi head upright with the blanket pooled beneath it, pairing the piece with coordinating wooden toys, framed art prints, and small potted succulents. For practical daily organization, store clean loveys in open woven seagrass baskets near the nursery changing station, keeping backup comfort blankets easily accessible during evening routines. Coordinate the blanket yarn colors directly with room textiles, matching shades to crib sheets, blackout curtains, and floor rugs to establish a unified aesthetic. When preparing a lovey as a baby shower gift, roll the blanket neatly around the base of the plush character, securing the bundle with a soft linen ribbon and a care instruction tag detailing washing guidelines.
Budget Discipline and Production Scheduling
Crafting handmade loveys allows makers to produce upscale nursery accessories while maintaining firm control over supply costs and production timeframes. Purchase core materials like premium mercerized cotton and hypoallergenic fiberfill in bulk quantities, as neutral shades like cream, soft grey, and oatmeal transition easily across multiple character themes. A single one-hundred-gram skein of main yarn alongside small scrap quantities for muzzles and ears is typically sufficient to complete an entire character and small blanket. Structure your production schedule across three distinct crafting sessions: dedicate the first evening to crocheting and detailing the amigurumi head, ears, and appendages; spend the second evening working the blanket base to its full dimensions; and reserve the third session for careful blocking, structural joining, and end weaving. This staged workflow prevents hand fatigue from switching between small and large hooks while ensuring that each component receives dedicated craftsmanship, allowing creators to finish high-quality projects within a dependable five-to-six-hour total timeframe.
Creative Design Expansion and Variations
Once you have mastered baseline lovey construction, explore custom modifications to expand your design catalog and tailor pieces to unique nursery themes. Incorporate gentle sensory elements by inserting a sealed, child-safe plastic rattle insert inside the center of the fiberfill stuffing, transforming the comforting lovey into an engaging developmental toy. Experiment with alternative blanket materials by sewing the finished amigurumi head onto a hemmed square of pre-washed double gauze, plush minky, or organic linen fabric rather than crocheting the base. Adapt classic characters to matching nursery sets by creating coordinating accessories, such as matching teething rings attached to natural wooden beads or small stroller clips featuring identical animal ears. Explore subtle color modifications by working the blanket in ombré gradients or delicate self-striping yarns to achieve modern visual movement without increasing the number of ends to weave. These versatile assembly mechanics provide an enduring foundation, empowering crafters to transform simple sketches into cherished childhood keepsakes.