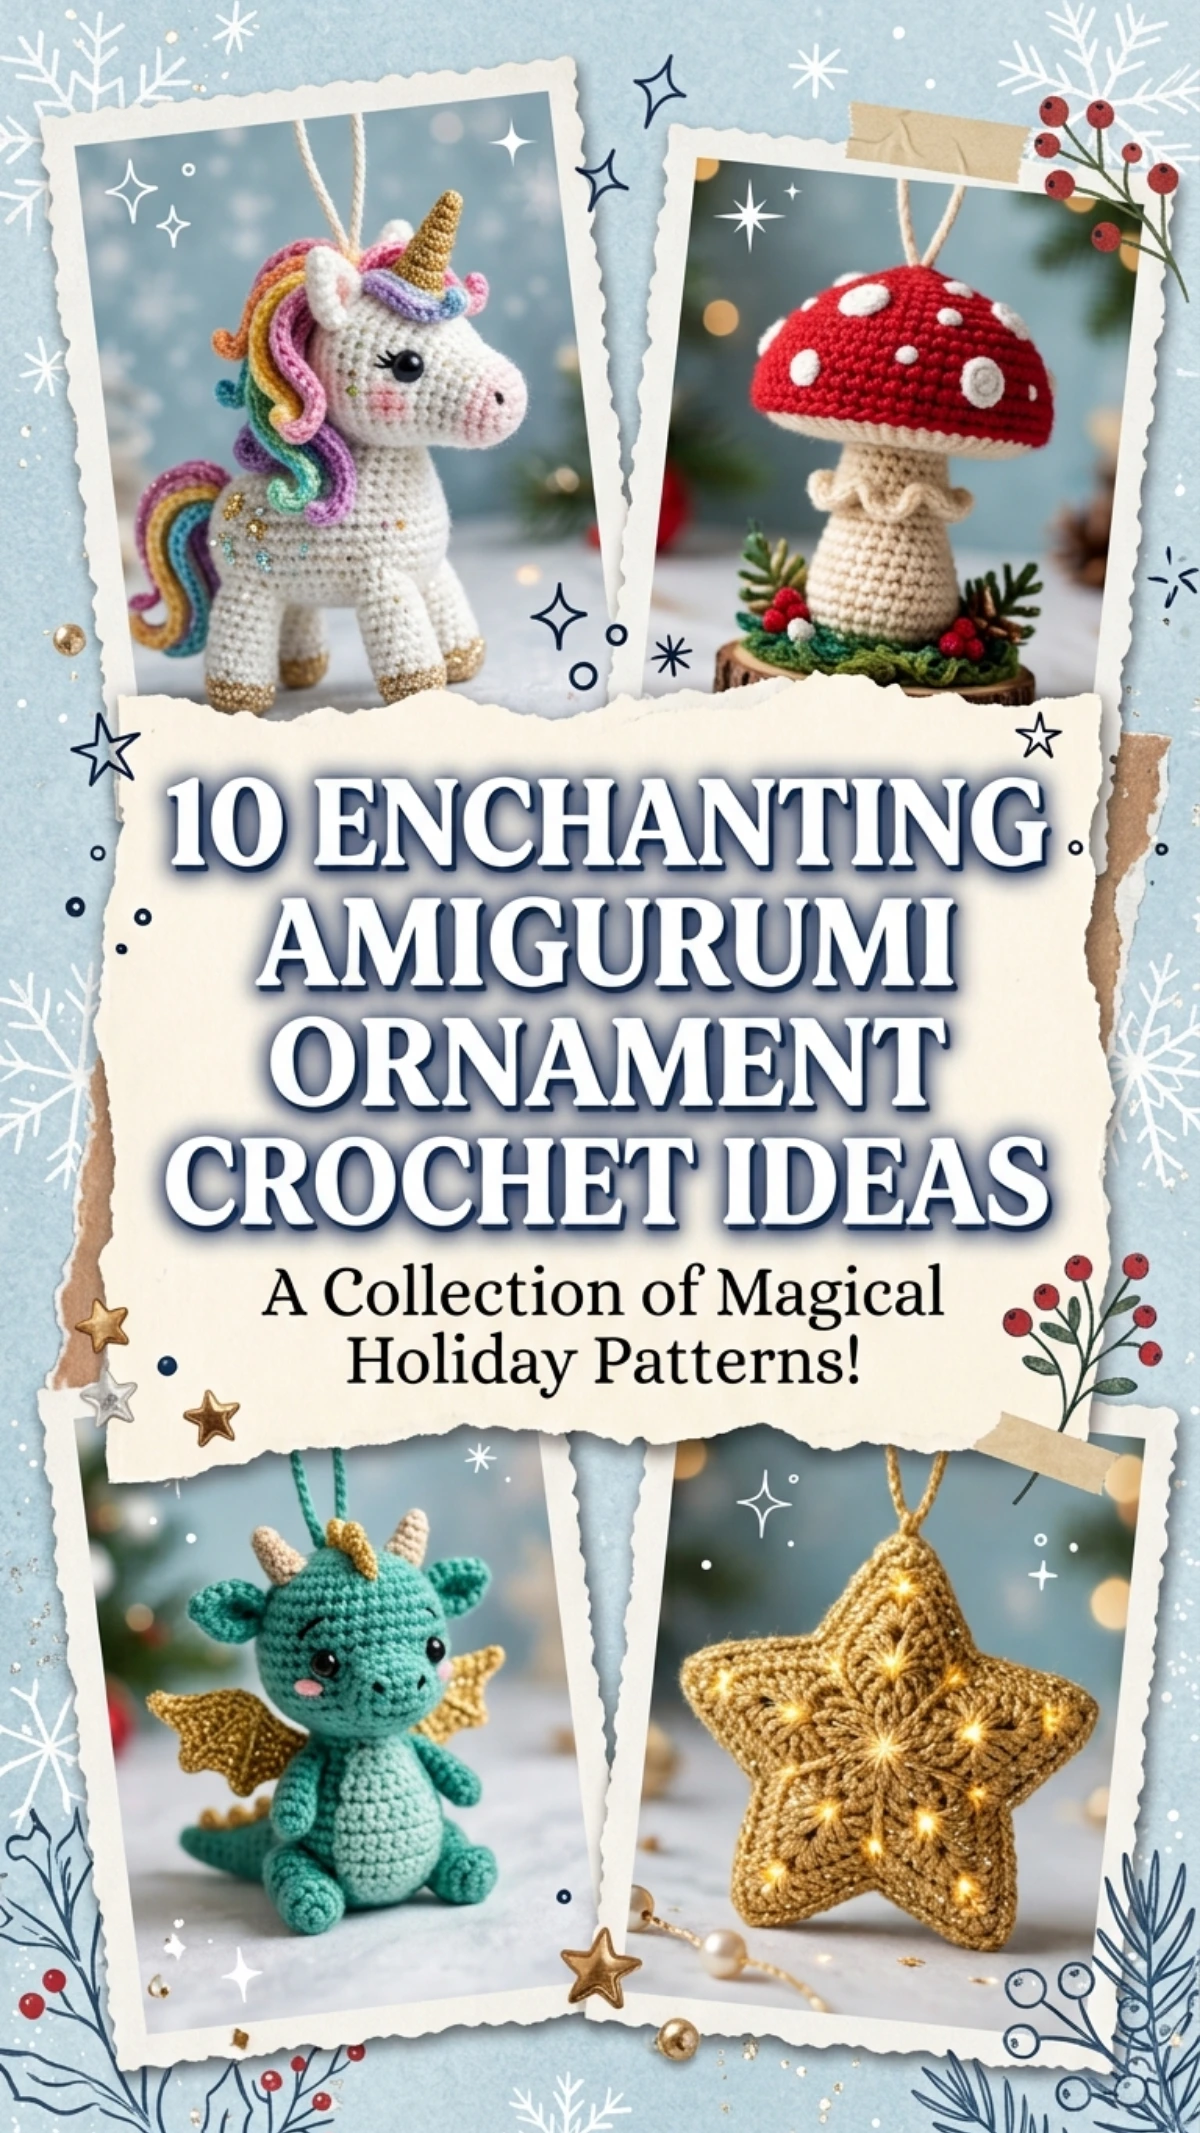
Handcrafted holiday ornaments have become a central focus across modern design boards, offering makers a tactile, personalized alternative to commercial plastic trinkets. This detailed guide explores ten versatile concepts for crocheting three-dimensional decorative charms using smooth cotton yarns, ergonomic hooks, and dependable suspension loops. Readers will discover clear mechanics for continuous spiral rounds, invisible shaping decreases, tidy stuffing distribution, and secure hanging hardware installation without needing complex pattern training. Creating handmade ornaments simplifies seasonal decorating because every finished piece can be tailored precisely to fit your interior palette, tree proportions, or gift-wrapping themes. You will learn how to maintain consistent stitch tension, anchor decorative appliques firmly, close spheres invisibly, and blend varied geometric profiles for balanced visual appeal. Beyond decorating festive holiday trees, these lightweight crochet charms transition smoothly into charming bag tags, rearview mirror pendants, ceiling branch displays, and permanent home decor accents. Whether your aesthetic leans toward a crisp minimalist style or a cozy vintage storybook theme, this guide delivers the practical guidance, technical insight, and creative ideas needed to complete durable, photo-ready holiday decoration on a sensible schedule.
Why This Idea Is Trending or Useful
Crochet ornaments dominate seasonal inspiration because they solve common decorating challenges while delivering rich textural warmth to indoor spaces. Unlike fragile glass baubles that shatter when dropped or heavy ceramic pendants that pull down evergreen boughs, soft yarn figures provide remarkable durability that withstands busy households with pets and toddlers. This resilience makes miniature yarn sculpture a practical creative project for crafters who desire dependable holiday keepsakes. From an economic perspective, small-scale crochet provides excellent budget ideas, allowing makers to transform modest yarn remnants into coordinated collections without buying full commercial sets. Furthermore, the tactile, dimensional stitches inherent to crochet introduce an authentic handmade aesthetic that complements neutral modern design palettes. Because each miniature ornament requires only basic single crochet stitches and takes very little time to finish, this design approach serves as a completely beginner friendly medium. Both novice makers and seasoned stitchers can complete finished baubles in a single evening, building a unified holiday collection at their own pace without the pressure of complicated finishing steps.
Materials and Preparation
Proper preparation forms the essential foundation of every successful crochet tutorial, ensuring consistent stitch gauge, secure inner structures, and clean surface finishes. Gather core materials, including sport-weight or light worsted mercerized cotton yarns, which provide clean stitch definition without fuzzing, paired with an ergonomic hook sized between 2.25 mm and 2.75 mm. Mechanical essentials include sharp yarn snips, locking stitch markers, bent-tip metal tapestry needles, firm polyester fiberfill, natural wooden suspension beads, and durable braided twine or metallic embroidery floss for hanging loops. Before starting the first round, inspect your workspace, ensuring you have bright lighting and organized storage trays to prevent tiny crochet parts from getting lost. Prepare your yarn skeins by pulling from the center to maintain smooth, uninterrupted tension throughout the project. Check that your selected fiber fill is pulled apart into small, cloud-like wisps before stuffing to prevent unsightly internal lumps. Planning your color palette beforehand ensures that your finished ornaments form a balanced, coordinated set when hung together on branches or displayed across decorative mantel garlands.
1. Rustic Pinecone Bauble with Layered Crocodile Scales
Step-by-Step Guide
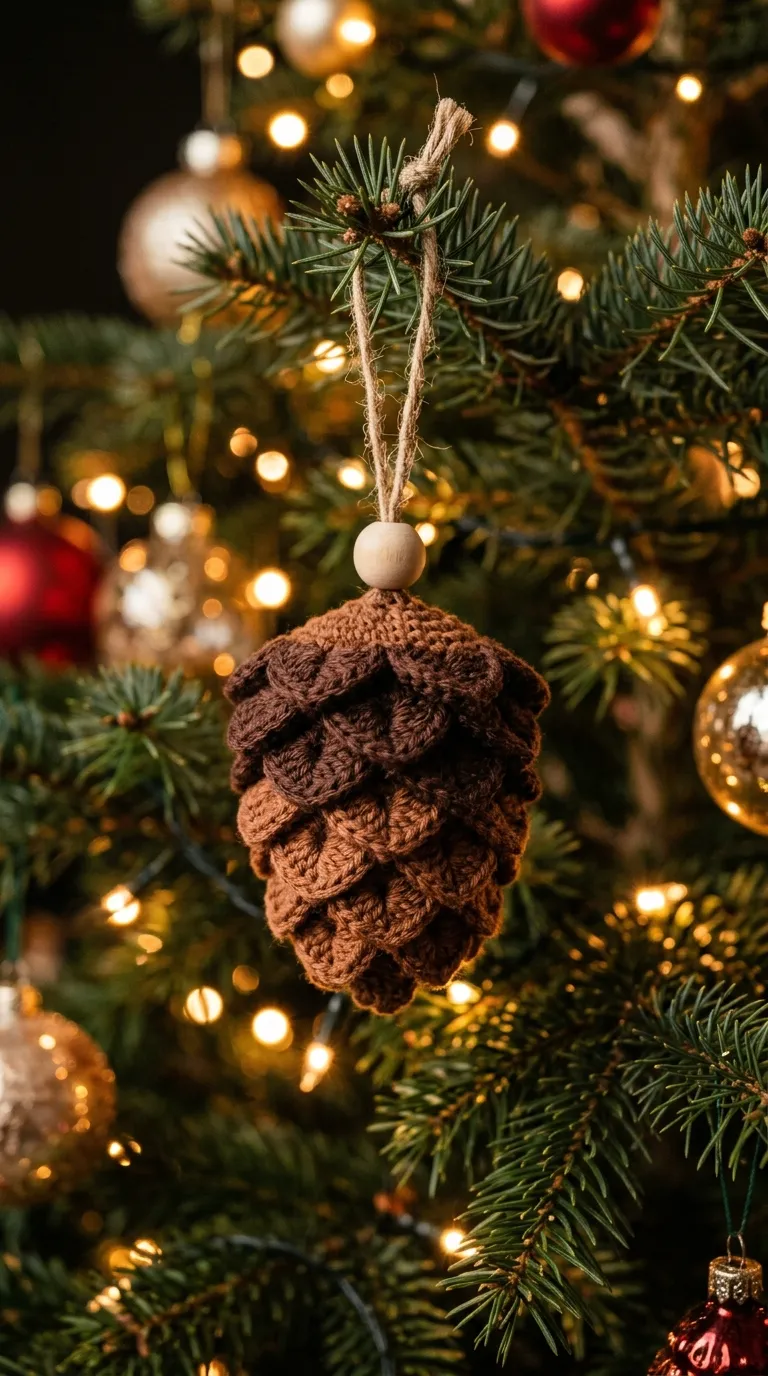
The rustic pinecone bauble introduces botanical woodland charm to tree branches, capturing organic forest textures through layered, overlapping crochet stitches. This concept uses an internal egg-shaped core covered with textured petal scales worked directly into the surface, creating natural depth and geometric rhythm. Using deep cedar brown, warm cocoa, or muted taupe yarn, the design provides an earthy, grounded presence that balances brighter, shiny baubles on holiday trees. The pointed scales catch tree lights softly, producing gentle shadows across the surface that highlight the dimensional single crochet stitches beneath. The compact, tapered shape hangs straight without tilting, providing an elegant, natural look that suits rustic woodland, Scandinavian, or modern farmhouse themes. This pinecone design eliminates the mess of falling pine needles and brittle scales found on real foraged cones, delivering a soft, durable heirloom piece that packs away neatly year after year.
To construct this textured pinecone, begin at the tapered base by working six single crochet stitches into an adjustable magic ring using deep brown cotton yarn. Increase gradually over four continuous rounds to create a sturdy cone base, switching into a front-loop and back-loop alternating pattern to establish anchoring ridges for the exterior scales. Work five double crochet stitches into each exposed front loop to form pointed scales, securing each shell with a firm slip stitch before advancing to the next row. Pack the internal cavity with dense polyester stuffing as you work upward, keeping the core firm to prevent the scales from collapsing inward. Once you reach the widest upper circumference, execute rapid invisible decreases through the back loops only to close the top of the pinecone smoothly. Finish the assembly by threading an eight-inch length of natural jute twine through the top center, capping the cord with a small raw wooden bead to anchor the loop.
2. Minimalist Nordic Star with Crisp Pointed Edges
Read This:
How to Create
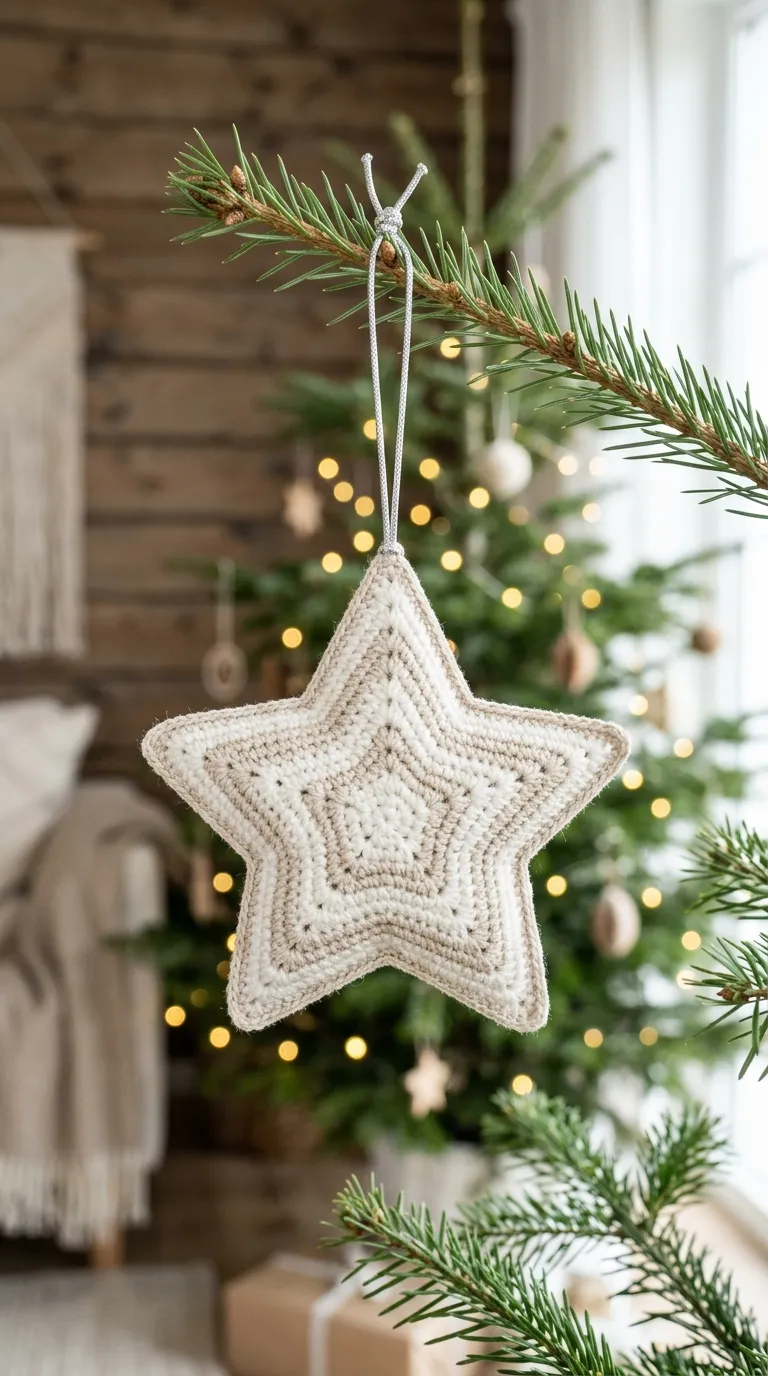
A minimalist Nordic star ornament brings clean geometric structure, crisp lines, and contemporary Scandinavian flair to seasonal holiday decor. This design focuses on a flat, two-piece star silhouette joined along the outer edge, offering firm dimensional balance without unnecessary bulk or complicated surface embellishments. Crocheted in snowy ivory, oatmeal heather, or pale linen yarn, the five-pointed star introduces a serene, bright focal point against deep green pine needles. The tight, dense single crochet stitches create a smooth, modern canvas that highlights clean lines and architectural form. Because the profile remains relatively flat and lightweight, the star hangs without twisting or weighing down delicate branch tips. This adaptable aesthetic integrates naturally into modern design spaces, minimalist holiday trees, and Scandinavian window displays, offering a quiet, sophisticated beauty that feels intentional, orderly, and timeless.
Begin making the star by crocheting two identical five-point motifs using a 2.5 mm hook and firm unbleached cotton yarn. For each motif, work a flat circular center using two rounds of single crochet, then build five separate triangular points outward using sequences of single, half-double, and double crochet stitches. Block both flat motifs lightly with a cool steam iron to sharpen the five points and flatten the center fabric. Align the two star pieces with their right sides facing outward, pinning the matching points together with locking stitch markers to ensure alignment. Join the outer edges by working a neat round of tight slip stitches or whipstitches around the perimeter, inserting a tiny pinch of polyester stuffing into each point before completing the seam. Knot a twelve-inch loop of metallic silver cord securely through the top point of the star, trimming the tail ends neatly inside the inner chamber.
3. Playful Striped Peppermint Candy Disk with Picot Border
Execution Process
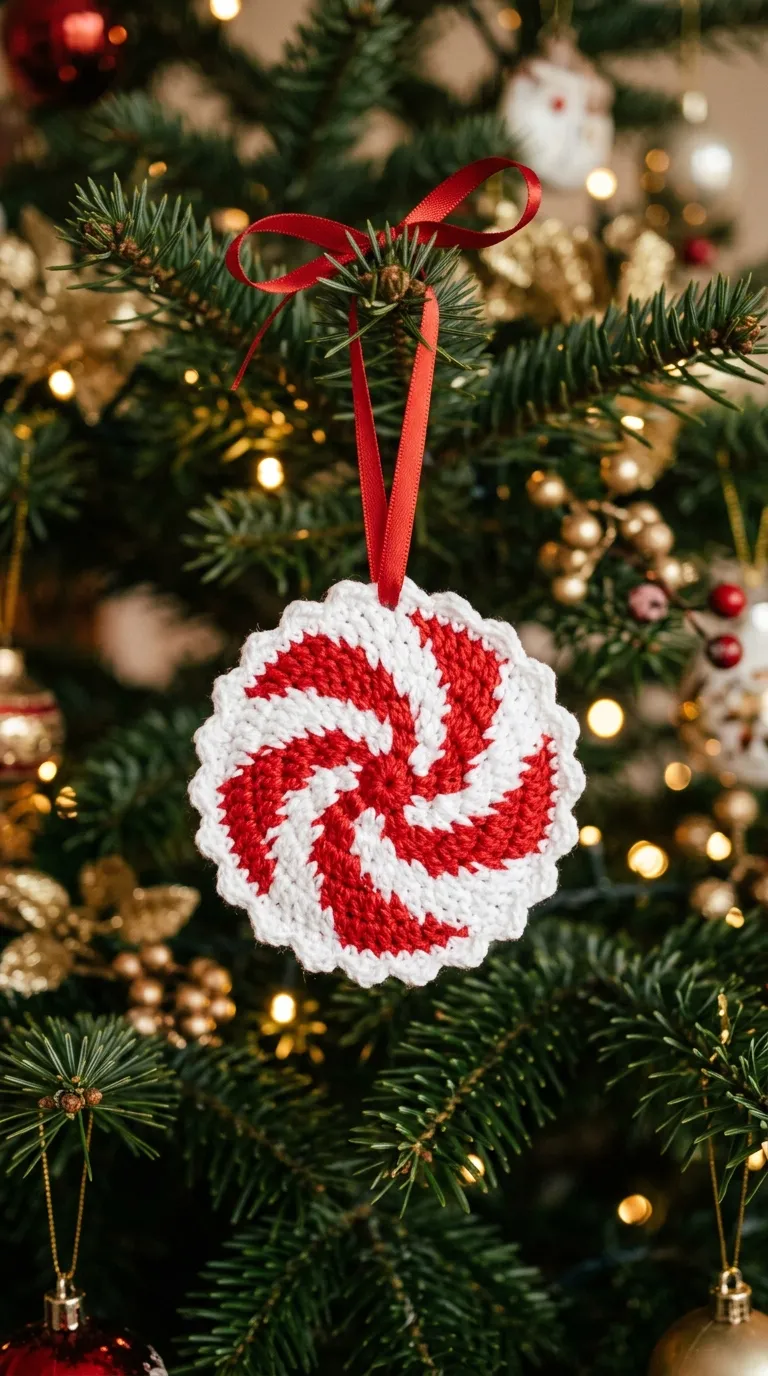
The peppermint candy disk brings cheerful vintage charm, bright graphic contrast, and sweet holiday nostalgia to Christmas tree styling. This concept features a circular, two-sided candy wheel worked in swirling spiral stripes of bright crimson and crisp white, framed by an openwork border. The bold contrast between red and white yarn draws the eye across the tree, creating visual energy that breaks up solid green boughs. By using flat, double-thick construction, the candy keeps its neat disk shape without bulging or distorting under temperature shifts. The outer picot edge mimics the frilled wrapper of nostalgic hard candies, adding a playful, handcrafted look that delights both children and adults. This lightweight ornament is simple to make and stores flat, making it an ideal choice for crafters who need quick, high-impact designs for holiday craft fairs or gift exchanges.
To create the peppermint swirl, start with white and red sport-weight yarns joined together in a single adjustable magic loop. Work alternating segments of three single crochets in each color around the circle, carrying the unused strand loosely along the back of the work to maintain smooth spiral stripes. Continue expanding the circle through regular, symmetrical increases across six continuous rounds until the disk measures approximately three inches in diameter. Crochet an identical second disk, then sandwich a round circle of recycled plastic canvas or stiff craft felt between the two crochet circles for rigidity. Join the edges of both disks using a single round of white single crochet worked through both thicknesses simultaneously, adding a tiny three-chain picot loop every fourth stitch. Fasten off the final stitch securely, thread a red satin ribbon through a top picot loop, and tie a firm knot to form a sturdy hanging loop.
4. Cozy Winter Beanie with Fluffy Pom-Pom and Ribbed Brim

Read This:

Setup Method
A miniature winter beanie ornament brings cozy alpine warmth, comforting textures, and charming winter fashion directly to holiday tree branches. This amigurumi concept mimics the construction of a real cold-weather ribbed hat, complete with a folded brim, textured body, and an oversized faux-fur or yarn pom-pom. Using soft heathered tones like oatmeal, dusty rose, slate blue, or forest green, the design creates a relaxed, ski-lodge feel that pairs well with wooden beads and knitted garlands. The vertical ribs catch ambient light, adding rich surface texture that makes the small ornament feel substantial and well-crafted. Its hollow interior makes it very lightweight, so it hangs easily from outer evergreen tips without bending delicate twigs. This charming design also doubles as a seasonal topper for wine bottles or an adorable addition to wrapped holiday packages.
To make the miniature beanie, start by crocheting the folded brim as a long, narrow flat strip worked in back-loop-only single crochet using an oatmeal-colored yarn. Continue working back and forth across eight stitches until the ribbed band measures approximately five inches, then seam the short ends together into a neat, stretchy cuff. Turn the cuff sideways and work continuous rounds of single crochet around the upper edge of the ribbed ring to build the hat body upward. Work straight for eight rounds, then execute three rounds of rapid decreases to gather the crown of the hat tightly into a rounded point. Make a tiny one-inch pom-pom using matching yarn or soft faux fur, securing it firmly to the gathered top opening with a metal yarn needle. Fold the bottom ribbed brim upward by one-half inch, then tie a loop of natural baker’s twine through the crown behind the pom-pom to finish the ornament.
5. Dainty Frosted Gingerbread Person with White Ric-Rac Trim
Step-by-Step Guide
The dainty frosted gingerbread person brings warm holiday memories, rich kitchen spices, and storybook charm into modern handmade holiday decor. This amigurumi project features a flat-profile gingerbread figure worked in rich caramel or ginger brown yarn, detailed with crisp white embroidery that looks like piped sugar icing. Tiny dark French knots form the eyes and front buttons, while delicate wavy surface slip stitches trace the cuffs, ankles, and head to mimic decorative ric-rac trim. The warm brown yarn provides a cozy contrast against snowy tree branches, making the ornament stand out clearly from across the room. Crocheting the figure as two flat panels joined with a light layer of stuffing gives it a soft, pillowy depth without making it heavy or bulky. This classic holiday character coordinates naturally with dried orange slices, cinnamon stick bundles, and vintage glass ornaments for an old-fashioned holiday display.
Begin by crocheting the front silhouette of the gingerbread person, starting at the head and working downward through the neck, chest, arms, and legs using smooth single crochet. Work an identical back panel in matching gingerbread-brown cotton yarn, setting it aside while you complete the surface embroidery on the front piece. Using a sharp tapestry needle and white cotton floss, embroider small scalloped lines along the wrist and ankle cuffs, and add three small red French knots down the chest for buttons. Align the front and back panels with wrong sides facing together, joining the outer edges with a neat round of brown single crochet. Pause along the upper torso to insert a light layer of polyester stuffing into the limbs and head, taking care to keep the body flat and evenly filled. Close the final seam with a slip stitch, then thread an eight-inch white cord through the top of the head to form a clean suspension loop.
6. Golden Acorn with Real Wooden Cap and Hanging Loop
Read This:

How to Make
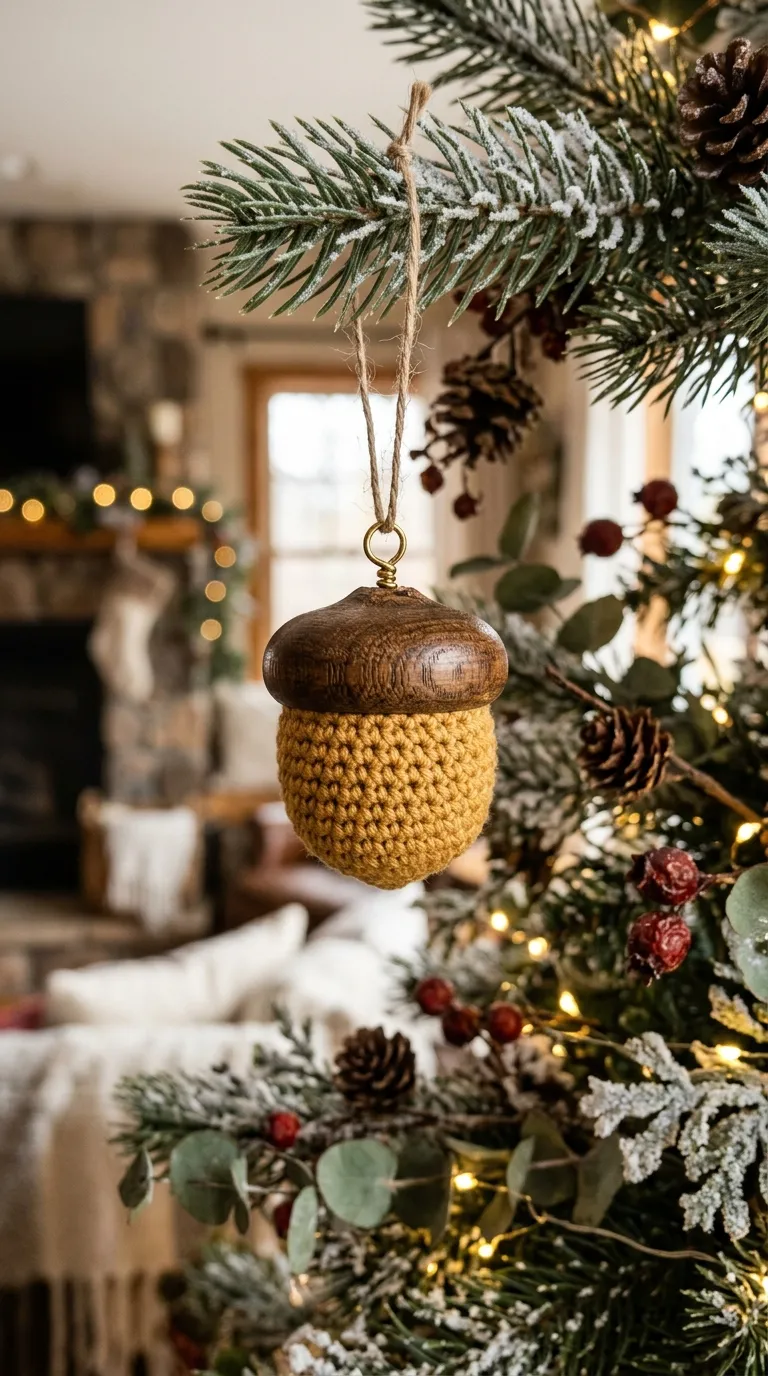
The golden acorn ornament blends delicate textile work with natural wood textures, creating an elegant woodland bauble that celebrates autumn and winter nature. This concept combines a smooth, rounded amigurumi nut crocheted in warm mustard, antique gold, or soft moss yarn with an authentic, foraged oak acorn cap or a turned wooden bead. The juxtaposition between soft, hand-crocheted cotton and smooth, rigid wood creates an artisanal, mixed-media look that stands out on the tree. The acorn’s small, rounded shape brings subtle visual variety when grouped alongside larger spherical baubles, helping to fill small gaps between branches. Because the project uses very little yarn, it offers a quick and satisfying way to use up treasured scraps of premium fibers. These petite ornaments also look lovely grouped in shallow ceramic bowls, strung along dining table garlands, or used as elevated accents on holiday gift wrapping.
To build the acorn, begin by making the lower nut shape using an adjustable magic ring and rich mustard-gold sport-weight cotton yarn. Work continuous rounds of single crochet, increasing gradually to sixteen stitches to form a smooth, rounded dome that tapers slightly toward a rounded bottom tip. Stuff the small cavity firmly with polyester fiberfill, then execute two rounds of rapid decreases to close the upper opening securely. Select a cleaned, dried natural acorn cap or a turned wooden cap that matches the diameter of your crocheted nut. Coat the inside rim of the wooden cap with a clear, heavy-duty craft adhesive, pressing the top of the crocheted nut firmly into the cap for sixty seconds until the glue sets. Drill a tiny hole through the center of the wooden cap, loop a length of thin metallic brass wire through the opening, and twist the ends inside the cap before securing the nut to create a strong hanger.
7. Serene Little Dove with Folded Textured Wings
Execution Process
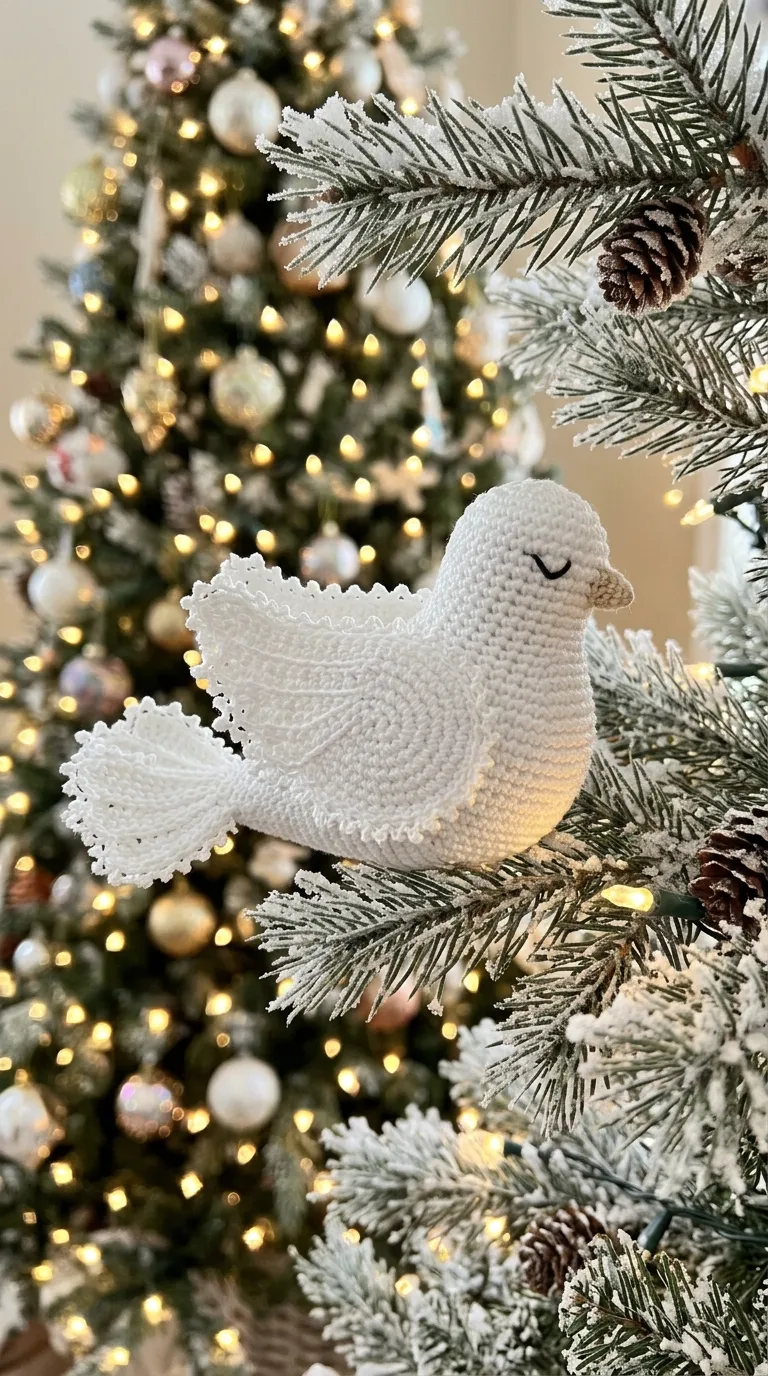
The serene little dove ornament introduces quiet peace, symbolic warmth, and gentle movement to holiday trees through clean shapes and soft white fibers. This design features a streamlined, bird-like amigurumi body worked in pure white or soft cream cotton, accented with two separate textured wings sewn to the sides in a folded resting position. The smooth, sweeping lines of the tail feathers flare outward, catching ambient tree lights and giving the bird a graceful, elegant presence. Embroidered sleepy eyes made from fine charcoal thread give the dove a restful, gentle expression that enhances the peaceful feel of seasonal decor. Because the bird is hollow and lightly stuffed, it floats effortlessly on slender branches without tipping downward. This timeless design fits comfortably into traditional, modern, and faith-based holiday settings, serving as an uplifting focal point that coordinates with various color palettes.
Start the dove by crocheting the body from the beak toward the tail, working in continuous spiral rounds of white sport-weight yarn using a 2.25 mm hook. Increase through the throat and chest to build a soft, rounded breast, then decrease toward the back to shape the tail into a flat, flared fan worked in back-loop-only slip stitches. Stuff the chest cavity firmly with polyester fiberfill, making sure the neck stays supported without stretching the stitches apart. Crochet two small oval wings separately, working concentric rounds of single and half-double crochet with picot tips to simulate delicate flight feathers. Pin the wings to the sides of the dove at a gentle backward angle, sewing them securely in place along the upper edge with hidden whipstitches. Embroider a tiny beak using two straight stitches of pale gold floss, and tie a fine nylon illusion cord through the upper back balance point so the dove hangs perfectly level on the tree.
8. Woodland Amanita Mushroom with Embroidered White Dots
Read This:
Step-by-Step Guide
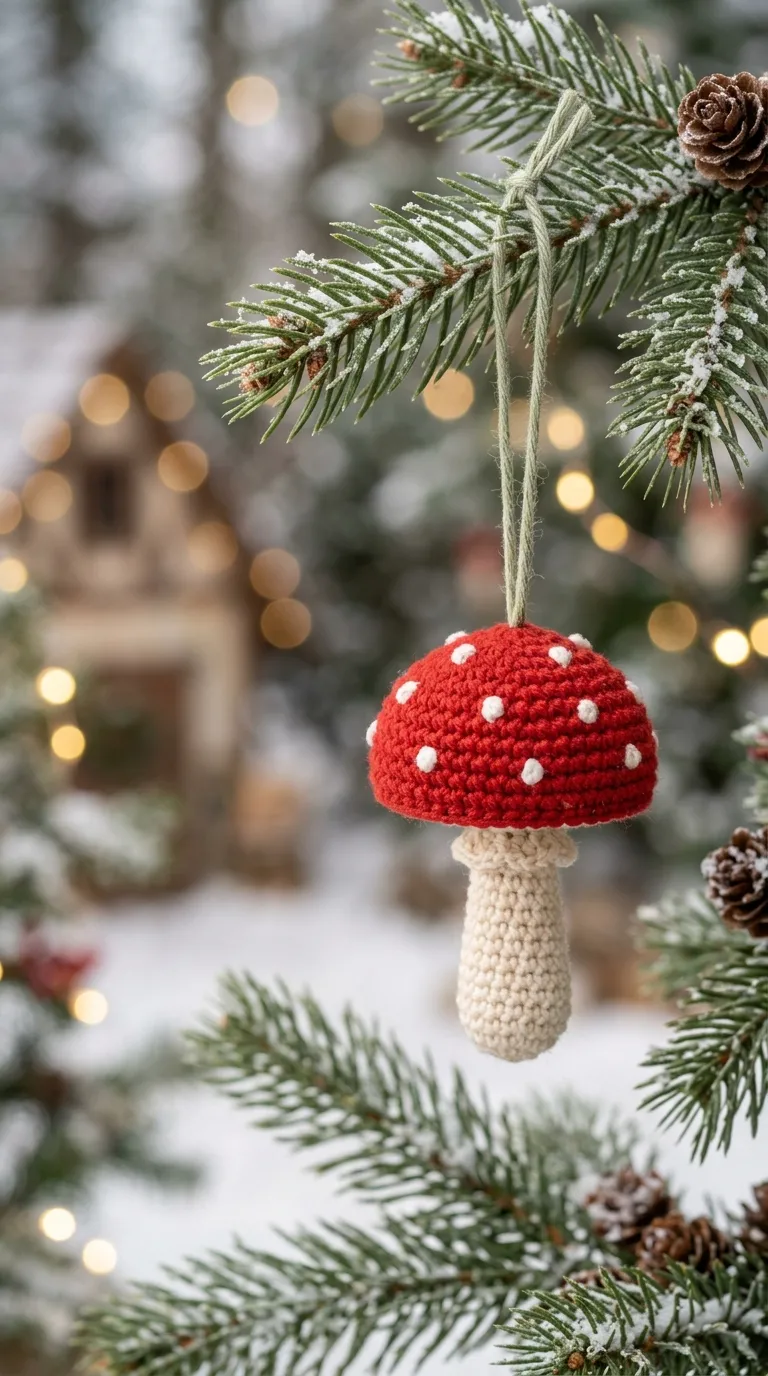
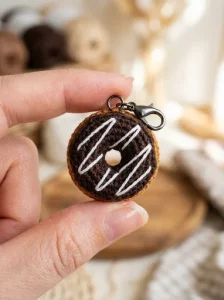
The woodland amanita mushroom brings whimsical storybook charm, bright woodland color, and folklore-inspired holiday style to winter decorating. This design combines a vibrant scarlet red domed cap with a slender, pale cream or unbleached linen stalk, finished with French knots or felt spots. The bright red cap stands out against evergreen needles, adding a cheerful splash of festive color to deep green branches. The bell-shaped cap curves downward, giving the mushroom an authentic, organic look that mimics real forest fungi. This design taps into classic European holiday traditions, where red mushrooms symbolize good fortune and forest magic in winter homes. The small, lightweight design makes it simple to display multiple mushrooms across a single tree, weaving an enchanting, storybook woodland aesthetic throughout your living room.
Begin by crocheting the bright red cap, starting at the top point with six single crochet stitches in an adjustable ring. Increase gradually across eight continuous rounds, shaping the fabric into a deep, downward-curving bell with a smooth, rounded crown. Once the cap reaches the desired width, switch to cream-colored yarn and work through the back loops only to create the flat underside of the cap, tapering the stitches inward toward a narrow center hole. Work the stalk downward from this center opening in continuous rounds of cream single crochet, stuffing the cap and stem firmly as you build the shape. Flatter the base of the stem with two decrease rounds so the mushroom sits evenly if displayed on a flat surface. Using a tapestry needle and white cotton floss, embroider small French knots across the red cap, spacing them naturally. Attach a loop of rustic green linen thread through the center top of the red cap to complete the ornament.
9. Monochromatic Ribbed Bauble with Wooden Bead Accents
Setup Method
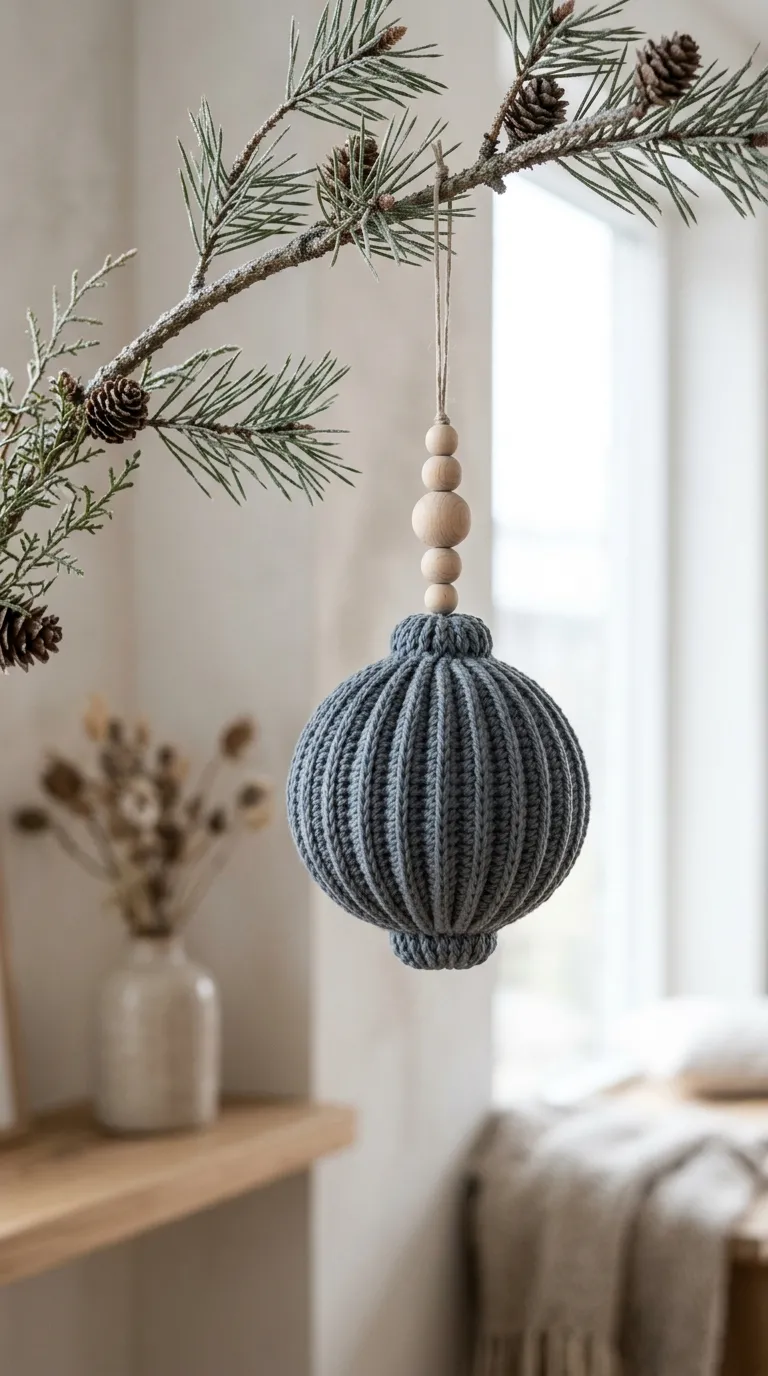
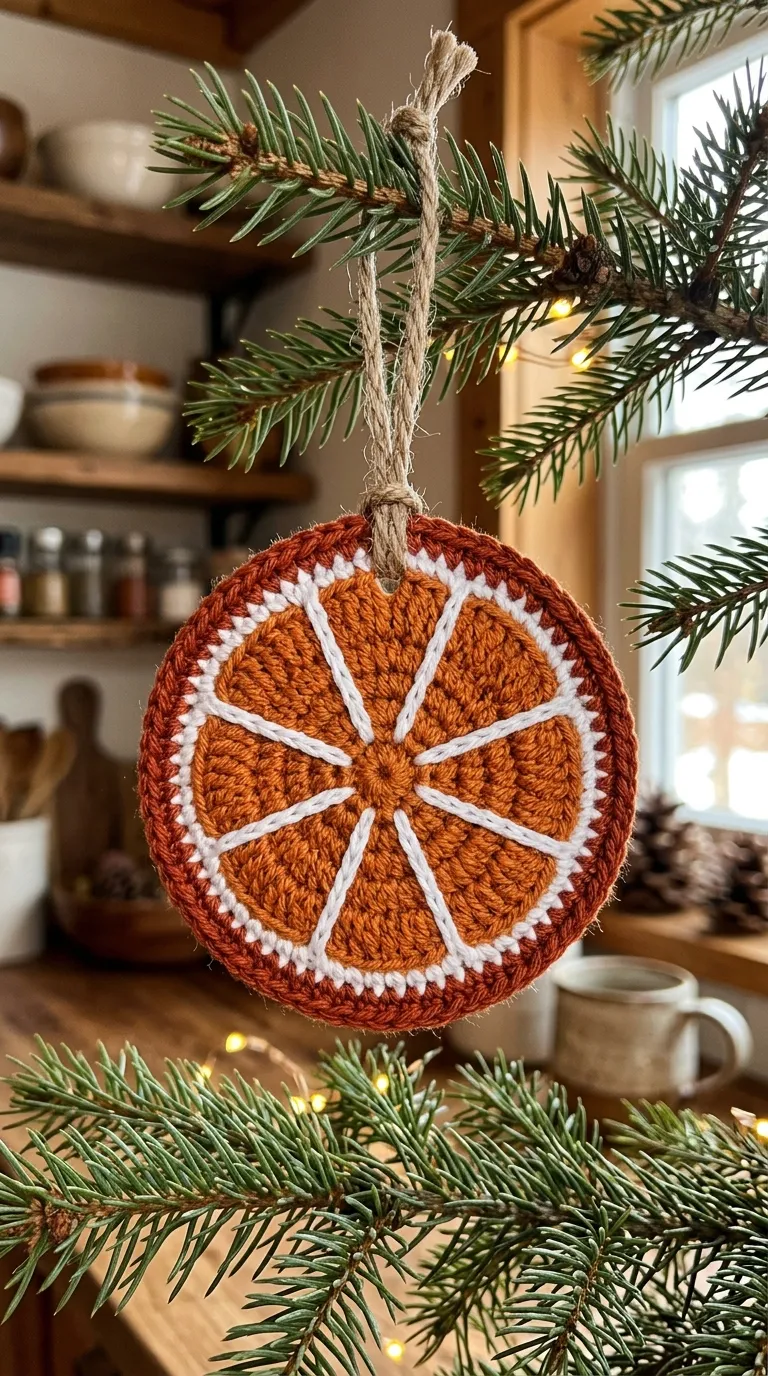
The monochromatic ribbed bauble offers a clean, contemporary alternative to classic shiny glass bulbs, using neat vertical ridges to build architectural form and subtle visual depth. This design works around a round internal form or dense core of stuffing, using back-loop-only stitches to produce sharp, vertical relief lines that run from pole to pole. Worked in neutral shades like slate grey, soft oatmeal, deep charcoal, or muted olive, the bauble introduces an understated, upscale feel that suits modern holiday interiors. The raised ribs catch both warm indoor lamps and cool outdoor daylight, casting soft shadows that highlight the precision of the hand-crocheted stitches. Natural, raw wooden beads placed above and below the yarn sphere add an artisanal touch that grounds the modern shape. This durable bauble is an ideal choice for high-traffic rooms, as it maintains its shape and appearance without denting or scratching over time.
To make the ribbed bauble, crochet a flat rectangular swatch using back-loop-only single crochet worked across twenty-four stitches in a medium-weight cotton yarn. Continue working back and forth until the textured, accordion-like fabric measures approximately five inches in length when slightly stretched. Seam the foundation edge to the final row using tidy slip stitches through the matching loops, forming an open, ribbed cylinder. Thread a matching piece of sturdy yarn through the edge stitches of the bottom opening, cinching it tightly into a gathered point and knotting it securely inside. Fill the interior cavity firmly with polyester fiberfill, shaping it into a smooth, even ball with your fingers as you add the stuffing. Cinch the top opening closed with another gathering thread, securing the knot firmly. Thread both cord ends through an untreated natural beechwood bead, tying the excess cord into a neat suspension loop above the bead.
10. Tiny Citrus Orange Slice with Radiating White Rind
Read This:

How to Make
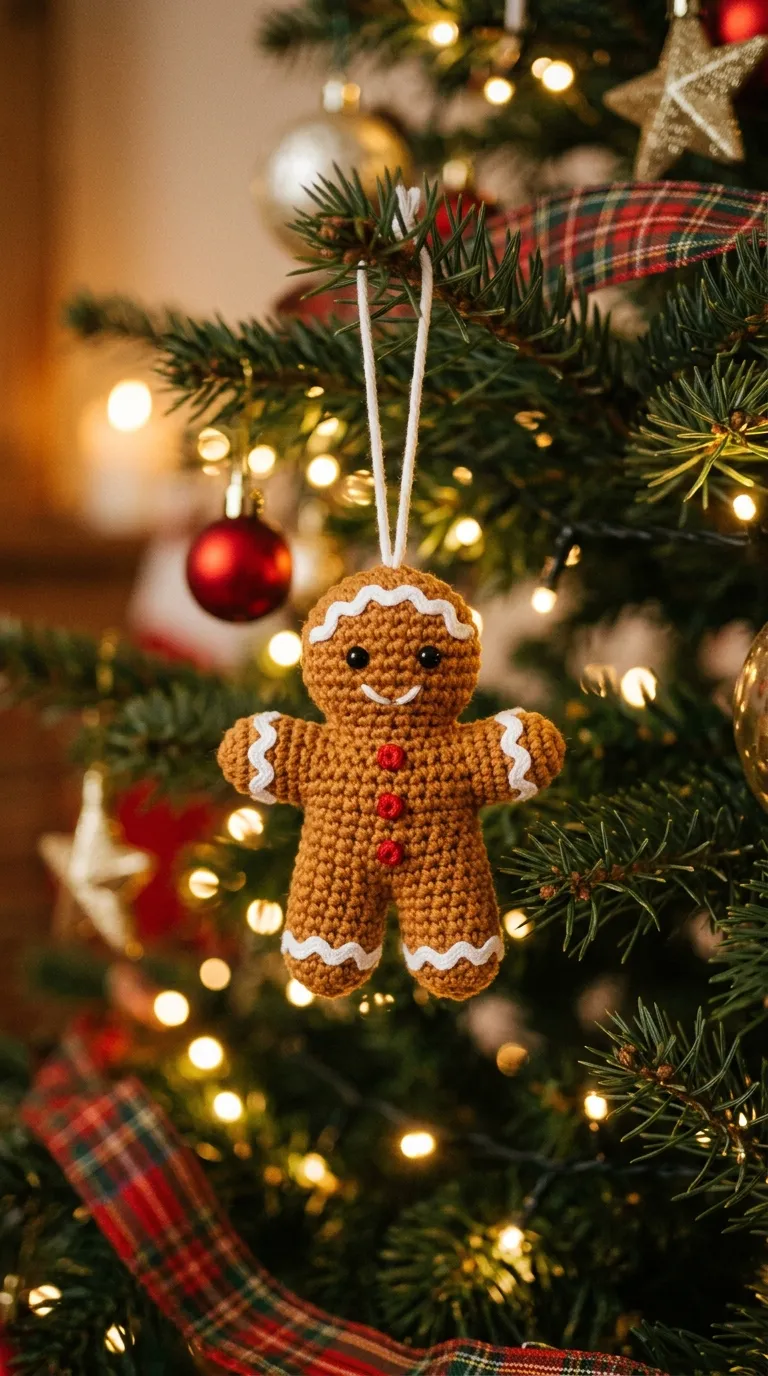
The tiny citrus orange slice brings bright kitchen warmth, sunny winter cheer, and fresh natural textures to seasonal holiday decorating. This design mimics a dried orange wheel, featuring radiating triangular segments worked in burnt orange or amber yarn, framed by an ivory pith line and a deep orange rind. The circular shape and bright fruit colors add a welcoming, cheerful feel that pairs nicely with dried fruit garlands and cinnamon stick bundles on rustic trees. Because the slice is crocheted as a flat, double-layered disk, it stays completely flat without curling along the outer edges. The simple geometric segments catch the light, adding clean graphic detail to traditional holiday greenery. This design works exceptionally well for makers looking for quick, easy projects that use up small bits of leftover yarn while delivering bright, high-impact tree decor.
Begin the citrus slice by making a small magic ring with crisp white cotton yarn to form the central core of the fruit wheel. Switch to bright burnt-orange yarn and work eight distinct triangular segments around the ring, using small chain spaces between each segment to create fine white gaps that look like natural fruit pulp. Once the segments are complete, work a continuous round of white single crochet around the entire wheel, stitching through the gaps to define the pith layer. Switch to a darker rust-orange yarn for the final two rounds, working firm single crochet stitches around the edge to build the outer rind. Crochet an identical matching disk, align the back sides together, and join them with a single round of slip stitches through the outer rind loops to add thickness and prevent curling. Knot a length of braided jute twine or thin gold cord through the outer rind, leaving a three-inch loop for hanging on tree branches.
10. Tiny Citrus Orange Slice with Radiating White Rind
How to Make
The tiny citrus orange slice brings bright kitchen warmth, sunny winter cheer, and fresh natural textures to seasonal holiday decorating. This design mimics a dried orange wheel, featuring radiating triangular segments worked in burnt orange or amber yarn, framed by an ivory pith line and a deep orange rind. The circular shape and bright fruit colors add a welcoming, cheerful feel that pairs nicely with dried fruit garlands and cinnamon stick bundles on rustic trees. Because the slice is crocheted as a flat, double-layered disk, it stays completely flat without curling along the outer edges. The simple geometric segments catch the light, adding clean graphic detail to traditional holiday greenery. This design works exceptionally well for makers looking for quick, easy projects that use up small bits of leftover yarn while delivering bright, high-impact tree decor.
Begin the citrus slice by making a small magic ring with crisp white cotton yarn to form the central core of the fruit wheel. Switch to bright burnt-orange yarn and work eight distinct triangular segments around the ring, using small chain spaces between each segment to create fine white gaps that look like natural fruit pulp. Once the segments are complete, work a continuous round of white single crochet around the entire wheel, stitching through the gaps to define the pith layer. Switch to a darker rust-orange yarn for the final two rounds, working firm single crochet stitches around the edge to build the outer rind. Crochet an identical matching disk, align the back sides together, and join them with a single round of slip stitches through the outer rind loops to add thickness and prevent curling. Knot a length of braided jute twine or thin gold cord through the outer rind, leaving a three-inch loop for hanging on tree branches.
Common Beginner Mistakes and How to Avoid Them
Crocheting small holiday ornaments requires close attention to stitch tension, internal stuffing, and neat closing techniques that differ from making larger blankets or garments. The most common mistake beginners make is using an oversized hook, which creates loose, open stitches that allow white polyester stuffing to show through the finished ornament. Always choose an ergonomic hook that is one or two sizes smaller than the yarn manufacturer recommends, ensuring tight, solid single crochet stitches that hide the filling completely. Another frequent issue is overstuffing or understuffing the miniature forms; overstuffing stretches the stitches apart and distorts the shape, while understuffing leaves soft, dented ornaments that lose their structure when packed away. Pack your fiberfill in small, gradual pinches, shaping the piece with your fingers as you work to keep the curves smooth and even. Beginners also tend to use standard single crochet decreases, which can leave small bumps and gaps along the surface of the work. Use the invisible decrease method instead, working through the front loops of two adjacent stitches to create a seamless decrease that looks just like regular stitches. Taking care with these small construction details will ensure your finished ornaments look polished, professional, and built to last.
Practical Tips for Better Results
Achieving professional, boutique-quality results with small crochet ornaments comes down to choosing the right materials, refining internal mechanics, and finishing each piece with care. Always select smooth, mercerized cotton yarns over fuzzy acrylics or wools; combed cotton delivers crisp stitch definition, shows off textured patterns clearly, and will not shed loose fibers onto tree branches. When starting any circular amigurumi shape, use an adjustable magic ring rather than a standard foundation chain loop; the magic ring cinches completely shut, preventing loose center holes where stuffing might poke through. To keep your suspension loops secure and level, attach hanging cords before closing the final stitches of your ornament, anchoring the knot inside the stuffed cavity with a dab of fabric glue. Use locking plastic stitch markers to track the first stitch of every continuous round, which prevents accidentally dropping or adding stitches as you work around small shapes. Finally, block flat components—like star points, wings, and leaves—with a cool steam iron before assembling the pieces; gentle blocking sets the fibers, straightens edges, and gives your completed ornaments a crisp, professional finish.
Styling, Presentation, or Organization Ideas
The visual appeal of handmade crochet ornaments depends on how thoughtfully they are integrated with other decorative elements across your holiday tree, mantel, or tabletop displays. Instead of scattering yarn ornaments randomly across the tree, space them evenly among contrasting textures, like shiny mercury glass bulbs, matte ceramic stars, and warm fairy lights, to build a layered look. To create an eye-catching focal point, cluster three matching crochet ornaments of varied shapes together on a low branch, balancing them against deep evergreen needles. Beyond decorating the Christmas tree, you can string multiple handmade ornaments along a length of twisted jute twine to create a textured garland across a fireplace mantel, open bookshelf, or sunny window frame. When packaging handmade ornaments as gifts, nestle the crochet baubles inside kraft gift boxes lined with natural crinkle paper, tying an extra mini ornament into the exterior ribbon as a charming gift topper. For simple off-season storage, organize your ornaments in compartmentalized egg cartons or divided plastic containers; this keeps delicate cords untangled, protects tiny details from dust, and ensures your handmade pieces emerge fresh, clean, and ready for next year’s decorating.
Budget or Time Planning
Making your own crochet holiday ornaments provides significant savings over purchasing boutique seasonal decor, but finishing a coordinated set requires realistic planning and organized project pacing. Establish an achievable timeline four to six weeks before the holiday season begins, dedicating small thirty-minute stitching sessions to complete one or two miniature ornaments per evening. Organize your production by batching steps together: crochet all circular bases and body panels during the first week, work on smaller wings, caps, and details during the second week, and reserve the final week for assembly, embroidery, and attaching hanging loops. Save on craft supplies by purchasing cotton yarns in neutral multipacks, or use up small scrap balls left over from earlier knitting and crochet projects throughout the year. Keep your leftover yarn organized by color in clear bins; small ornament details like pinecone scales, mushroom stalks, and pom-poms rarely need more than five to ten yards of yarn, making them ideal stash-busting projects. This structured, step-by-step approach keeps holiday crafting relaxing and affordable, helping you build a beautiful collection of handmade decorations without last-minute holiday stress.
Creative Expansion and Advanced Inspiration
Once you master the basic amigurumi ornament designs in this guide, you can expand these core construction skills into larger seasonal decorating projects and personalized keepsakes. Scale up your favorite miniature patterns by using bulky chenille yarn and an 8 mm hook to create oversized plush holiday pillows for living room sofas, or shrink the designs with fine lace thread to make delicate jewelry charms. You can also add sensory elements to your ornaments, such as tucking dried lavender buds, whole cloves, or aromatic cedar shavings inside the polyester stuffing to release subtle natural holiday scents throughout your room. For a personalized touch, embroider significant family initials, baby birth years, or commemorative dates onto the bases of gingerbread figures and baubles using fine metallic thread. You can also adapt these patterns into interactive advent calendars, hanging twenty-four numbered miniature ornaments across a wall branch for family members to discover each morning leading up to Christmas. The timeless appeal of handmade crochet turns these simple crafting sessions into treasured seasonal traditions, filling your home with warmth and beauty for many holidays to come.