Crochet flower keychains represent a prominent craft trend across visual discovery platforms, serving as compact, functional accessories and expressive handmade accents. These small portable items merge fiber art with daily utility, offering an approachable medium for exploring floral structures, yarn textures, and color combinations. Readers will explore ten distinct floral keychain patterns, ranging from flat retro petals and layered dimensional blossoms to miniature potted designs and succulent silhouettes. Each design breakdown details specific stitch anatomy, construction stages, loop securement techniques, and essential metal hardware assembly. Understanding these floral constructions allows makers to transform leftover yarn scraps into purposeful gifts, bag charms, and decorative embellishments without large financial investments. Beyond aesthetics, mastering these miniature projects builds fundamental crochet skills such as working in the round, controlling yarn tension on small gauges, and joining metallic jump rings cleanly. This comprehensive tutorial provides practical assembly instructions, yarn weight recommendations, and finishing procedures, ensuring every finished floral accessory maintains long-term structural integrity through daily handling and transport.
Why This Idea Is Trending or Useful
Handmade botanical keychains continue to trend widely across digital inspiration boards due to their balance of accessibility, functional utility, and aesthetic versatility. Modern design preferences favor tactile, artisan items that replace mass-produced plastic accessories with sustainable, natural fibers. As an easy project requiring minimal yarn yardage, these floral charms serve as an ideal entry point for beginners seeking immediate creative output without committing to large garments or blankets. From a practical standpoint, the compact dimensions make keys easier to locate within bags while adding a distinct tactile presence to everyday carry items. The designs adapt effortlessly across varied stylistic themes, encompassing minimalist neutral palettes, vibrant retro motifs, and soft cottagecore styles. Crafters can produce a complete botanical charm in under an hour, making these items exceptionally viable for craft fairs, seasonal gifting, and personalized accessory collections. Their rising popularity stems directly from this fusion of low material overhead, rapid construction timelines, and durable decorative application across backpacks, purses, planners, and key sets.
Materials and Preparation
Proper preparation directly determines the durability and aesthetic appeal of any miniature fiber craft. The foundational materials require durable mercerized cotton yarn or tightly spun acrylic yarn in light worsted, sport, or fingering weights. Cotton yarn provides structural rigidity and crisp petal definition, preventing soft edges from curling excessively during sustained daily friction. A steel or ergonomic aluminum crochet hook ranging between 2.25 mm and 3.5 mm ensures tight, consistent stitches that retain dimensional form without gaps. Additional essential tools include sharp fabric snips, a blunt tapestry needle for weaving thread tails securely, locking stitch markers, and split rings paired with heavy-duty lobster clasps. Preparing requires organizing yarn skeins by complementary color palettes, measuring jump ring diameters, and presorting hardware components on a clean work surface. Makers must evaluate stitch tension before beginning, as tight gauge control ensures the finished botanical charm remains stiff and resilient rather than loose or misshapen after regular contact with heavy key sets.
1. Miniature Classic Daisy Charm

Step-by-Step Guide
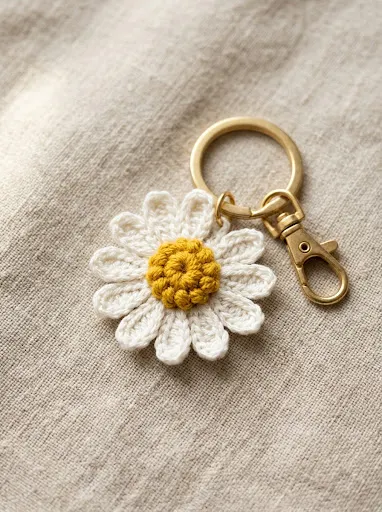
The classic daisy charm relies on a clean, high-contrast palette featuring a solid golden-yellow core encircled by radiating white petals. This design incorporates a flat circular disc formed through single crochet stitches worked continuously into an adjustable magic loop, establishing a dense, firm base that holds structural integrity under daily pocket storage. The white petal loops extend outward from the perimeter using standard chain extensions and slip stitches, creating twelve distinct, evenly spaced petals that remain rigid without curling inward. The flat profile makes this charm exceptionally practical for organizing key clusters, sliding smoothly into pockets without unnecessary bulk. Mercerized cotton thread or sport-weight yarn prevents excessive fraying around the petal edges, ensuring the sharp botanical geometry remains clearly visible over prolonged use.
To construct this charm, form an adjustable loop using golden yarn and work six single crochet stitches into the center, pulling the strand taut to eliminate central apertures. Increase evenly in the second round to twelve stitches, fasten off the golden fiber cleanly, and weave the starting tail into the wrong side. Join crisp white yarn to any outer stitch loop, then chain five, work three double crochet stitches along the chain length, and slip stitch back into the baseline stitch. Advance to the next stitch along the circumference and repeat this petal formation across all twelve available edge loops. Using a blunt tapestry needle, weave all residual ends deeply through the central core to lock the tension permanently. Finally, open a sturdy split ring, thread it through the apex of any single petal loop, attach a lobster clasp, and close the ring securely.
2. Dimensional Layered Rosebud Accent
Read This:
Execution Process
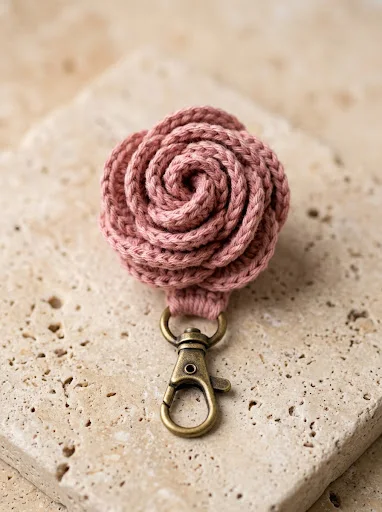
The dimensional layered rosebud charm utilizes concentric floral spirals to mimic natural garden blooms, producing a luxurious textured accessory for backpacks and totes. Unlike flat motifs, this design constructs a long scalloped fiber strip that coils tightly inward, forming overlapping petals that build outward volume from a central spiraled core. The resulting structure provides firm, cushioned dimensionality that retains its spherical geometry even when handled frequently. Using a slightly heavier fingering or sport-weight acrylic yarn produces soft, rich gradients when using variegated threads, while solid rose hues emphasize the stepped ridge heights of the petals. The layered format conceals structural interior stitching completely, making the piece visually seamless from every perspective while maintaining sufficient stiffness to prevent deflation.
Begin by working a foundation chain of thirty-two stitches using a 3.0 mm hook, ensuring loose tension along the initial spine. Work a foundation row of alternating single crochet and chain spaces to establish anchors for petal expansion, then execute five treble crochet clusters into each designated chain space across the entire length, allowing the edge to naturally twist and ripple. Fasten off with a twelve-inch yarn tail, thread the tail onto a blunt needle, and carefully roll the scalloped ribbon from the narrow end into a compact, tiered cylinder. Drive the tapestry needle horizontally across the lower base multiple times in a crosswise pattern, binding every internal layer securely into position. Pierce an eyelet pin or heavy-duty jump ring directly through the densest part of the stitched base, fasten the metal ring closed, and link it directly to a swivel key ring.
3. Flat Retro Five-Petal Wildflower
How to Create
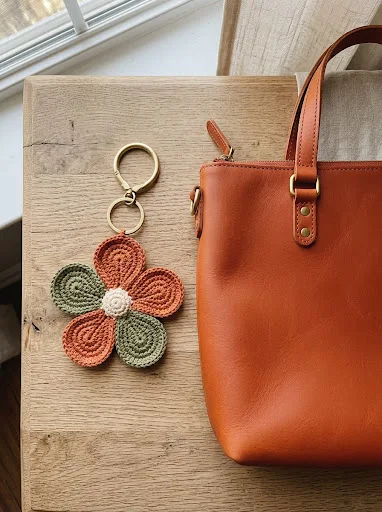
The flat five-petal wildflower takes inspiration from mid-century graphic patterns, emphasizing bold proportions, minimalist balance, and clean stitch work. This design uses a two-round construction method where an oversized central hub provides balance for five broad, paddle-shaped petals. The petals are worked directly into the center without intermediate expanding rounds, which keeps the total charm diameter compact and structurally cohesive. This flat geometry is particularly beneficial for planners, laptop bags, and key bundles, as it remains completely flat against surfaces without snagging on surrounding fabrics. Choosing complementary vintage shades, such as mustard yellow centers framed by terracotta or olive petals, creates a sophisticated modern aesthetic that appeals directly to contemporary fiber art audiences.
Start by wrapping a double magic loop using the central color to guarantee center security, then work ten single crochet stitches directly into the ring and slip stitch to close the circle. Fasten off the center color, join the secondary petal yarn with a standing slip stitch, and work two chains to gain working height. Into the very same stitch, place one half-double crochet, two double crochet stitches, and one half-double crochet, then chain two and slip stitch into the adjacent base stitch to lock down the first completed petal. Repeat this structured sequence around the remaining eight stitches until five uniform, rounded petals ring the central core evenly. Secure the final slip stitch onto the reverse side, tie off the loose ends using a reef knot, hide the strands inside the center hub, and pierce a jump ring through the valley between two petals to attach key hardware.
4. Textured Sunburst Sunflower Keychain
How to Make
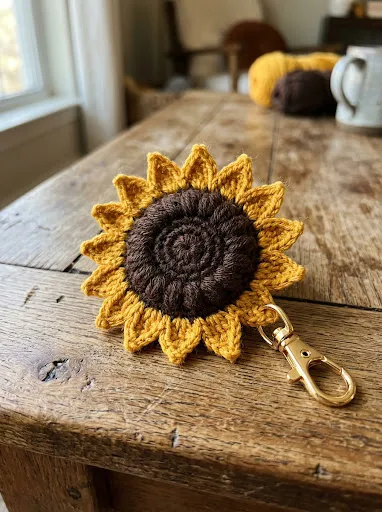
The sunburst sunflower charm features a deeply textured, dark chocolate seed center surrounded by pointed, bright yellow petals, producing a recognizable rustic motif. This piece utilizes textured puff stitches or cluster stitches in the circular center to imitate the natural tactile surface of sunflower seeds. The surrounding yellow petals use descending stitch heights, beginning with tall double trebles and tapering sharply down toward the tips using tiny slip stitches and picot points. This sharp variation in stitch height gives the petals an authentic pointed profile that holds its shape without requiring interior wire armatures. The resulting charm displays a balance of high-relief surface texture and geometric perimeter lines, making it a standout visual accent on neutral canvas totes.
Begin by working twelve puff stitches separated by single chain spaces into an adjustable loop using dark brown cotton thread, pulling the loop closed to generate a raised, button-like seed platform. Join rich golden yarn into any chain space, chain three, and work two partial treble crochet stitches, pulling through all loops simultaneously to complete a defined cluster. Chain two, work a single slip stitch into the first chain to form a sharp decorative picot point, chain two downward, and anchor the strand into the adjacent space with a firm slip stitch. Continue this sequence across every gap along the circumference until twelve pointed sunburst rays encircle the raised brown core. Draw both yarn ends to the rear surface, weave them deeply through the dense base of the puffs, insert a split key ring through the back loops of one petal, and clamp the link shut.
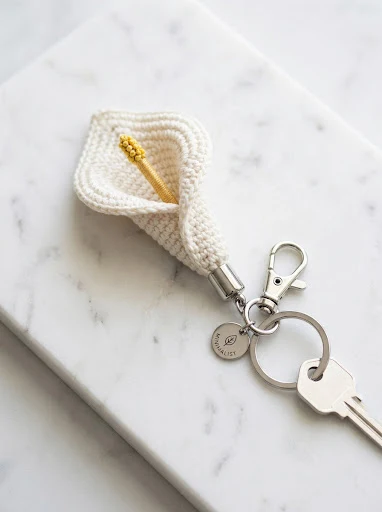
5. Modern Minimalist Calla Lily Cone
Setup Method
The modern calla lily charm is characterized by its sculptural, trumpet-shaped cone wrapping gracefully around a contrasting central stamen. This piece departs from symmetrical circular patterns, utilizing a flat crocheted oval that is folded and stitched into an elegant funnel form. The pristine outer petal displays smooth, single-crochet surfaces that highlight minimalist style, prioritizing precise contouring over surface ornamentation. A slender, golden-yellow interior stamen extends slightly beyond the upper curved lip, providing an authentic botanical touch. This streamlined, elongated profile fits naturally alongside car keys and entry fobs, offering a smooth, sleek silhouette that avoids excess bulk while presenting a refined, modern artisan look.
To create the outer trumpet, chain nine stitches using smooth off-white cotton yarn, work along both sides of the chain using single, half-double, and double crochet stitches to form a smooth, rounded flat oval, and fasten off with an eight-inch yarn tail. Construct the inner stamen separately by chaining eight stitches in golden yarn, working slip stitches back down the chain length to create a firm cord, and securing the ends. Position the yellow stamen within the lower third of the white oval, wrap the bottom edges of the oval inward around the stamen base to form a cone, and stitch the overlapping fiber edges together using the tail. Fasten the bottom seam firmly with several whipstitches, thread a long metal headpin upward through the lower funnel base through the stamen, bend the top wire into a closed loop, and attach your keychain hardware.
6. Miniature Hanging Potted Plant Charm

Execution Process
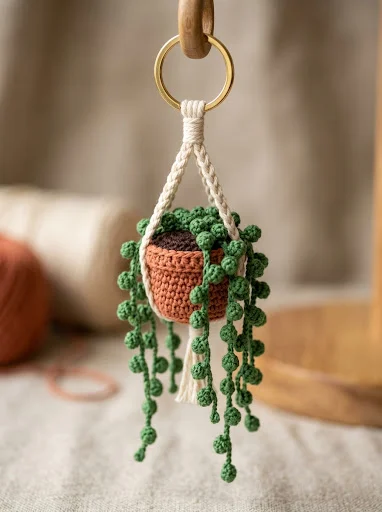
The miniature hanging potted plant charm captures the popular botanical aesthetic by combining a structured, bucket-shaped yarn pot with overflowing green foliage strands. The tiny container uses dense, firm single crochet rounds worked exclusively in back loops to establish crisp horizontal ledges and vertical stability. Cascading tendrils are formed using simple chain sequences punctuated by slip-stitch leaf nodes, creating the visual impression of a string-of-pearls or miniature ivy plant spilling over a ceramic vessel. This dimensional micro-sculpture functions as an eye-catching bag pendant or decorative locker charm, providing depth and movement through the freely dangling foliage strands. Using earthy terracotta yarn for the pot and variegated moss tones for the vines enhances the realistic, handmade quality of the piece.
Using terracotta sport-weight cotton, work six single crochet stitches into a magic circle, increase to twelve stitches, and work one round in the back loops only to establish a flat bottom edge. Continue working even rounds upward for four tiers to form the container walls, fold the final row outward to mimic a ceramic pot rim, and lightly stuff the interior with recycled fiberfill. Using deep green yarn, create a small flat circular disc to serve as topsoil, chain multiple varied lengths extending from this green cap, and work small slip stitches along each chain to establish trailing foliage strands. Sew the green foliage disc securely into the upper rim of the terracotta pot using a whipstitch, capturing the fiberfill inside. Finally, anchor a three-strand braided cord to opposite edges of the pot rim, uniting them at a single split ring for balanced suspension.
7. Soft Plush Cherry Blossom Sphere
How to Create
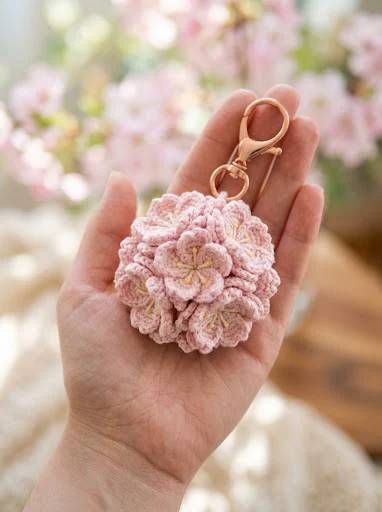
The soft plush cherry blossom charm combines Japanese amigurumi techniques with delicate floral anatomy, producing a tactile, rounded accessory with indentations defining five distinct petals. Rather than lying flat, this charm features front and back circular faces lightly stuffed with soft batting, giving it a pillow-like feel that resists creasing. The outer perimeter incorporates deep indentation valleys formed by anchoring elongated slip stitches directly into the central hub, drawing the circular volume inward into five distinct segments. The soft pastel pink fiber paired with a central contrasting French knot or embroidered pistil creates a soft, balanced accent suitable for zipper pulls, vehicle mirrors, or delicate purse straps.
Construct two identical circular discs by working six single crochet stitches into a magic ring using pale pink cotton yarn, increasing across three concentric rounds until eighteen stitches are obtained. Place the wrong sides of both discs together, join matching yarn along the combined edge, and work a border consisting of single crochet, double crochet, and slip stitch petals, working through both layers simultaneously. Before sealing the final two petal segments, insert a small amount of polyester fiberfill into the core using a chopstick to establish uniform plush dimensionality. Complete the final petal stitches to close the seam, fasten off, and thread the remaining strand through the central hub five times, pulling firmly over the petal valleys to sculpt defined clefts. Knot the sculpting thread securely at the back, trim cleanly, and attach a swivel clasp directly to the center cleft.
8. Multi-Petal Layered Carnation Ball
Read This:
Step-by-Step Guide
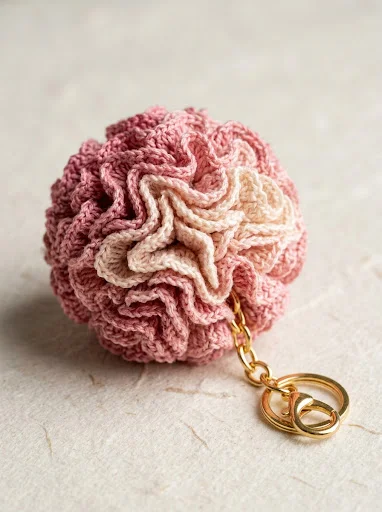
The layered carnation charm delivers exceptional fullness and texture, resembling a dense sphere of ruffled floral tissue. This voluminous visual appeal is achieved through exponential stitch increases, where each foundation space holds three to four fan stitches, forcing the fiber fabric to ripple and fold over itself repeatedly. The dense gathering of ruffled edges creates a resilient pom-pom effect that hides everyday wear and resists flattening during heavy handling. Carnation charms offer great creative flexibility, allowing crafters to apply tonal shifts by working the foundation rows in deep wine shades and completing the ruffled outer edges with soft blush or cream tones for a realistic petal margin.
Begin by chaining twenty stitches using sport-weight yarn, then work three double crochet stitches into every single chain space across the foundation line, establishing a base ruffle of sixty stitches. For the subsequent round, turn the piece and work four double crochet stitches into every single existing stitch, expanding the total stitch count dramatically to two hundred and forty active ruffled loops. Fasten off with a generous fourteen-inch yarn tail, thread the tail through a large-eye tapestry needle, and thread it through the straight foundation chain to gather the entire piece tightly inward. Spiral the gathered base into a tight, dense sphere, passing the needle back and forth through the central gathering multiple times to anchor the dense petal ruffles permanently. Secure the bottom knot with fabric adhesive, loop a jump ring through the gathered core, and secure a metal keychain clasp.
9. Geometric Hexagonal Tulip Medallion
Setup Method
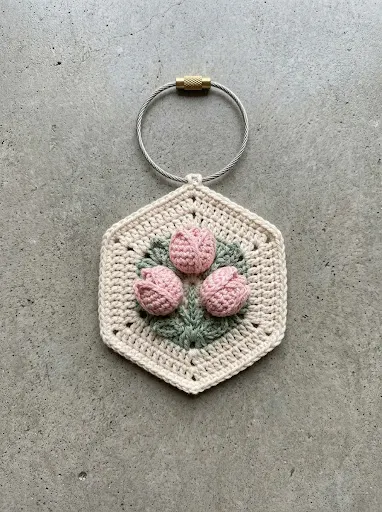
The geometric hexagonal tulip medallion combines structured tile motifs with stylized floral imagery, forming a durable flat charm with clean angles. This design uses corner chain spaces to shape an expanding hexagon, inside of which three-dimensional tulip puff buds emerge from green leaf stems. The flat geometric frame encloses the delicate botanical elements, providing straight, reinforced borders that prevent the internal floral stitches from catching on stray items in bags. The medallion style works particularly well for modern, minimalist aesthetics, turning traditional floral crochet into a clean mosaic charm that suits modern key rings, briefcases, and gym bags.
Using light green cotton yarn, work six single crochet stitches into an adjustable circle, then transition into contrasting tulip colors by executing three distinct three-loop puff stitches separated by three-chain corners to create the flower core. Switch to a clean cream or neutral background yarn, working a sequence of single crochet stitches along the flat sides and double crochet clusters inside each corner space to square off the botanical centers into a six-sided medallion. Complete a final border round of tight single crochet stitches around the perimeter, placing three single crochet stitches into each outer tip to keep the corners crisp and straight. Fasten off the outer edge cleanly using an invisible join technique, weave all loose thread ends securely behind the dense puff stitches, and punch a hole through one corner tip to insert a screw-lock wire keychain loop.
10. Trailing Vine and Lavender Sprig
How to Make
The trailing vine and lavender sprig keychain uses an elongated, vertical construction that dangles naturally alongside standard keys. This design features an interconnected botanical cluster of narrow green leaves and elongated purple flower spikes, creating an airy, organic silhouette. Rather than building outward from a central point, the lavender sprig uses a central chain spine punctuated by tightly packed bobble stitches that mimic individual purple florets. Paired with a delicate, spiraling vine strand, this vertical design adds visual interest and movement without excessive bulk, making it a comfortable, pocket-friendly accessory.
Start by chaining twenty-four stitches using olive green thread, turning to work slip stitches along the upper third to form the main stem, and extending tiny five-chain loops outward to establish small pointing leaves along the center spine. Fasten off the foliage base, join vibrant violet or soft lavender yarn at the stem tip, and work three-stitch bobbles into alternating front loops along the top twelve stem chains. Work downward along the opposite side of the chain spine, placing matching bobble clusters into the remaining open loops to envelop the stem in a dense, four-sided cylinder of purple buds. Tie off the active strands, knot them together at the stem base, and secure the joint with a drop of fabric glue. Connect the upper leaf loop to a short three-link curb chain attached to a split ring, allowing the botanical sprig to dangle freely.
Common Beginner Mistakes and How to Avoid Them
Miniature floral crochet projects require tight stitch control, making small structural errors noticeable in the finished item. A frequent mistake is using loose, uneven tension, which produces floppy petals that fold backward and lose their shape during use. Beginners should select a crochet hook that is one half-millimeter to one full millimeter smaller than the yarn label recommends, ensuring the stitches remain tight, rigid, and durable. Another common issue is improperly securing the central magic adjustable loop; a loose central loop can unravel under the weight of heavy keys. Crafters must weave starting yarn tails through the center loop in three alternating directions rather than simply snipping them short. Finally, attaching metallic jump rings directly through a single yarn strand often tears the fiber over time. Makers should anchor metal hardware under at least two structural loops, distributing the mechanical tension evenly across the crochet fabric to prevent premature tearing.
Practical Tips for Better Results
Achieving clean, professional results with crochet floral charms requires careful fiber selection, blocking steps, and neat hardware finishing. Mercerized cotton yarn remains the preferred choice over standard acrylic fibers, as its mercerization treatment burns away loose fluff, providing crisp petal definition and natural moisture resistance. Once assembly is complete, steam blocking flat motifs makes a significant difference in petal alignment. Pinning the unattached floral pieces to a foam block and applying gentle steam smooths out curling edges without flattening the natural texture. When assembling hardware, crafters should use two pairs of smooth, flat-nosed pliers to twist jump rings open sideways rather than pulling the ends outward; this preserves the circular integrity of the metal ring and prevents unexpected gaps. Additionally, applying a small dab of clear, washable fabric sealant to final woven knots locks internal fibers in place, keeping the finished charm neat through daily pocket and purse friction.
Styling, Presentation, or Organization Ideas
Crochet flower keychains offer exceptional versatility as styling accents, boutique products, and home organizers. Beyond organizing car key sets, these floral accents can be clipped onto monochromatic leather purses, canvas backpacks, or weekend travel totes to introduce color and tactile contrast. Crafters designing these items for seasonal markets or gifts can mount them onto heavy kraft-paper backing cards stamped with botanical care instructions, elevating their presentation. At home, these botanical pieces function well within entryway organization systems; hanging distinct floral designs on labeled wall hooks helps household members quickly identify specific room keys, padlock sets, and mailboxes at a glance. In craft spaces, assigning different floral charms to specialized tool bags, rotary-cutter cases, or scissor handles introduces practical order while keeping creative accessories within arm’s reach. Grouping three complementary botanical designs along a single lobster clasp also creates a balanced, multi-dimensional cluster charm suitable for modern personal styling.
Budget or Time Planning
Constructing miniature floral charms is an efficient, low-cost craft that works well for batch production. A standard fifty-gram skein of sport-weight cotton yarn produces between eight and twelve floral keychains, keeping material expenses exceptionally low per piece. Sourcing metal hardware such as split rings, jump rings, and swivel clasps in multi-piece bulk packs significantly lowers construction costs compared to purchasing individual retail findings. Time allocation improves quickly when makers plan their work in batches rather than completing charms individually from start to finish. Crocheting all central hubs first, switching colors to work all outer petal sequences together, and setting aside time to steam block all components cuts project completion time down to roughly twenty minutes per item. This efficient, assembly-line workflow helps crafters build balanced inventory for craft fairs, assemble classroom gifts, or prepare party favors within predictable timeframes and modest supply budgets.
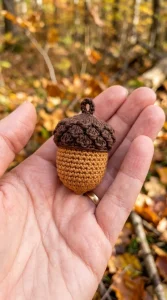
Creative Expansion and Advanced Inspiration
Once crafters master basic flat and spiral floral constructions, they can incorporate advanced techniques and mixed-media accents to elevate their projects. Advanced makers can introduce multi-tonal hand embroidery to petal bases, using fine embroidery floss and bullion knot stitches to mimic realistic floral centers. Threading tiny glass seed beads directly onto the working yarn before crocheting allows sparkling accents to sit along petal margins, adding visual interest. Crafters can also create multi-charm arrangements by pairing a primary blooming flower with miniature secondary accents, such as tiny crocheted leaves, textured acorns, or geometric macramé tassels. Scenting the charms offers another engaging expansion; inserting naturally aromatic cedar shavings, dried lavender buds, or wool felting infused with essential oils into the stuffed flower cavities creates subtle, pleasant pocket sachets. Exploring varying yarn weights, such as ultra-fine micro-crochet threads or sturdy cord fibers, allows these botanical motifs to scale smoothly from delicate jewelry charms up to oversized statement purse decor.