Amigurumi represents the Japanese art of crocheting stuffed yarn creatures, and working with chunky yarn transforms this traditional craft into a modern tactile experience. Chunky yarn, often categorized as bulky, super bulky, or chenille-style blanket yarn, produces oversized, plush creations that work up significantly faster than projects made with standard fingering or worsted-weight thread. This comprehensive guide covers essential crochet techniques, structural considerations, and design fundamentals necessary for mastering large-scale soft sculpture. Crafters will explore ten distinct project concepts designed to maximize the volume, softness, and structural integrity characteristic of heavy-weight fibers. Understanding how to control tension with larger gauge hooks allows makers to eliminate loose gaps, ensuring the internal polyester fiberfill remains invisible beneath the stitches. The practical utility of bulky yarn amigurumi extends beyond simple novelty toys; these pieces serve as functional home decor accents, comforting sensory objects, and statement gifts. By learning the foundational shaping mechanics, seamless joins, and safety assembly steps outlined in this article, makers at any skill level can construct clean, professional plush objects with ease. Transforming thick fiber skeins into durable, structured forms offers an accessible pathway to developing three-dimensional fiber art skills without requiring dozens of tedious working hours.
Why Chunky Amigurumi Projects Are Trending
The surge in popularity surrounding chunky yarn amigurumi across social craft spaces stems from its remarkable efficiency and striking visual aesthetic. Standard amigurumi often requires days of intricate work with small steel hooks, causing significant hand fatigue for beginners and experienced crafters alike. In contrast, heavy-weight chenille and plush velvet fibers yield substantial, high-impact results in just a single afternoon of focused work. This rapid turnaround delivers instant creative gratification, making the medium exceptionally appealing to modern makers seeking rewarding DIY projects amid busy daily routines. Beyond speed, the aesthetic qualities of chunky yarn align seamlessly with contemporary interior styling trends, particularly minimalist nursery decor, modern Scandinavian living spaces, and cozy cottage aesthetics. The dense, velvet-like texture softens sharp interior lines, providing warmth and tactile interest when arranged on shelving units, reading chairs, or nursery furniture. Furthermore, the exaggerated stitch definition highlights the structural beauty of basic single crochet stitches, allowing even novice makers to produce neat, professional-looking plush sculptures without mastering complex stitch varieties. Its accessibility, tactile charm, and photogenic finish make chunky crochet a staple of contemporary craft culture.
Materials and Preparation for Bulky Fiber Projects
Successful execution of chunky amigurumi requires selecting compatible tools and planning proper material ratios before beginning the initial slipknot. The foundation of every project is a super bulky weight six or jumbo weight seven yarn, typically composed of soft polyester chenille or tube-style cotton jersey. Working with these heavy fibers requires an ergonomic crochet hook ranging from six to ten millimeters, depending on individual tension; selecting a hook two sizes smaller than the yarn label recommendation ensures stitches remain tight enough to conceal stuffing. Essential secondary tools include a blunt, wide-eye metal tapestry needle for seaming thick components, locking stitch markers to track continuous spiral rounds, and high-resilience polyester fiberfill that maintains shape without clumping. Crafters must also prepare secure fastenings, such as safety eyes with locking washers, or alternative embroidery thread for child-safe facial features. Preparation involves establishing proper physical workspace ergonomics, as manipulating bulky yarn engages wrist and forearm muscles differently than lightweight thread. Proper planning requires winding skeins into stable center-pull cakes to prevent yarn snagging, pre-cutting anchor threads, and verifying gauge swatches to avoid running short of specific dye lots during mid-construction.
Idea 1: Minimalist Chunky Sleeping Bear

Step-by-Step Guide
The minimalist chunky sleeping bear emphasizes soft contours, clean silhouettes, and a tranquil aesthetic that complements modern nursery spaces. Unlike complex stuffed animals that require dozens of small limbs, this design utilizes a seamless teardrop body where the head and torso flow together in one continuous piece. The oversized spherical head features gently tapered snout shaping achieved through systematic single crochet increases and decreases. Subtle, rounded ear cups are worked separately and anchored low on the crown to reinforce a gentle, resting expression. Instead of protruding plastic safety eyes, the facial features rely on minimalist curved lines hand-embroidered with dark contrast yarn to depict closed, sleeping eyelids. The limbs remain compact and streamlined, attached flat against the lower torso to allow the finished bear to sit independently without tipping forward. Using soft matte chenille yarn in muted earth tones—such as warm oatmeal, soft fawn, or unbleached cream—elevates the finished piece from a casual toy into an intentional Scandinavian home decor element. The density of the chunky fiber ensures the bear retains its rounded form even with frequent handling.
To begin creating the sleeping bear, craft a magic ring using an eight-millimeter hook and six single crochet stitches with bulky chenille yarn. Work in continuous spiral rounds, placing a locking stitch marker in the first stitch of each tier to monitor progress accurately. Increase evenly across consecutive rounds by placing two single crochet stitches in designated loops until reaching thirty-six stitches, establishing a broad spherical head. Work five rounds even without increases to build vertical height before initiating systematic decrease rounds to transition smoothly into the upper neck and torso. Lightly fill the upper section with premium polyester fiberfill, distributing the stuffing toward the outer walls to prevent lumpy central cores. Expand the stitch count outward along the base to create a wide sitting platform, then close the lower cavity using invisible single crochet decreases. Fabricate four short cylindrical limbs using rounds of eight stitches, lightly packing the tips while leaving the upper third hollow for flat attachment. Stitch the limbs securely to the base using a blunt tapestry needle, embroider the sleeping eyes across round nine, and weave all yarn tails deeply into the internal stuffing.
Idea 2: Giant Velvet Sea Turtle

Read This:

Setup Method
The giant velvet sea turtle utilizes the expansive surface area of bulky yarn to showcase contrasting geometric textures between the carapace and soft underbelly. The defining feature of this creative project is its broad, domed upper shell, which can be constructed using muted sage green, deep seafoam, or warm slate blue yarn. A flat cream or sand-colored plastron forms the underside, joined securely to the upper dome with a clean perimeter border. Thick, paddle-shaped flippers extend outward from the sides, engineered with graduated stitch heights—ranging from single crochet to treble crochet—to capture the natural hydrodynamic curves of marine flippers. The head features an elongated oval shape with embedded safety eyes secured tightly against reinforced backing washers. The tactile contrast of smooth velvet yarn paired with the plump, pillowy dimensions makes this marine design an inviting sensory floor cushion or playful bed accent. The substantial weight of the completed turtle gives it a grounded, balanced feel, serving as a functional piece of handmade room decoration that appeals across all age demographics.
Construction begins with the upper shell, starting from a central ring of eight single crochet stitches worked in your primary shell color. Expand the circle through systematic increases over seven rounds until the flat disk measures approximately ten inches in diameter, then execute two rounds without increases to create a structured rim. Switch to the cream underside yarn to construct an identical flat circle, reserving assembly until the extremities are completed. For the front flippers, chain eight stitches, crochet around both sides of the foundation chain to form an oval, and gradually step up stitch heights to create sweeping, angled fins. Fasten the front and rear flippers, along with a tapered tail and rounded head, directly along the outer edge of the bottom shell piece. Align the top carapace over the bottom assembly, working single crochet stitches through both edges simultaneously to unite the sections. Insert dense polyester fiberfill through a four-inch remaining opening, packing the center firmly while keeping the outer edges slightly supple. Complete the perimeter join, fasten off, and pull the final yarn tail through the body cavity to conceal the raw end.
Idea 3: Plump Woodland Toadstool Mushroom
How to Create
The plump woodland toadstool mushroom combines botanical design with the playful proportions unique to bulky chenille yarn. This piece features an oversized, conical scarlet or terracotta cap balanced atop a sturdy, textured off-white stalk. The flared underside of the cap can be accented with subtle surface slip stitches or ribbed ridges to mimic natural fungal gills, adding structural realism to an otherwise whimsical aesthetic. Pure white circular spots are either crocheted as separate flat disks and sewn onto the cap, or surface-embroidered using thick cotton cord to maintain a clean, modern design. To prevent top-heavy drooping, the broad stalk is designed with a weighted, flat circular foundation that maintains vertical stability on flat surfaces. This project functions exceptionally well as an individual shelf ornament, a creative bookend, or part of a clustered nature-inspired home decor arrangement. The natural plushness of super bulky yarn softens the geometric contours, creating a rounded, pillowy accent piece that brings organic warmth and handmade character into any interior space without overwhelming surrounding furnishings.
Begin by fabricating the mushroom cap using an eight-millimeter hook and rich red chunky yarn, starting with four single crochet stitches in a magic ring. Gradually increase the stitch count over alternating rounds to form an authentic conical taper, expanding progressively until reaching forty-eight stitches at the widest brim circumference. Transition to an off-white yarn to crochet an inward-facing flat circular base that seals the underside of the cap, incorporating back-loop-only stitches to define the sharp structural edge. For the stalk, begin with a flat circle of twenty-four stitches using ivory yarn, insert a rigid circular cardboard or plastic insert into the base for flatness, and crochet upward in even rounds to form a thick, stable cylinder. Stuff the stalk firmly with dense fiberfill, ensuring the lower half remains solid enough to support upper weight. Firmly attach the stalk to the center of the underside gill piece using a heavy-duty tapestry needle and strong yarn strands. Embellish the red cap by attaching five to seven small crocheted white circles randomly across the surface, ensuring each applique is locked down with concealed whip stitches.
Idea 4: Oversized Fluffy Bumblebee


How to Make
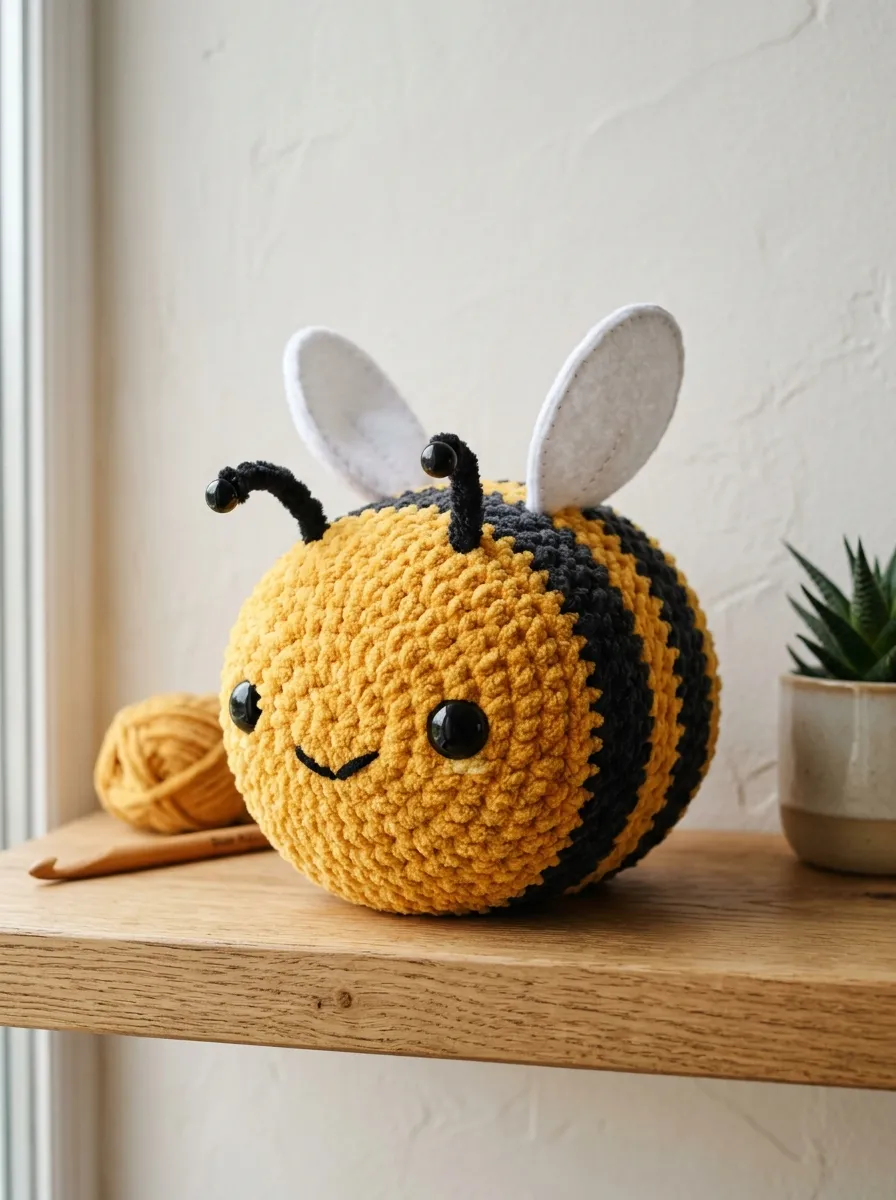
The oversized fluffy bumblebee stands as one of the most accessible, high-yield patterns in the realm of chunky yarn amigurumi. Characterized by bold, alternating bands of golden yellow and charcoal black velvet yarn, this design relies on a clean, pillowy barrel shape that highlights smooth color transitions. The broad proportions eliminate the need for intricate limb attachments, focusing attention on simple decorative elements such as translucent white wings and a cheerful facial profile. Two small, teardrop-shaped wings worked in flat, single-layer stitches are affixed symmetrically across the upper spine, providing delicate visual contrast against the dense body. Embedded safety eyes are placed wide apart along the anterior curve to maximize the cute, approachable character of the piece. Because the body consists of simple cylinder geometry, it serves as an exceptional baseline tutorial for beginners learning continuous round tracking and clean color changes with bulky fibers. The finished bee functions delightfully as a whimsical throw pillow, a comforting sensory plush, or a cheerful addition to a children’s play space.
Initiate the bee body by forming a magic ring with vibrant yellow bulky yarn, working six single crochet stitches into the center. Expand the circle over four rounds of uniform increases until reaching twenty-four stitches, then crochet two complete rounds even to establish the curved front face. Secure two sixteen-millimeter black safety eyes between rounds three and four, spacing them approximately seven stitches apart, and lock the washers firmly inside the cavity. Join black chunky yarn on the final pull-through of the next stitch, working three rounds of black, followed by three rounds of yellow, repeating this sequence to produce distinct, crisp body stripes. While executing color changes, carry unused yarn loosely along the inside cavity to avoid unsightly seam ridges on the exterior surface. Craft two flat wings by working double crochet clusters into a magic ring using white worsted or bulky yarn, fastening off with an eight-inch tail for sewing. Pack the cylindrical body evenly with fiberfill, decrease systematically at the rear using black yarn to close the cavity, and anchor the wings firmly across the upper middle stripe.
Idea 5: Minimalist Cozy Cactus in a Ribbed Pot
Execution Process
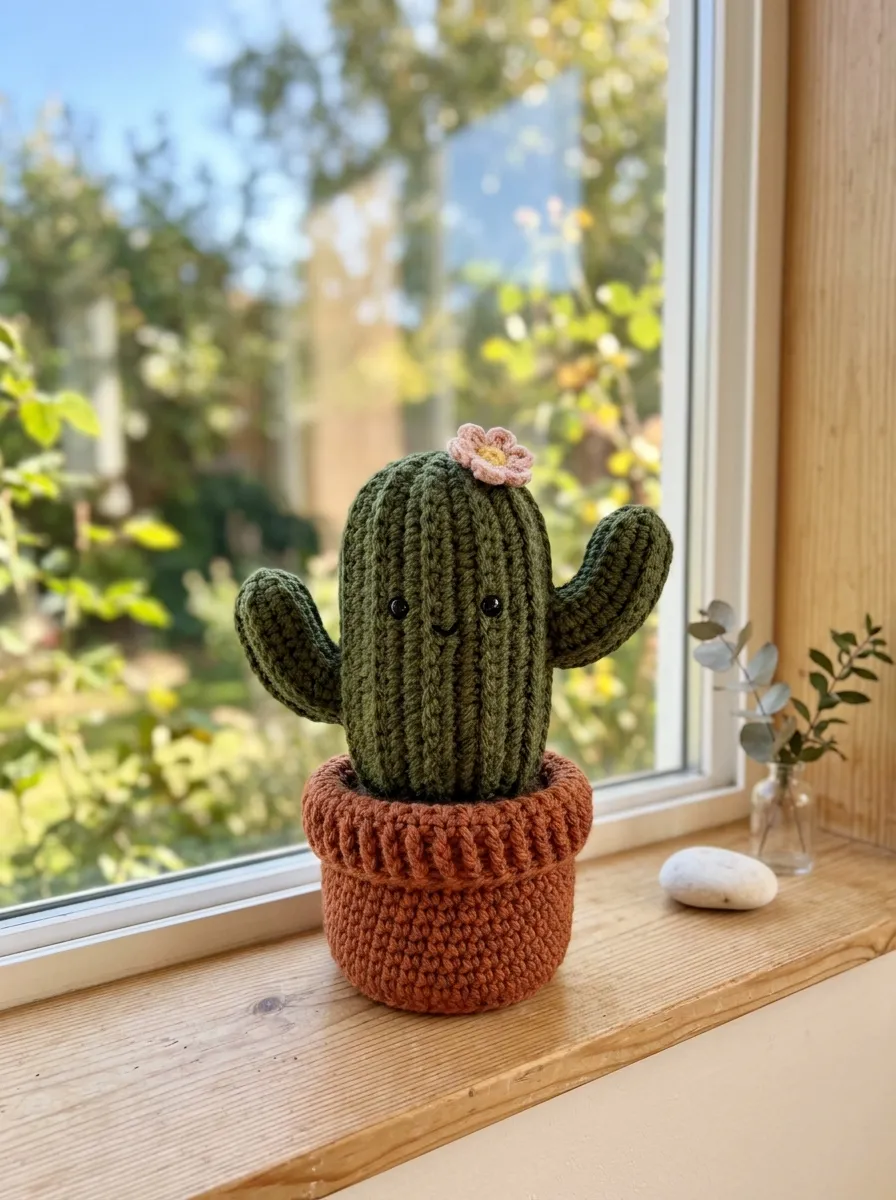
The minimalist cozy cactus in a ribbed pot introduces structural variety by combining smooth cylindrical crochet with textured post stitches to replicate desert flora. This project consists of two core components: a sturdy, textured container worked in neutral heathered yarn, and a plump green succulent body positioned securely inside. The cactus component uses deep moss or sage chunky yarn, worked in back-loop-only stitches to produce vertical structural ridges that mirror natural ribbed saguaro folds. A small, vibrant floral accent in blush pink or mustard yellow can be anchored to the apex, introducing a delicate focal point. The pot foundation utilizes tight single crochet rounds worked in dense terracotta or oatmeal yarn, creating a stable, upright vessel that sits squarely on flat surfaces. This creative project offers a zero-maintenance botanical decoration ideal for brightening window sills, home office desks, or minimalist bookshelf arrangements. Its sturdy construction and clean lines ensure it maintains aesthetic appeal over time, serving as an everlasting handmade plant alternative that showcases functional structural crochet.
To make the pot, use a seven-millimeter hook and camel-toned bulky yarn to crochet a flat circular base of twenty-four stitches, working through the back loops on round five to establish a crisp ninety-degree upward turn. Continue upward for eight rounds of standard single crochet, folding the top round outward to form a pronounced rim, and insert a circular plastic base inside to ensure permanent flatness. For the cactus, chain twenty stitches using deep green chenille yarn, then work eighteen rows of single crochet exclusively through the back loops to produce a ribbed rectangular sheet. Fold the short ends of the rectangle together, seam them using a slip stitch, and gather one open end tightly with a running thread to form the rounded top dome. Stuff the cactus firmly with polyester fiberfill, adjust the vertical ribs so they align symmetrically, and stitch the open lower perimeter securely into the interior rim of the prepared pot. Finish the piece by crocheting a tiny multi-petal flower using fine coral yarn, attaching it firmly to the top crest of the ribbed succulent body.
Idea 6: Monochromatic Chunky Whale

How to Create
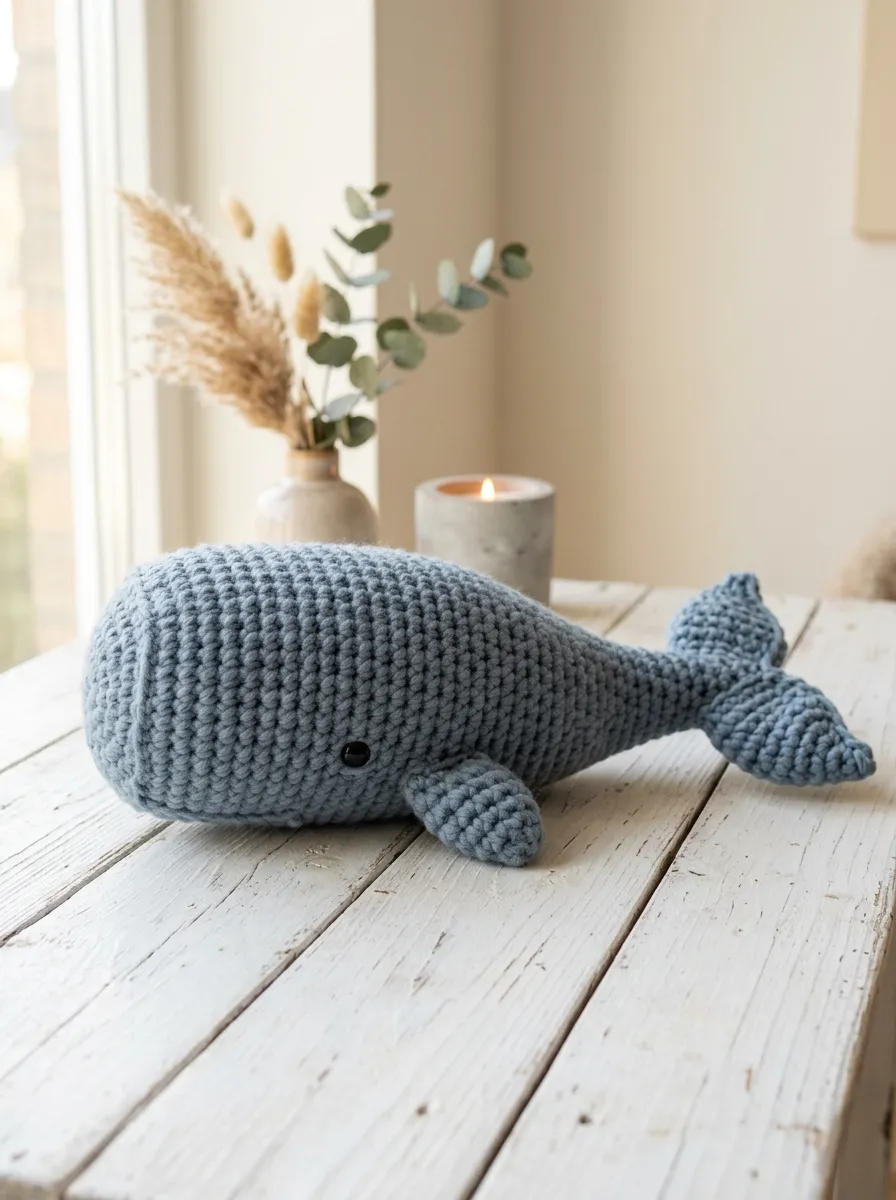
The monochromatic chunky whale captures ocean-inspired elegance through clean curves, streamlined contours, and a distinct taper from head to fluke. Crafted in a continuous sweep from the rounded snout back toward the tail fins, this design eliminates the clutter of multiple small seams, resulting in a cohesive, modern soft sculpture. The broad head curves gently into a smooth back, while the underbelly can be left solid or detailed with light horizontal ribbing to suggest baleen grooves. Minimalist side pectoral fins project outward at natural 45-degree angles, while a balanced, symmetrical horizontal tail fluke completes the aquatic silhouette. Working this design in muted marine hues—such as slate navy, misty gray, or dusty denim—creates a sophisticated aesthetic suitable for modern living spaces as well as children’s nurseries. The substantial thickness of chunky yarn lends the whale an appealing weight and presence, making it a comforting handheld piece or an artistic accent resting across an open display shelf.
Start the whale by casting six single crochet stitches into a magic ring using an eight-millimeter hook and misty gray super bulky yarn. Increase systematically over six rounds to achieve thirty-six stitches, working eight subsequent rounds even to construct the broad, expansive forward body cavity. Position eighteen-millimeter safety eyes symmetrically on the sides of the head along round seven, securing the locking backs with firm thumb pressure. Begin gentle tapering along the lower spine by spacing single crochet decreases evenly across alternate rounds, gradually narrowing the circumference down to twelve stitches to form the slender caudal peduncle. Stuff the broad head firmly, transitioning to lighter stuffing density near the tail to allow natural flexibility. Without cutting the yarn, divide the remaining tail stitches to form two identical flared tail flukes using escalating stitch sequences of half double, double, and treble crochets. Crochet two small triangular pectoral flippers separately, anchoring them four rounds behind the eyes along the lower lateral line, and bury all structural knot tails deeply into the internal fiberfill.
Idea 7: Pastel Velvet Bunny with Long Floppy Ears

Step-by-Step Guide
The pastel velvet bunny combines classic nursery charm with exaggerated proportions, highlighted by long, weighted ears that cascade down past the body. The body and head can be worked as a singular pear-shaped unit, establishing a balanced foundation that supports the oversized ear attachments without sagging. Super bulky velvet yarn in soft powder pink, dove gray, or muted lilac gives the bunny an exceptionally soft, touchable surface that enhances its comforting appeal. The ears are worked flat in elongated oval bands without internal stuffing, allowing them to drape naturally alongside the cheeks and shoulders with fluid mobility. The facial treatment remains intentionally understated, utilizing simple embroidered French knots for the eyes or clean vertical satin stitches to suggest a subtle pink nose and mouth. This project serves as an ideal heirloom-style gift or seasonal spring decoration, combining minimalist styling with traditional handmade craftsmanship. The luxurious texture of velvet yarn highlights delicate stitchwork while creating a substantial, huggable plush piece.
Commence construction with the combined head and torso, working six single crochet stitches into a magic ring using a seven-millimeter hook and pastel velvet yarn. Expand progressively to thirty stitches, work four straight rounds to define the spherical head, then execute two decrease rounds to establish a subtle neck contour. Immediately widen the stitch count again over three consecutive rounds to thirty-six stitches, creating a wide, bell-shaped lower torso that provides a stable base. Add dense polyester fiberfill through the neck opening, focusing firmness in the lower core to ensure the bunny sits upright independently. For each ear, chain twenty-five stitches, crochet along both sides of the chain using a mixture of single and half double crochets to form a long, flat ribbon, and leave a long tail for seaming. Gather the narrow base of each ear slightly to form a natural curved scoop, then stitch them firmly onto round four of the head crown. Embroider a delicate inverted triangular nose at round seven, weave all ends securely, and gently brush the velvet pile to conceal attachment seams.
Idea 8: Chunky Round Kawaii Penguin
Read This:

Execution Process
The chunky round kawaii penguin presents an ultra-simplified, egg-shaped silhouette that prioritizes geometric balance and high visual contrast. By utilizing dense black and stark white super bulky yarn, this design creates a recognizable avian form with minimal component stitching. The primary body consists of a continuous rounded teardrop worked predominantly in black, interrupted across the front chest by a pristine white oval patch that forms the belly and facial backdrop. Two short, flat flippers sit flush against the lateral flanks, while tiny triangular mustard-colored feet provide a bright pop of contrast along the bottom edge. A miniature conical beak centered between large, glossy safety eyes establishes an endearing, stylized facial expression. This beginner-friendly design minimizes shaping complexity while delivering a polished, highly photogenic result that aligns with modern minimalist aesthetic preferences. The compact, spherical nature of the finished penguin makes it durable, resistant to deforming, and perfectly sized for desktop display or decorative nursery arrangements.
To construct the penguin, begin with an eight-millimeter hook and black chenille yarn, working six single crochet stitches into a magic ring. Widen the circle through four increase rounds to twenty-four stitches, working six rounds even to establish the rounded head before expanding outward to thirty stitches for the plump body cavity. Simultaneously, crochet a flat white oval patch starting from a foundation chain of six stitches, working around the chain perimeter for three rounds until it matches the vertical span of the front body. Stitch the white patch securely to the front surface using matching sewing thread, then insert safety eyes directly through both the white patch and the black body layer to lock the assemblies together. Pack the inner cavity firmly with polyester fiberfill, making sure the lower perimeter remains spherical, and close the base with continuous decrease rounds. Fabricate two small paddle-shaped flippers in black and two tiny webbed feet in mustard yarn, stitching the feet directly beneath the base edge and attaching the flippers symmetrically along the upper flanks.
Idea 9: Cozy Farmhouse Pumpkin

How to Make
The cozy farmhouse pumpkin serves as a classic autumn decor piece that highlights the natural gathering and structural cinching capabilities of bulky ribbed crochet. Rather than working in traditional continuous rounds from the bottom up, this design is constructed flat as a horizontal ribbed rectangle worked in back-loop-only stitches. Once the rectangular panel reaches the desired length, the short ends are joined to form a textured tube, which is then gathered tightly at the top and bottom poles. Deep structural ribs are defined by pulling heavy exterior yarn segments tightly around the stuffed sphere, dividing the form into six or eight plump, organic segments. A genuine cinnamon stick or a small crocheted stem made from rustic brown yarn acts as the central topper, providing an earthy, organic finish. Rendered in contemporary autumnal shades like rust, mustard, olive, or cream, these chunky pumpkins bring tactile warmth to dining table centerpieces, entryway consoles, and layered fall displays.
Begin by selecting an eight-millimeter crochet hook and burnt orange or cream bulky yarn, creating a foundation chain of twenty-two stitches. Work twenty rows of single crochet exclusively through the back loops of each stitch, creating a flexible, accordion-pleated rectangular fabric with distinct ridges. Fasten off with a generous thirty-inch yarn tail, fold the panel in half to align the first and last rows, and join the edges using a neat slip-stitch seam. Thread the long yarn tail onto a metal tapestry needle, weave a running stitch through the outer edge of one open end of the cylinder, and draw the thread firmly to cinch the base completely closed. Turn the piece right-side out and pack the interior generously with polyester fiberfill, maintaining a firm yet pliable density. Weave a secondary thread around the remaining open rim, cinch it tightly closed around the top, and knot the thread securely. Wrap the leftover tail around the outside of the pumpkin from pole to pole, pulling tightly to sculpt eight deep, rounded lobes, then hot-glue a fragrant cinnamon stick into the center crest.
Idea 10: Chubby Velvet Dinosaur

Read This:
Step-by-Step Guide
The chubby velvet dinosaur reinterprets prehistoric creatures into an adorable, rounded plush sculpture characterized by smooth curves and playful spine accents. Featuring an egg-shaped torso that blends into an arched neck and broad head, this design avoids harsh angles in favor of continuous, gentle contours. The tail projects naturally from the lower spine as an integrated taper, providing third-point balance that keeps the dinosaur standing upright alongside its two stocky legs. A series of small, contrasting triangular plates or rounded ridges runs along the spine from the crown of the head to the tip of the tail, introducing vibrant visual interest. Rendered in contemporary pastel tones like dusty mint, sage, or soft mustard velvet yarn, this sculpture avoids cartoonish brightness, aligning with modern aesthetic nursery decor. The plush, tactile surface invites touch, while the sturdy proportions ensure the completed toy maintains structural integrity throughout regular handling or open-shelf presentation.
Initiate the dinosaur body with an eight-millimeter hook and mint green chunky yarn, placing six single crochet stitches into a magic ring. Increase across five rounds to reach thirty stitches, then proceed with eight rounds even, incorporating selective increases along one side to shape the outward curve of the belly while keeping the spine flat. Form the tapered tail separately by starting with four stitches and increasing gradually over six rounds, attaching it seamlessly to the rear torso opening before completing internal stuffing. Position glossy safety eyes along round five of the head section, then pack the head, body, and tail uniformly with dense fiberfill to preserve continuous structural curves. Construct two wide, stubby legs using rounds of ten single crochet stitches, stitching them securely to the lower belly quadrant to facilitate balanced freestanding capability. Finally, using a contrasting cream or mustard yarn, crochet seven to nine small triangular spikes by chaining three and working graduated stitches, then align and sew them along the central dorsal ridge from crown to tail tip.
Common Beginner Mistakes and How to Avoid Them
Working with chunky yarn presents unique physical and mechanical challenges that require targeted adjustments to standard crochet habits. A frequent error among beginners is utilizing the hook size recommended on the yarn manufacturer label, which is typically calibrated for loose blankets rather than firm three-dimensional amigurumi. Using too large a hook creates loose stitches, causing internal polyester fiberfill to poke through the gaps and compromising the finished aesthetic. Makers should consistently downsize their hook by one to two millimeters to ensure tight, opaque stitch walls. Another widespread issue is pulling tension too tightly, which can shear the delicate pile fibers off chenille or velvet yarn cores, leaving bare internal strings. Crafters must maintain smooth, even hand tension without aggressive tugging. Additionally, the dense fuzz of bulky yarn obscures visual stitch anatomy, making continuous round tracking difficult; crafters must rely rigorously on locking plastic stitch markers placed at the start of every tier. Finally, under-stuffing leads to deflated, wrinkly sculptures, while over-stuffing stretches stitch loops open. Distributing small clusters of fiberfill gradually toward the outer walls creates smooth contours while preserving stitch integrity throughout the life of the piece.
Practical Tips for Better Results
Achieving professional, boutique-quality finishes with chunky amigurumi depends on adopting specialized technical habits tailored to heavy-gauge fibers. When beginning any circular component, replace the traditional magic ring with an alternative chain-two method if using fragile chenille yarn; working stitches into the second chain from the hook eliminates core breakage caused by pulling tight loops closed. When executing reductions, always utilize the invisible decrease technique, which involves inserting the hook through the front loops only of two consecutive stitches before yarning over and completing the single crochet. This approach prevents unsightly bumps and holes across prominent facial contours. Furthermore, secure yarn tails by knotting them around internal structural stitches before weaving, as slick polyester velvet fibers can unravel over time if left held by friction alone. When seaming limbs onto main body components, switch to a matching shade of strong worsted cotton thread if the bulky yarn proves too fragile or thick to pull through small needle eyelets. Finally, gently steam finished acrylic or polyester plush pieces with a garment steamer held several inches away to relax surface fibers and settle facial embroidery into the plush pile.
Styling, Presentation, or Organization Ideas
Chunky yarn amigurumi serves as an expressive, high-texture design element when styled thoughtfully within modern interior spaces. To avoid visual clutter, display finished pieces in cohesive color stories that echo existing room palettes, such as pairing earthy terracotta and oatmeal pieces within minimalist neutral living rooms. Arrange smaller sculptures, like woodland toadstools or miniature cacti, in odd-numbered clusters along floating wooden wall shelves to create dynamic visual rhythm and tactile depth. Larger pieces, including oversized sleeping bears or velvet turtles, function beautifully as accent cushions nestled into the corner of a reading nook, bench seat, or nursery rocker. In craft spaces or retail setups, present these creations within shallow woven seagrass baskets, wire wireframe cubbies, or tiered wooden risers to accentuate their handmade aesthetic. For functional home organization, adapt hollow patterns—such as oversized cactus pots or open-topped pumpkin baskets—to serve as soft catchalls for holding vanity supplies, keys, or desk accessories. The balance of plush structural softness against hard timber, metal, or stone surfaces creates an inviting, balanced aesthetic that enhances residential decor.
Budget or Time Planning
Executing chunky yarn amigurumi efficiently requires thoughtful advance planning regarding material procurement and project scheduling. Because bulky chenille and velvet yarns consume yardage rapidly, verify that you possess adequate yardage from the identical dye lot before initiating large projects, preventing costly color mismatches midway through production. Buying primary base shades—such as ivory, charcoal, and warm camel—in bulk multi-skein packs reduces overall material costs, while accent colors can be sourced from smaller, economical skeins. From a time-management perspective, chunky amigurumi is exceptionally practical; most beginner-to-intermediate designs require only two to four hours of active work from start to finish. Break projects into organized phases: spend the first hour crocheting primary body components, thirty minutes preparing facial features and extremity pieces, and the final hour conducting stuffing, seaming, and detailing. Preparing precut limb anchoring threads and staging filling materials prior to crocheting eliminates workflow interruptions. This strategic approach ensures rapid completion, allowing makers to produce beautiful gifts or seasonal inventory without suffering from unfinished project fatigue or excessive budget expenditures.
Creative Expansion and Advanced Inspiration
Once the foundational shaping mechanics of chunky yarn amigurumi are mastered, makers can explore advanced creative variations to elevate their craft. Experimenting with mixed-media elements provides an immediate route to creative expansion; consider incorporating genuine turned-wood rings for teething toys, smooth leather straps for hanging planters, or metallic wire armatures inside limbs to create posable soft sculptures. Crafters can also explore mixed-gauge design, combining super bulky bodies with delicate, fine-weight cotton accessories like tiny crocheted sweaters, spectacles, or floral crowns to generate striking visual and textural contrast. Another compelling direction involves scaling standard patterns: by working multi-strand projects holding two bulky yarns together with a fifteen-millimeter hook, standard toy patterns transform into functional jumbo floor poufs. Alternatively, incorporating hidden sensory components—such as gentle internal rattle inserts, soothing chime bells, or dried lavender sachets within the center cavity—enhances the interactive value of each piece. These expansive techniques empower makers to push beyond standard patterns, establishing a distinctive artistic voice within modern fiber arts.