Amigurumi ladybug creations represent an engaging category within modern fiber arts, blending classic needlecraft techniques with playful insect anatomy to form delightful decorative and functional keepsakes. This extensive guide explores ten distinctive amigurumi ladybug concepts, detailing their design principles, construction methodologies, and practical applications for crafters of all skill levels. Readers will gain comprehensive insight into circular stitch mechanics, tension control, dimensional assembly, color transitions, and facial embroidery techniques tailored specifically to beetle silhouettes. The utility of this subject matter extends beyond simple hobby work, as these versatile pieces serve seamlessly as sensory nursery toys, practical pin cushions, bag charms, hanging plant accents, and seasonal home decor items. Engaging with structured amigurumi projects sharpens three-dimensional spatial understanding and fine motor precision through repetitive, mindful stitching. By following the systematic instructions and design variations presented throughout this article, fiber artists will be fully equipped to transform basic skeins of cotton and wool into heirloom-quality handmade sculptures that celebrate the bright, cheerful aesthetic of nature’s most iconic garden beetle.
Why This Idea Is Trending or Useful
The sustained popularity of ladybug crochet figures across curated digital platforms stems from their vibrant color blocking, organic symbolism, and inherent structural simplicity. In contemporary interior styling, organic nature motifs provide a grounded, cheerful contrast against sleek neutral palettes, making miniature insect sculptures an attractive accent for modern desks, bookshelves, and children’s spaces. From a practical standpoint, the hemispherical body geometry of a ladybug provides an ideal canvas for beginner friendly crafting, requiring basic increases and decreases worked in spiral rounds without complex garment shaping. The cultural association of ladybugs with good fortune, regeneration, and thriving spring gardens gives these handmade items emotional resonance as thoughtful housewarming tokens, baby shower gifts, or teacher appreciation keepsakes. Additionally, the small physical footprint of these figures makes them an outstanding project for consuming leftover yarn scraps, minimizing financial investment while maximizing creative output. Their tactile nature, especially when crafted using varied yarn weights from fine mercerized cotton to ultra-plush velvet chenille, provides sensory satisfaction that continues to fuel their viral status among DIY enthusiasts.
Materials and Preparation
Successful fabrication of crochet insect figures requires deliberate material selection and careful preliminary workspace planning before the first stitch is formed. Smooth, tightly spun yarns, particularly four-ply mercerized cotton or durable cotton-acrylic blends, are the preferred choice because they offer crisp stitch definition, prevent splitting, and exhibit minimal fuzziness around color changes. Pair your chosen yarn with an ergonomic crochet hook sized approximately one half to one full millimeter smaller than the manufacturer’s recommendation; this deliberate downsizing ensures extremely tight, dense stitches that completely prevent white polyester stuffing from peeking through the fabric. Additional tools include locking plastic stitch markers to track continuous spiral rounds, a blunt metal tapestry needle for seaming parts, precision embroidery scissors, rustproof straight pins for component placement, and high-loft hypoallergenic polyester fiberfill. Workspace preparation involves pre-measuring contrast yarns, testing safety eye locking backings to ensure child safety compliance, and winding skeins into center-pull cakes to prevent rolling. Dedicating time to crochet a small hemispherical test swatch guarantees that your natural stitch tension produces a firm, rigid dome capable of supporting its own weight.
1. Classic Dome-Backed Spotted Ladybug Figurine
Setup Method
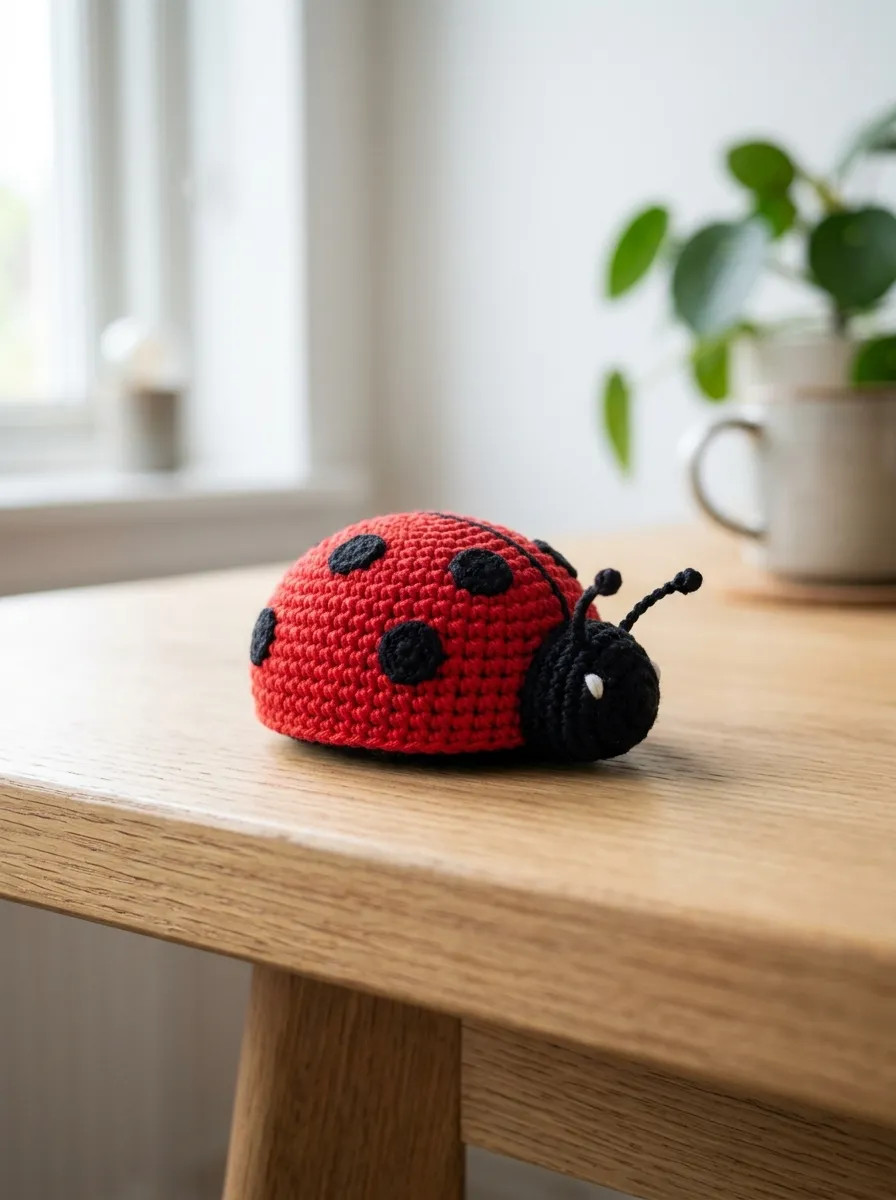
The classic dome-backed spotted ladybug figurine celebrates the traditional anatomical beauty of the Coccinellidae family through a clean, graphic, and highly stylized profile. This concept utilizes a dense, hemispherical red shell positioned directly atop a flat, circular black underbelly, terminating in an integrated rounded black head that leans forward at an alert angle. Six jet-black circular spots are arranged symmetrically across the curved elytra, dissected down the center by a sharp, embroidered black dividing groove. The design prioritizes balance and structural firmness, ensuring the finished piece rests completely flat on desk surfaces, windowsills, or decorative trays without tilting sideways. Its bright scarlet and midnight-black palette produces a stark visual contrast that commands attention, making it an enduring staple for spring and summer tabletop vignettes. The absence of floppy limbs or fragile appendages makes this specific model exceptionally durable, resilient against handling, and ideal for long-term domestic display.
Fabrication begins with the crimson wing cover, worked in continuous spiral rounds of single crochet starting from an adjustable magic ring and expanding systematically until reaching thirty-six stitches. Maintain uniform tension across all increase points to prevent angular ridges from disrupting the smooth, organic curvature of the shell dome. Work the flat base using charcoal or black yarn, matching the final stitch count of the red shell before joining the two sections together with a round of firm slip stitches, pausing two-thirds through to pack the interior with high-density fiberfill. For the surface spots, crochet six individual miniature discs using black embroidery floss or lace-weight cotton, securing each round with an invisible fasten-off technique to ensure neat circular edges. Pin the finished black spots across the red dome using dressmaker pins to evaluate spacing, then sew them flat against the red fabric using fine whip stitches, finishing the shell by stitching a straight, taut dividing line down the spine.
2. Sleeping Nursery Ladybug Cushion Buddy
Read This:

Step-by-Step Guide
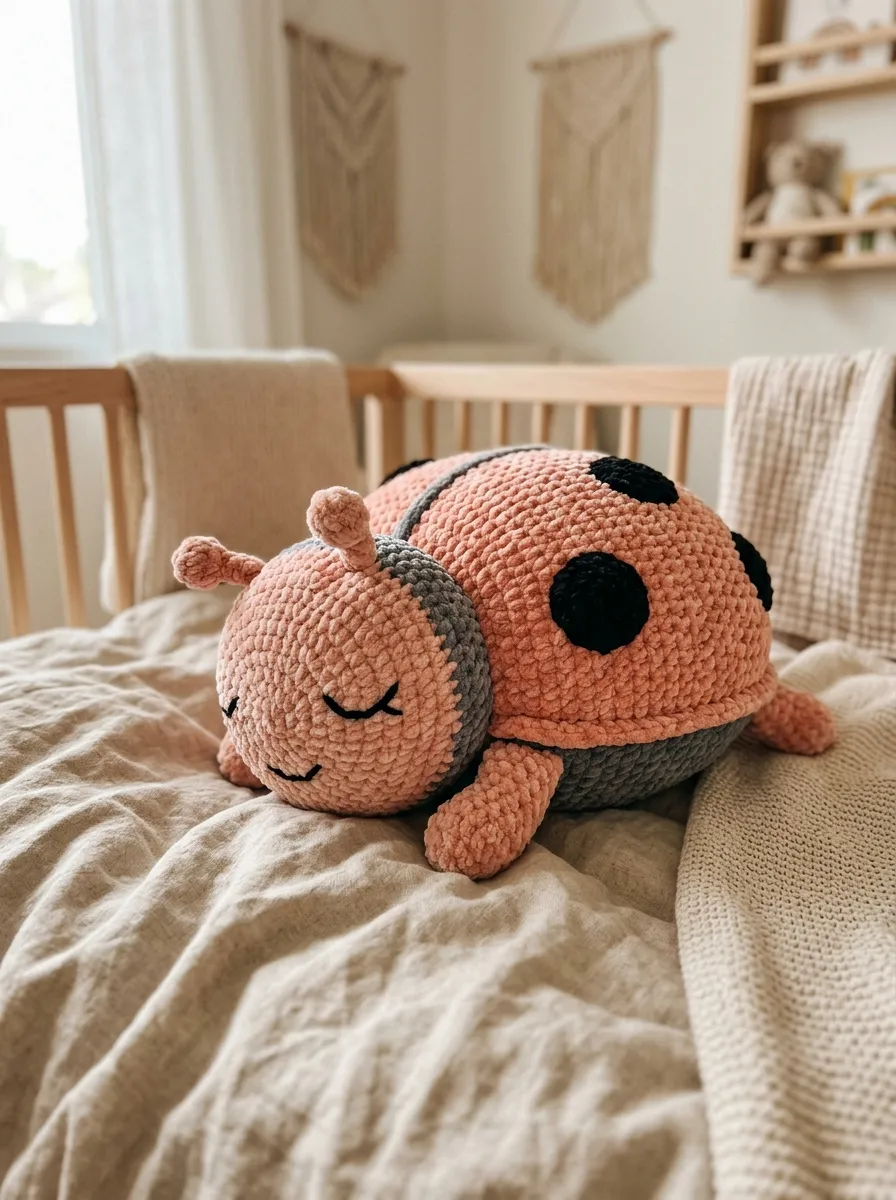
The sleeping nursery ladybug cushion buddy reimagines the energetic garden insect as a serene, oversized comforting companion tailored for infant nurseries and reading nooks. Crafted from bulky velvet or plush chenille yarn, this design features an elongated oval body, soft squishy contours, and gentle, closed eyelids embroidered into the facial fabric. The traditional bright red is softened into a muted terracotta, blush coral, or gentle rose shade, paired with warm slate gray accents rather than harsh black, creating an inviting, tranquil aesthetic. The oversized scale provides a cozy tactile presence, functioning simultaneously as an accent cushion on nursery rocking chairs and a sensory comfort object for young children. All features, including the spots and facial elements, are completely yarn-based, intentionally avoiding rigid plastic components to ensure maximum safety, softness, and washable practicality for regular nursery environments.
To create this plush companion, utilize a six-millimeter crochet hook paired with super-bulky velvet yarn, beginning at the head with gentle increases worked in single crochet. Transition seamlessly into the enlarged body cavity, gradually expanding the stitch circumference to accommodate a voluminous inner core while keeping the fabric tight enough to conceal the inner stuffing. Incorporate wide, flat spots by surface-crocheting directly onto the coral base fabric using slate yarn, or crochet separate flat chenille circles and seam them securely using reinforced backstitches. Stuff the interior with a blend of lightweight microfiber fiberfill and larger cluster-fill to achieve a cloud-like, huggable firmness that rebounds easily when compressed. Complete the face using heavy matte cotton thread to embroider two downward-curving crescent lines that signify sleeping eyes, adding subtle blush highlights just below the lids with soft pink yarn embroidery or diluted nontoxic fabric tint applied with a cosmetic blending sponge.
3. Whimsical Daisy-Crowned Garden Ladybug
How to Create
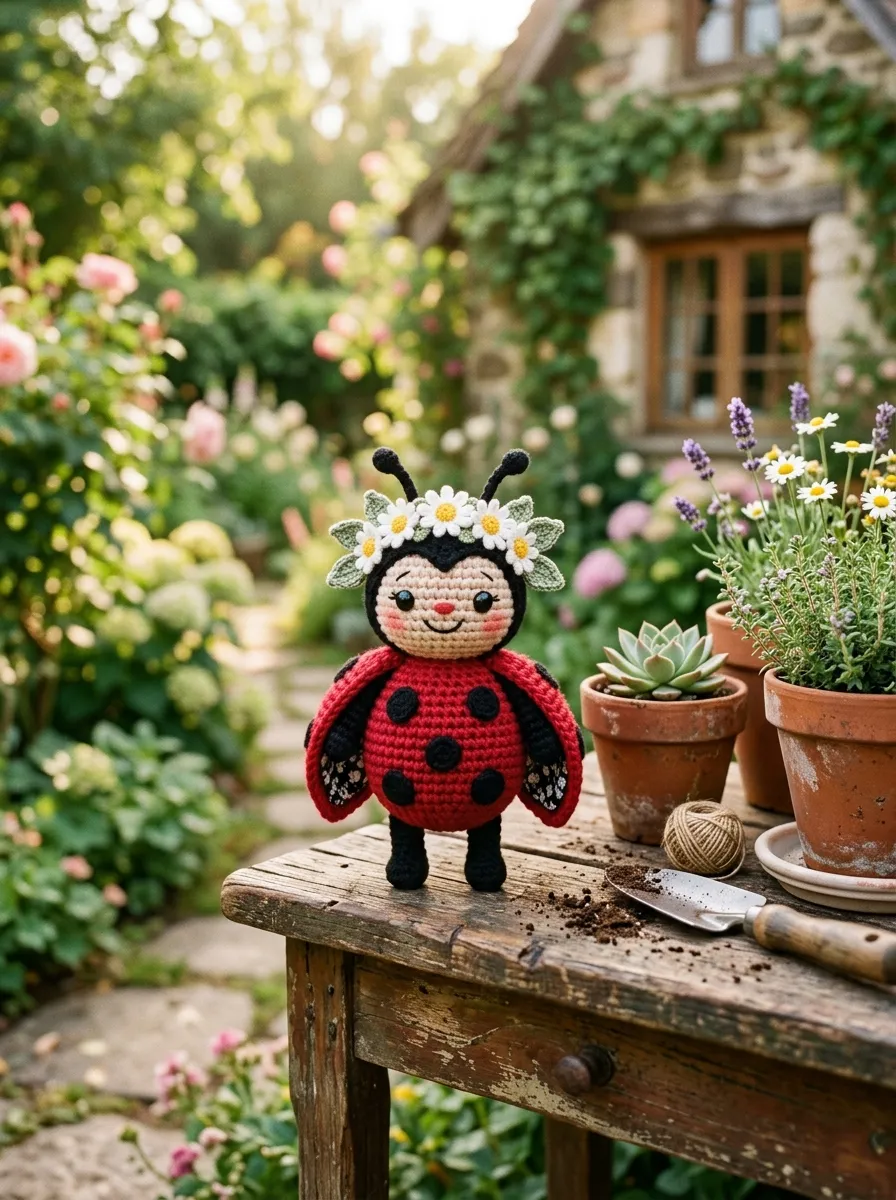
The whimsical daisy-crowned garden ladybug blends sweet floral charm with woodland character styling, making it an eye-catching focal point for spring centerpiece arrangements. This model features a soft, rounded ladybug body embellished with a handcrafted botanical garland consisting of miniature crocheted white daisies with sunny yellow centers resting gracefully across the crown of the head. The body proportions lean slightly toward a chubby, vertical egg silhouette, granting the bug an expressive, animated persona that feels lively and curious. Delicate light-green leafy accents peek out from underneath the floral crown, establishing an organic bridge between the crisp white petals and the deep crimson shell. This project appeals directly to crafters who enjoy assembling small botanical components and layering textures, resulting in a display piece that captures the essence of a tranquil cottage garden.
Begin by crocheting the upright torso and head as a continuous single piece using worsted cotton, transitioning from a black rounded head down into a crimson lower half through a tidy tapestry crochet color shift. Form the wings as two separate, slightly cupped ovals that are sewn directly to the back of the figure, allowing their lower tips to flare outward slightly for added dimensional movement. For the floral headpiece, create four to five micro-crochet daisies by forming a central yellow ring of five single crochet stitches, working delicate chain-loop petals into each stitch using fine white crochet thread. Stitch the completed daisies onto a slender chain of sage-green yarn that mimics a twisted vine stem, anchoring tiny green leaf picots between each flower. Wrap the finished botanical garland around the upper seam where the head meets the body, securing each flower base with invisible tacking stitches to guarantee the crown stays permanently positioned during handling.
4. Minimalist Scandinavian Geometric Ladybug

Execution Process
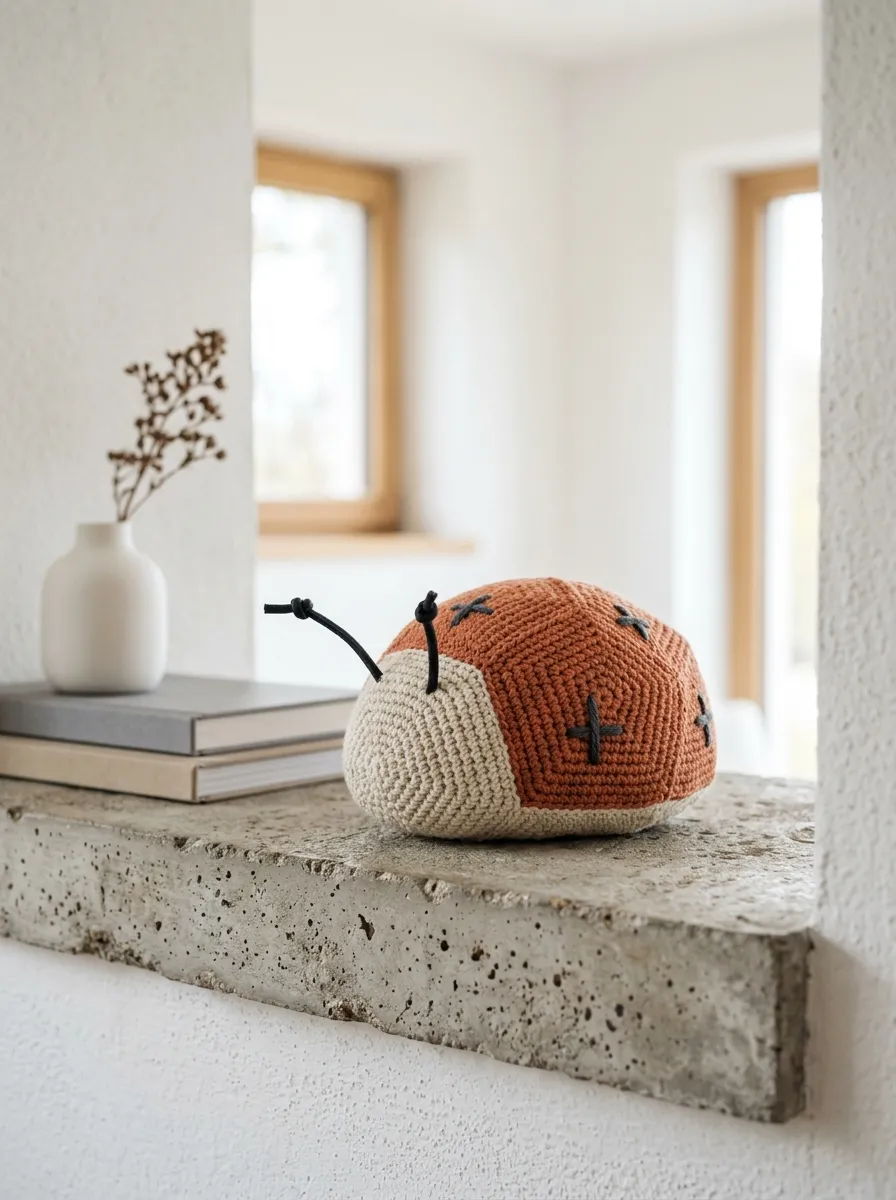
The minimalist Scandinavian geometric ladybug strips away excess ornamentation to focus entirely on pure form, structured lines, and understated Nordic design principles. This concept replaces the traditional spherical dome with a stylized, faceted pebble silhouette, utilizing muted neutral tones such as rust-orange, unbleached linen, and charcoal slate. The spots are executed not as appliqued circles, but as crisp, single-stitch cross-stitch embroidered plus signs or tiny linear tick marks distributed sparsely across the wings. The legs are omitted entirely or reduced to simple threaded leather cording knots, maintaining an uncluttered, modern presence that integrates effortlessly into contemporary Scandinavian home decors, architectural shelf arrangements, and minimalist children’s spaces. The beauty of this piece relies heavily on the immaculate precision of its stitches, celebrating the clean geometry of crochet loops as an artistic architectural element.
Fabricate the body by working with an unmercerized organic cotton-linen blend yarn and a wooden ergonomic hook, maintaining firm, rigid stitch tension throughout the build. Work the body using a flat oval base technique—increasing around both sides of a central foundation chain—to establish an elongated, clean structural profile before building straight vertical walls. Incorporate clean color transitions by employing the tapestry crochet technique, carrying the secondary charcoal yarn inside the stitches to create sharp horizontal color divisions without loose interior floats. Once the outer envelope is fully crocheted and packed with dense wool roving, close the final opening using an invisible decrease finish to preserve the continuous, seamless edge. Use fine charcoal embroidery thread to add three precisely measured cross-stitch marks on each wing panel, securing the thread tails inside the central core to leave the exterior surface smooth, flat, and impeccably tailored.
5. Functional Magnetic Kitchen Ladybug Clip
How to Make
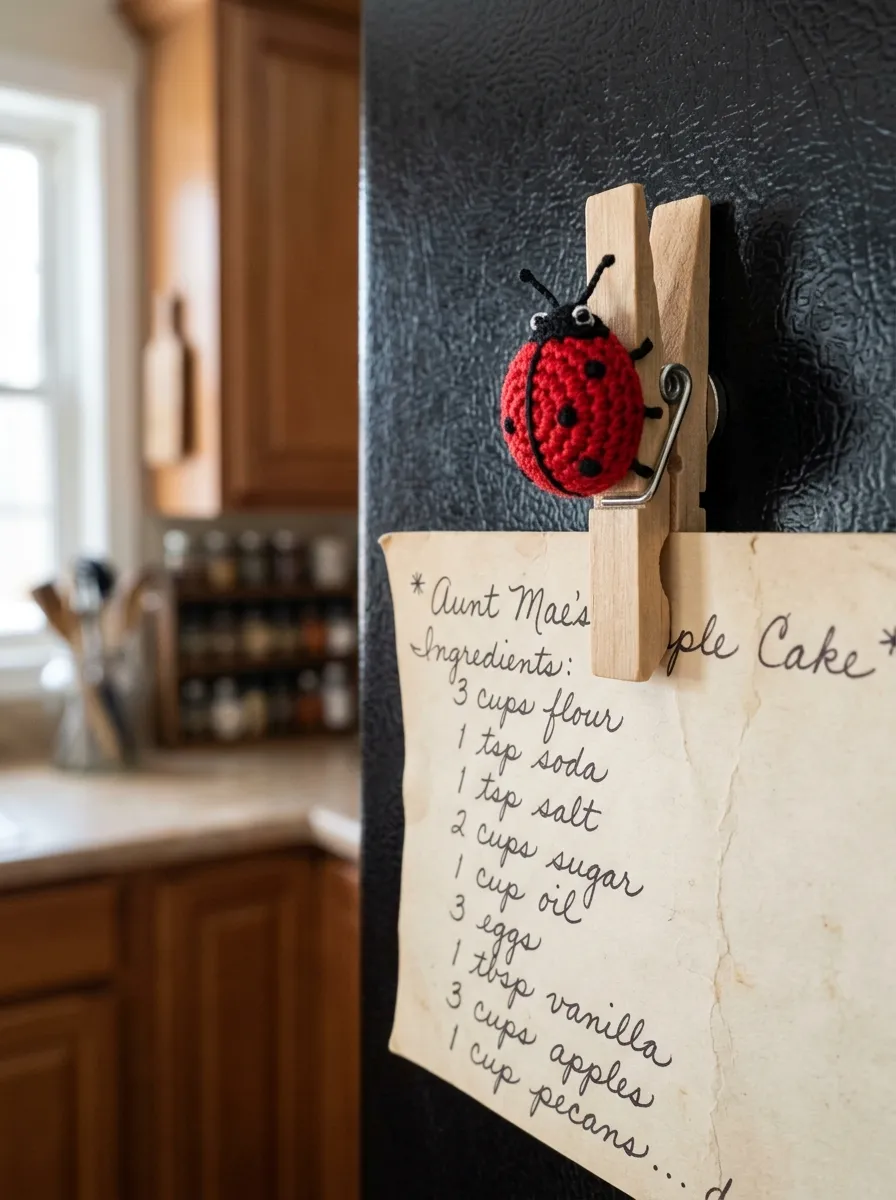
The functional magnetic kitchen ladybug clip unites decorative fiber art with everyday household utility, serving as a charming and dependable organizer for refrigerators and magnetic memo boards. This project features a compact, low-profile ladybug shell measuring roughly two inches in diameter, permanently mounted to a sturdy wooden spring clothespin containing a recessed rare-earth neodymium magnet. The petite scale requires fine gauge crafting, producing a tidy, jewel-like finished object that securely holds recipes, grocery checklists, and cherished photographs against metallic kitchen surfaces. Because these items experience frequent physical handling, their construction prioritizes tight, snag-free stitching, flat surface detailing, and robust bonding mechanics. These miniature utility clips make wonderful party favors, stocking stuffers, or quick weekend stash-busting projects that deliver immediate functionality and cheerful color to utility spaces.
To construct this functional accent, use size ten crochet cotton thread and a 1.5-millimeter steel hook to produce an ultra-dense, wear-resistant exterior shell. Crochet a tiny hemispherical red dome across eight rounds of tight single crochet, followed by a flat circular black base that mirrors its exact diameter. Before closing the seam, insert a flat metal washer or coin inside the body along with a minimal pinch of stuffing; this flat internal substrate provides structural rigidity and prevents the dome from crushing under thumb pressure. Crochet the head as a tiny semi-circle attached directly to the front rim, embroidering two microscopic white eye knots with fine sewing thread. Secure a high-strength neodymium disc magnet to the reverse side of a miniature wooden clothespin using two-part epoxy adhesive, then bond the crocheted ladybug to the front wooden clip face using waterproof craft glue, clamping the components firmly for twelve hours to ensure an unbreakable bond.
6. Playful Rattle Ladybug with Teething Ring
Read This:
Setup Method
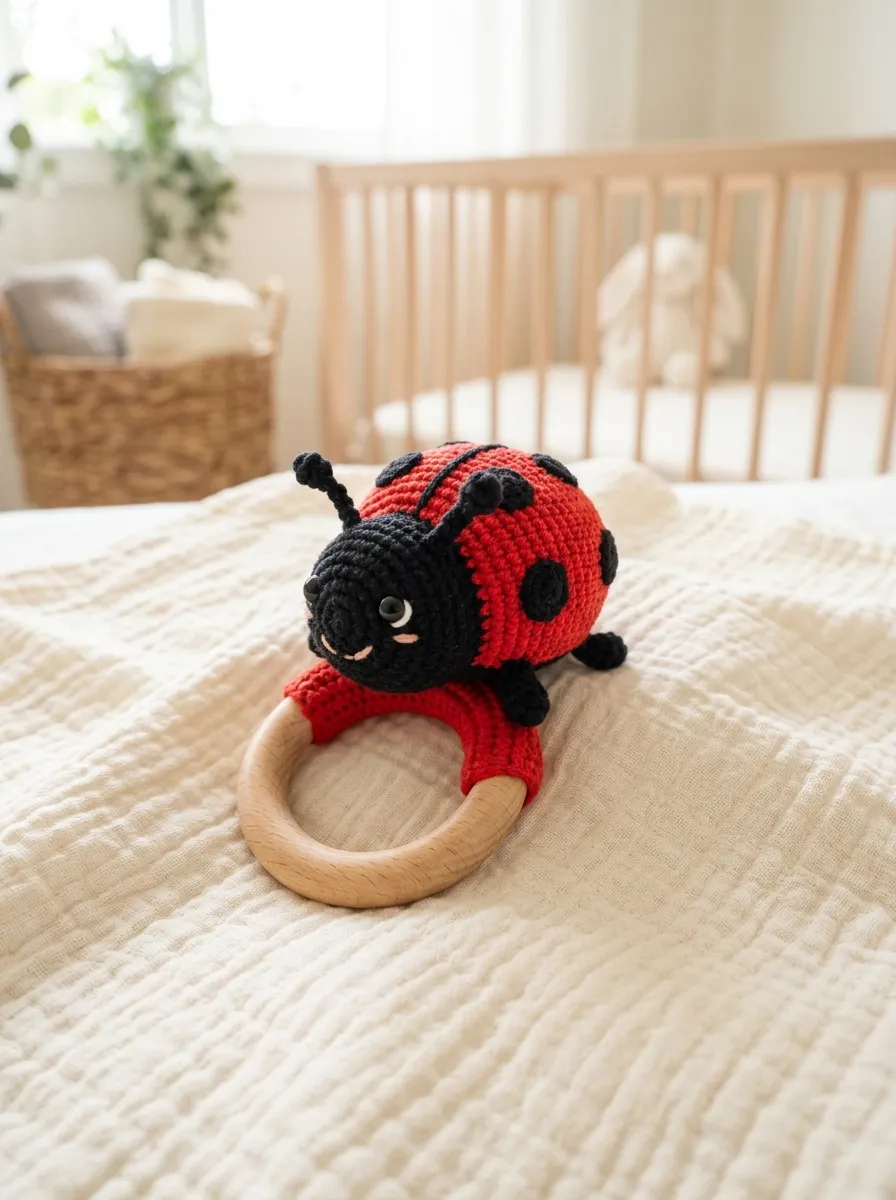
The playful rattle ladybug with teething ring combines sensory developmental features with artisanal needlework, functioning as a stimulating and safe infant accessory. The design mounts a cheerful, spherical amigurumi ladybug securely onto a smooth, untreated natural beechwood teething ring, allowing babies to grip the toy easily while exploring diverse tactile surfaces. Inside the crocheted head cavity rests a fully sealed plastic rattle insert that produces a soft, pleasant chime whenever the toy is shaken. High-contrast elements, such as stark black antennae, bold white embroidered eyes, and deep red wing cases, cater directly to an infant’s developing visual perception. Every element is engineered to withstand vigorous chewing and tugging, avoiding any glued parts, plastic beads, or unreinforced seams, thereby meeting rigorous child safety standards while maintaining a clean, artisanal aesthetic.
Begin by selecting an unfinished, chemical-free natural hardwood ring measuring three inches in outer diameter, smoothing any surface grain with ultra-fine sandpaper if necessary. Crochet the main ladybug sphere using certified organic non-mercerized cotton yarn, working in single crochet to create a thick, chew-resistant fabric envelope. As you reach the halfway mark of the spherical body, place a sealed plastic rattle cage directly in the center, surrounding it entirely with dense, hypoallergenic polyester fiberfill to prevent the hard plastic from pressing against the outer yarn shell. To secure the figure to the wood, crochet a wide, reinforced cotton tab that loops through the wooden ring, overlapping the underside of the ladybug body. Sew this mounting tab to the base of the ladybug using quadruple-strand cotton thread, utilizing heavy-duty cross-stitches to ensure the plush component cannot be separated from the teething ring under extreme physical tension.
7. Hanging Botanical Ladybug Terrarium Accent
Step-by-Step Guide
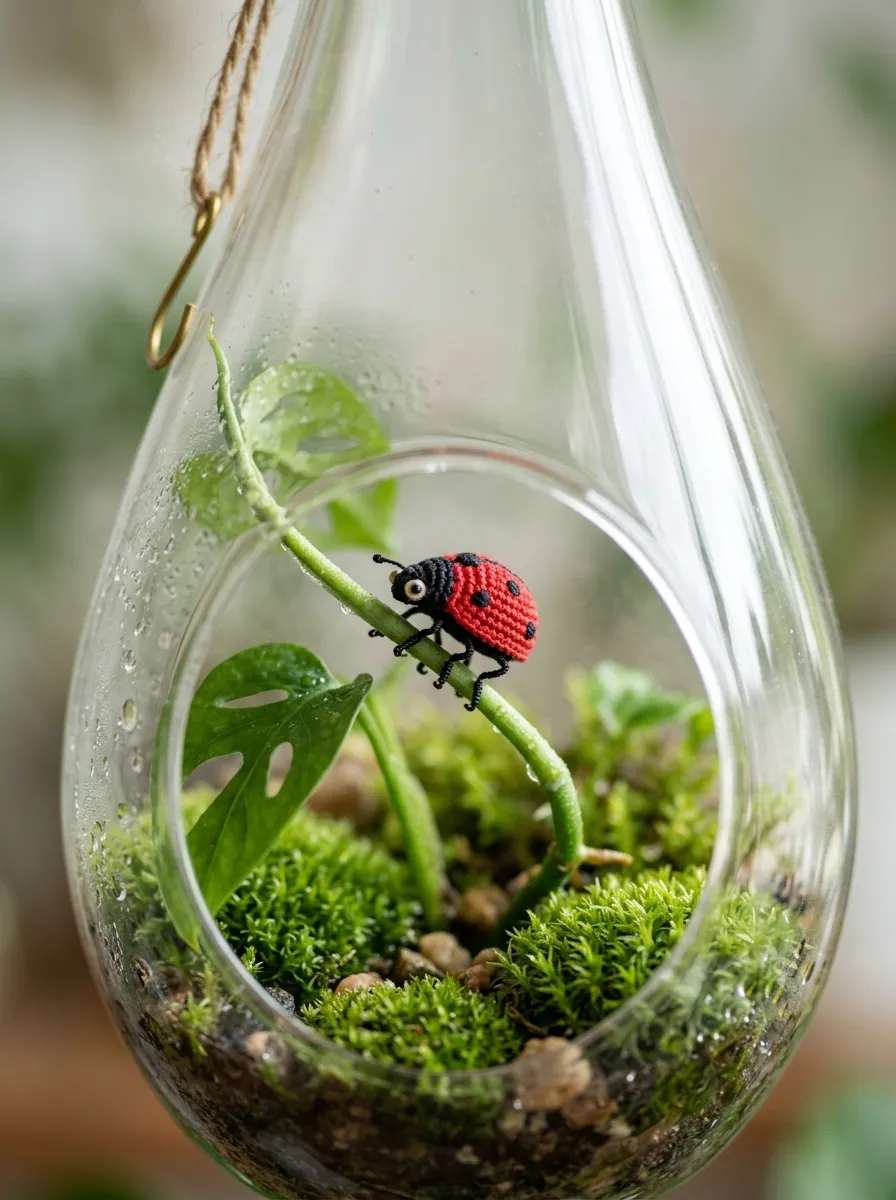
The hanging botanical ladybug terrarium accent introduces micro-scale needlecraft into indoor botanical styling, perching a diminutive fiber beetle within real or artificial plant displays. This miniature creation measures just over one inch in length and is suspended inside glass teardrop terrariums, perched atop moss poles, or clipped directly onto the stems of indoor houseplants like monsteras and pothos. The design features lifelike details adapted for micro-crochet, including delicate wire-reinforced legs wrapped in dark thread, tiny thread-embroidered spots, and slender thread antennae terminating in French knots. When nestled amidst living emerald foliage, the vivid red bug provides a stunning focal point, bridging the gap between indoor gardening and bespoke textile artistry. This concept suits plant enthusiasts looking for unique, whimsical embellishments to personalize their indoor jungle environments.
To build this micro-accent, work with fine two-ply embroidery floss separated into individual strands or size twenty crochet thread paired with a 0.75-millimeter micro-hook. Form a tiny oval body shell over six intricate rounds, taking care to pull each loop firmly to prevent looseness across the microscopic stitch ridges. Fill the miniature cavity with a tiny ball of black wool batting, sealing the base with a flat oval piece stitched directly across the opening. For the legs, cut three two-inch pieces of fine black floral wire, inserting them horizontally completely through the lower base of the body to form six protruding limb segments. Bend the wire ends downward with round-nose jewelry pliers to mimic realistic insect joints, then wrap each wire leg with black thread coated in matte fabric glue for a tidy, finished look. Attach a thin monofilament fishing line to the top of the shell to hang the beetle, or bend the wire feet to grasp a plant stem securely.
8. Cozy Autumn Pumpkin-Patch Ladybug
Read This:
How to Create
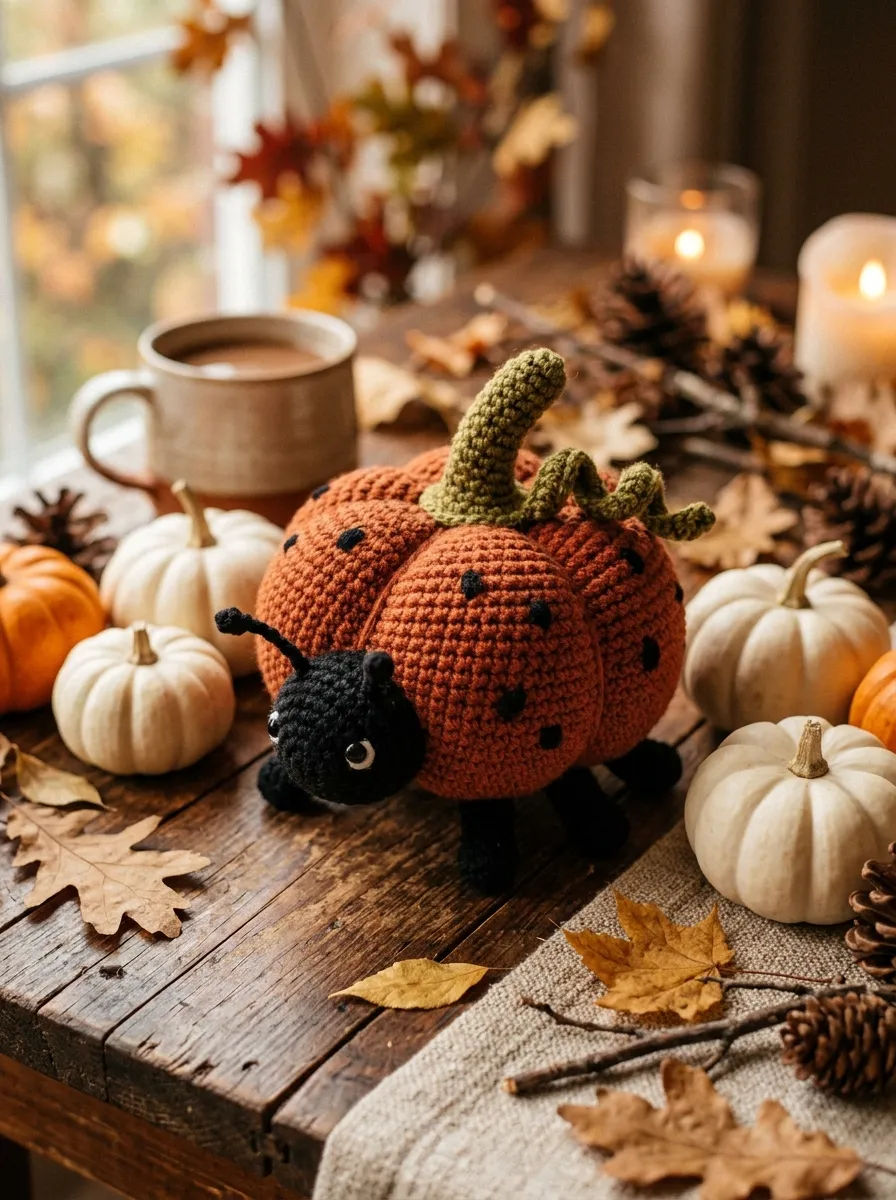
The cozy autumn pumpkin-patch ladybug merges playful insect shaping with rustic seasonal harvest themes, presenting a creative twist on traditional fall decorating. Instead of a standard round dome, the red shell is deeply segmented into six rounded lobes that mimic the ribbed silhouette of an heirloom pumpkin, using tight vertical surface cinching. The traditional black head is complemented by a warm cocoa-brown or charcoal palette, while the shell features deep rust, amber, or burnt scarlet tones that harmonize with autumn harvest aesthetics. A tiny, twisted green stem and curly tendril emerge from the apex of the shell, visually reinforcing the organic botanical transformation. This charming hybrid design functions as an unexpected, conversation-starting centerpiece element for fall tablescapes, Thanksgiving mantels, and rustic kitchen tiered-tray displays.
Construct this seasonal character by crocheting a slightly flattened sphere using warm rust-colored worsted-weight yarn, ensuring the stitch count expands generously around the equator before decreasing back to a narrow base opening. Stuff the sphere firmly with fiberfill, but take care not to overstretch the stitches so the fabric retains flexibility for external shaping. Thread a long tapestry needle with matching heavy rust yarn, anchoring it at the base of the sphere and wrapping the yarn up and over the outside of the ball, pulling it down through the center hole with firm tension. Repeat this external wrapping five times around the circumference, pulling the yarn taut to cinch the plush ball into six distinct pumpkin lobes before knotting the thread securely at the base. Crochet a miniature curled stem in olive green yarn, stitching it to the top central indentation alongside a coiled thread tendril, then add tiny embroidered black dots across each individual lobe to finish the harvest look.
9. Modern Hanging Ladybug Planter Ornament
Execution Process
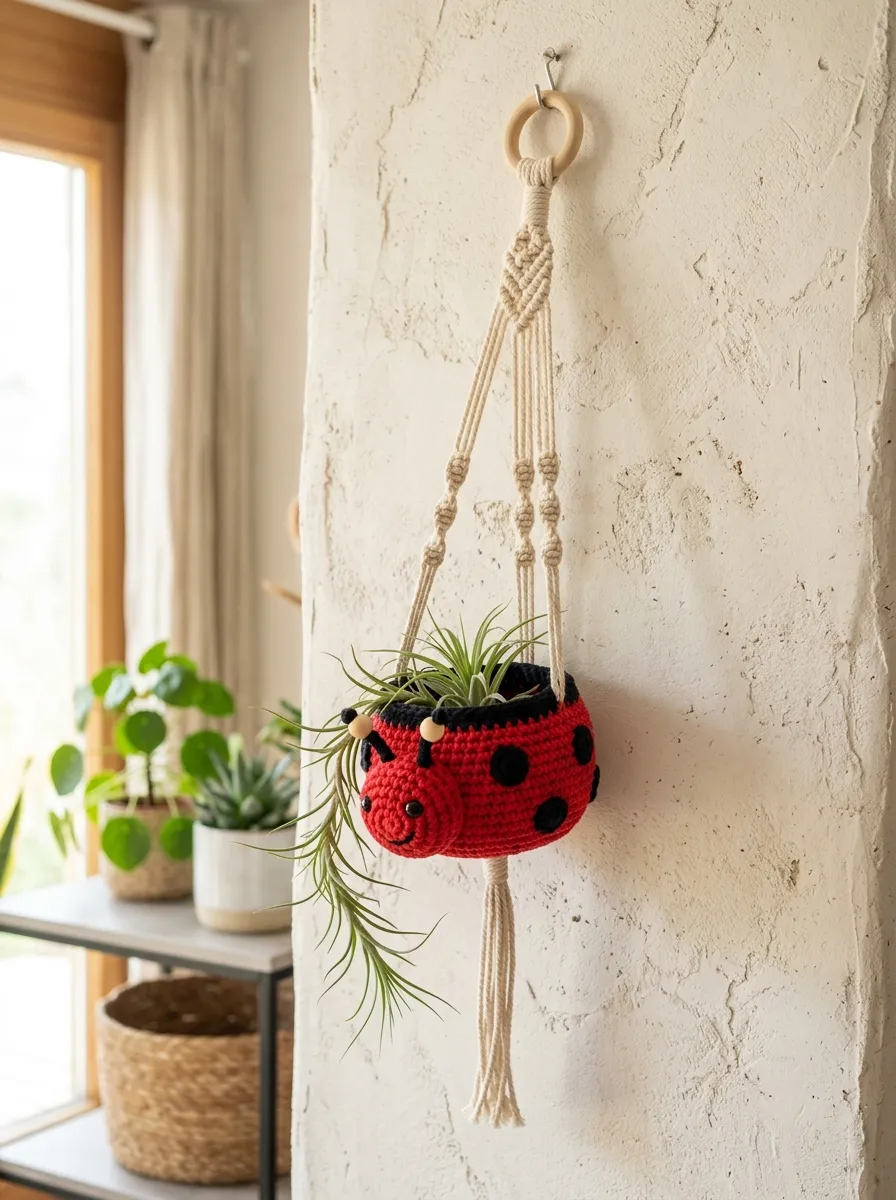
The modern hanging ladybug planter ornament transforms the traditional bug silhouette into a functional, suspended decorative bowl designed to cradle small air plants, faux succulents, or dried florals. This hollow, semi-spherical design features an inverted cup construction where the red spotted shell forms the exterior hanging basin, while the interior remains open to accommodate botanical stems. Suspended by three sleek macrame-style cotton cords tied beneath the base, this floating textile planter adds vibrant vertical color to window frames, craft studios, and sunlit reading corners. The design relies on sturdy, double-stranded yarn construction to maintain a rigid, open-mouthed cup shape that will not sag, warp, or collapse under the weight of holding indoor greenery, presenting a fresh intersection of fiber craft and interior plant display.
Begin fabrication using two strands of durable aran-weight cotton yarn held together, paired with a four-millimeter aluminum hook to create a dense, rigid structural fabric. Work a flat circular base using continuous rounds of single crochet until reaching a four-inch diameter, then continue working upward without further increases for eight consecutive rounds to build the vertical basin walls. Switch to black yarn for the final three rounds to establish a bold, clean rim around the opening, finishing the edge with a round of reverse single crochet stitches to add structural rigidity. Crochet six flat black circles and sew them onto the red exterior walls with flat seams. Punch three evenly spaced eyelet holes beneath the top rim, threading lengths of natural unbleached cotton cording through each hole. Knot the cords together securely at the base and top, creating a stable, three-point suspension harness ready to hold a tillandsia air plant securely in place.
10. Vintage-Inspired Jointed Collectible Ladybug
Read This:
How to Make
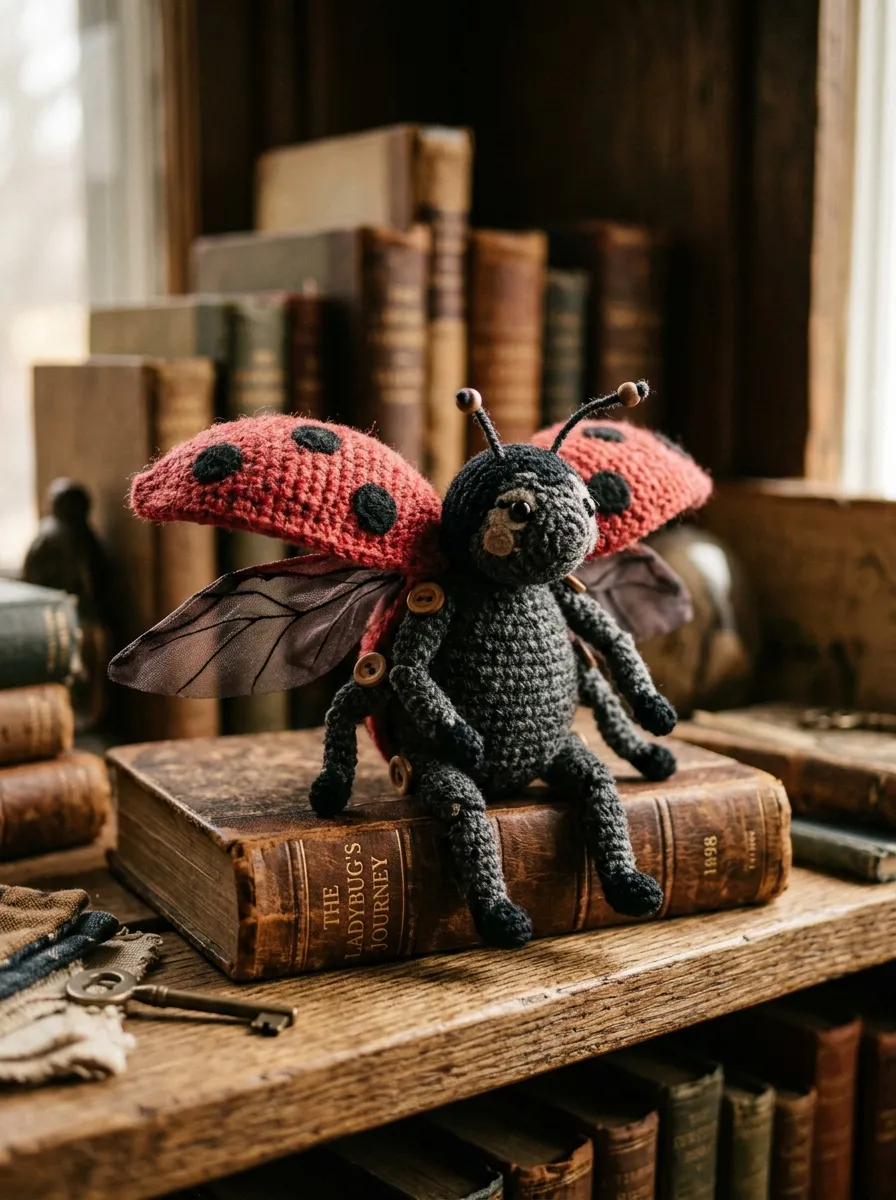
The vintage-inspired jointed collectible ladybug draws aesthetic influence from classic mid-century artisan plush toys, featuring articulated limbs, a distinct segmented thorax, and an elegant, upright standing posture. Unlike basic single-piece models, this heirloom-grade figure is constructed from multiple distinct units—head, segmented thorax, hinged wing shields, and four articulated limbs—assembled using small wooden craft buttons or miniature doll joints. The wings are crocheted as separate curved shields that can be pivoted outward to reveal a soft, hidden under-body, introducing delightful kinetic interactivity to the sculpture. Crafted from soft heathered wool yarn with lightly brushed surface textures, this sophisticated project appeals to experienced fiber artists and adult collectors who appreciate mechanical craftsmanship, tactile history, and display-worthy fine craft techniques.
Start by crocheting the internal body core in rich charcoal wool, shaping a defined head, an indented neck groove, and an elongated lower torso with deliberate decrease clusters. Form the two red wing shields separately, working dense single crochet ovals that are stiffened slightly with fabric blocking spray and edged with a clean border of black slip stitches. Sew miniature wooden buttons through the upper shoulders of each wing shield, anchoring them into the charcoal thorax with waxed linen thread to create a functional pivot joint that allows the wings to open and close. Assemble the four limbs as slender, lightly stuffed tubes, using matching button joints at the hips and shoulders to allow the finished ladybug to sit, stand, or adjust its posture dynamically. Finish by using a wire carding brush to gently raise the wool fibers across the surface, giving the completed piece a nostalgic, velvety halo reminiscent of antique mohair collectibles.
Common Beginner Mistakes and How to Avoid Them
One of the most frequent errors made by novice amigurumi crafters is using inappropriate hook sizes, which creates loose, gaping stitches that expose internal polyester stuffing. To avoid this common pitfall, always choose a crochet hook that is one to two sizes smaller than the size listed on your yarn label; this tighter gauge ensures that single crochet stitches pull together closely, forming an opaque, sturdy barrier that retains the stuffing completely. Another widespread problem is the unintentional spiral distortion of surface details, where spots and color transitions tilt diagonally across the body due to the natural slant of continuous spiral rounds. Prevent this misalignment by adopting the yarn-under single crochet technique, which produces neat, square-aligned stitches that stack vertically rather than drifting sideways. Beginners also frequently struggle with floppy, insecure parts, which occurs when makers attach limbs and antennae with only a few loose stitches. Ensure long-term structural durability by firmly pinning all components in place with dressmaker pins before sewing, then attaching them with small, interlocking whip stitches pulled taut through both the appendage and the underlying body fabric.
Practical Tips for Better Results
Achieving a clean, gallery-worthy finish on amigurumi ladybugs depends on mastering subtle, high-impact finishing techniques that elevate the overall structural precision of your work. When working the hemispherical shell, employ the invisible decrease method—working single crochet decreases through the front loops only—which eliminates the bulky, uneven bumps typical of traditional decreases and produces an unblemished, smooth dome. For the surface spots, consider switching from standard crochet rings to needle-felted wool dots; applying small tufts of black wool roving with a fine felting needle directly onto the finished red shell allows for perfectly circular, flush spots with zero bulky seam lines. When stuffing the body, tear the polyester fiberfill into small, wispy tufts and pack them gradually, using the blunt back of a wooden crochet hook to press the filling firmly against the outer walls first. This deliberate distribution builds a smooth, lump-free curve that holds its shape under pressure. Finally, lightly steam your completed piece using a handheld garment steamer held several inches away, which relaxes the yarn fibers, eliminates minor tension irregularities, and sets your final stitches beautifully.
Styling, Presentation, or Organization Ideas
Curating how you display handmade amigurumi ladybugs transforms individual fiber pieces into captivating, thematic decor installations within your living space. For a refined, botanical aesthetic, nestle small crochet ladybugs inside open glass terrariums alongside live moss, smooth river pebbles, and preserved wood bark, establishing an organic micro-landscape that adds life to floating wall shelves. In home office settings, use magnetic ladybug clips on metal bulletin boards to organize recipe cards, daily affirmations, or seasonal floral postcards, blending colorful handmade charm with practical desk organization. If you are decorating a child’s nursery, arrange ladybug plushies in groups of three with varying sizes along open picture ledges, pairing them with illustrated vintage nature books and potted leafy ferns to create an engaging, nature-inspired reading nook. For festive seasonal gatherings, scatter small ladybug figures down the length of a rustic dining table along with fresh eucalyptus garlands and natural beeswax candles, providing an unexpected, playful pop of vibrant scarlet that enlivens the entire tablescape.
Budget or Time Planning
Executing amigurumi projects efficiently requires thoughtful material budgeting, realistic time management, and an organized production workflow. Because amigurumi ladybugs feature compact proportions, an entire collection can easily be fabricated from partial skeins and leftover yarn scraps, keeping direct material expenses remarkably low at just a few dollars per figure. To optimize your crafting hours, batch similar processes together rather than making one complete ladybug from start to finish; for example, dedicate an initial evening solely to crocheting all red shells and black bases, followed by a separate session for assembling spots, eyes, and antennae. A miniature ladybug clip or keychain typically requires roughly one to two hours of focused stitching, whereas larger cushion buddies or jointed collectible figures demand four to six hours of detailed assembly and embroidery. Setting up a dedicated project basket containing pre-measured yarn lengths, notions, and safety components prevents misplaced tools and allows you to capitalize on short fifteen-minute pockets of free time throughout the week.
Creative Expansion and Advanced Inspiration
Once you have mastered foundational amigurumi ladybug patterns, explore advanced design variations and innovative multimedia adaptations that expand your creative repertoire. Experiment with unconventional yarn textures and fiber blends, such as combining matte linen bodies with glossy silk-embroidered wings or utilizing iridescent metallic threads to outline each individual wing cover for subtle, light-catching elegance. You can also integrate alternative media into your fiber builds, incorporating cast resin spots, carved wooden legs, or fine brass wire armatures inside the antennae to achieve dynamic, poseable expressions. Explore functional expansions by inserting lavender-infused rice sachets inside the body cavity to create soothing, aromatic drawer organizers, or insert zipper closures across the underbelly to craft charming coin purses. Furthermore, consider scaling patterns drastically up or down by pairing the exact same stitch formulas with either micro-crochet lace thread or giant fifteen-millimeter super-bulky roving, opening up a diverse spectrum of creative possibilities ranging from wearable stud earrings to massive, sculptural floor poufs.