Handmade yarn trinkets have become a cherished medium for personal gifting, blending detailed fiber artistry with everyday function. These miniature tokens transform small amounts of yarn into meaningful, portable gifts suitable for keychains, bag pendants, planner accents, and personalized keepsakes. This extensive guide provides practical, step-by-step guidance for crafting ten charming miniature crochet designs tailored for thoughtful gifting. Readers will explore structural construction, delicate shaping techniques, color management, and durable hardware assembly needed to build high-quality accessories. Each idea demonstrates distinct techniques, from tight amigurumi spheres to flat botanical motifs and layered novelty creations. Learning how to scale stitches and select appropriate thread weights ensures your finished projects maintain structural integrity under daily wear. By understanding how to balance visual appeal, tactile structure, and reliable hardware integration, crafters can produce polished, boutique-quality keepsakes. Whether you are seeking quick weekend projects, creative ways to use leftover yarn scraps, or personalized tokens for special celebrations, this resource provides the necessary instructions and construction advice to create memorable, beautifully finished gifts.
Modern Appeal and Creative Utility of Miniature Fiber Accessories
Miniature crochet charms continue to captivate design communities and visual platforms due to their accessible scale and charming versatility. Contemporary lifestyle enthusiasts appreciate small handmade accents that bring personality and warmth to everyday essentials like canvas totes, backpacks, smart devices, and minimalist desk displays. For crafting enthusiasts, these small pieces offer an approachable entry point into fiber art, requiring very little initial investment while teaching fundamental shaping and stitch precision. A miniature project eliminates the lengthy commitment of full-scale garments or blankets, delivering satisfying results in just an hour or two. Because these pieces use only small amounts of thread, they are ideal for zero-waste crafting, allowing makers to turn leftover yarn scraps into charming, functional items. Their compact size makes them budget-friendly to produce in bulk for party favors, teacher appreciation gifts, stocking stuffers, or holiday gift toppers. The blend of simple construction, practical utility, and creative adaptability ensures miniature fiber crafts remain a staple in modern crafting culture.
Essential Crafting Equipment and Preliminary Workflow
Achieving neat, professional results with miniature crochet pieces requires disciplined preparation and appropriate tool selection. Fine fingering-weight or sport-weight mercerized cotton yarn is ideal, as its smooth finish resists splitting, holds tight stitch tension, and produces sharp definition. Pair this yarn with an aluminum or steel crochet hook between 1.5 millimeters and 2.5 millimeters to ensure a dense fabric that conceals polyester fiberfill. Essential notions include a set of fine-point tapestry needles, sharp thread snips, locking micro-stitch markers, and jewelry pliers. For structural assembly, gather durable hardware components such as stainless steel jump rings, lobster claw clasps, key rings, and eye pins. Begin by auditing your yarn inventory to select coordinating palettes, making sure to test your stitch density on a small swatch to confirm stitches remain tight and firm. Pre-opening your metal jump rings with pliers and laying out hardware in divided trays streamlines assembly, keeping your workspace organized and allowing you to transition smoothly from crochet work to final hardware attachment.
1. Miniature Golden Honeycomb Bee Pendant
Step-by-Step Guide
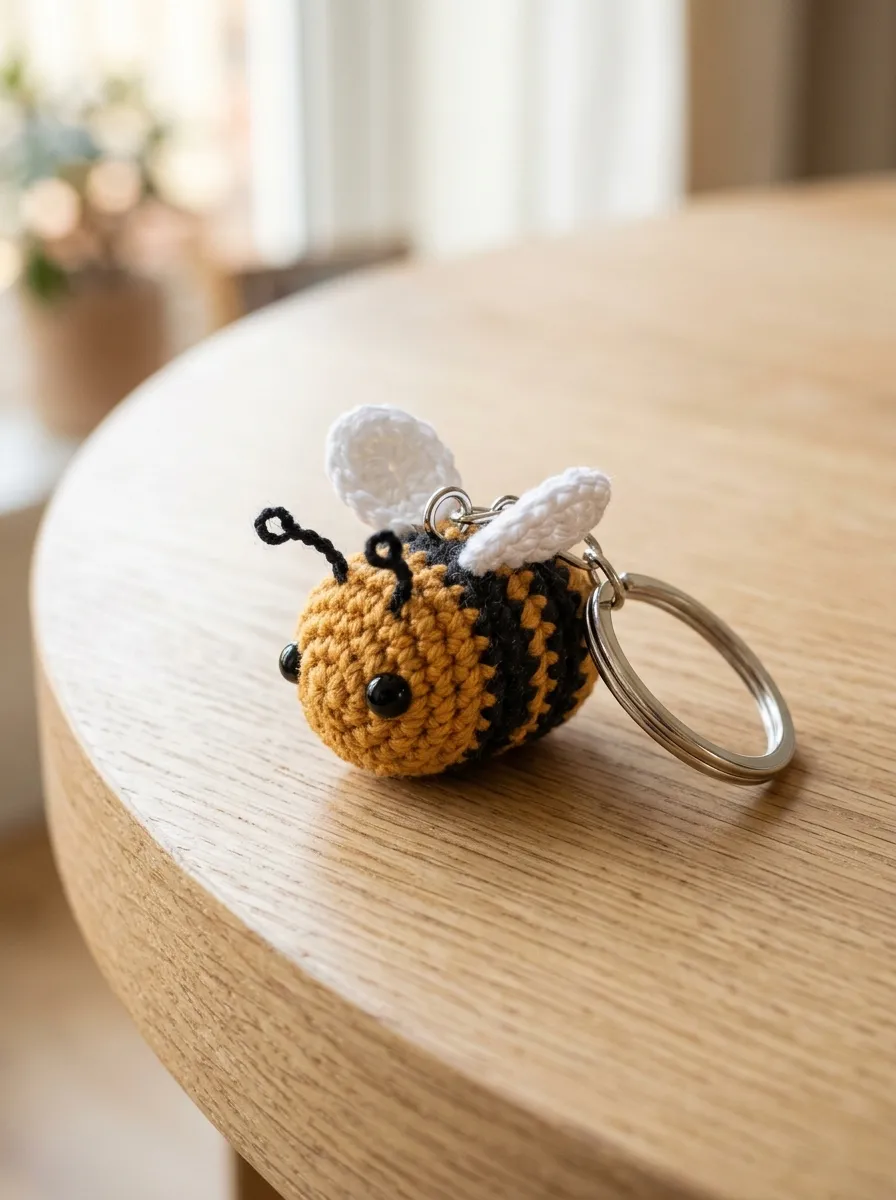
The miniature honeybee pendant combines vibrant contrasting bands with delicate wing shaping to create a cheerful, pocket-sized gift. This design relies on alternating stripes of golden amber and charcoal black yarn, forming a compact, rounded capsule that holds its shape well when suspended from keyrings or bags. Two translucent, teardrop-shaped wings sit flat against the back, adding subtle textural contrast to the dense body. The bright color scheme brings warmth and charm, making it a wonderful gift for friends, teachers, or coworkers. Because the overall structure uses simple circular increases and decreases, makers can practice tight color transitions and neat stuffing placement on a manageable scale. Its sturdy, compact profile prevents snagging, making it as durable as it is visually appealing.
Begin by working six single crochet stitches into an adjustable magic ring using golden amber cotton yarn and a two-millimeter hook. Expand the round symmetrically through regular increases until the circumference reaches eighteen stitches, then work two straight rounds to establish the rounded head. Introduce deep charcoal yarn using the tapestry technique to alternate two-round black stripes with two-round gold stripes across eight total rounds. Insert four-millimeter black safety eyes along round four, spacing them four stitches apart, and stuff the interior firmly with dense fiberfill. Work two small wings by chaining six in pure white thread, working slip stitches, single crochets, and double crochets along the chain to produce an oval leaf profile. Stitch the wings to the top back ridge, cinch the tail opening closed with a needle, and attach a ten-millimeter split ring through the upper back using jewelry pliers.
2. Sun-Ripened Wild Strawberry Bag Trinket
Read This:

How to Make
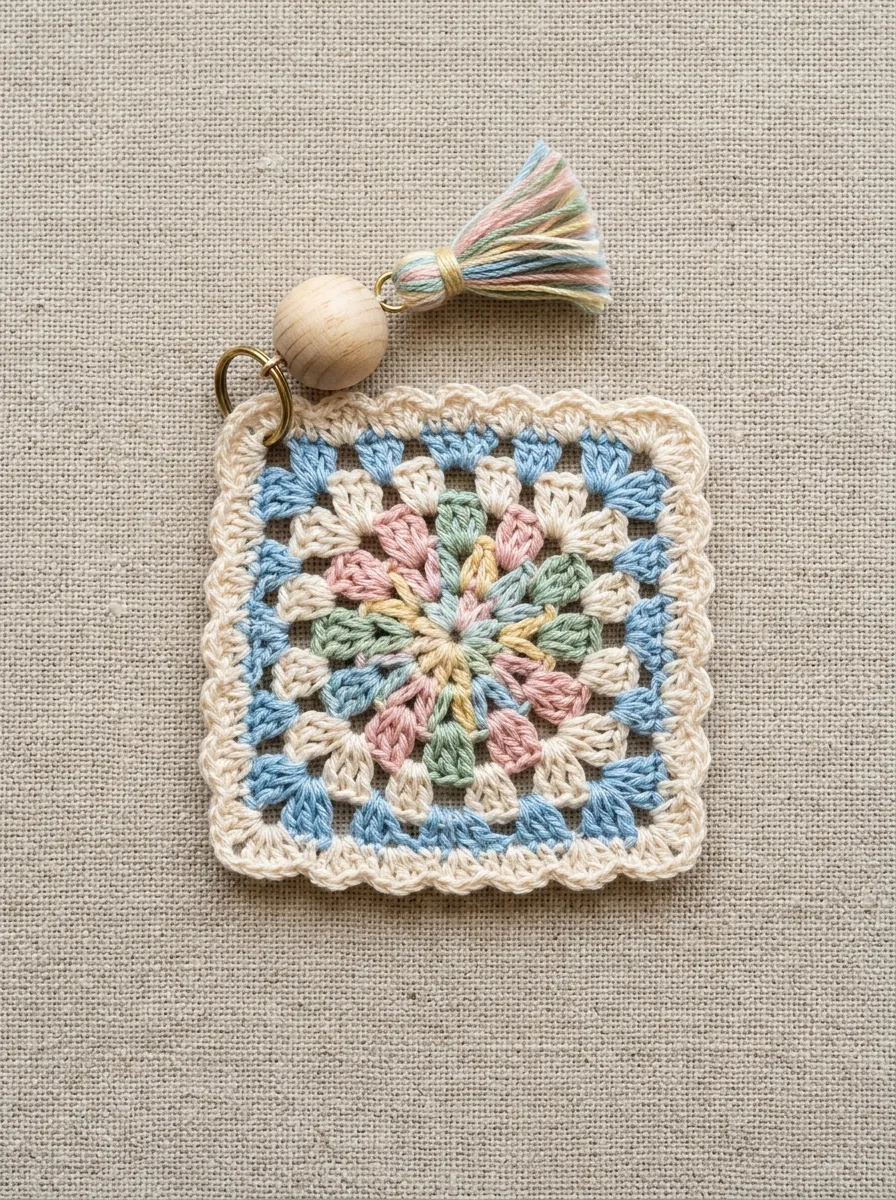
The wild strawberry trinket brings a touch of cottage-inspired charm to modern accessories, featuring a textured red berry accented with delicate green leaves. The body uses a tapered teardrop shape crocheted from rich crimson yarn, dotted with pale cream or golden yellow embroidery stitches to mimic tiny seeds. A five-pointed green calyx caps the top, providing botanical realism and hiding the hardware anchor point beneath. This charm works wonderfully as a zipper pull, purse accent, or seasonal car mirror accessory. Its simple three-dimensional shape offers an approachable project for beginners practicing even stuffing and neat surface embroidery. The rich contrast between crimson, leaf green, and light seed accents gives the completed charm a polished, handmade look that feels thoughtful and personal.
Crochet the main berry form from the bottom tip upward using deep crimson sport-weight yarn, expanding from four single crochets in a magic ring to sixteen stitches over six rounds. Work three straight rounds to build vertical volume, then gently shape the top curve through four evenly spaced single crochet decreases. Pause to embroider tiny vertical seed flecks across the surface using a single strand of pale butter-yellow embroidery thread, staggering stitches in an alternating brick pattern. Pack the interior with small tufts of fiberfill to create a firm, rounded cone, then close the remaining opening with a tapestry needle. Separately, crochet a leaf cap by working a tiny ring of five single crochets in leaf-green yarn, extending each stitch into a five-chain pointed leaf tip. Stitch the green calyx directly over the gathered berry top, securing a silver jump ring through the central stem loop for effortless bag attachment.
3. Potted Desert Succulent Desk Bauble
Setup Method
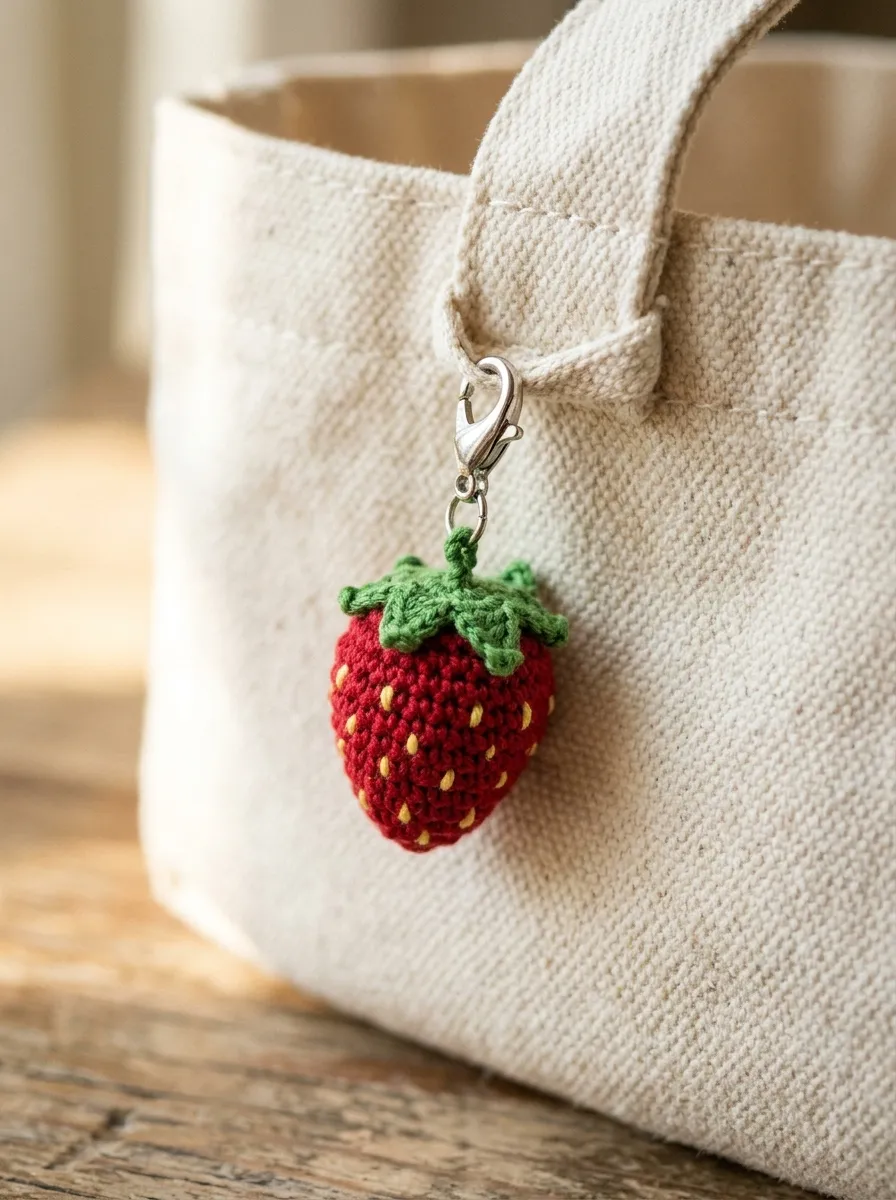
The potted desert succulent transforms a beloved houseplant into a durable, charming fiber sculpture designed to decorate keys, backpacks, or workspaces. The design pairs a tiny ribbed terracotta flower pot with a clustered rosette of sage green succulent petals nestled inside. Using structural stitches like half-double crochet and back-loop techniques gives the pot a defined rim and ribbed wall texture. This botanical design appeals to plant enthusiasts, making it an ideal handmade gift for housewarmings, desk decor, or nature lovers. The self-contained, sturdy shape protects the delicate inner foliage from getting crushed during daily use. Its earthy, calming palette of terracotta, rich soil brown, and soft eucalyptus green fits seamlessly with contemporary minimalist accessories.
Begin the miniature pot using warm terracotta yarn, working a flat six-stitch circular base before switching to the back loops to turn upward into the walls. Work four rounds in un-joined spiral rounds, then fold the final round outward with slip stitches to form a distinct container rim. Join dark espresso yarn into the inner top loops, working two flat rounds to represent potting soil, leaving a small opening to insert polyfill and a weighted glass bead for stability. Shape six individual succulent leaves by chaining four in muted sage green, working small graduated slip stitches and single crochets back down the chain to form pointed leaves. Sew the leaves to the center of the dark soil base in overlapping concentric circles, placing the smallest leaf cluster in the middle. Secure an eye pin vertically through the center of the succulent core to connect your chosen keyring hardware.
4. Vintage Granny Square Key Accent

Execution Process
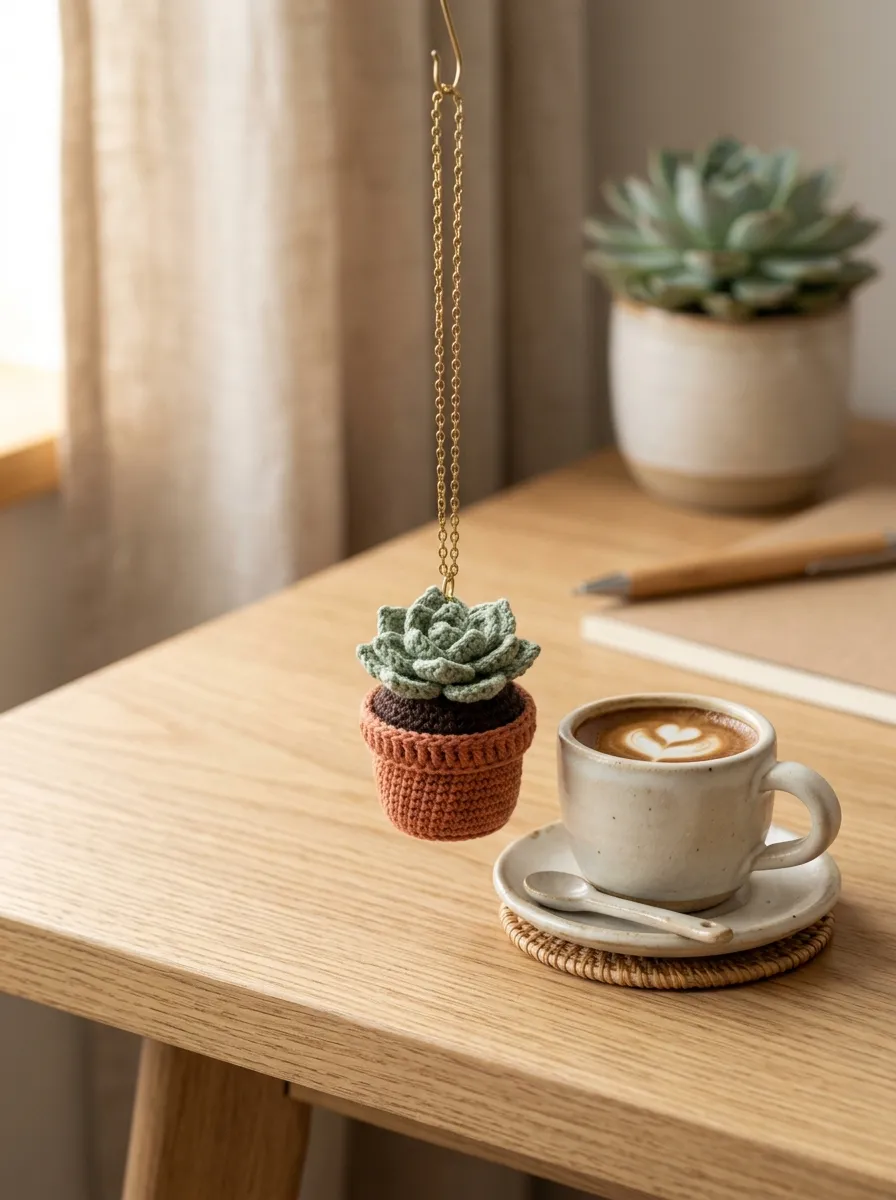
The vintage granny square key accent reimagines a classic fiber art motif as a sleek, modern accessory. By working traditional cluster stitches with ultra-fine crochet thread and a steel hook, the design scales down a heritage pattern into a crisp, delicate geometric pendant. Two identical micro-squares are crocheted and joined back-to-back around a firm felt insert, creating a sturdy, double-sided charm that resists curling. The design offers endless color possibilities, from muted monochromatic neutrals to vibrant retro palettes, making each gift completely unique. This project provides excellent practice for crafters looking to refine their tension and stitch alignment on a smaller scale. Finished with a natural wooden bead or a short yarn tassel, it brings a touch of timeless warmth to key sets and everyday bags.
Work the first micro-square using fine mercerized cotton thread and a 1.5-millimeter steel hook, starting with a center ring of three double crochet clusters separated by chain-two corners. Change thread colors on round two and round three, using contrasting shades to highlight the geometric flower pattern while keeping your corner spaces tight. Produce two identical square motifs, each measuring approximately two inches across, and block them with a steam iron to square the edges. Cut a thin square of stiffened craft felt slightly smaller than the crochet patches, sandwiching it between the two squares with wrong sides facing inward. Join the outer edges using single crochet stitches in a neutral border color, working three stitches into each corner loop to keep the edges flat. Attach a short three-strand yarn tassel to the bottom corner, and anchor a swivel lobster clasp to the top corner with a reinforced jump ring.
5. Citrus Blossom Lemon Wedge Accent
Step-by-Step Guide
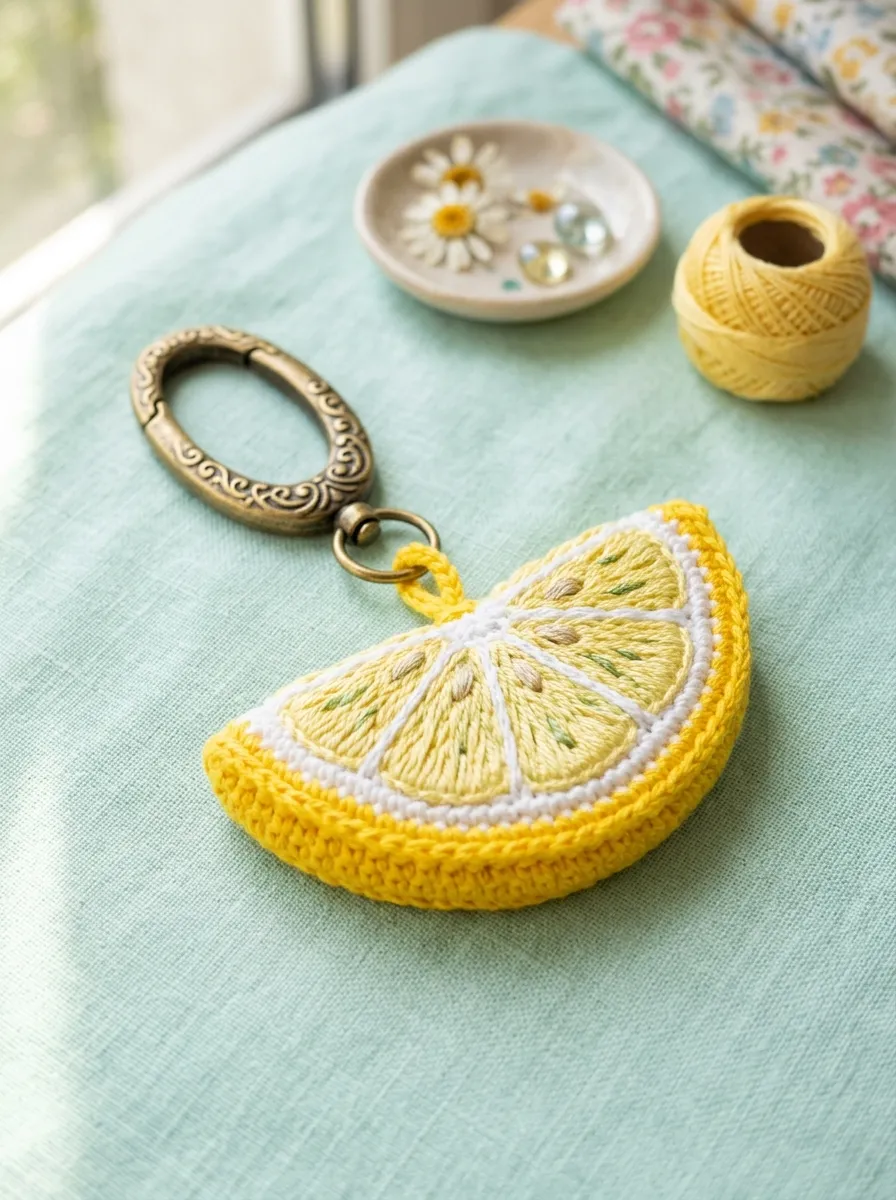
The lemon wedge accent brings a cheerful, refreshing pop of color to personal belongings, evoking the sunny aesthetic of summer markets. The design features a semi-circular citrus slice with clearly defined radial segments, a crisp white pith ring, and a bright yellow outer rind. Working in flat rounds that fold in half allows crafters to create dimensional accessories without navigating complex amigurumi increases. This bright, playful motif makes a fun gift for friends, travelers, or summer party attendees. The geometric wedge shape sits flat against bags and wallets, reducing bulk while adding personality. Learning the clean color changes and surface embroidery needed for the citrus segments builds valuable precision skills for other miniature projects.
Crochet a flat circular disc starting with pale cream or soft white yarn, working eight single crochets into a magic circle and increasing regularly across three rounds. Switch to vibrant lemon yellow yarn on round four, working through the front loops only to create a slightly raised boundary line. Before fastening off, use white embroidery thread to sew six straight lines radiating outward from the center point to the inner edge of the yellow round, defining individual citrus segments. Fold the circular disc in half with the embroidered fruit segments facing outward, enclosing a thin layer of batting between the folded halves. Single crochet through both layers around the curved outer edge using bright yellow yarn to form a sturdy, raised rind. Secure your working tail neatly with a tapestry needle, and attach an oval brass clasp to one pointed corner of the wedge.
6. Pastel Meadow Daisy Flower Talisman
How to Make
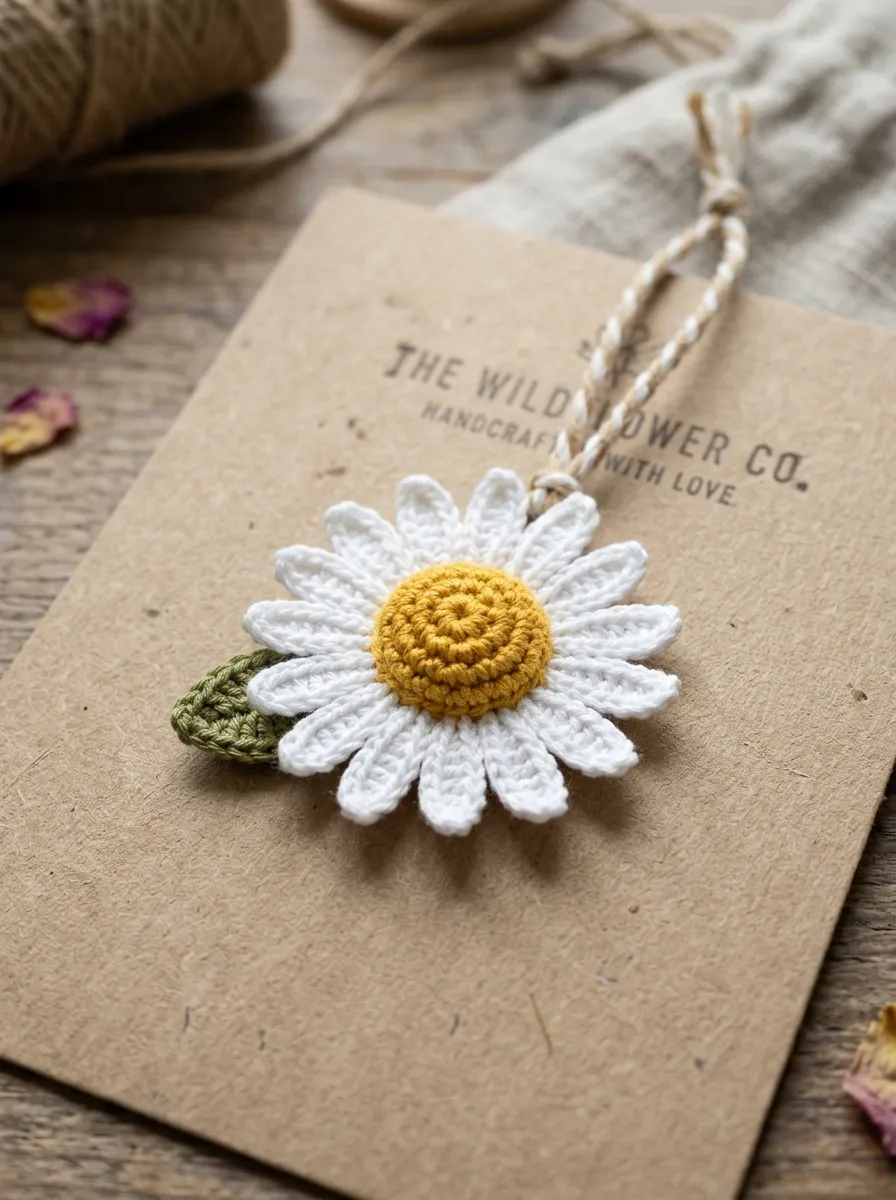
The meadow daisy talisman captures the cheerful simplicity of wild flora in a durable, double-layered accessory. The design features a raised, honey-yellow center surrounded by a halo of crisp white petals, finished with a subtle olive leaf stem. Unlike thin, single-layer flower motifs that can curl with use, this construction uses a reinforced two-piece base that stays flat and holds its shape over time. Its clean, floral aesthetic fits well with cottagecore styles, nature-inspired accessories, and spring celebrations. This makes it an especially sweet gift for birthdays, bridal party favors, or simple thank-you tokens. The repetitive petal sequence helps beginners build rhythm and muscle memory, resulting in a balanced, symmetrical bloom.
Begin by crocheting two identical circular discs in warm goldenrod yarn, expanding each from six single crochets to twelve stitches over two rounds. Place the two golden centers together with wrong sides facing, and join crisp white yarn through both layers to form the petal foundation. Work around the perimeter by chaining seven, slip stitching into the second chain, and working single crochets back down the chain before slip stitching into the next rim stitch. Repeat this petal sequence in every rim stitch to create twelve radiating petals that frame the yellow center. Gently press the finished petals flat using your fingers to smooth out any curling. To complete the charm, chain ten in olive green yarn to form a hanging loop, attach a small green leaf to the base of the chain, and secure the finished loop to the back of the flower with a sturdy jump ring.
7. Velvet Acorn Foraged Autumn Bauble
Setup Method
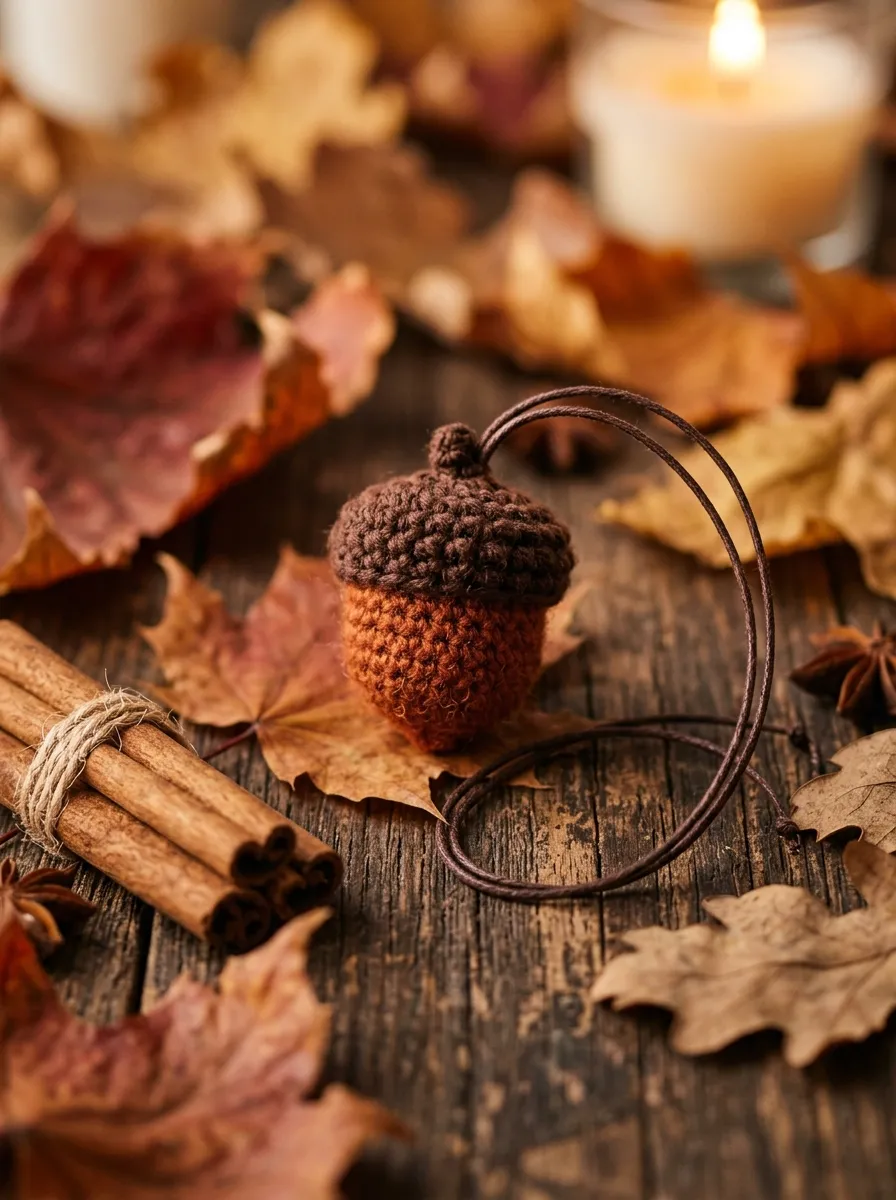
The velvet acorn bauble brings rich, woodland texture to winter and autumn gifting, pairing smooth yarn with genuine natural elements. The design uses a deeply saturated jewel-toned body—such as burnt copper, forest green, or mustard yellow—topped with a textured acorn cup worked in post stitches or secured inside an upcycled natural cap. This combination of soft fiber and rustic, earthy tones creates a cozy, grounding aesthetic. It functions beautifully as a planner charm, winter coat zipper accent, or rustic gift topper. Because it is small and quick to make, crafters can easily produce sets of three in coordinating seasonal colors. Working on this rounded, tapered shape teaches crafters how to manage gradual decreases while maintaining smooth, even surface tension.
Crochet the lower acorn nut using fingering-weight wool in rich autumn tones, starting with four single crochets in a magic ring and expanding to fourteen stitches over four rounds. Work four straight rounds to build a plump, rounded base, inserting dense fiberfill to keep the curved teardrop shape firm. If crocheting the cap, switch to deep chocolate or heathered charcoal yarn, working back-post half-double crochets to create a textured, raised rim. Add a tiny hanging stem by chaining four from the center of the cap, then slip stitching back down into the foundation ring. Alternatively, apply a small ring of clear epoxy adhesive to the top of the fiber acorn and press it into a real, cleaned oak acorn cap. Once set, loop a waxed cotton cord through the stem to complete the rustic woodland accessory.
8. Cozy Frosted Coffee Mug Pendant
Read This:
Execution Process
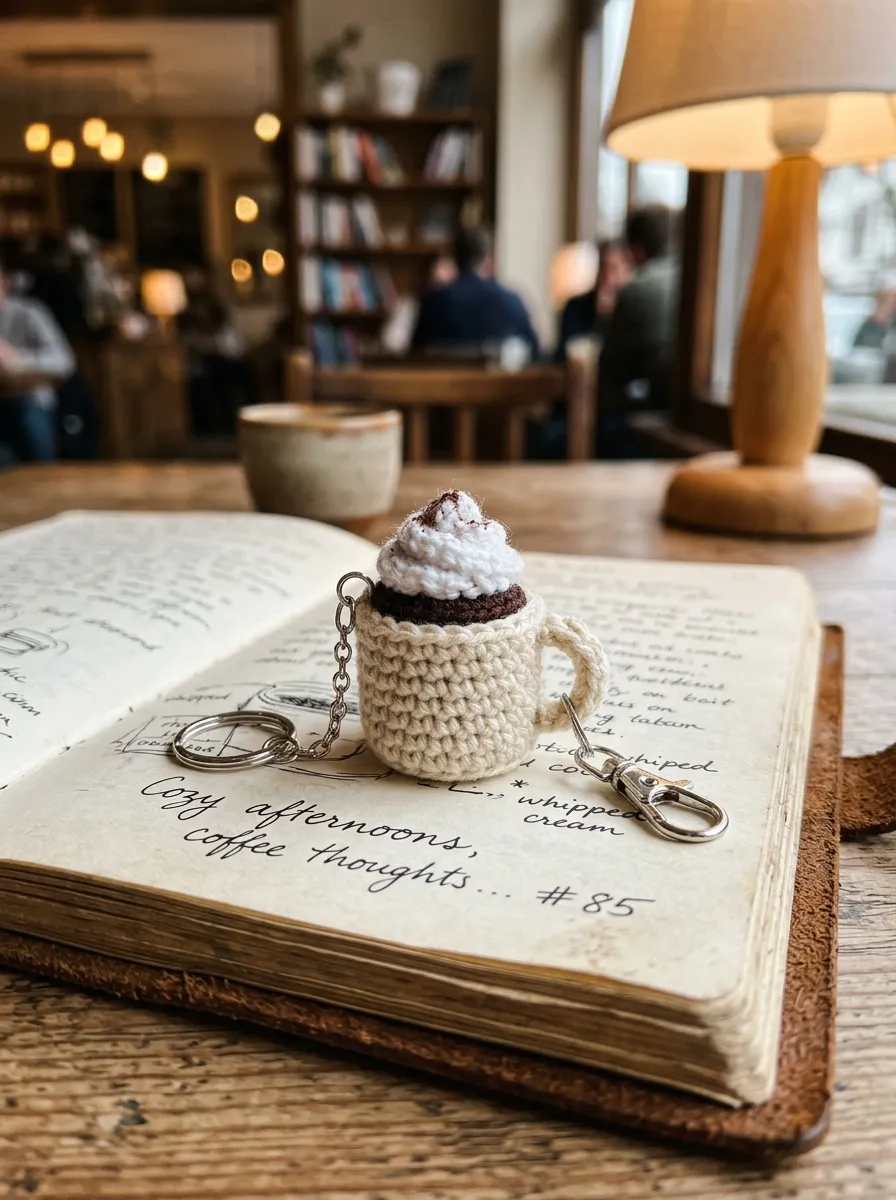
The frosted coffee mug pendant brings cozy cafe culture to life in miniature form, making it a wonderful gift for coffee lovers, readers, and coworkers. The charm features a tiny cylindrical ceramic-style mug filled with rich espresso-brown stitches and topped with a swirl of white foam. A delicate curved handle on one side completes the silhouette, while a few surface embroidery stitches on the front can suggest a heart or coffee bean. The flat circular bottom allows the miniature mug to stand upright on a desk or shelf when not attached to keys or a bag. Working on this cylindrical shape gives crafters practice in maintaining straight, even side walls and attaching tiny, delicate elements cleanly.
Start with warm cream or pastel stoneware yarn, crocheting a flat disc of twelve single crochets to form a stable, flat base. Work one round in the back loops only to create a sharp bottom edge, then continue in spiral rounds for six tiers to build the mug walls. Switch to dark espresso brown yarn on round seven, working in the back loops to define the beverage surface, then cinch the top opening closed with light stuffing inside. Join fluffy white yarn to the front loops of the top brown round, slip stitching around the rim to create a soft, frothy whipped cream border. To form the handle, chain eight in the body color, work slip stitches down the chain to add thickness, and sew both ends to the side wall with a tapestry needle. Attach a small silver chain and lobster clasp opposite the handle for easy clipping.
9. Minimalist Whimsical Toadstool Pocket Keepsake
How to Make
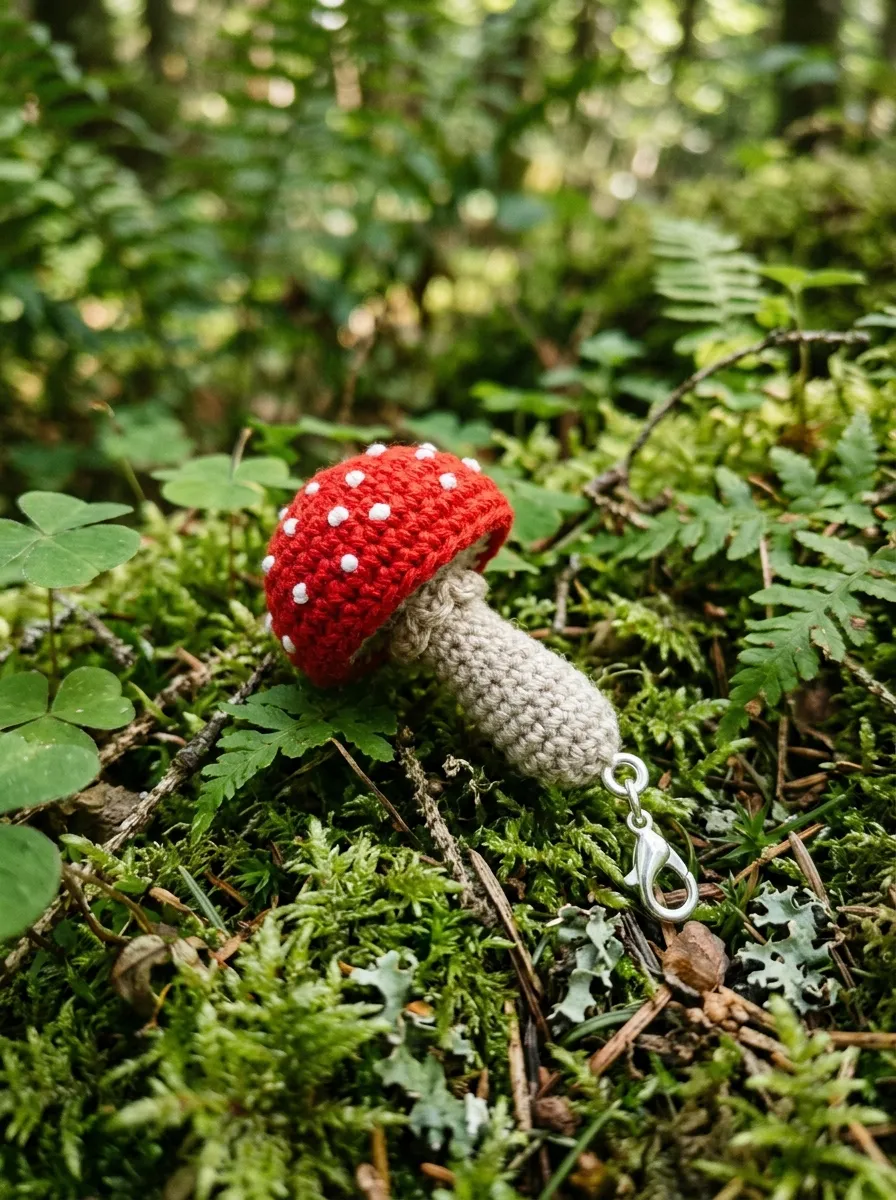
The woodland toadstool keepsake brings a classic fairy-tale motif to miniature fiber accessories, using bold color blocking and playful proportions. The charm features a domed scarlet cap dotted with small white embroidery knots, balanced by a pale cream or natural linen stalk. A flat, weighted bottom allows the mushroom to stand upright on a flat surface, making it versatile as both a portable charm and a miniature desk companion. This design makes a thoughtful gift for nature lovers, book enthusiasts, and those who appreciate whimsical forest decor. Constructing the flared mushroom stalk teaches makers how to shape smooth transitions between narrow columns and wider bases. The bright pop of scarlet adds a cheerful touch of color to bags, pencil cases, or keyrings.
Begin the mushroom cap with vibrant scarlet red yarn, expanding from six single crochets in a magic ring to eighteen stitches across four rounds. Work two straight rounds to build the cap’s rounded dome, then fasten off, leaving a long yarn tail for assembly. Use white cotton embroidery floss to add delicate French knots across the upper dome, spacing them naturally to create a classic spotted look. Crochet the stalk separately in pale linen yarn, working a narrow six-stitch cylinder that widens to twelve stitches at the base to create a stable pedestal. Stuff the stalk firmly with fiberfill, adding a few glass beads at the bottom for weight before stitching the flat base closed. Sew the red cap to the top of the stalk, and insert a sturdy metal eyelet into the top of the dome to secure your hardware.
10. Sweet Pastel Macaron Zipper Accent

Step-by-Step Guide
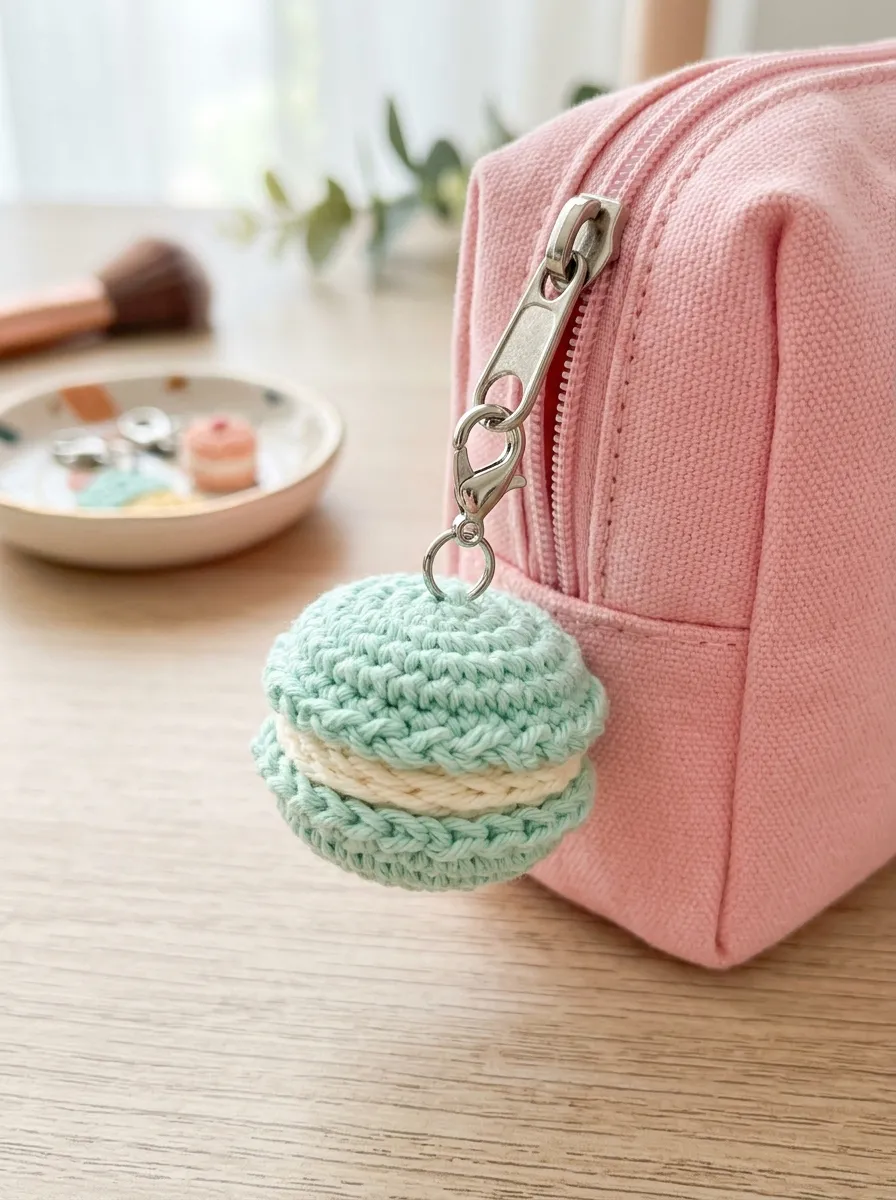
The sweet pastel macaron accent transforms beloved French pastry elegance into a chic, tactile gift accessory. The design features two rounded meringue shells in soft pastel shades—such as mint green, lavender, or rose pink—separated by an off-white cream filling with a ruffled foot edge. Its symmetrical, rounded shape feels satisfying in the hand, making it a great addition to cosmetic bags, backpacks, or key sets. The clean geometric design suits modern minimalist tastes, using soft color palettes rather than intricate facial details. Making this piece teaches crafters how to build ruffled edges and work layered assembly, expanding their skill set for other food-inspired crochet projects.
Crochet two identical curved cookie discs using soft pastel cotton yarn, expanding six single crochets to eighteen stitches over three rounds. Work one round even to create a gentle curve, then single crochet around the front loops only, working three slip stitches into every fourth stitch to form the textured, ruffled edge of the macaron shell. Fasten off both shells, leaving smooth interiors, and prepare a small central disc in rich vanilla cream yarn that matches the eighteen-stitch diameter. Place the cream filling between the two pastel shells with wrong sides facing inward, sewing the inner back loops together with matching thread. Before closing the seam, insert a thin circle of craft foam and a touch of fiberfill to give the macaron a firm, squishy feel without overstuffing. Attach a small silver swivel clasp to the outer edge using a secure jump ring.
Common Beginner Mistakes and How to Avoid Them
Creating polished miniature crochet accessories requires attention to detail, as small structural issues become much more noticeable at this scale. A frequent mistake is using a crochet hook that is too large for the chosen yarn, which creates loose stitches that let white polyester stuffing show through. Always drop down one or two hook sizes from the yarn label’s recommendation to keep the fabric dense, firm, and opaque. Another common error is overstuffing small shapes, which can distort the planned silhouette, stretch stitches apart, and cause bulges along the seams. Add fiberfill in small, teased pinches, guiding it gently into corners with the back of a crochet hook or dull tweezers to build an even foundation. Crafters also run into issues when attaching metal jewelry hardware directly to soft yarn loops, which can fray fibers over time and lead to lost charms. Always reinforce your attachment points with a small inner felt disc or sew through multiple stitch bars, using sturdy jump rings with securely closed joins to keep your hardware firmly in place.
Practical Tips for Better Results
Applying deliberate finishing techniques will help your handmade charms look neat, refined, and store-bought. Maintain consistent, steady tension by keeping your yarn guide hand relaxed; fluctuating tension quickly leads to uneven shapes across small rounds. When working in continuous spiral rounds, always use a fine thread or contrasting micro-stitch marker to track the start of each round, ensuring your increases and decreases stay symmetrical. When changing colors, finish the final yarn over of the previous stitch with the new color to keep color transitions clean and prevent jagged edges. Use the invisible decrease technique across narrowing rounds; working through only the front loops of adjacent stitches minimizes holes and creates a smoother surface. Finally, give your finished cotton pieces a light steam block with an iron, hovering the plate an inch away from the fabric to set the stitches without flattening their natural texture.
Styling, Presentation, or Organization Ideas
Thoughtful packaging and creative display methods can turn small handmade charms into elevated, boutique-quality gifts. Try mounting finished charms onto heavy kraft cardstock backing cards stamped with simple botanical motifs or personalized messages like “Handmade for You.” Use a craft punch to make two small holes near the top of the card, threading the metal clasp through so the charm hangs neatly in the center. For celebrations like weddings, showers, or birthdays, tuck individual charms into sheer organza pouches with a sprig of dried lavender or a customized card detailing the materials and care instructions. If organizing a craft space or market display, hang charms by their clasps from horizontal brass wire racks, tabletop wooden carousels, or tiered wooden pegboards to showcase colors clearly and invite browsing. Grouping charms by collection—such as forest themes, cafe motifs, or botanical garden sets—creates a cohesive visual story that highlights your range and craftsmanship.
Budget or Time Planning
Smart material choices and structured time management make producing these small gifts both cost-effective and rewarding. A single fifty-gram skein of sport-weight cotton yarn provides enough yardage to make eight to twelve complete miniature charms, keeping your material costs very low per piece. Save your small yarn scraps in divided glass jars; even an eighteen-inch length of green or yellow thread can easily make a leaf, stem, or embroidered detail. In terms of crafting time, most small charms take between forty-five and ninety minutes from first stitch to final hardware attachment. To work more efficiently, use an assembly line approach when making gifts in bulk: crochet all the primary bodies in one sitting, work the leaves and secondary elements in a second, and finish with stuffing, detailing, and hardware in a dedicated final session. This structured method speeds up your workflow, keeps your notions organized, and ensures every finished piece receives the same care and attention.
Creative Expansion and Advanced Inspiration
Once you master basic miniature shapes, you can explore exciting new ways to personalize and expand your crochet projects. Experiment with scale by using identical patterns with different thread weights; fine embroidery floss with a 0.75-millimeter hook produces delicate jewelry pieces, while bulky velvet yarn yields an oversized plush bag accessory. Try adding subtle color depth with powdered artists’ pastels or fabric markers, brushing soft pink tints onto cheeks, petal edges, or fruit tops with a small makeup brush. You can also incorporate mixed-media elements, such as natural wooden beads, glass seed beads, or raw brass findings, to give your charms an elevated, modern artisanal look. Seasonal variations offer another great avenue for creativity: add tiny Santa hats to acorn baubles, turn the daisy talisman into a vibrant sunflower, or top the coffee mug with miniature cinnamon sticks. These personal touches allow you to continuously adapt simple patterns, building a versatile collection of thoughtful, handmade gifts tailored to any occasion.