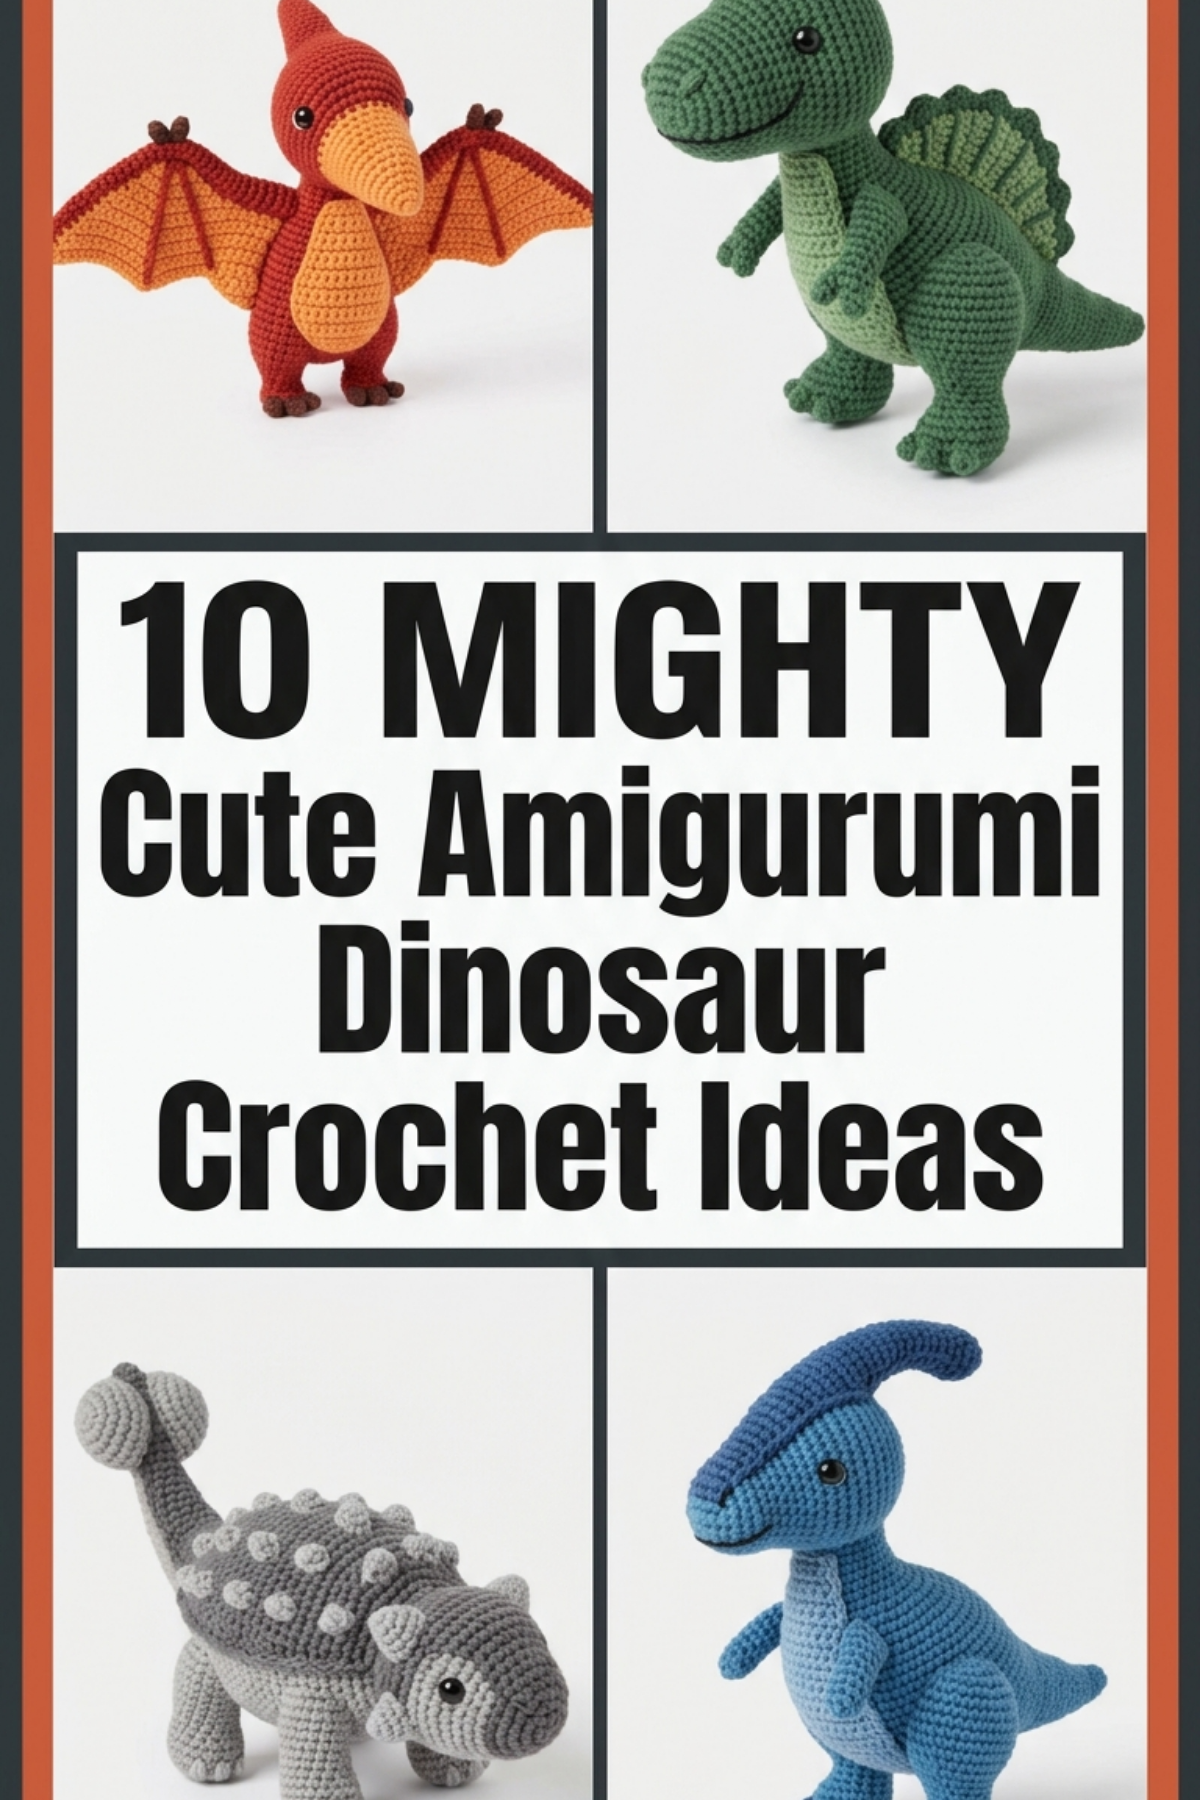
Handmade yarn crafts bring warmth and character into modern living spaces, with amigurumi remaining one of the most rewarding fiber art techniques. Originating in Japan, amigurumi refers to the practice of crocheting small, stuffed yarn creatures using continuous spiral rounds and compact stitches. Prehistoric creatures provide an exceptional foundation for this craft, transforming formidable ancient reptiles into gentle, rounded, and expressive yarn companions. This comprehensive tutorial delivers ten practical, beginner friendly amigurumi dinosaur concepts designed to expand your stitching skills while producing charming decorative keepsakes. You will explore critical techniques including magic ring starts, invisible decreases, seamless limb joins, safety eye installation, and balanced fiberfill stuffing. Every project highlights clean sculptural shapes, showing how simple single crochet stitches build spheres, tapered tails, and textured back plates. Beyond stitch mechanics, you will gain essential knowledge regarding hook sizing, tension management, yarn weight compatibility, and firm seam assembly. Whether you are building an adorable nursery collection or crafting thoughtful handmade gifts for friends, these practical Pinterest ideas deliver actionable guidance for every stage of your creative project.
Why Amigurumi Dinosaurs Inspire Modern Craft Spaces
Miniature crocheted dinosaurs continue to dominate visual inspiration boards because they merge playful prehistoric forms with contemporary interior styling. Modern home decor trends frequently embrace soft textures and whimsical accents that soften sterile shelves, nursery corners, and minimalist desk setups. Amigurumi projects align seamlessly with this design movement, allowing makers to customize color palettes to match earthy tones, muted pastels, or bold contemporary aesthetics. From a practical perspective, working up miniature dinosaurs offers an accessible DIY creative project that requires minimal equipment, zero harsh chemicals, and very modest storage. Fiber artists appreciate the structural resilience of tight cotton or acrylic stitches, which hold their shape reliably over years of display and gentle handling. The universal appeal of friendly dinosaurs crosses generations, making them reliable choices for baby showers, educational gifts, or collectible desk ornaments. Social media feeds consistently highlight these projects because the rhythmic progression from yarn skein to three-dimensional character offers compelling creative satisfaction that encourages crafters of every skill tier to pick up their hooks.

Essential Materials and Workspace Preparation
Careful workspace setup and tool selection ensure smooth crochet sessions, even tension, and uniform proportions across all dinosaur builds. Begin by gathering medium worsted-weight mercerized cotton or smooth anti-pilling acrylic yarn in chosen primary, secondary, and accent colors. Pair your yarn with an ergonomic crochet hook that is one to two sizes smaller than the manufacturer label recommends, typically between 2.5 mm and 3.5 mm, to guarantee tight, dense stitches that prevent white polyester fiberfill from showing through the fabric. Essential tools include a blunt-tipped tapestry needle with a large eye, bent jewelry tweezers for precise stuffing placement, locking plastic stitch markers, sharp embroidery scissors, and plastic safety eyes with secure back washers. Prepare a tidy, well-lit workspace with a firm seating surface and a wide shallow tray to hold your yarn skeins, preventing them from rolling across dusty floors. Pre-project planning involves checking your gauge on a small circular swatch to verify your hand tension produces a stiff, gap-free fabric without causing unnecessary strain to your fingers or wrists during prolonged stitching sessions.
Chubby Mint Brontosaurus with Slender Arched Neck
Step-by-Step Guide
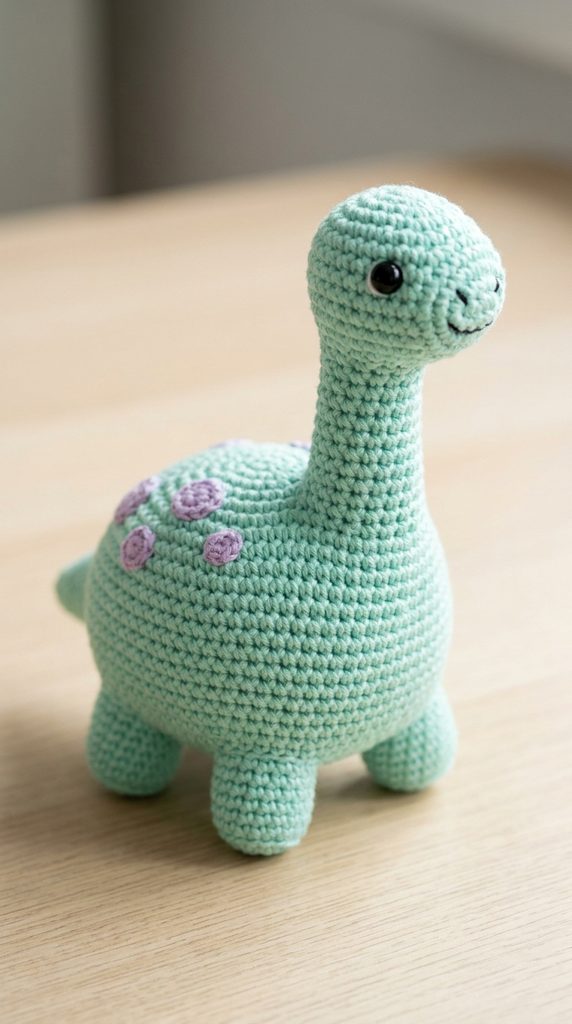
The chubby brontosaurus design emphasizes gentle curves and balanced proportions, pairing a stout, spherical body with an elegant, upright neck and a tapered tail. Soft mint green yarn establishes a soothing visual presence, accented by small lavender felt spots or embroidered french knots along the flank. The rounded, bulbous head sits atop an arched neck that relies on dense internal stuffing rather than wire armatures, ensuring the finished piece remains soft, pliable, and child-safe. Adding wide-set black safety eyes and a tiny embroidered mouth line infuses this herbivore with signature friendly charm. The low center of gravity provided by four short, cylindrical column legs ensures the dinosaur stands upright independently on flat surfaces without tipping forward, making it an exceptional display accent for bookshelves and bedside tables.

Begin the body by working six single crochet stitches into an adjustable magic ring using mint green yarn, placing a locking stitch marker in the first stitch. Increase evenly across subsequent spiral rounds until reaching thirty-six stitches, working even rounds to build a smooth, rounded torso. To construct the neck and head seamlessly, work continuous rounds of twelve single crochet stitches upward for twenty rounds, expanding gradually at the crown into a rounded head sphere before inserting nine-millimeter safety eyes between rounds four and five of the head. Stuff the neck firmly with polyester fiberfill as you stitch, using the back of a crochet hook to pack the stuffing tightly so the neck stays erect without wobbling. Crochet four identical stubby legs by working eight single crochets into a magic ring, expanding to sixteen stitches for five rounds. Sew the four legs securely to the lower quadrant of the torso using a tapestry needle, pin the tapered tail to the rear, and weave in all loose yarn ends neatly.
Rosy Triceratops with Ruffled Crown Shield
How to Create
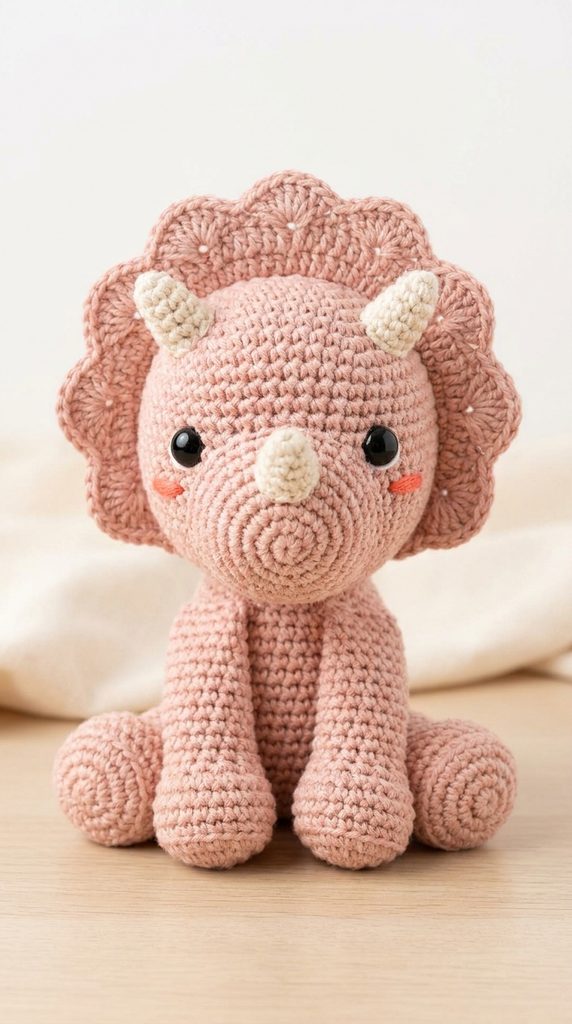
The rosy triceratops model combines geometric facial planes with a decorative ruffled neck frill, transforming a horned dinosaur into an adorable, approachable plush companion. Soft blush pink yarn forms the primary body, contrasted with cream or ivory horns and a scalloped crest that frames the face like a bonnet. Three miniature stuffed cones serve as the brow and nose horns, securely fastened to prevent detachment while retaining structural definition. The neck frill utilizes simple shell stitches worked directly into the surface loops behind the head, creating an authentic paleontological feature with minimal sewing. This concept remains an easy project for beginners because the wide, squat body shape provides a stable foundation that easily forgives slight tension variations or minor stitch count discrepancies.

Start the head by chaining two and working six single crochet stitches into the second chain, increasing outward over six rounds until you achieve thirty-six stitches. Insert safety eyes between rounds ten and eleven, spacing them eight stitches apart, and begin tapering downward with invisible decreases to form a rounded snout. Before closing the head, locate the ridge of front loops behind the eye line and work alternating double crochet shells to construct the fan-shaped neck frill. For the facial horns, use ivory yarn to crochet two small three-round cones for the brow and one miniature cone for the snout, stuffing them lightly before stitching them to the face. Form the body by expanding a new magic ring to forty-two stitches, building twelve straight rounds, and firmly stuffing the torso with high-loft fiberfill. Attach the head securely to the front body opening using mattress stitch, sew on four stout legs along the base, and embroider soft blush marks below the eyes using coral embroidery floss.
Sunny Yellow Stegosaurus with Soft Coral Plates
How to Make
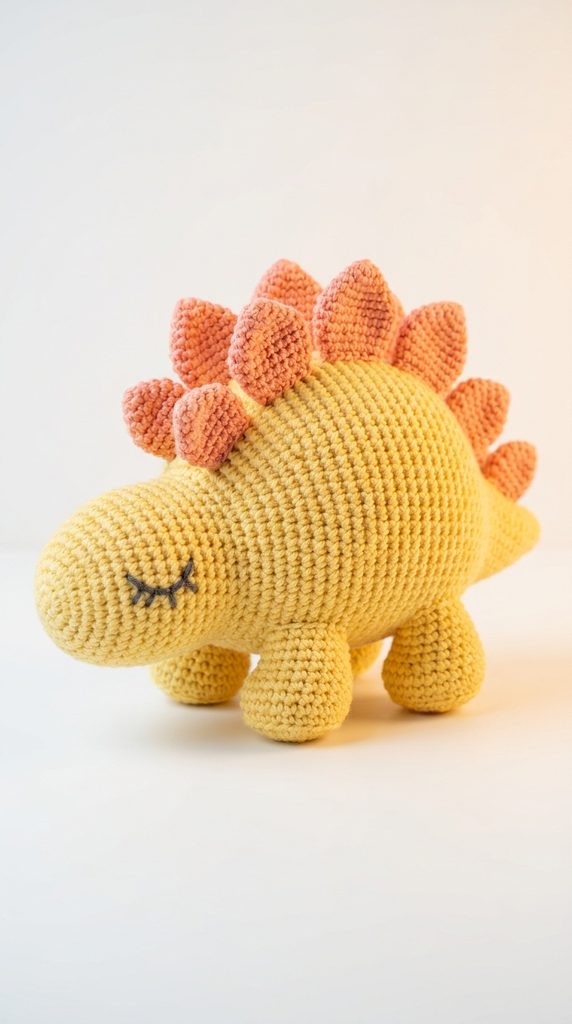
The sunny yellow stegosaurus design celebrates contrasting textures and vibrant color blocking, featuring an arched back lined with geometric plates. A warm buttercup yellow yarn provides a bright, cheerful base, complemented by dusty coral or peach double-layered pentagonal plates along the spine. The elongated body slopes downward toward a pointed tail, maintaining an organic reptile silhouette while preserving chunky, modern aesthetic proportions. Minimalist embroidered sleeping eyes give the creature a gentle, peaceful personality that suits nursery spaces and calm reading nooks. Crafting the back plates separately allows makers to experiment with placement, symmetry, and spacing, ensuring a balanced finished piece that sits neatly on any flat desk surface.
Crochet the main body from the tip of the snout to the end of the tail in a continuous seamless piece, expanding gradually over twenty-five rounds to form a wide belly before tapering down to an eight-stitch tail tip. Firmly stuff the body progressively as the shape narrows, ensuring the stuffing remains smooth and free of interior lumps. For the signature dorsal plates, use coral yarn to crochet eight pairs of small triangular tabs, working two identical pieces for each plate and single crocheting around their combined perimeters to give them rigid thickness without requiring internal plastic stiffeners. Pin the plates in two parallel, alternating rows along the upper spine, adjusting their spacing from the base of the neck to the mid-tail. Use a tapestry needle to stitch the plates firmly into the body fabric, ensuring every join is tight. Finish by crocheting four rounded foot pads, sewing them to the underbelly, and backstitching sleepy curved eye arcs onto the face using dark charcoal embroidery floss.
Gentle Lilac Tyrannosaurus with Dainty Forelimbs
Execution Process
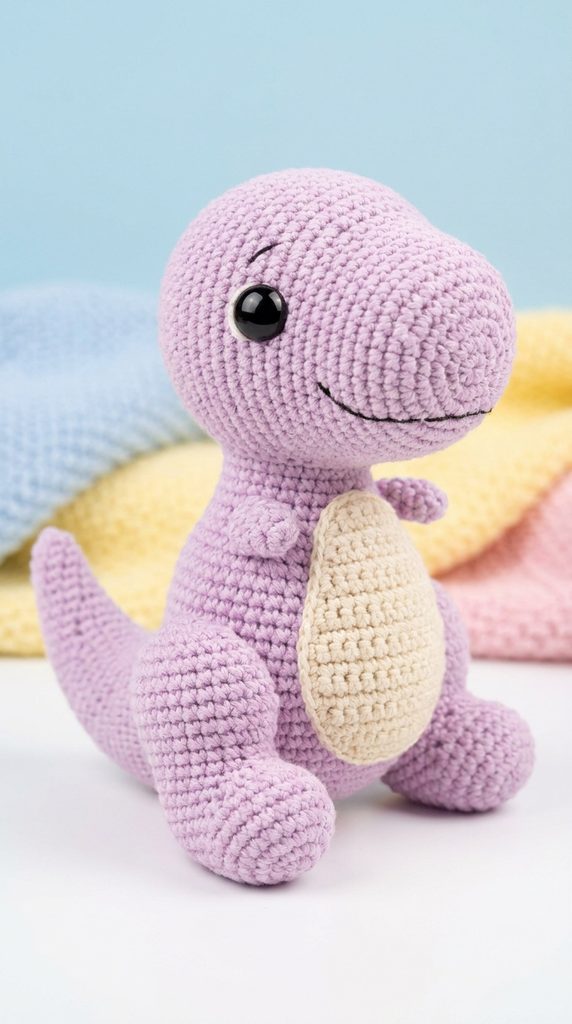
The gentle lilac tyrannosaurus redesigns the most famous carnivorous predator into a sweet, non-threatening desk companion with tiny forelimbs and a bulbous head. Soft lavender yarn softens the fierce dinosaur silhouette, complemented by a pale cream oval tummy patch that breaks up the solid body tone. The design features an oversized, rounded jawline that balances against a thick, counterweight tail extending behind the seated posture. Tiny, two-stitch arms project playfully from the chest, providing visual contrast against the massive, sturdy hind feet that support the character in a seated pose. This project provides excellent practice in sculpting three-dimensional facial ridges, teaching beginners how targeted increases and decreases create expressive cheek and brow contours without complicated cutting or assembly.

Begin by shaping the head with lavender yarn, working a foundation chain of six stitches and crocheting around both sides of the chain to create an elongated oval snout. Expand the stitch count across the back half of the head to form pronounced cheeks, inserting ten-millimeter safety eyes near the transition point before stuffing the cavity with resilient polyester fiberfill. Build the teardrop-shaped body separately, expanding to forty-eight stitches to create a wide seated base, and attach a long, tapering tail that curves outward along the floor. For the hind legs, crochet two substantial oval foot pads complete with three tiny bobble stitches on each foot to represent rounded claws. Crochet two miniature three-round cylinders for the comical forearms, attaching them centrally on the chest just below the jaw seam. Sew the head, body, hind legs, and tail together, using long pins to check balance before anchoring the thread, ensuring the dinosaur sits independently without rocking backwards.
Petite Parasaurolophus with Curved Head Crest
Setup Method
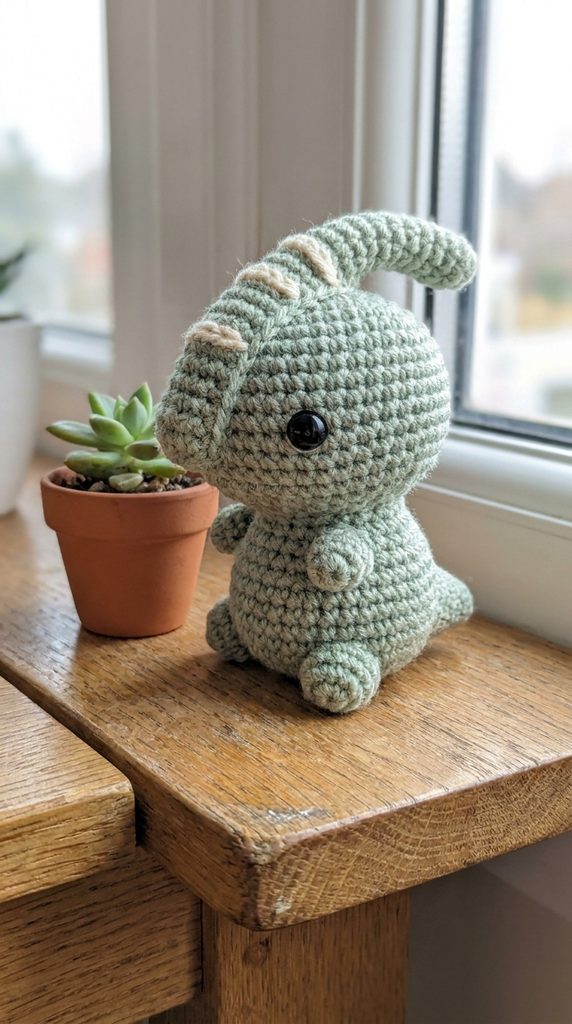
The petite parasaurolophus model highlights distinctive prehistoric anatomy through a sweeping cranial crest that curves gracefully back from the crown of the head. Rendered in soft sage green with pale yellow accent striping along the crest, this design introduces crafters to curved tube shaping techniques. The crest is formed using asymmetrical increases on one side and matching decreases on the opposing side, creating a natural arch without requiring external wire supports. A slender neck flows into a pear-shaped seated body, giving the finished amigurumi a poised, curious expression. This piece functions wonderfully as a modern minimalist shelf accent, offering an intriguing silhouette that appeals to paleontology enthusiasts and design-focused crafters alike.
Construct the signature cranial crest by casting six single crochets into a magic ring using pale yellow yarn, working alternating rounds with three increases on the outer edge and three decreases on the inner edge to produce a smooth, backward-curving arc. Transition to sage green yarn at round twelve to form the facial sphere, placing safety eyes low on the cheeks to accentuate the oversized forehead and crest structure. Stuff the crest lightly so it retains flexibility while remaining fully three-dimensional, packing the main head firmly with dense fiberfill. Build a pear-shaped torso starting from a wide base of thirty-six stitches, tapering inward toward the neck over eighteen rounds. Stitch the head and crest unit to the upper torso using sturdy whipstitches, catching both layers securely with your tapestry needle. Add two curved front legs and two rounded back legs positioned in a seated configuration, finishing with a short pointed tail anchored to the rear base to ensure complete stability.
Baby Spinosaurus with Pastel Rainbow Sail
Step-by-Step Guide
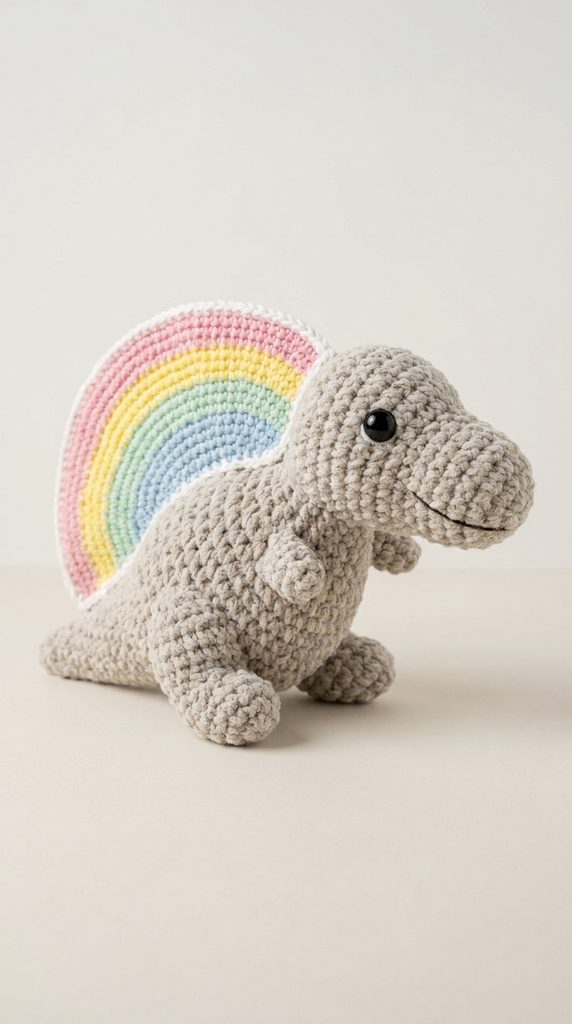
The baby spinosaurus transforms a dramatic semi-aquatic predator into a charming nursery accent defined by an arched dorsal sail. The primary figure uses a neutral stone-gray or soft oatmeal yarn, allowing a vibrant pastel rainbow sail along the back to serve as the dominant visual focal point. The body features an elongated snout and a sturdy, flattened tail that reflects the aquatic nature of the species, balanced by a wide stance that rests securely on any flat surface. The semi-circular back sail is crocheted in flat rows using alternating pastel stripes of pink, yellow, mint, and blue before being edge-stitched to the spine. This project offers practical experience in combining flat two-dimensional crochet elements with rounded three-dimensional amigurumi forms, expanding your construction versatility.
Crochet the extended snout by working eight single crochets into a magic ring, working straight rounds to create a cylinder before increasing outward into the main cranial cavity. Insert safety eyes eleven rounds back from the snout tip, securing the washers firmly on the inside before filling the head with dense fiberfill. To make the dorsal sail, chain twenty-four in pale pink yarn and work short rows of single crochet, switching colors every two rows through yellow, mint, and sky blue while tapering the outer edges with decreases at each row end. Single crochet around the curved perimeter of the sail in white yarn to give the edge a crisp, clean border. Build the thick, flattened tail and wide torso, assembling the body parts with mattress stitches. Pin the rainbow sail straight along the center spine from behind the neck to the base of the tail, sewing it firmly through both loops of the surface stitches to keep it upright.
Striped Ankylo with Bumpy Armor Shell
How to Create
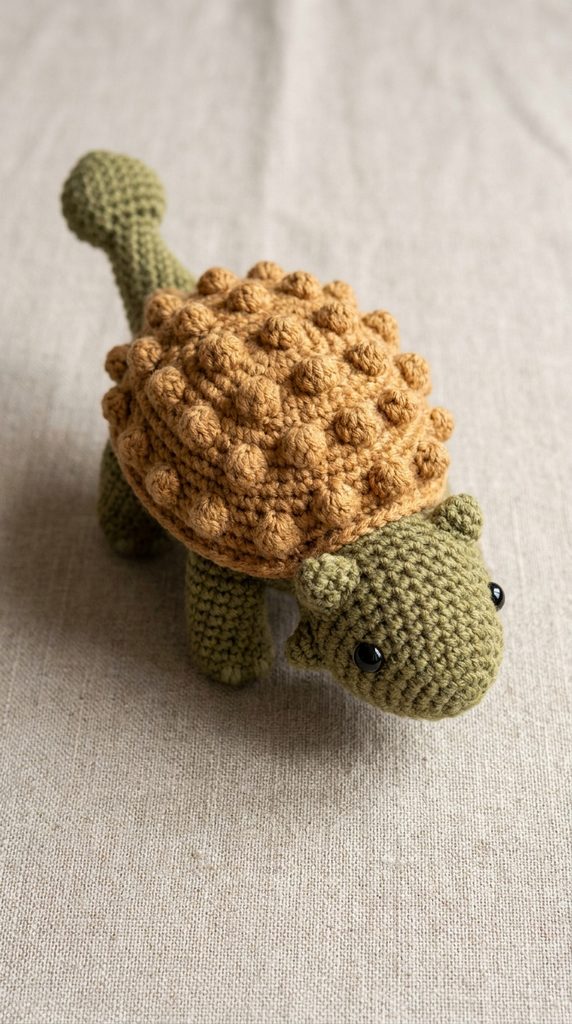
The striped ankylo design showcases tactile surface textures through a domed back shell covered in raised bobble stitches that replicate natural bony armor plating. Earthy olive green yarn forms the underbody and head, while a contrasting caramel or tan yarn defines the raised dorsal shell. The wide, flattened body profile makes this dinosaur exceptionally sturdy, resisting tipping and retaining its form during heavy handling. A distinctive club tail terminates in a round, firm ball that balances the broad head at the opposite end. This project introduces beginners to special texture stitches, demonstrating how bobbles and cluster stitches can be worked directly into an amigurumi pattern to generate rich three-dimensional relief without separate piece attachment.
Begin by crocheting the domed shell separately, working in caramel yarn from a magic ring and alternating rounds of plain single crochet with rounds featuring four-stitch bobbles spaced evenly apart. Once the shell reaches forty-two stitches in diameter, set it aside while crocheting an identical flat oval base in olive green yarn. Stuff the space between the shell and flat base firmly with polyester stuffing, joining the two edges together with a round of single crochet worked through both thicknesses simultaneously. For the head, crochet a wide, blunt wedge in olive green, placing safety eyes along the outer corners and sewing the neck flush against the front of the armored shell. Crochet a thick tail extending six centimeters behind the shell, ending with a round stuffed club sphere in caramel yarn. Attach four short, wide leg stumps beneath the flat base, ensuring all feet touch the ground evenly to support the broad armored body.
Perky Pterodactyl with Broad Folded Wings
How to Make
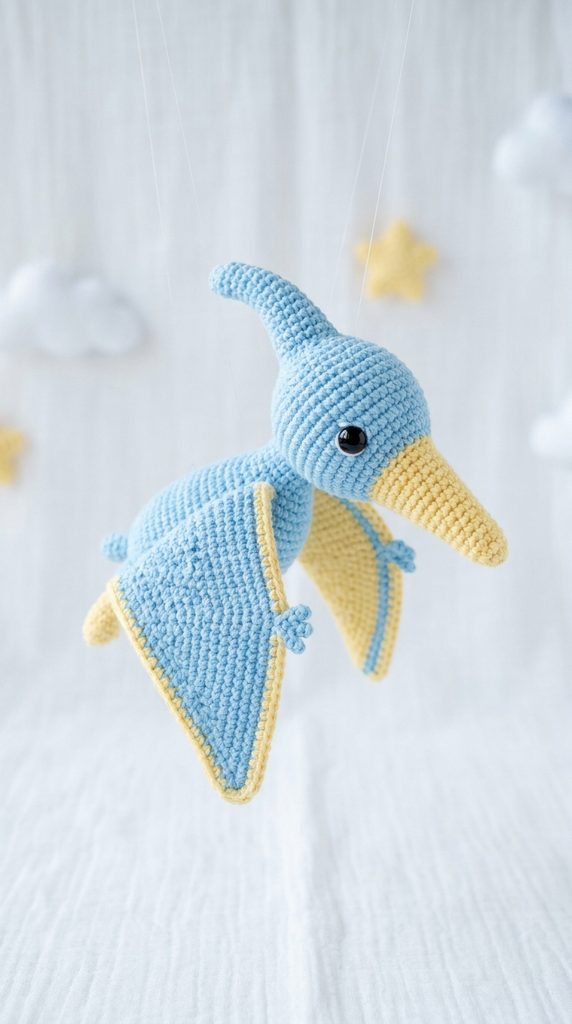
The perky pterodactyl adapts prehistoric flying reptiles into a sweet, winged character that can sit upon a shelf or suspend gracefully as a mobile element. Sky blue yarn provides a clean, airy foundation, accented by soft buttercup yellow along the beak and inner wing membranes. The design features a prominent pointed crest extending behind the head, balanced by an elongated, smooth beak projecting forward. The broad triangular wings can be pinned flat against the torso in a resting fold or left spread wide for a dynamic flying presentation. Crocheting thin, flat wing panels and connecting them seamlessly to a three-dimensional torso teaches makers how to manage varying fabric thicknesses within a single cohesive project.
Work the head and pointed crest as a single unified piece with sky blue yarn, beginning at the sharp crest tip and widening toward the eye line before narrowing back down into a yellow beak cylinder. Fasten safety eyes securely near the base of the yellow beak, filling the head firmly with stuffing while leaving the narrow crest point lightly filled. To create the wings, work flat triangular wedges in back-and-forth rows of single crochet, switching to yellow for the final border rows to outline the flight membranes. Crochet a petite, teardrop-shaped body and two tiny clawed feet, attaching the legs to the lower underbelly with close, invisible stitches. Pin the broad straight edge of each wing along the sides of the torso, stitching them securely with matching blue yarn so they hold their position cleanly. If displaying the pterodactyl as hanging decor, attach a clear monofilament loop through the center balance point along the upper back.
Pocket Sized Diplodocus with Sweeping Tail
Execution Process
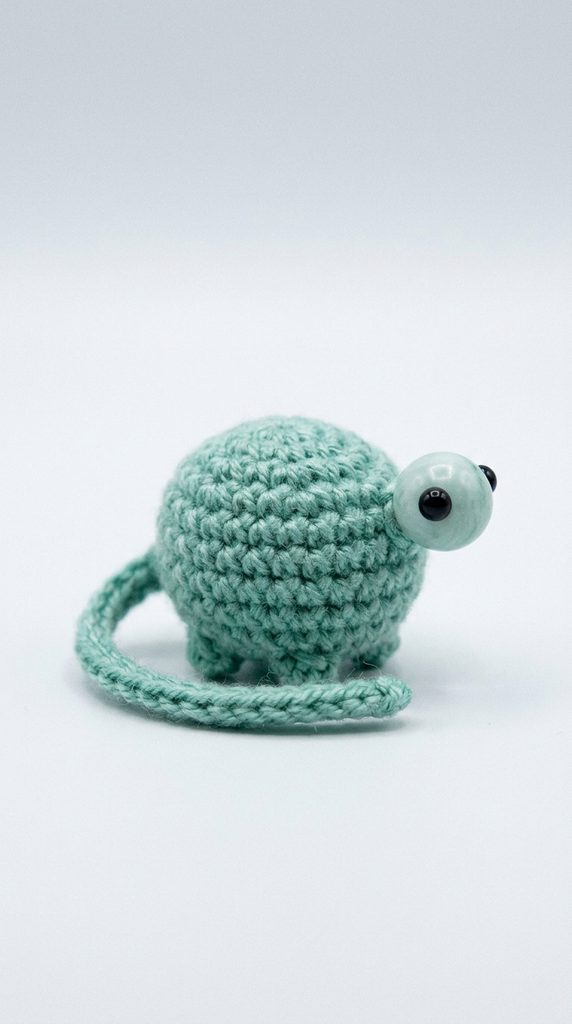
The pocket-sized diplodocus delivers maximum charm in a compact format, designed to fit snugly in the palm of a hand or hang from a keychain. Utilizing seafoam green yarn, this miniature project scales down traditional sauropod proportions into a fast, economical stitch pattern that works up in under two hours. The body and neck utilize simple, low-count rounds that curve naturally through strategic single crochet placement without requiring complex intermediate maneuvers. A long, slender tail tapers to a fine point, coiling gracefully around the base to provide additional surface stability. This tiny project serves as an ideal stash-buster for leftover yarn remnants, allowing crafters to produce charming, complete figurines quickly with minimal material investment.
Begin at the head using seafoam green yarn, working five single crochets into a magic ring and expanding to just ten stitches for a compact, marble-sized skull. Insert small four-millimeter safety beads or stitch tiny french knots for eyes, transitioning immediately into a narrow six-stitch neck that extends downward for ten rounds. Expand rapidly over three rounds to form a small, spherical body thirty stitches around, inserting small pinches of fiberfill with tweezers to ensure every corner is evenly packed. As you reach the rear of the body, decrease gradually over fifteen rounds to build an elongated, flexible tail that tapers down to three stitches at the tip. Crochet four tiny peg legs consisting of six single crochets worked for three rounds each, sewing them directly beneath the torso. Smooth the tail into a gentle resting curl beside the hind leg, tacking it in place with a single hidden stitch to preserve its graceful curving line.
Playful Plesiosaur with Flared Flippers
Setup Method
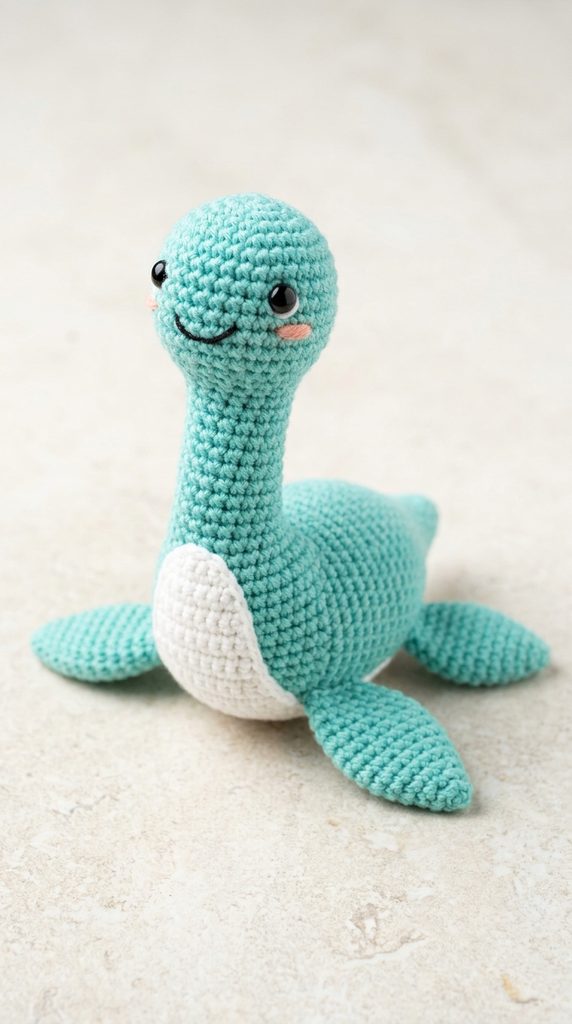
The playful plesiosaur model brings marine paleontology into fiber art, replacing traditional walking legs with four streamlined, paddle-shaped flippers. Soft aqua marine yarn provides an ocean-inspired body tone, contrasted with a clean white underside belly patch. The long, serpent-like neck rises gracefully from a wide, buoyant torso, terminating in a smooth, rounded head with a bright, curious expression. The four flippers are crocheted flat and attached horizontally along the lower flanks, allowing the creature to rest flat on any table like an aquatic navigator. This design provides an engaging study in balance and proportion, proving how subtle adjustments to limb shapes can transform standard land-dinosaur patterns into convincing ocean dwellers.
Craft the head and neck in aqua yarn by starting with six single crochets in a magic ring, widening to eighteen stitches for the head before tapering to twelve stitches for a long, eighteen-round neck column. Pack the neck with firm, compressed fiberfill to ensure it maintains its upright arch without slumping forward under the weight of the head. For the torso, crochet a wide, flattened oval shape by working increases primarily along the lateral edges rather than in a round sphere, achieving a broad aquatic silhouette thirty-six stitches wide. For the flippers, crochet four flat leaf shapes by chaining eight, working half double crochets down the chain, and rounding the tip with five stitches in the end loop. Pin the two front flippers at a slight forward angle and the two rear flippers toward the back, sewing them firmly into the lateral seam lines of the torso. Embroider a subtle smile beneath the safety eyes, steam the flippers lightly to prevent curling, and secure all thread tails.
Common Beginner Mistakes and How to Avoid Them
Novice amigurumi crafters frequently encounter loose fabric tension, visible stuffing, and asymmetrical limb placement that undermine the polished appearance of their finished pieces. Using a crochet hook that is too large for the chosen yarn weight remains the primary cause of loose stitches; always choose a hook at least one full millimeter smaller than the yarn band suggests to ensure the fabric remains stiff and opaque. Another common error involves overstuffing or understuffing the three-dimensional cavities. Understuffing leads to sunken, wrinkled limbs and drooping necks, while overstuffing stretches the stitches apart, exposing unsightly white polyester fibers. Avoid this by adding fiberfill in small, compressed tufts, packing the center firmly while keeping the perimeter stitches relaxed. Misaligned safety eyes also disrupt facial symmetry; always test eye positioning by viewing the face from straight ahead and from above before locking the permanent plastic washers onto the posts. Finally, skipping locking stitch markers during continuous spiral rounds leads to lost count sequences, resulting in warped shapes and misplaced increases that ruin the balance of the finished character.
Practical Tips for Clean and Durable Results
Achieving professional, long-lasting results in amigurumi crafting depends on disciplined technique, deliberate assembly habits, and meticulous finishing methods. Always utilize the invisible decrease method when shaping downward curves, which involves inserting the hook through the front loops only of two consecutive stitches before yarning over and completing the single crochet. This technique eliminates the bulky horizontal bars and wide holes characteristic of standard decreases, producing an uninterrupted, smooth fabric surface. When attaching separate appendages to the main body, utilize long glass-headed sewing pins to anchor every limb, horn, and plate securely before picking up your tapestry needle. Step back and evaluate the piece from multiple angles to verify alignment and balance while the parts are still pinned. When sewing limbs, use the mattress stitch to catch one loop of the body and one loop of the limb alternately, pulling the yarn snug after every few stitches to create an invisible, indestructible join. After completing all sewing, pull all yarn tails into the interior body cavity and trim them flush, allowing the cut ends to retract safely inside the stuffing.
Creative Styling, Nursery Presentation, and Display Ideas
Curating your finished crocheted dinosaurs transforms individual yarn figures into cohesive room accents and delightful decorative centerpieces. For nursery and playroom home decor, arrange three dinosaurs of complementary pastel shades along floating natural wood wall shelves, pairing them with small potted trailing succulents or wooden building blocks. Suspending lightweight winged pterodactyls and long-necked sauropods from an embroidery hoop using clear nylon monofilament creates an enchanting, custom crib mobile that adds handmade warmth to modern infant spaces. On home office desks or craft room organization shelving, use a flat-bodied stegosaurus or ankylo as a whimsical paperweight or pincushion by weighting the lower body cavity with clean glass crafting beads enclosed in a nylon pouch before adding stuffing. If presenting these handmade creations as gifts, package the dinosaur nestled inside an open cardboard berry basket lined with crinkle-cut kraft paper, adding a hand-lettered care tag that outlines gentle spot-cleaning instructions. Grouping various species together into thematic sets produces an eye-catching craft fair display that highlights your technical range and visual storytelling.
Efficient Budget and Time Planning for Fiber Projects
Managing your crafting time and material resources efficiently allows you to maximize creative output without accumulating unnecessary clutter or expenses. Maximize your budget ideas by purchasing high-yield, premium acrylic or cotton yarns in large economy skeins of neutral foundational tones like cream, soft gray, and mint, using smaller scrap remnants from past projects for colorful horns, back plates, and embroidery details. Amigurumi projects are inherently economical because a single one-hundred-gram skein of worsted yarn yields several miniature dinosaurs, providing immense value per project. Organize your crafting sessions into focused assembly-line stages: spend one session crocheting all heads and torsos, a second session stitching smaller limbs, ears, and plates, and a final session dedicated exclusively to stuffing, pinning, and seam assembly. This segmented planning reduces the mental fatigue of constant tool swapping and makes the assembly process move swiftly. Store active project components in clear zippered pouches alongside their designated yarn and hook, keeping individual pieces clean and organized until you are ready for final construction.
Advanced Modifications and Design Expansion Inspiration
Once you achieve confidence with basic dinosaur patterns, you can expand these fundamental designs into elaborate, personalized fiber art creations. Experiment with tactile luxury by substituting standard smooth yarns with plush chenille, textured bouclé, or fine lace-weight mohair held double with cotton, creating varied sensory textures across different species. You can also integrate functional hardware to convert miniature pocket dinosaurs into functional accessories, such as durable metal split keyrings, sturdy backpack clip clasps, or flexible curtain tiebacks for a themed child bedroom. Explore colorwork techniques like tapestry crochet or surface slip stitching to add organic reptile stripes, dappled sunspots, and graphic color patches directly into the skin fabric as you stitch. Another rewarding avenue involves designing removable miniature accessories, such as tiny crocheted party hats, winter scarves, saddle packs, or miniature flower crowns that slide over the horns and crests. Embracing these advanced design expansions allows you to continuously reinvent classic prehistoric characters, generating endless inspiration for your evolving handmade portfolio.