Small-scale yarn crafts have become a cornerstone of practical accessory design, offering both utility and personalized style in daily routines. Handcrafted keychains provide an ideal entry point into fiber arts, transforming modest yarn lengths into durable, functional pieces. Readers exploring this tutorial will learn the essential crochet fundamentals required to construct ten distinct, structurally sound keychains suited for keys, tote bags, and backpacks. This comprehensive guide outlines the critical elements of tension control, stitch geometry, secure hardware attachment, and durable fiber selection. Gaining proficiency in these core mechanics enables makers of all experience levels to produce clean, compact accessories that withstand daily friction and active handling. Furthermore, understanding the interplay between hook gauge, structural stability, and loop joins guarantees that finished projects maintain their shape without stretching or fraying over time. By following a methodical step by step approach, beginners can quickly master stitch counting, neat color transitions, and seamless closure techniques. These small-format projects serve as excellent creative ideas that deliver immediate practical satisfaction while building a solid foundation for future large-scale textile creations.
Why This Idea Is Trending or Useful
Miniature fiber accessories continue to gain massive momentum across modern Pinterest inspiration boards because contemporary lifestyle trends emphasize customized, portable craftsmanship. Modern consumers increasingly gravitate toward intentional handmade items that add warmth and tactile appeal to everyday hardware, contrasting with generic, mass-produced metal keyrings. From an everyday functional perspective, a textured yarn charm makes keys instantly identifiable by touch within deep bags, solving an everyday organization challenge. The creative appeal remains consistently high because miniature crochet requires minimal yardage, transforming leftover yarn scraps into high-value accessories that align with sensible budget ideas. Beginners appreciate this format because each easy project can be finished in an hour or two, providing rapid creative gratification without the multi-week commitment of blankets or garments. The minimalist style and neutral palettes popular in modern design allow these keychains to complement leather goods, commuter bags, and minimalist home decor entryways. Crafting these portable pieces provides a low-pressure learning environment where novice makers can build fine-motor stitch precision and confidence.
Materials and Preparation
Achieving sharp stitch definition and long-lasting durability in small keychain accessories begins with deliberate material sourcing and thoughtful workspace preparation. Crafters should prioritize tightly plied, non-mercerized or mercerized DK to worsted weight cotton yarn, as plant-based fibers resist stretching, surface pilling, and abrasive wear far better than delicate acrylic or loose wool roving. Select an ergonomic aluminum crochet hook sized between 2.25 mm and 3.0 mm; sizing down creates a dense, impenetrable fabric weave that prevents internal polyester stuffing from showing through or snagging on keys. Essential assembly hardware includes heavy-duty metal split keyrings, swivel lobster claw clasps, open jump rings, flat-nose jewelry pliers, sharp thread snips, and blunt steel tapestry needles. Before starting, measure out a flat, well-lit surface to prevent losing small metal components, and wind your yarn into compact center-pull cakes to maintain smooth, uninterrupted feed tension. Practice working the basic slip knot, chain foundation, and single crochet gauge swatches to verify that your tension produces stiff, self-supporting fabric planes before starting the main designs.
1. Minimalist Ribbed Cotton Wristlet Strap

Step-by-Step Guide
The minimalist ribbed cotton wristlet strap is a classic, practical accessory designed to slide comfortably over the wrist for secure, hands-free key carrying. The design features a flat, continuous woven band created by working back-loop-only single crochet stitches, resulting in flexible horizontal ridges that provide a comfortable, non-slip grip. Using a neutral palette such as oat, slate grey, or unbleached natural cream aligns the accessory with contemporary minimalist style, ensuring it pairs effortlessly with canvas bags, daily commuter gear, and everyday outfits. Because the strap must bear the weight of heavy key bundles, the structural geometry focuses on tight lateral tension to prevent stretching. The absence of complex 3D shaping makes this an exceptionally beginner friendly project, allowing new crocheters to focus entirely on maintaining consistent edge margins and even loop tension. The clean rectangular band transitions into a tapered join, securing a heavy-duty swivel clasp that clips directly onto existing keyrings.
To begin this easy project, make a slip knot using worsted weight cotton yarn and chain fifty-one stitches with a 3.0 mm hook, ensuring your foundation chain remains firm without curling. Turn your work and execute fifty single crochet stitches across the chain, beginning in the second chain from the hook, and chain one to turn at the end of the row. For rows two through eight, work single crochet stitches exclusively into the back loops of every stitch, maintaining an exact count of fifty stitches per row to create seven distinct raised ribs. Fasten off the yarn, leaving a long twenty-inch tail, and fold the rectangular strip in half lengthwise to align the short ends. Thread the yarn tail onto a blunt metal tapestry needle, slide the folded ends through the base loop of a metal swivel lobster clasp, and whipstitch the edges together through both fabric layers using three passes for structural reinforcement. Weave the remaining tail securely through five interior rib ridges before snipping flush.
2. Classic Amigurumi Acorn Charm
Read This:

How to Create
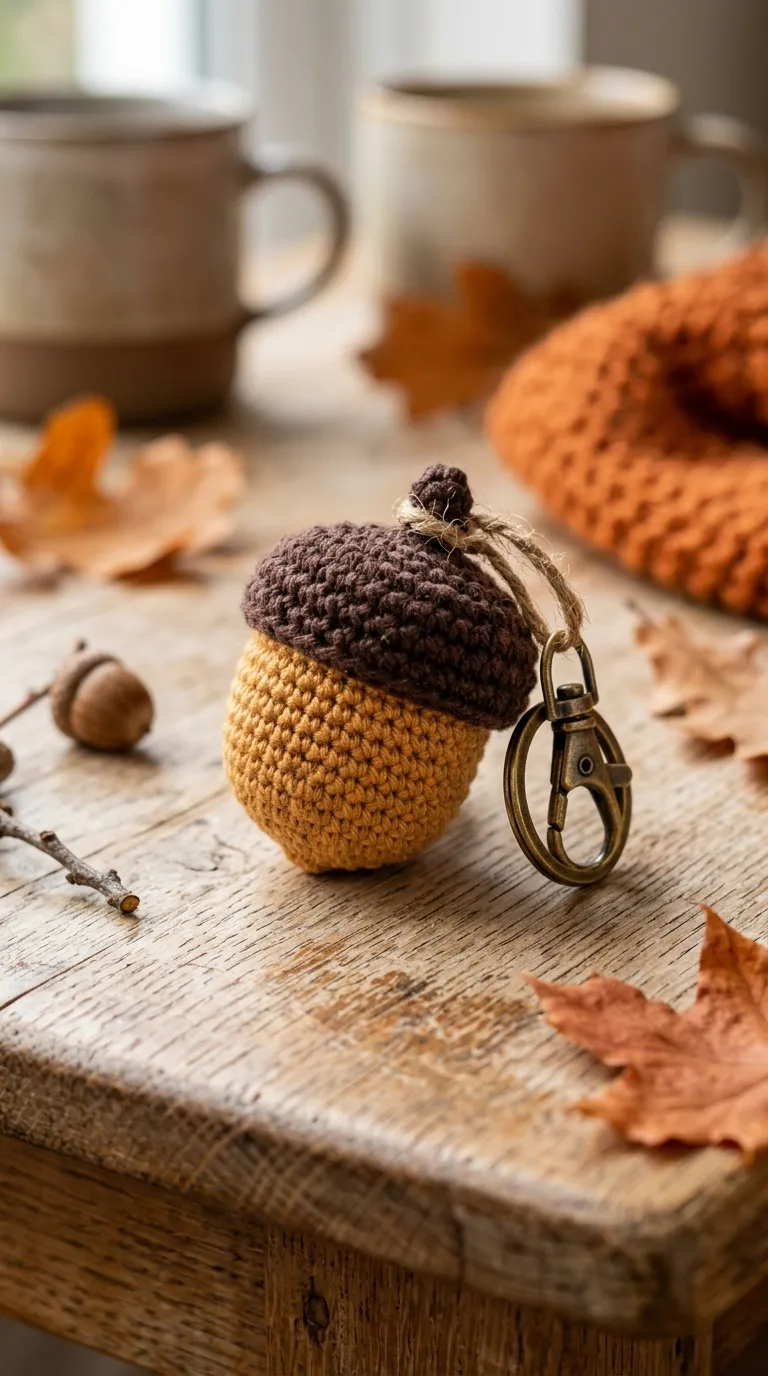
The classic amigurumi acorn charm brings earthy woodland character to daily accessories, using two contrasting yarn shades to create a realistic seed-and-cap silhouette. The lower acorn body is worked as a smooth, dense single crochet egg in warm golden tan or rich caramel, while the textured cap is worked in deep espresso brown using textured front-loop stitches to mimic natural oak fruit. This design introduces beginners to working in continuous spiral rounds, regular increases, and tidy invisible decreases on a compact scale. The small internal cavity holds a firm core of hypoallergenic polyester fiberfill, giving the acorn a solid feel that keeps its shape even when packed into tight pockets. A natural jute twine or twisted yarn stem emerges from the cap crown, forming a durable suspension loop that connects to a metal split ring. This timeless design offers rustic appeal that complements autumnal bags, cottage-inspired accessories, and nature-themed key collections.
Start with the acorn base using caramel worsted cotton, casting six single crochets into a magic adjustable loop with a 2.5 mm crochet hook. Expand the sphere by working two single crochets into each stitch for round two to reach twelve stitches, then alternate one single crochet and one increase in round three to achieve eighteen stitches. Work continuous single crochet across rounds four through eight to build vertical depth, then taper the shape by working single crochet two together around round nine down to twelve stitches. Pack the cavity firmly with small clusters of polyester stuffing before working six consecutive decreases to close the base, fastening off with a hidden knot. To construct the textured cap, cast six single crochets into a magic loop using dark espresso yarn, increasing evenly across three rounds to twenty-four stitches, then work two rounds of alternating slip stitches and half double crochets to form a textured lip. Position the cap over the upper half of the acorn base, sew the perimeter down using hidden mattress stitches, and anchor a metal jump ring through the top stem loop.
3. Geometric Textured Hexagon Key Fob

Execution Process
The geometric textured hexagon key fob showcases clean architectural lines and flat-plane structural stability, making it an ideal showcase for modern color blocking. The design consists of two flat, six-sided crochet motifs worked in concentric rounds from the center outward, featuring crisp corner increases that define the sharp geometric perimeter. Using high-contrast color schemes, such as mustard yellow paired with charcoal grey or olive green with ivory, gives the fob an eye-catching graphic look. Stitching two identical hexagonal panels back-to-back creates a double-thick, durable fabric pad that will not curl, bend, or lose its shape under everyday pocket pressure. The center features a subtle starburst pattern formed by working initial cluster stitches into a central ring. This flat, structured profile slips smoothly into slim pockets without adding bulk, while the firm corners offer an easy, tactile grip when fishing for keys in deep bags.
To make the first hexagon motif, create a magic loop with your chosen center color, chain two, and work two double crochets into the ring, followed by a chain-two corner space. Repeat the sequence of three double crochets and chain two five more times to establish six three-stitch clusters separated by six corner spaces, slip stitching to the initial chain to close round one. Fasten off and join a contrasting yarn shade into any chain-two corner space, chaining two and working two double crochets, chain two, and three double crochets into the same corner. Work three double crochets into each subsequent corner space with two chains between them, placing single double crochets across the straight sides to complete round two, then fasten off. Repeat the entire process to create an identical second hexagon. Place the two finished motifs with wrong sides facing together, join them around the outer edge using a continuous round of single crochet through both loops of both panels, insert a split key ring through one corner space during the final border stitch, and weave all yarn tails inside the joined sandwich.
4. Vintage Granny Square Mini Pocket Charm

How to Make
The vintage granny square mini pocket charm scales down the iconic crochet motif into a pocket-sized, functional pouch that can hold a folded emergency banknote, a shopping cart token, or a gym locker key. The design uses traditional three-double-crochet cluster groupings separated by chain spaces, worked in concentric squares that showcase creative scrap-yarn color combinations. Working with traditional multi-round granny squares allows beginners to practice color transitions, corner turning chains, and tension balance across open lace spaces. Folding two opposing corners inward transforms the flat square into an envelope pouch, creating a functional charm that combines vintage style with everyday utility. When accented with a small wooden button or a tiny metallic snap fastener, the charm keeps its contents secure during daily commutes. The retro aesthetic pairs naturally with canvas backpacks, denim jackets, and casual travel accessories, bringing a nostalgic handmade touch to everyday carry setups.
Work the granny square foundation by chaining four stitches with DK cotton yarn and joining with a slip stitch to form a central ring using a 2.75 mm hook. Chain three to act as the first double crochet, work two double crochets into the ring, chain two, and work three double crochets into the ring three more times, closing the round with a slip stitch into the top of your initial turning chain. Fasten off round one, join a contrasting color into any corner space, and work three double crochets, chain two, and three double crochets into each corner, with a single chain separating the side clusters. Complete three concentric rounds, alternating colors on each round to create a vibrant square measuring approximately 3.5 inches per side. Fold the bottom corner upward toward the center, bring the left and right corners inward to overlap slightly, and whipstitch the intersecting diagonal seams together to form a triangular envelope pocket. Sew a small five-millimeter wooden toggle button onto the lower flap, loop a chain-stitch strap through the top corner to secure a brass keyring, and weave all thread ends through the corner clusters.
5. Modern Boho Macrame-Style Tassel Fringe Fob

Step-by-Step Guide
The modern boho macrame-style tassel fringe fob combines structured crochet stitches with loose, combed yarn fringe to create an organic, textural accessory. This design features a narrow, flat crochet tab worked in dense herringbone single crochet, creating an arrow-like diagonal weave that supports a flowing lower tassel skirt. Selecting earthy, unbleached fibers like raw linen, camel cotton, or sage green evokes relaxed bohemian style, while a clean brass split ring and matching rivet hardware anchor the piece in modern design. The flat crochet tab provides a stable mounting surface that sits flush against key rings, while the soft, brushed lower fringe adds tactile movement that is easy to locate by touch. This hybrid design allows beginners to practice dense, decorative stitch patterns alongside simple fringe assembly and combing techniques, producing a boutique-quality gift that requires minimal yarn yardage.
Begin by casting eleven chain stitches using worsted weight unmercerized cotton yarn and a 3.0 mm hook. For row one, work ten herringbone single crochet stitches across: insert your hook through the vertical bar of the previous stitch, then down through the next foundation chain, yarn over, pull up a loop, yarn over, and pull through all three loops on your hook. Continue this pattern across eight rows, chaining one at each turn, to produce a thick, diagonal-ribbed fabric rectangle measuring roughly 1.5 inches wide by two inches long. Cut twelve eight-inch lengths of matching yarn to form the fringe skirt, fold each strand in half, and attach them across the bottom edge of the crochet tab using simple lark’s head slip knots. Comb out the hanging strands using a fine-toothed metal pet brush to separate the plies into a soft, uniform fringe, then trim the bottom straight across with sharp tailoring shears. Fold the top edge of the crochet tab over the bar of a flat brass key clasp and sew it down firmly using reinforced backstitches.
6. Playful Citrus Slice Roundel

Read This:

How to Create
The playful citrus slice roundel brings bright, refreshing color into daily routines, using circular round crochet to replicate fruit slices like lemons, limes, grapefruits, and blood oranges. The design features a two-sided circular disc with an inner white pith layer, vibrant pulp segments divided by embroidered surface lines, and an outer textured rind border. Working this design in the round gives beginners practical experience with flat-circle mathematics, using calculated increases across concentric rounds to keep the fabric perfectly flat without buckling or curling. The compact, round profile provides a comfortable palm grip, while the cheerful colorways bring an optimistic, summery accent to daily key bundles and diaper bag zippers. Embroidering the radial segment lines onto the flat crochet face provides an easy introduction to basic needle embroidery on crochet fabric, building skills that translate directly to more complex decorative embellishments.
Using white DK weight cotton yarn and a 2.5 mm hook, cast six single crochets into a magic loop, increasing in every stitch during round two to achieve twelve stitches. Switch to bright lemon yellow or lime green yarn for round three, working an increase in every second stitch to reach eighteen stitches, and expand round four to twenty-four stitches by increasing in every third stitch. For round five, switch back to white yarn to form the inner pith, increasing in every fourth stitch to reach thirty stitches, then complete round six with deep rind green or golden yellow, increasing in every fifth stitch to finish with thirty-six stitches. Repeat the entire process to create an identical backing roundel in solid rind color. Using a tapestry needle threaded with white cotton floss, stitch six straight radiating lines across the colored inner circle of the front piece to separate the citrus segments. Align the front and back pieces with wrong sides facing together, single crochet the outer perimeters together through both loops, and insert a metal key chain ring through the final border stitch before fastening off.
7. Chunky Spiral Twirl Ribbon Charm
Setup Method
The chunky spiral twirl ribbon charm relies on natural stitch curvature to produce a three-dimensional cascading spiral that bounces and flexes with movement. The curling ribbon effect requires no wire inserts or complex folding; it forms naturally by working multiple stitches into each foundation chain, forcing the fabric row to curve tightly around its own center axis. Worked in tonal ombré gradients, bold primary colors, or alternating striped rows, the spiral charm adds vertical length and dynamic movement to keyrings without adding excessive weight. The long, curling ribbons are easy to spot inside large travel bags, making it an excellent functional accessory for luggage tags and daily key bundles. Because the construction uses a single continuous row of simple stitches worked over a long foundation chain, beginners can complete the entire project in less than thirty minutes, making it a quick, high-yield project for holiday craft fairs and personal gifts.
Using bulky weight cotton yarn or two strands of DK cotton held together, chain thirty-one stitches with a 3.5 mm crochet hook, keeping your chain tension slightly loose to accommodate multiple stitches. Skip the first chain from the hook and work three single crochets directly into the second foundation chain loop. Continue down the length of the chain, placing three single crochets into every single foundation chain stitch across, which naturally forces the fabric strip into a tight, cascading spiral coil. Once you reach the final chain, chain one and turn your work, executing one slip stitch into the front loop of every single stitch across the entire curled edge to add structure and define the outer spiral lip. At the top of the completed spiral, chain eight stitches to create an integrated suspension loop, slip stitch back into the first working stitch, and fasten off with an eight-inch tail. Thread this tail onto a tapestry needle, loop it through a heavy-duty metal split ring, and weave the tail down through the core of the top spiral turns before trimming flush.
8. Sweet Strawberry Mini Amigurumi Drop

Read This:

How to Make
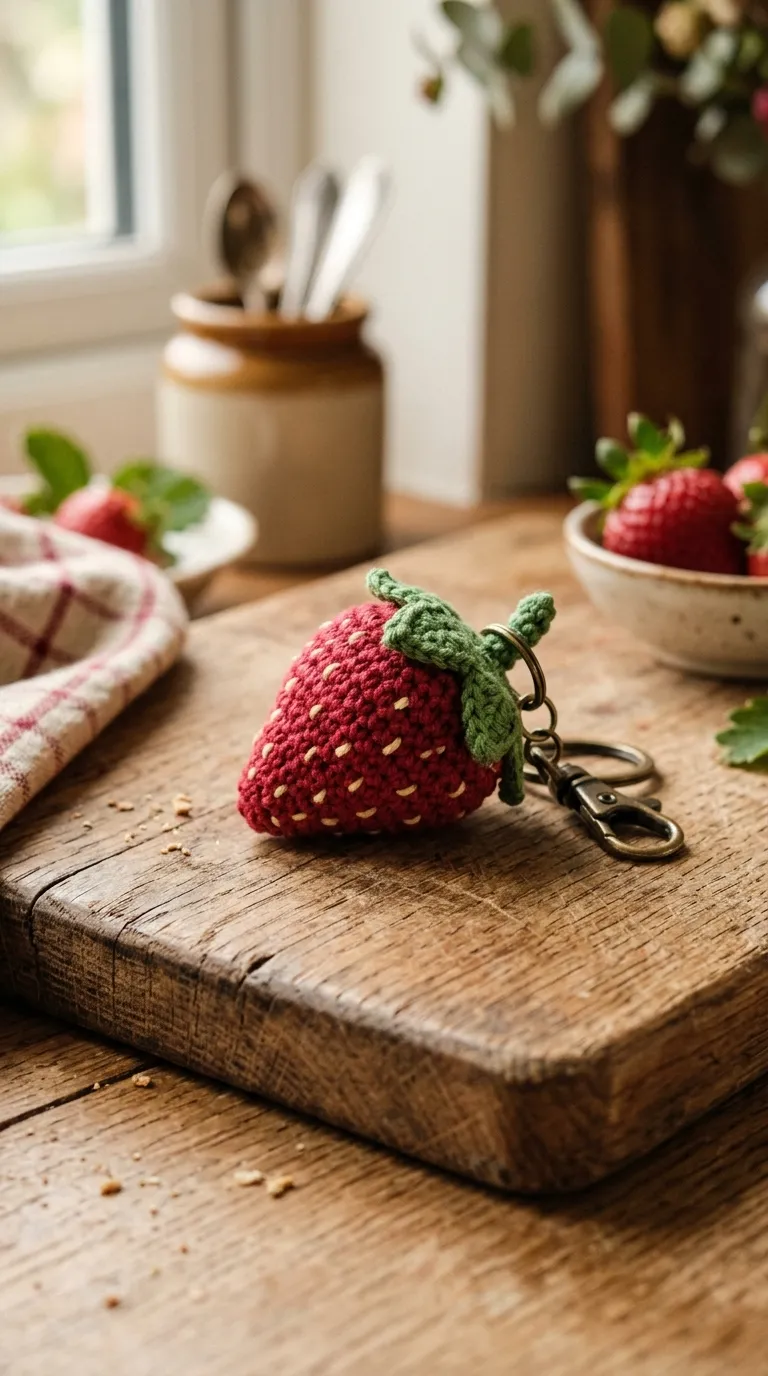
The sweet strawberry mini amigurumi drop is an approachable fruit pattern that combines cone-shaped 3D decreases with delicate leaf appliques. The bright red berry body tapers naturally from a broad, rounded base down to a delicate tip, textured with tiny French knots or surface flecks that mimic strawberry seeds. A star-shaped leafy green calyx sits atop the crown, providing a flat anchor platform for a metal eyelet pin or a braided hanging loop. This small-scale project helps beginners develop steady tension when working small circumferences, where loose loops can allow white polyester stuffing to show through. The compact, tactile berry adds a sweet, vintage pop of color to tote handles, cosmetic pouches, and key organizers. Because it requires only small amounts of red and leaf-green cotton yarn, this project is an exceptional scrap-buster that turns leftover yarn bits into charming, giftable handmade accessories.
Using vibrant crimson sport weight cotton yarn and a 2.25 mm hook, start at the berry tip with four single crochets in a magic ring. Work round two by placing one single crochet in the first stitch and an increase in the next, repeating once to reach six stitches. Continue widening the cone across rounds three through eight by adding three increases per round until you reach eighteen stitches, then work two straight rounds to create the rounded shoulder. Pack the berry cavity firmly with clean polyester fiberfill using the blunt end of a pencil, then decrease systematically by working single crochet two together around round eleven to taper the top opening down to six stitches; fasten off and draw the hole shut. Using forest green yarn, construct the five-point leafy calyx by making a five-stitch magic loop, chaining three, slip stitching down the chain to form a pointed leaf petal, and slip stitching into the next loop; repeat four more times to create a five-pointed star. Sew the leaf calyx flat onto the strawberry crown, embroider small yellow seed flecks across the red body using a tapestry needle, and attach a jump ring through the central stem loop.
9. Sturdy Braid-Look Thermal Stitch Bar

Execution Process
The sturdy braid-look thermal stitch bar focuses on exceptional structural density and clean minimalist style, producing an unyielding, thick rectangular fob that resists stretching. Thermal stitch is a unique variation of single crochet that works into the unworked loop of the row below alongside the current stitch, doubling the fabric thickness and creating an interlocking, braid-like texture across both sides. The resulting solid, heavy fabric slab feels substantial in the hand, much like thick leather or woven webbing, making it an ideal key holder for heavy toolboxes or vehicle ignitions. Using muted industrial colors like olive drab, navy, or charcoal black reinforces the utilitarian aesthetic, turning humble cotton yarn into a rugged, everyday accessory. The dense, thick fabric holds up well to pocket friction, car ignition wear, and frequent laundering without deforming, offering beginners an easy introduction to specialized, functional crochet stitch mechanics.
To start this durable bar, chain seven stitches using worsted weight cotton yarn and a 2.75 mm hook, then work six regular single crochets across the row starting in the second chain from the hook. For row two, chain one, turn your work, insert your hook into the back loop of the current stitch and down through the unworked front loop from the foundation row below, yarn over, pull up a loop, and complete a single crochet. Continue working in this manner across all six stitches, repeating the two-loop thermal stitch process for thirty continuous rows to construct a thick, dense rectangular bar measuring approximately four inches in length. The resulting strip will be twice as thick as standard single crochet fabric, with smooth, braided edges along both margins. Cut your yarn, leaving an eight-inch tail, fold the top half-inch of the thermal bar over the flat crossbar of a brass key clasp, and use a tapestry needle to whipstitch the folded edge down with reinforced lock stitches. Weave the remaining tail through the interior thermal matrix to lock the seam without visible bulk.
10. Textured Puffed Daisy Flower Medallion

Read This:
How to Create
The textured puffed daisy flower medallion brings dimensional floral design to keychain hardware through plump puff stitches and cheerful springtime color blocking. The medallion features a prominent raised central disc worked in rich golden-yellow, surrounded by six to eight rounded white petals that pop outward from the surface. Each petal is formed using multi-loop puff stitches, creating a cushiony texture that holds its volume without internal polyester stuffing. This project helps beginners practice yarn-over consistency and hook control, as pulling multi-loop puffs to an even height is key to achieving uniform petal shapes. The flat, circular flower shape sits neatly against car key fobs without catching on clothing, adding a sunny, playful touch to daily essentials. The flower design pairs naturally with woven summer totes, pastel cardigans, and backpacks, serving as a bright, mood-boosting accessory for daily routines.
Begin the flower center using sunny yellow DK cotton yarn and a 2.5 mm hook, casting six single crochets into a magic loop, increasing in every stitch during round two to twelve stitches, and slip stitching to the first stitch to close the circle. Fasten off the yellow yarn, join pure white cotton into any stitch, chain two, and prepare to work the first dimensional petal puff. To create the puff petal, yarn over, insert your hook into the same stitch, yarn over, and pull up a loop to the height of your turning chain; repeat this four times in the same stitch until nine loops rest on your hook. Yarn over, draw through all nine loops smoothly, chain two to lock the cluster, and slip stitch down into the next base stitch to anchor the petal. Repeat this sequence across all twelve base stitches to form twelve distinct, pillowy daisy petals radiating around the center. Secure all working tails at the back, thread a short length of green or white yarn through the base of two adjacent petals to form an anchor loop, attach an eight-millimeter jump ring, and clamp the ring shut around a silver split key clasp with jewelry pliers.
Common Beginner Mistakes and How to Avoid Them
The most frequent challenge beginners face when crocheting keychains is loose, inconsistent stitch tension, which creates a floppy, weak fabric that stretches out under the weight of metal keys. When stitches are worked too loosely, internal polyester fiberfill peeks through amigurumi toys, and flat wristlets quickly sag into thin, misshapen cords. To fix this, always choose a crochet hook that is 0.5 mm to 1.0 mm smaller than the yarn manufacturer recommends, using your fingers to seat each loop firmly down on the hook shaft after every stitch. Another common mistake is insecurely attaching metal hardware, such as sewing a jump ring with only a single strand of yarn that can fray from friction against metal edges. Always reinforce your attachment points by passing the yarn through the fabric and hardware loop three to four times, or use an intermediate fabric tab to prevent sharp metal rings from cutting through your yarn strands. Finally, beginners often skip stitch counting on small rounds, which leads to accidental increases that warp flat circles into bowls or cause straight wristlet edges to wave. Use locking plastic stitch markers to flag the first stitch of every round or row, counting your stitches at every turn to keep your shapes symmetrical and clean.
Practical Tips for Better Results
Achieving clean, boutique-quality finishes on small crochet accessories requires careful attention to fiber behavior, joining mechanics, and neat finishing steps. Always choose 100% mercerized or tightly plied standard cotton over acrylic blends; cotton offers superior abrasion resistance, holds crisp stitch definitions under daily friction, and will not stretch out when exposed to rain or moisture. When working circular amigurumi shapes, use the invisible decrease method—inserting the hook only into the front loops of two adjacent stitches before finishing the single crochet—to prevent gaps and visible knots across your project surfaces. Use a dedicated pair of flat-nose jewelry pliers to open jump rings sideways with a gentle twisting motion rather than pulling the ends outward, which weakens the metal and ruins its circular shape. When weaving in your project ends, use a sharp metal tapestry needle to split the interior yarn plies rather than gliding between them, reversing directions three times to lock the tails permanently against active handling. Finally, lightly steam-block flat cotton pieces like wristlets and geometric fobs with an iron held two inches above the fabric to relax the fibers and set straight, professional edges without flattening the surface textures.
Styling, Presentation, or Organization Ideas
Handcrafted crochet keychains make practical, attractive additions to home organization systems and personalized gift presentations. Hang multiple completed keychains from a natural oak peg rail or an iron entryway board by your front door; organizing car fobs, bicycle locks, and mailbox keys with color-coded yarn straps helps household members identify their keys instantly. When preparing these pieces as thoughtful handmade gifts, mount each keychain onto a piece of sturdy, unbleached kraft cardstock stamped with your maker mark, wrapping a strip of natural jute twine around the center to create an authentic artisan look. You can also color-coordinate your keychain palettes with your favorite daily accessories, pairing earthy mustard and olive fobs with vintage canvas totes, or attaching bright citrus and strawberry charms to diaper bags and gym backpacks to add a cheerful focal point. For craft fairs and boutique displays, hang the keychains from a revolving brass counter tree or arrange them flat inside divided wooden shadow boxes lined with neutral linen, allowing customers to easily feel the distinct stitch textures and inspect the quality of the hardware.
Budget and Time Planning
Crochet keychains offer some of the highest value-to-cost ratios in the textile craft world, making them an ideal choice for budget-conscious makers and small handmade shops. A single fifty-gram skein of premium DK or worsted cotton yarn typically provides enough yardage to create five to eight small key charms or wristlets, keeping your material costs remarkably low per finished piece. To optimize your craft budget, purchase essential hardware—like split rings, lobster clasps, and jump rings—in bulk assortments online, and save all your leftover yarn scraps from larger blanket and garment projects to use for multi-colored designs like granny squares and citrus charms. In terms of time investment, these compact projects fit easily into busy daily routines, with most designs taking between thirty and ninety minutes to complete from foundation chain to final hardware assembly. Establishing a streamlined, assembly-line workflow will dramatically increase your making efficiency: spend one evening crocheting multiple fabric straps or amigurumi bases in batches, and dedicate a second session to attaching metal hardware and weaving in yarn tails.
Creative Expansion and Advanced Inspiration
Once you feel confident working basic flat rows, continuous spirals, and standard hardware joins, you can expand these simple keychain ideas into more complex, multi-functional accessories. Scale up your favorite designs by adding specialized closures, such as transforming a flat geometric hexagon or miniature granny square into a zippered lip balm holder or a protective wireless earbud pouch. Experiment with mixed-media accents by incorporating smooth, natural wooden beads, braided leather thongs, or metal charms alongside your crochet fabric to introduce striking visual and textural contrasts. You can also explore surface embroidery techniques, using fine stranded cotton floss to stitch delicate botanicals, custom initials, or geometric stars directly onto dense single-crochet canvas straps to create personalized heirlooms. Consider dipping finished unbleached cotton straps into natural botanical dyes—like indigo vats, avocado pit baths, or black tea infusions—to produce organic ombré color transitions across the ribbed textures. Mastering these modular techniques allows you to design versatile, long-lasting accessories that showcase the warmth and skill of handmade craft in every corner of your daily life.