Amigurumi tiger designs have established a substantial presence across digital crafting communities, offering makers a structured method for turning yarn into expressive, sculptural keepsakes. This comprehensive guide examines ten distinct amigurumi tiger concepts, providing specific structural blueprints, shaping methodologies, and styling techniques. You will learn the exact construction principles needed to build stable three-dimensional figures, from minimalist tabletop mascots to functional nursery accents. Understanding these yarn-sculpting frameworks allows crocheters to master proportion, balance, structural symmetry, and seamless stripe integration without tension distortion. The tiger motif carries notable versatility, functioning equally well as a playful children’s companion, an aesthetic decorative element, or a personalized handmade gift. By following systematic fabrication steps, makers of any skill level can produce reliable, durable fiber art that retains its shape over years of display or handling. Master the essentials of gauge control, clean color changes, firm fiberfill packing, and precise facial embroidery to elevate simple yarn loops into polished, heirloom-grade tiger sculptures.
Why This Idea Is Trending or Useful
The surge in popularity of amigurumi tiger concepts across modern Pinterest boards stems from their unique blend of classic craft appeal and modern interior aesthetics. Contemporary crafters frequently seek projects that deliver tactile comfort while serving as eye-catching home decor accents on open shelving, work desks, and nursery mantels. Tigers possess an iconic biological silhouette and striking high-contrast patterning that naturally draws visual attention, making them dynamic focal points in any space. From a maker’s perspective, these projects offer exceptional educational value because they incorporate multiple foundational techniques within a single compact structure, including continuous spiral stitching, precise color transitions, and dimensional assembly. The project remains remarkably accessible to beginners because it relies almost entirely on single crochet stitches worked in the round, avoiding complex stitch multiples while producing dense, durable fabric. Furthermore, yarn crafts provide an eco-conscious, budget-conscious alternative to mass-produced synthetic decor, empowering creators to choose sustainable natural fibers and custom color palettes that perfectly complement their personal living environments.
Materials and Preparation
Achieving structural precision in three-dimensional crochet requires deliberate material curation and methodical preparation before stitching the initial magic ring. The primary foundation is a sturdy, non-splitting yarn; sport-weight or worsted-weight mercerized cotton and smooth semi-cotton blends represent the optimal standard because they yield sharp stitch definition and resist surface pilling. Select an ergonomic crochet hook sized approximately one half to one full millimeter smaller than the yarn label recommends, ensuring the resulting fabric weave remains completely tight and prevents internal stuffing from migrating through the stitches. Essential notions include high-resilience polyester fiberfill, blunt tapestry needles with large eyes for piece assembly, locking stitch markers to track spiral rounds, and rustproof dressmaker pins for securing components before seaming. Workspace planning requires calculating yarn yardage beforehand, pre-winding skeins to prevent tangling, and establishing adequate task lighting to track dark contrast stripes accurately. Investing initial time into producing a small circular gauge swatch guarantees proper hook-to-yarn tension, preventing misshapen body parts and ensuring the finished figure stands evenly on level surfaces.
1. Minimalist Pocket Sized Amigurumi Tiger Cub

Setup Method
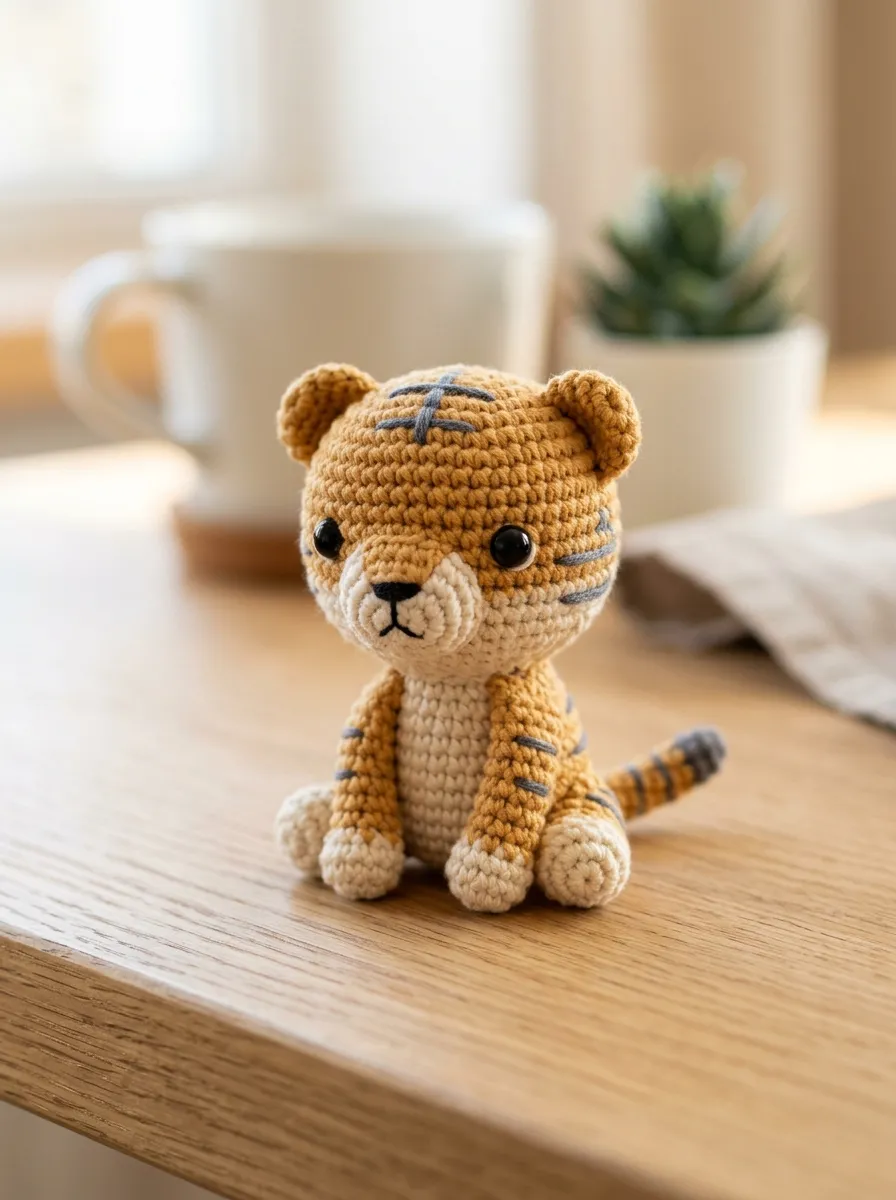
The pocket-sized amigurumi tiger cub emphasizes clean lines, reduced stitch counts, and an understated aesthetic suitable for keychains or desktop ornaments. This design utilizes a unified head-and-body construction to eliminate complex neck seams, resulting in a continuous rounded egg shape that measures approximately four inches in total height. Rather than incorporating dense, realistic stripe patterns, the minimalist concept employs subtle horizontal stripe accents across the back and flanks, leaving the facial plane open, bright, and uncluttered. The palette focuses on muted tones such as soft ochre, warm cream, and charcoal slate rather than high-saturation primary shades. This restrained coloration integrates seamlessly into modern Scandinavian or Japandi interior settings, turning a traditional animal toy into a refined fiber sculpture. Limiting the total component count makes this pattern structurally durable, lightweight, and exceptionally quick to assemble, providing immediate satisfaction for crafters seeking functional, portable handmade projects.
To construct this compact cub, begin at the crown of the head using an adjustable magic circle worked with single crochet stitches in continuous rounds. Expand the circle through systematic increases until reaching twenty-four stitches, working several rounds even to establish head height before integrating two alternating rounds of charcoal yarn for the upper back striping. Transition the lower circumference smoothly by working single crochet decreases to delineate the waist, followed by immediate increases to form the rounded lower torso. Pack the upper head firmly with dense polyester stuffing before the opening narrows, ensuring the plastic safety eyes remain securely locked with their interior washers seated flat against the fabric. Crochet four miniature tubular limbs of six stitches each, fastening them directly to the lower quadrant using whip stitches to allow the completed tiger cub to sit upright independently on flat surfaces.
2. Sleeping Nursery Tiger Pillow Buddy

Step-by-Step Guide
The sleeping nursery tiger pillow buddy serves as a gentle, tactile comfort companion specifically proportioned for crib displays and children’s reading nooks. This concept features an elongated, cylindrical torso with relaxed, outstretched paws and closed, embroidered crescent eyes that communicate peaceful rest. Soft chenille or velvet blanket yarns work exceptionally well for this project, yielding an ultra-soft, plush finish with hidden stitch ridges that maximize cuddliness. The physical proportions favor an enlarged head joined to a softly padded, flexible body, allowing the piece to rest flat on its stomach across bedding or nursery rocking chairs. The color blocking incorporates expansive areas of pastel apricot and creamy ivory along the underbelly, interrupted by wide, rounded charcoal stripes that mimic the gentle contours of a sleeping wildcat.
Begin fabrication with the elongated oval torso, working from the rear base toward the front chest using continuous rounds of single crochet. Maintain an even tension when handling chenille yarn to avoid snapped core fibers, checking frequently that the internal fiberfill remains distributed loosely to preserve flexibility rather than rigid stiffness. Construct the rounded head separately, placing greater emphasis on wide cheek bulges by concentrating increase clusters along the lower lateral quadrants of the facial sphere. Once the head is stuffed and seamed to the front torso opening, position the ears low on the sides of the head to reinforce the resting posture. Finish the facial features using black cotton embroidery floss, working horizontal backstitches to define downward-curving sleeping eyelids and a delicate triangular nose directly along the central vertical seam.
3. Nordic Hygge Chunky Yarn Tiger Mascot

How to Create
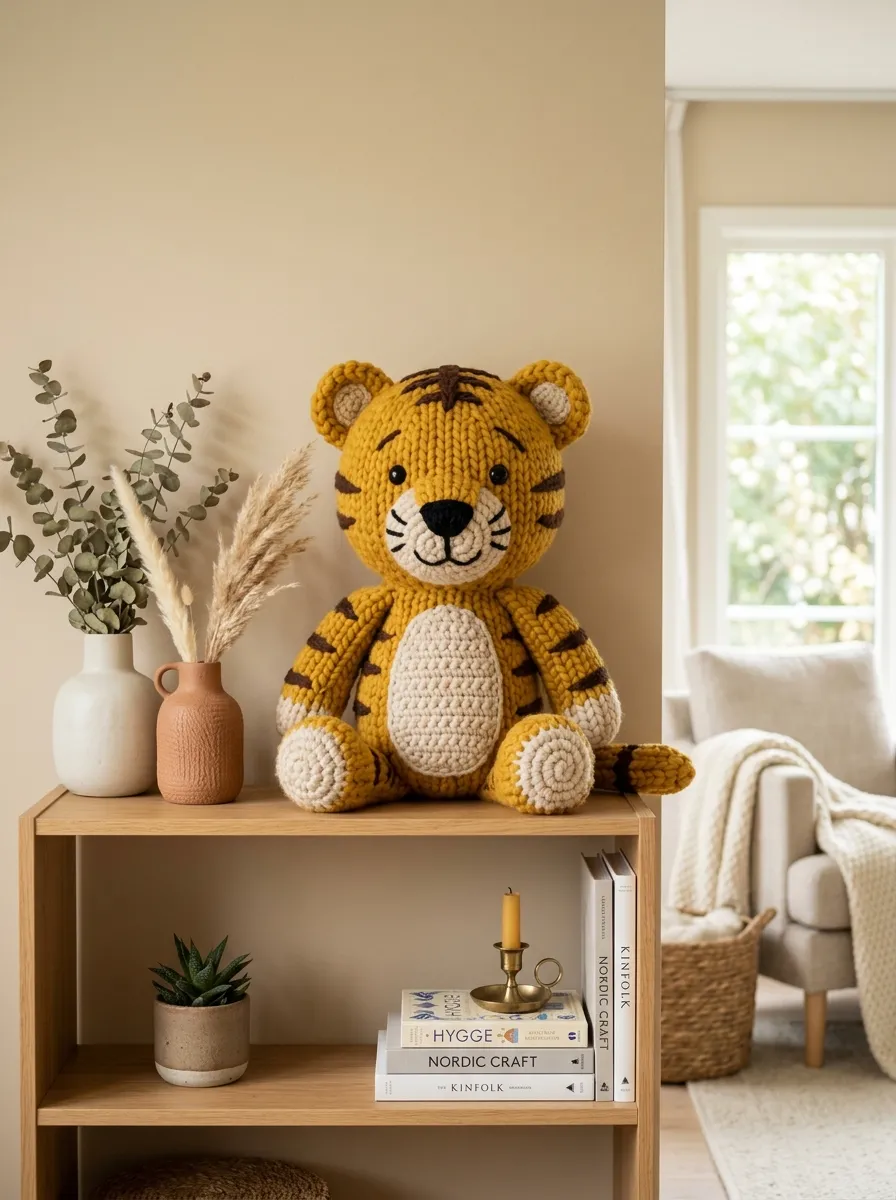
The Nordic hygge chunky yarn tiger mascot merges Scandinavian minimalism with exaggerated textural proportions, making it a prominent statement piece on modern living room bookshelves. This design features an oversized head, an ultra-chunky torso, and stubby, unjointed limbs that create a grounded, substantial silhouette. Utilizing super bulky wool-blend yarn paired with an eight-millimeter hook, the individual stitches become prominent architectural elements that celebrate the geometry of crochet loops. The color scheme prioritizes natural sheep wool shades, pairing heathered mustard with undyed ecru and deep espresso brown for the accent striping. The physical scale of each stitch eliminates the need for intricate surface embroidery; instead, the overall shape and structural contrast carry the entire design language, offering a warm, grounding presence that complements organic interior textures like natural linen, unfinished light oak, and stone pottery.
Fabrication begins by establishing a firm base ring, working tight single crochet stitches with heavy yarn to ensure the bulky fabric retains its density without gaps. Work the rounded torso upward in twelve continuous rounds, incorporating single-row color stripes by carrying the non-working yarn loosely along the interior wall to maintain structural elasticity. When forming the broad head, execute increases rapidly across three rounds to produce a flattened, wide skull structure, followed by several non-increase rounds to establish architectural depth. Stuff the internal cavity using firm wool roving or compressed batting, which provides substantial weight and keeps the chunky mascot stable when displayed upright. Attach wide, semi-circular ears flat against the upper perimeter, angling them slightly backward, and finish by embroidering a solitary, bold vertical stripe down the forehead using a thick tapestry needle.
4. Vintage Inspired Jointed Heirloom Tiger
Read This:

How to Make
The vintage-inspired jointed heirloom tiger pays homage to early twentieth-century classic mohair toys, featuring fully moveable limbs and a distinguished, upright posture. This sophisticated model employs an intricate multi-part construction where the head, torso, arms, and legs are crocheted as separate, sealed units before being joined with mechanical doll joints or heavy thread hinges. The aesthetic utilizes heathered, fine-gauge wool yarn brushed lightly with a wire carding brush to produce a soft, historic halo reminiscent of antique mohair plush. The proportions are slender and elongated, featuring an articulated snout, an arched spine, and curved paws that evoke traditional European toy manufacturing. Striping on this heirloom model is delicate, created using narrow single-row contrast lines that wrap around the limbs at precise intervals, establishing a timeless, collectable fiber art piece.
Begin by gathering five sets of miniature plastic or wooden safety doll joints, which consist of grooved posts, hard washers, and locking discs. Crochet the slender limbs starting at the paws, inserting the joint posts through the upper interior edge of each limb fabric before closing the final stitch rounds. As you crochet the main body from bottom to top, pause at the designated limb coordinates to press the protruding joint posts through the torso wall, securing the interior locking washers tightly against the inner stuffing. Pack the head with ultra-dense fiberfill, paying special attention to sculpting the distinct muzzle through precise stitch decreases along the bridge of the nose. Secure the head to the neck joint, inspect the joint articulation to confirm smooth rotational movement, and embroider layered satin stitches across the muzzle to form a rich, polished leather-style nose.
5. Geometric Low Poly Desktop Tiger

Execution Process
The geometric low-poly desktop tiger reinterprets traditional organic animal forms through sharp angles, faceted planes, and modern digital design sensibilities. Rather than following smooth continuous rounds, this innovative pattern uses strategic single crochet increases, sharp corner turns, and front-loop-only stitches to produce distinct structural edges. The resulting figurine mimics modern faceted papercraft or polygon digital renders, functioning as an intellectual, contemporary accent piece for home offices and architectural drafting desks. The color blocking abandons traditional wavy stripes in favor of crisp, horizontal triangular color shifts that emphasize the geometric planes of the body. Crisp, mercerized cotton yarn is mandatory for this design, as its lack of surface fuzz and high structural rigidity keep the faceted corners sharp, clean, and immediately recognizable.
Initiate the build by constructing faceted polygonal units, starting with a hexagonal base that forms the flat undercarriage of the chest and abdomen. Utilize corner-increase sequences—working three single crochets into a single corner stitch—to force the fabric to bend sharply outward at defined forty-five-degree angles. To create the distinctive faceted jaw, work alternating rows through the back loop only, which leaves a visible horizontal ridge that functions as an architectural ridge line across the face. When adding the polyester filling, wrap the core material in thin quilt batting to prevent round bulges, maintaining the flat geometric planes across each facet. Seam the angular ear pyramids to the upper facial corners using mattress stitch, aligning the fabric edges precisely to maintain uninterrupted geometric lines from the crown down to the base.
6. Functional Hanging Tiger Planter Basket

Setup Method
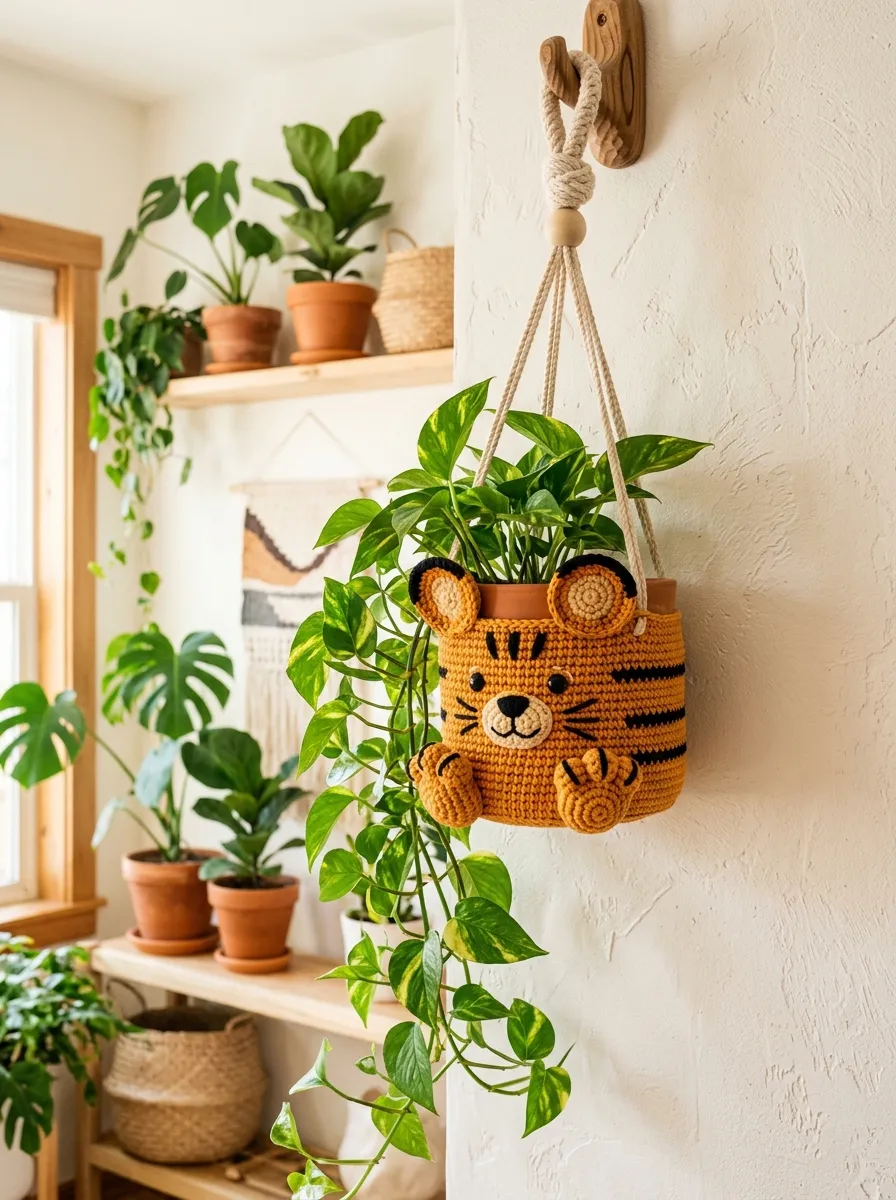
The functional hanging tiger planter basket merges whimsical amigurumi character design with utilitarian indoor gardening accessories. This project consists of a sturdy, open-topped cylindrical basket styled as a tiger’s body, complete with dimensional paws draped over the outer rim and facial details centered on the front wall. Suspended by macramé-style braided yarn cords, this vertical decor element provides an ideal home for trailing houseplants like string of pearls, pothos, or spider plants. The fabrication requires durable, heavy-gauge cotton cord or double-stranded worsted cotton to produce an exceptionally rigid wall structure capable of supporting the weight of a potted plant. The tiger’s wide facial features wrap around the exterior curve, creating an engaging visual display that enlivens empty wall corners, kitchen windowsills, or studio shelving units with vibrant botanical warmth.
Begin by crocheting a flat, reinforced circular base using continuous rounds of single crochet, increasing evenly until the diameter matches standard four-inch plastic plant nursery containers. Transition to the vertical basket walls by working one complete round into the back loops only, creating a ninety-degree structural ledge that prevents the base from bowing under weight. Continue upward in un-joined spiral rounds, switching between bright marigold and deep black yarn every four rounds to establish broad, graphic tiger stripes across the cylinder. Crochet two flat, semi-circular ear flaps and stitch them securely to the upper rim, followed by two separate paw modules positioned as if gripping the edge. Thread four three-ply braided cotton hanging cords through the reinforced upper rim stitches, knotting them firmly underneath the base to ensure level, secure suspension.
7. Cozy Autumn Tiger with Removable Scarf

Step-by-Step Guide
The cozy autumn tiger with a removable scarf brings seasonal warmth and interactive styling into classic amigurumi craft collections. This concept features a medium-sized sitting tiger dressed in miniature autumnal accessories, including a textured moss-stitch scarf and a matching ribbed beanie with ear openings. The tiger itself is crafted from warm terracotta yarn, accented with rich cream patches on the muzzle, chest, and tail tip, which evokes the cozy atmosphere of falling leaves and crisp weather. The limbs are sewn in a permanently bent, seated orientation, ensuring the finished doll perches gracefully on mantels, decorative tiered trays, or seasonal tablescapes. The removable clothing accessories introduce varied textile structures to the project, pairing smooth single crochet fabric with stretchy ribbing and woven textures that engage both visual and tactile senses.
Start by assembling the core tiger body, working from the base upward with consistent tension, incorporating symmetrical side increases that form distinct, chubby haunches. Construct the hind legs with curved foot pads, stuffing the lower paws firmly while leaving the upper thigh segments lightly packed so they flatten neatly against the torso during final assembly. Form the tail as an elongated, flexible tube, alternating black and terracotta rings before ending in an ivory tip, securing it directly to the lower back seam as a balancing support. For the removable accessories, switch to a complementary olive green or burnt burgundy yarn, knitting or crocheting a long, narrow strip in half-double crochet slip-stitch ribbing to produce a miniature fringed scarf. Drape the scarf twice around the tiger’s neck, securing it with an antique brass safety pin or wooden button to finish the autumn display.
8. Whimsical Sweet Pastel Tiger Cub
Read This:

How to Create
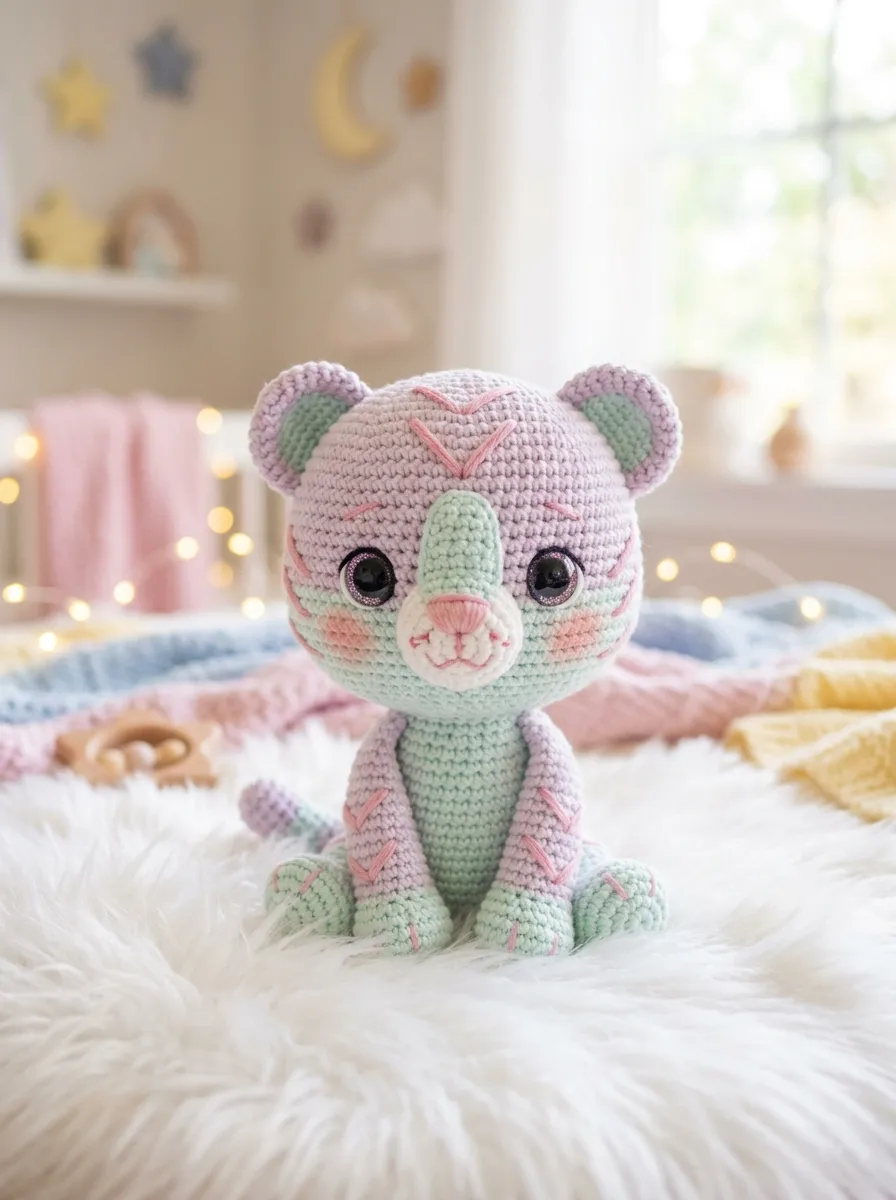
The whimsical sweet pastel tiger cub reimagines the ferocious jungle predator as an ethereal, fantasy-inspired fairy tale creature. Moving entirely away from traditional wildlife coloration, this design utilizes a delicate palette of powdery lilac, pale mint green, soft blush pink, and metallic silver thread accents. The proportions draw heavy inspiration from Japanese kawaii culture, featuring an exaggeratedly wide forehead, tiny down-turned limbs, and widely spaced, glossy black safety eyes set low on the facial plane. The traditional tiger stripes are simplified into delicate, embroidered pastel chevrons that look painted onto the surface. This gentle aesthetic makes the finished piece an ideal accent for modern pastel nurseries, baby shower gift hampers, or imaginative bedroom shelf displays, offering a tranquil, dreamy alternative to high-contrast safari themes.
To create this delicate cub, work with smooth fingering-weight bamboo-cotton blend yarn paired with a two-millimeter hook to generate an ultra-dense, porcelain-smooth fabric surface. Construct the spherical head with broad lower increases, creating prominent chubby jowls that immediately communicate youthfulness and whimsical charm. Secure ten-millimeter glitter-rimmed safety eyes between rounds twelve and thirteen, leaving a generous gap of eight unworked stitches between them to achieve the hallmark kawaii facial balance. Embroider tiny vertical nose details using metallic silver embroidery thread, keeping the stitches exceptionally short and refined. Crochet miniature rounded ears with pale pink inner inserts, stitching them horizontally along the upper curve of the head, and finish by adding soft powdered cosmetic blush to the fabric cheeks using a dry makeup brush for a gentle, rosy glow.
9. Modern Safari Tiger Bookend Set

How to Make
The modern safari tiger bookend set provides a sophisticated, dual-piece organizational solution for home libraries, children’s book ledges, and study desks. This concept splits the tiger’s anatomy into two separate functional sculptures: the front half features the head, chest, and forward paws, while the rear half showcases the hindquarters and an expressive, curled tail. When placed on either side of a row of books, the figure creates the amusing optical illusion of a tiger traversing directly through the literary collection. The aesthetic balances stylized realism with clean geometric contours, utilizing saturated saffron yarn, stark obsidian stripes, and brilliant white accents along the jawline. The primary engineering challenge lies in internal weighting, requiring hidden ballasts that provide substantial stabilizing mass to support heavy volumes without tipping.
Begin by crocheting the flat, weighted base plates for both halves, working dense slip stitches around cut-to-size oval acrylic or wooden stabilizer inserts. Build the hollow vertical cavities upward from these plates, inserting heavy cloth bags filled with washed river pebbles or polished steel shot into the lower base compartments before adding standard fiberfill above. Work the front segment into an alert chest and lifted head, angling the neck forward fifteen degrees to create a focused, determined posture. Construct the rear segment with pronounced hip joints and a reinforced wire-cored tail that can be curved gracefully upward. Glue heavy, non-slip felt pads to the exterior wooden or acrylic bottom plates, ensuring the completed bookends grip shelf surfaces firmly and support heavy hardcovers without shifting under lateral pressure.
10. Tiny Micro-Crochet Tiger Brooch

Read This:

Execution Process
The tiny micro-crochet tiger brooch showcases fine-art miniature craftsmanship, compressing the iconic tiger motif into a wearable piece of statement jewelry measuring less than two inches across. This intricate project requires extreme precision, using fine size-ten or size-twenty mercerized cotton sewing thread and a steel hook measuring between 0.6 and 0.75 millimeters. The design focuses entirely on a highly detailed, relief-sculpted tiger face, complete with layered cheek ruffs, dimensional ears, and hand-painted stripe details. Because standard safety eyes are far too large for micro-crochet scales, the facial features rely on microscopic glass seed beads and single-strand silk thread embroidery. The finished piece is sealed with fabric stiffener and mounted to a silver-plated locking pin back, transforming delicate yarn loops into a durable, wearable textile accessory suitable for coat lapels, tote bags, or craft aprons.
Fabrication requires intense visual focus and stable hand tension, working under high-magnification task lamps to track the microscopic thread loops accurately. Begin with an adjustable ring of six single crochet stitches, expanding outward through precise single-stitch increases to establish a circular base no larger than a standard coin. Form the dimensional muzzle by working a miniature oval separately, stitching it to the lower third of the facial disk using monofilament nylon thread for invisible joins. Sew two microscopic black glass seed beads into the eye sockets using a fine beading needle, anchoring the thread firmly through the back of the dense fabric disc. Finish by painting razor-thin tiger stripes directly onto the cotton surface using watered-down acrylic fabric paint and an ultra-fine detail brush, allowing it to cure completely before gluing a locking brooch bar to the felt-backed reverse side.
Common Beginner Mistakes and How to Avoid Them
Creating amigurumi tigers involves specific structural challenges that frequently trip up novice crocheters, with loose tension representing the most widespread initial error. When stitches are worked too loosely, the internal white polyester fiberfill shows prominently through the fabric gaps, instantly diminishing the professional quality of the finished tiger. To resolve this, always select a hook size significantly smaller than recommended on the yarn label and maintain firm, consistent yarn tension across every stitch. Another frequent mistake is asymmetrical stripe placement, which occurs when makers fail to track the natural spiral drift of continuous crochet rounds. Prevent crooked, wandering stripes by utilizing invisible color change techniques and placing locking stitch markers at the exact beginning of each round to maintain visual alignment. Finally, improper limb attachment often results in wobbly, unstable heads and crooked paws that prevent the tiger from sitting upright. Avoid this structural failure by pinning every component firmly into position using long dressmaker pins, checking the symmetry from multiple angles, and securing the parts with double-threaded whip stitches through both fabric layers.
Practical Tips for Better Results
Elevating an amigurumi tiger from an amateur project to a polished, professional-grade fiber sculpture requires attention to specialized finishing techniques. One of the most effective methods for achieving clean stripes is the yarn under, yarn under technique rather than the traditional yarn over method, which produces square, stacked stitches that prevent pattern skewing across rounds. When changing colors between the orange body and black stripes, complete the final pull-through of the previous stitch with the new color to create razor-sharp horizontal color divisions. Fiberfill management is equally critical; pack small, marble-sized clumps of stuffing gradually, pushing the material against the outer walls first to sculpt smooth, firm anatomical curves without internal lumps. For facial embroidery, use sharp sewing needles and stranded embroidery floss rather than thick yarn, as finer threads allow for delicate, expressive whiskers and clean nose contours. Finally, lightly steam the completed components using a garment steamer held several inches away, which relaxes the yarn fibers, softens acrylic stiffness, and permanently sets the final sculptural form.
Styling, Presentation, or Organization Ideas
Presenting amigurumi tigers effectively enhances their visual impact, transforming individual handmade items into curated design features within living spaces. For home decor arrangements, group miniature amigurumi tigers alongside complementary botanical elements, such as potted succulents, dried eucalyptus sprigs, or polished wooden display stands. Staggering figures of varying heights across floating wall shelves creates dynamic vertical visual interest while keeping the handmade display organized and intentional. In children’s nurseries, hang the tiger planter or pillow buddy near reading corners paired with natural rattan storage baskets, linen drapery, and warm, neutral safari-themed wallpaper murals. If creating pieces for craft exhibitions or digital portfolios, photograph the tigers under soft, diffused natural daylight using neutral, textured backdrops like raw linen, tumbled travertine stone, or unfinished light hardwood. Avoid harsh direct sunlight or cluttered backgrounds, ensuring the camera focus captures the intricate stitch geometry, delicate facial expressions, and vibrant contrast striping that define exceptional amigurumi artistry.
Budget or Time Planning
Efficient execution of amigurumi projects depends on smart resource allocation, organized time management, and realistic material budgeting. Because amigurumi figures consume relatively modest yardage, an entire tiger can easily be constructed from partial skeins or leftover scrap yarn, making it an exceptionally economical craft project costing only a few dollars in materials. To optimize production time, batch similar tasks together rather than completing figures sequentially from start to finish. Dedicate an initial focused session entirely to winding yarn, assembling safety eyes, and cutting internal weights, followed by an evening dedicated solely to crocheting the repetitive limb modules. Completing all small appendages before tackling the larger head and torso keeps project momentum high and prevents fatigue during assembly. Crafters can expect a pocket-sized mascot to take approximately two to three hours of active stitching, whereas weighted bookends or jointed heirloom tigers require six to eight hours of methodical fabrication. Tracking time intervals helps makers establish accurate pricing if producing finished pieces for boutique markets or online craft stores.
Creative Expansion and Advanced Inspiration
Once the foundational tiger anatomy is mastered, crafters can expand the motif into imaginative thematic variations and complex mixed-media fiber art pieces. Experiment with non-traditional yarn textures, such as combining matte cotton faces with brushed mohair cheek ruffs or boucle yarn underbellies, introducing sophisticated tactile contrast across the creature’s silhouette. Scale variations offer another compelling creative avenue; the same structural pattern can be worked with embroidery floss for dollhouse miniatures or super bulky chenille cord for floor-sized lounge poufs simply by altering hook sizes proportionally. Advanced makers can incorporate wire armatures inside the limbs and spine, creating fully poseable wildlife sculptures capable of gripping decorative branches or adjusting their stance dynamically. You can also explore fantasy adaptations by integrating metallic lurex threads into the striping, adding embroidered celestial markings, or fashioning removable seasonal wardrobes like winter coats, crowns, or botanical leaf collars. These creative modifications elevate foundational amigurumi techniques into unique, personalized artistic expressions that showcase technical mastery and visionary fiber design.