Handcrafted crochet charms offer a playful, creative approach to personalizing children’s accessories, school gear, and nursery spaces through tactile fiber art. Transforming small amounts of yarn into miniature figures allows crafters to produce lightweight, resilient items that serve as backpack zipper pulls, pencil case identifiers, and cheerful bedroom accents. This structured tutorial presents ten practical crochet charm ideas for kids, including miniature strawberries, smiling sunshine medallions, pocket pandas, pastel rainbow arches, and tiny friendly ghosts. Readers will learn essential technical methods for working continuous spirals, managing yarn tension, securing child-safe embroidered details, and attaching durable hanging hardware. Making your own textile charms eliminates reliance on mass-produced plastic novelties, giving makers complete control over fiber safety, color palettes, and structural durability. In addition to creating charming daily trinkets, practicing these small-scale crochet methods develops transferrable shaping techniques that support broader home decor projects, holiday decoration concepts, and kids’ room organization systems. By applying accessible techniques such as adjustable magic rings, single crochet increases, and invisible decreases, crafters of any experience level can achieve clean results. The upcoming sections outline core preparation workflows, material guidelines, ten structured two-paragraph project breakdowns, and practical project planning strategies.
Why This Idea Is Trending or Useful
Handmade crochet charms continue to gain traction across digital craft boards and Pinterest ideas because they balance functional everyday utility with joyful, personalized design. Modern parents and educators frequently look for sustainable, screen-free DIY creative project options that help young children distinguish personal belongings in shared classroom cubbies and locker areas. From an aesthetic perspective, miniature fiber charms introduce soft textures and cheerful colors that soften synthetic school bags, metal lunchbox latches, and utility key rings. As a practical craft activity, assembling miniature crochet motifs requires minimal workspace, allowing makers to complete small projects during daily commutes or brief crafting sessions. Because basic amigurumi construction relies primarily on foundational single crochet stitches worked in compact rounds, this craft serves as an exceptionally beginner friendly entry point into textile manipulation. Designing custom charms also delivers dependable budget ideas, transforming small scraps of leftover yarn into high-value handmade keepsakes, party favors, or classroom rewards at minimal cost. Furthermore, these compact crochet figures integrate naturally into kids’ bedrooms, functioning as decorative drawer pulls, hanging mobile elements, or shelf mascots that withstand years of active daily handling.
Materials and Preparation
Thorough planning and careful supply selection are essential for ensuring that miniature crochet charms withstand the heavy wear associated with children’s active daily routines. The primary fiber selection should focus on sport-weight or DK-weight mercerized cotton yarn, as smooth cotton fibers provide crisp stitch definition, resist pilling, and wash cleanly without losing structural shape. Pair this yarn with an ergonomic aluminum crochet hook sized between 2.0 mm and 2.5 mm to create a tight, dense fabric that prevents internal polyester fiberfill from migrating outward. Essential assembly tools include blunt steel tapestry needles, micro locking stitch markers, sharp thread snips, and sturdy hardware such as swivel lobster clasps, four-millimeter jump rings, and flat split rings. For child safety, avoid using plastic safety eyes or small glued components that present choking hazards, opting instead for colorfast cotton embroidery floss to embroider facial details directly onto the fabric. Preparation begins by verifying stitch tension on a small test swatch to confirm the fabric remains opaque under light stretching. Pre-wind your yarn scraps into center-pull balls, and set up an organized work tray equipped with locking markers to monitor your stitch counts accurately.
1. Sweet Dimpled Strawberry Backpack Zipper Pull
Step-by-Step Guide
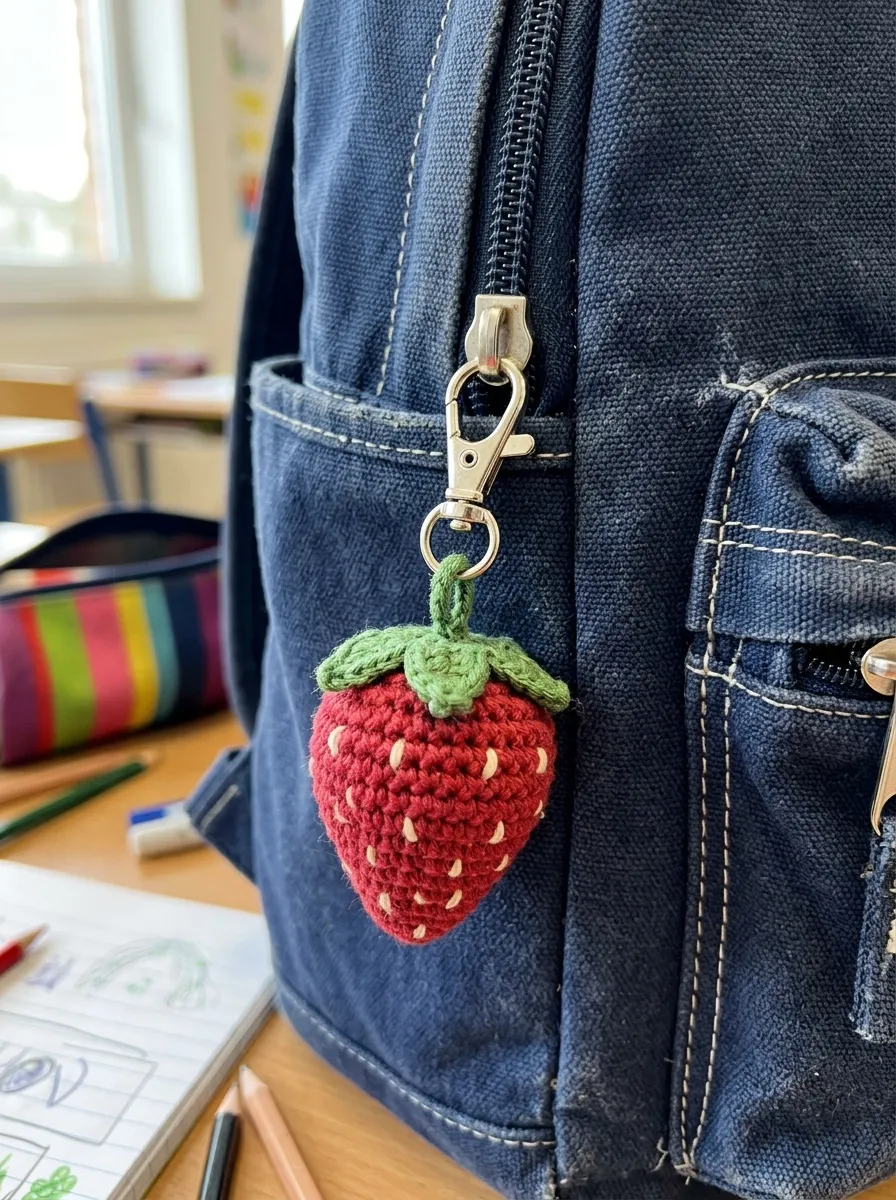
The miniature strawberry charm brings vibrant garden freshness and cheerful pop-art color to everyday school bags, backpacks, and coat zippers. This design features a plump, conical berry body crocheted from saturated strawberry-red cotton yarn, accented with hand-embroidered cream seed dots and crowned by a five-pointed green leaf calyx. The pointed, tapered silhouette provides a comfortable tactile grip that helps young children easily grasp and slide stubborn jacket or bag zippers. The dense single crochet construction gives the berry a firm, resilient structure that retains its shape even when compressed inside school lockers or desk drawers. Rendered in bright, contrasting tones, this charm makes backpacks instantly recognizable on crowded school cubby hooks. The lack of delicate protruding limbs ensures the design resists snagging, making it a reliable, long-lasting accessory for everyday childhood adventures.
To construct the strawberry, begin at the bottom tip using red cotton yarn, working four single crochets into an adjustable magic ring and increasing gradually over six rounds to eighteen stitches. Work three rounds even to establish the plump upper chamber, then embroider small vertical seed flecks across the red surface using a tapestry needle threaded with unbleached cream floss. Pack the interior cavity firmly with hypoallergenic polyester fiberfill, then execute rapid invisible decreases across the final two rounds before pulling the yarn tail through the remaining front loops to cinch the top opening shut. To create the leafy calyx, join bright green yarn into a four-stitch magic ring, chaining three and slip-stitching back along the chain five times to form five pointed sepals. Anchor the green calyx directly over the gathered top of the berry using matching thread, sewing a sturdy silver swivel lobster clasp into the center stem loop with reinforced stitches.
2. Radiant Smiling Sunshine Daypack Medallion
Execution Process
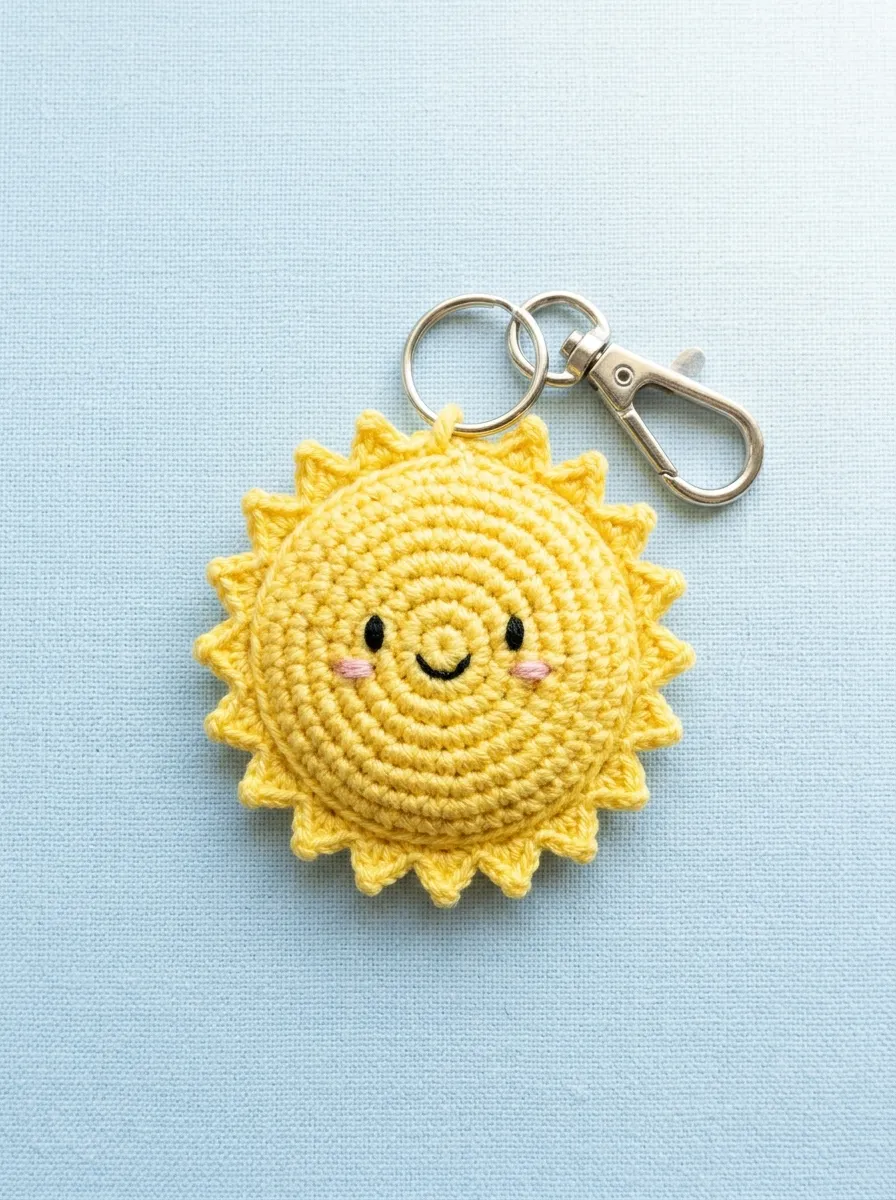
The smiling sunshine medallion introduces warm celestial optimism, graphic simplicity, and bright visual clarity to children’s daily accessories. This project consists of a double-thick circular core worked in warm buttercup-yellow cotton, framed by a continuous halo of petite triangular sunbeams. The flat disc silhouette features an embroidered sleeping or smiling face with soft blush cheeks, offering an approachable, friendly expression that brings comfort during school transitions. The two-dimensional medallion construction allows the charm to sit completely flat against backpack canvas or lunchbox sides without adding awkward bulk. The bright yellow shade stands out boldly against dark navy, black, or denim bag fabrics, helping children spot their belongings from across a busy playground. Its sturdy, border-locked design prevents edge curling, ensuring the sunbeams stay crisp through months of daily handling.
Start by crocheting two identical circular discs in buttercup-yellow cotton, working six single crochets into a magic ring and expanding evenly across four rounds to twenty-four stitches per disc. On the front disc panel, embroider two curved sleeping eyes and a small curved mouth using dark charcoal cotton embroidery thread, applying subtle pink blush marks using a dry cosmetic brush dipped in powdered chalk pastel. Place the two discs together with wrong sides touching, joining the perimeter edges with a round of single crochet stitches worked through both thicknesses while leaving a tiny opening to insert a very thin layer of polyester batting. Along the outer joined border, work a decorative round of sunbeams by alternating a single crochet, a chain-two picot stitch, and a slip stitch around the entire perimeter. Fasten off securely, weaving the yarn tail back into the center, and attach a small metal jump ring through the tip of one sunbeam to connect a backpack clip.
3. Playful Pocket Panda with Embroidered Patches
How to Create
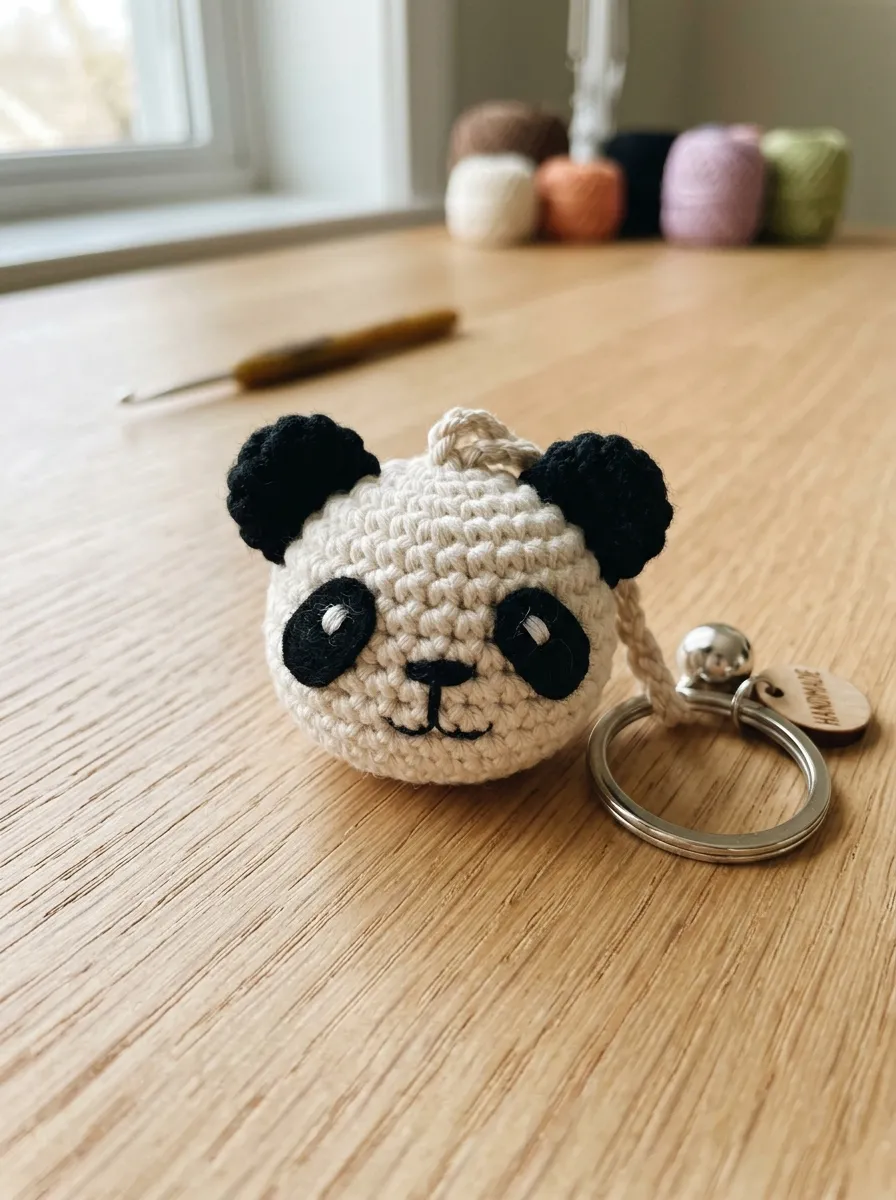
High-contrast monochrome animal designs provide immediate graphic appeal, making the pocket panda a beloved companion for children’s school accessories. This design features a compact, spherical panda head worked in clean optic-white cotton, accented by two rounded black ears and distinctive diagonal black eye patches. The crisp contrast between black and white yarn gives the character strong visual clarity across crowded classroom hooks, helping younger students identify their belongings with ease. Hand-embroidered white catchlights inside the black eye patches create an alert, curious expression without relying on rigid plastic parts. The compact, ball-shaped geometry distributes pressure evenly, preventing the figure from flattening or warping inside pockets. This adaptable charm works equally well clipped to a library card pouch, lunchbox handle, or bedroom reading lamp pull.
To shape the panda charm, begin with pure white cotton yarn, placing six single crochets into an adjustable loop and expanding evenly across five rounds to thirty stitches. Work five rounds even to establish a smooth, round head, then embroider two small horizontal catchlight stitches into two separately crocheted black oval eye patches before sewing them flat onto the lower front face. Embroider a small inverted triangular black nose between the eye patches, adding a tiny curved mouth line beneath it. Stuff the white head cavity firmly with dense polyester stuffing, then work continuous invisible decreases down to six stitches before cinching the base tightly shut. Crochet two small half-circle ears using black cotton yarn, sewing them symmetrically to the upper crown with reinforced overcast stitches. Attach a durable four-millimeter split ring through the top center crown stitches using jewelry pliers, securing a sturdy swivel hook for quick attachment.
4. Pastel Arch Rainbow with Cloud Anchors
Step-by-Step Guide
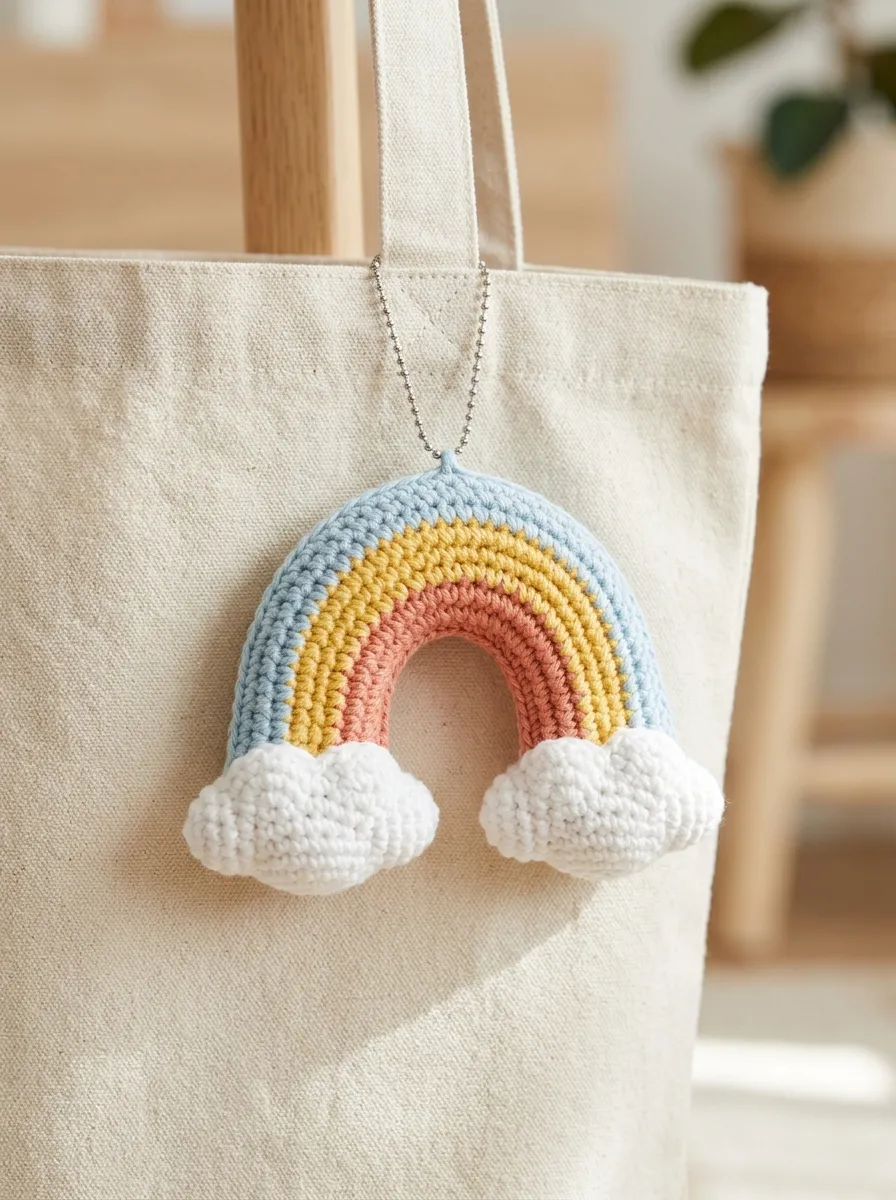
The arched rainbow motif represents a timeless symbol of joy, creativity, and gentle warmth that looks delightful hanging from children’s belongings. This charm design features a three-tiered curved rainbow worked in soft pastel shades—such as muted coral, sunshine yellow, and pale sky blue—anchored at both lower ends by tiny, puffy white clouds. The curved, semi-circular form provides an engaging geometric contour that introduces colorful dimension to neutral canvas bags. The flat, multi-layered construction keeps the charm lightweight while preventing tangles with keys or school badges. The soft pastel palette coordinates easily with modern children’s clothing and nursery decor, offering an understated alternative to overly saturated primary colors. The balanced two-point foundation creates an authentic rainbow silhouette that hangs straight when attached to lunchboxes or pencil cases.
To assemble the pastel rainbow, begin with the innermost arch using pale sky-blue cotton yarn, chaining twelve stitches and working one row of single crochet back along the chain. Fasten on sunshine-yellow yarn along the top ridge of the blue tier, working two single crochets into every third stitch to follow the expanding curved radius smoothly. Repeat this expansion method with the outer muted-coral tier, ensuring the three bands remain completely flat and free of puckering along the curve. For the cloud anchors, join bright white yarn directly to the lower edges of the rainbow, crocheting small shell clusters composed of three half-double crochets in a single stitch to form puffy cloud mounds. Weave all loose color yarn tails securely through the back loops of matching color rows using a tapestry needle. Fasten a fine metal ball-chain or split ring directly through the apex of the coral outer arch to complete the hanging mechanism.
5. Friendly Floating Ghost with Rosy Cheeks
Execution Process
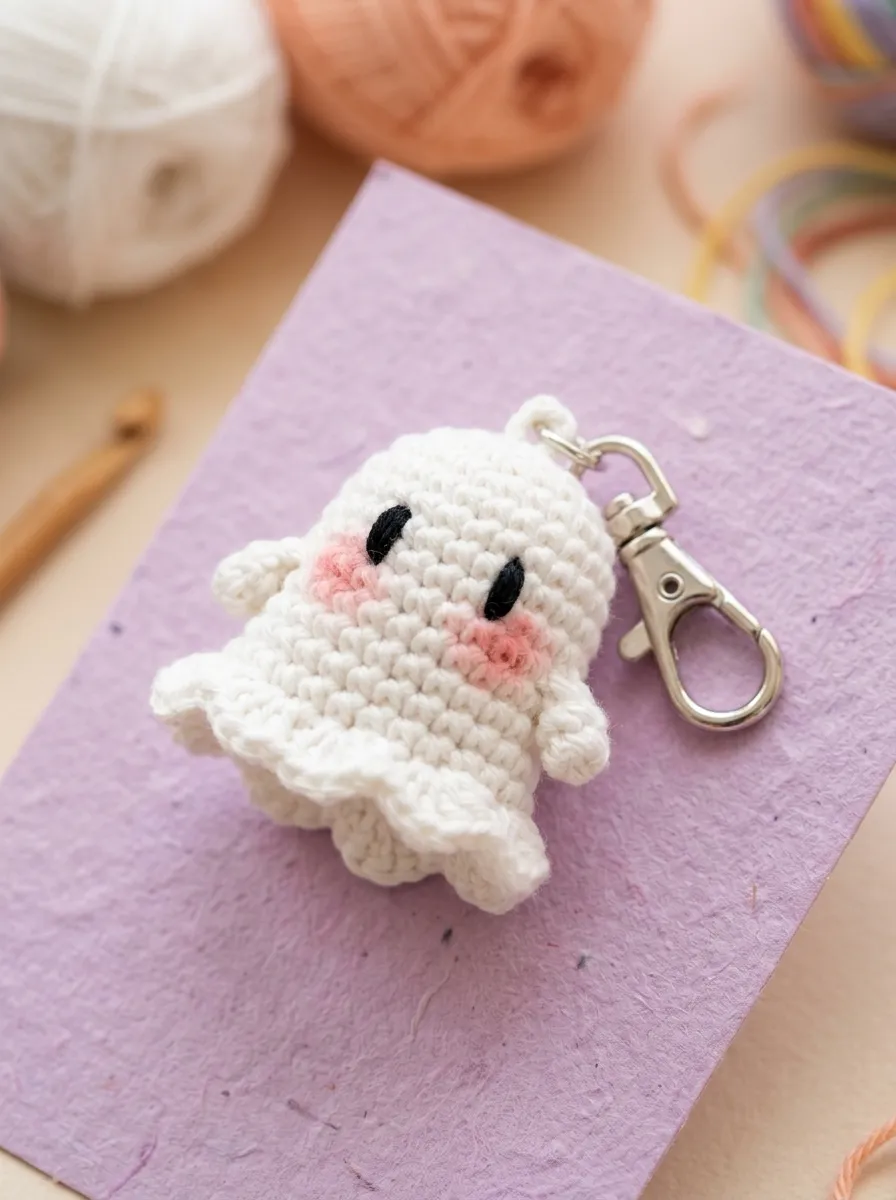
Playful character designs that celebrate gentle fantasy bring humor and comfort to children’s daily routines. This friendly ghost charm features a bell-shaped, flowing white body that flares outward into a wavy, rippled hemline reminiscent of a floating spirit. Two simple black embroidered oval eyes and subtle pink blushing cheeks give the ghost an approachable, welcoming personality that delights children year-round. The flared lower ruffle gives the charm kinetic movement, swishing gently as a child walks with their backpack. The pure white silhouette stands out cleanly against brightly colored bags, jackets, and water bottle pouches, making belongings easy to spot. The simple, unsegmented body has no fragile limbs, ensuring it withstands repeated playground tumbling and everyday rough handling.
Begin by working the ghost body from the rounded head downward using soft white cotton yarn, placing six single crochets into a magic ring and increasing over four rounds to twenty-four stitches. Work eight continuous rounds even to form the straight, bell-shaped torso, then embroider two vertical oval eyes using charcoal embroidery floss placed six stitches apart on the front face. Lightly dust the cheek area beneath the eyes with pink chalk pastel using a small cotton swab. Lightly pack the head and upper torso with polyester fiberfill, leaving the lower third un-stuffed so the skirt remains flexible and hollow. To create the rippled bottom hem, work three single crochets into the front loop of every stitch around the perimeter, producing an undulating, ruffled edge. Close the interior base using a flat crocheted disc sewn inside the skirt behind the ruffle, anchoring a silver lobster clasp to the top crown with reinforced cotton thread.
6. Mini Citrus Slice Keychain Charm
How to Create
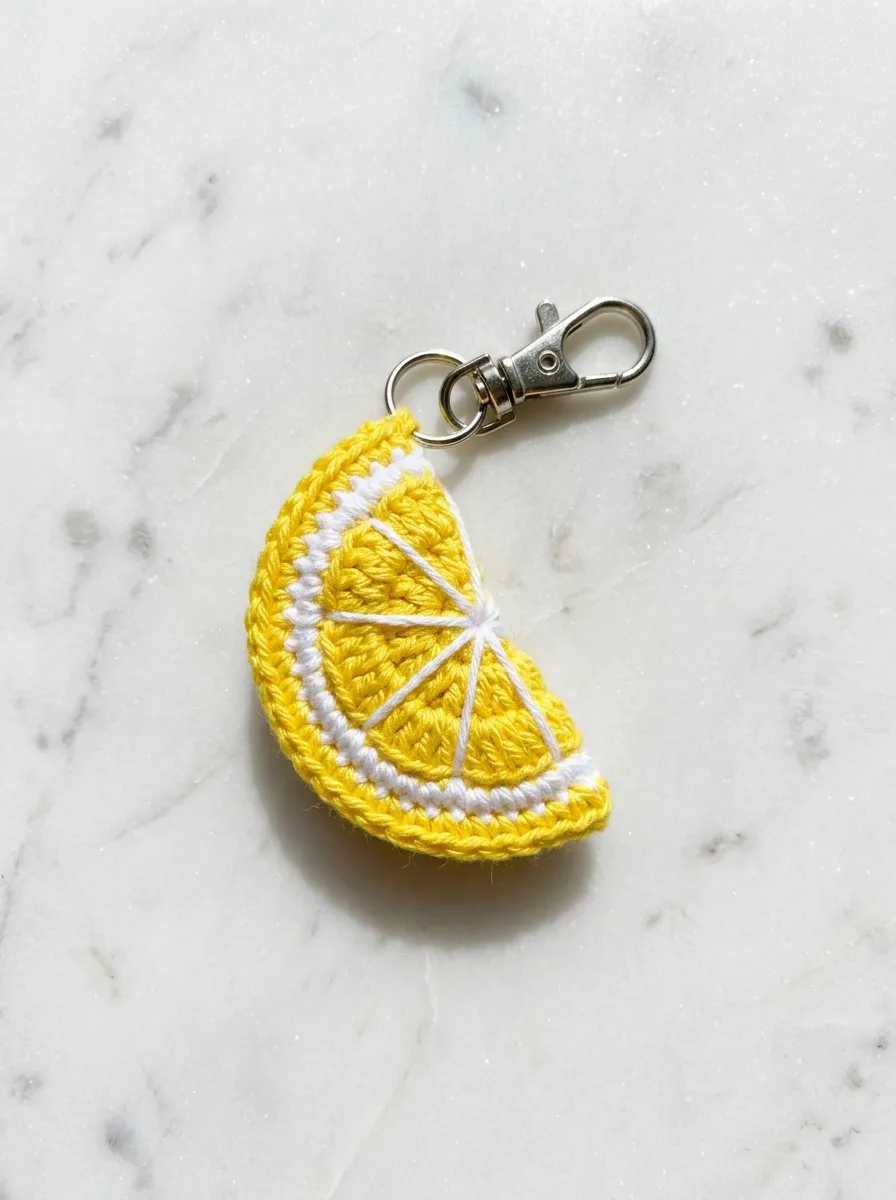
Bright citrus motifs introduce sunny energy, geometric order, and cheerful color combinations to children’s accessories through simple radial designs. This charm project features a compact semi-circular fruit wedge that captures the fresh appearance of a sliced lemon, lime, or orange. The design incorporates a textured outer rind in bright yellow or orange, a thin white inner pith border, and vibrant interior pulp segments separated by embroidered radial lines. The flat, low-profile wedge sits comfortably inside jacket pockets without snagging or poking, making it an ideal companion for school locker keys or library cards. Its sunny, high-contrast palette makes bags easy to locate on crowded bus seats or classroom cubby shelves. The sturdy single-crochet fabric resists bending, ensuring the fruit slice retains its neat triangular outline through everyday play.
Start by working the citrus slice as a flat circular disc, beginning with vibrant yellow cotton yarn in a six-stitch magic ring and increasing evenly across four rounds to twenty-four stitches. Switch to clean white cotton yarn for one round of single crochet to establish the pale inner pith, then transition to deep orange or darker yellow for a final perimeter round to form the outer fruit rind. Surface-embroider six fine radial dividing lines from the center out to the white border using single-strand white thread, splitting the circle into distinct citrus wedges. Fold the completed circular disc in half with wrong sides facing inward to form a sturdy semi-circular wedge, working a line of single crochet stitches through both matching edge layers to seal the straight diameter line. Fasten off with an invisible join, securing a four-millimeter metal jump ring and swivel clip through the outer corner of the folded wedge.
7. Cute Acorn Charm with Oak Leaf Tag
Step-by-Step Guide
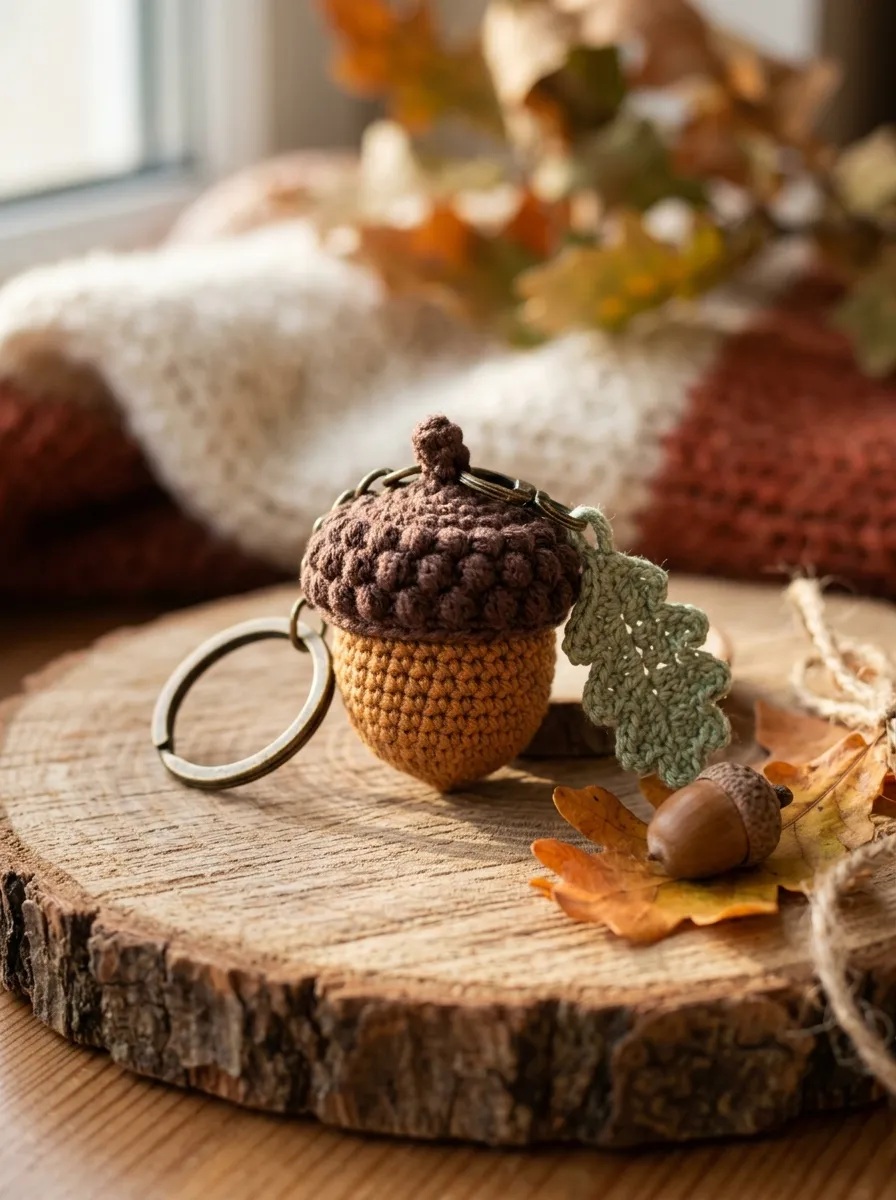
Woodland botanical designs bring earthy textures, gentle forest aesthetics, and natural warmth to children’s everyday accessories. This project features a smooth, egg-shaped acorn body worked in warm caramel cotton, topped with a deeply textured espresso-brown cap and paired with a miniature green oak leaf accent. The defining feature of this design is the raised post-stitch or pebble texture across the acorn cap, which mimics the scaly surface of real forest oak caps. The accompanying tiny green oak leaf hangs loosely from the top jump ring, creating a layered, multi-element accessory that moves dynamically with bag movement. The warm, neutral earth tones complement denim jackets, canvas backpacks, and leather straps, offering a timeless nature-inspired look. The dense, compact shape resists crushing, making it a durable choice for outdoor play and school gear.
To construct the acorn body, work a magic ring of six single crochets in warm caramel cotton, increasing over three rounds to eighteen stitches before working four rounds even to establish an oblong nut shape. Stuff the base firmly with polyester fiberfill, then execute gradual decreases down to twelve stitches before fastening off. To make the textured cap, join espresso-brown yarn in a six-stitch magic ring, increasing to eighteen stitches using alternating single crochets and front-post double crochets to create a raised, pebbled surface. Work two rounds even to build the cap walls, then slip the pre-stuffed caramel nut into the cap and seam the edges together using concealed whip stitches. For the leaf tag, chain eight in sage-green cotton, working slip stitches, single crochets, and double crochets along the chain to shape small undulating lobes. Attach both the acorn cap stem and the leaf stem to a bronze split ring using jewelry pliers.
8. Chubby Baby Chick in Half-Egg Shell
Read This:
Execution Process
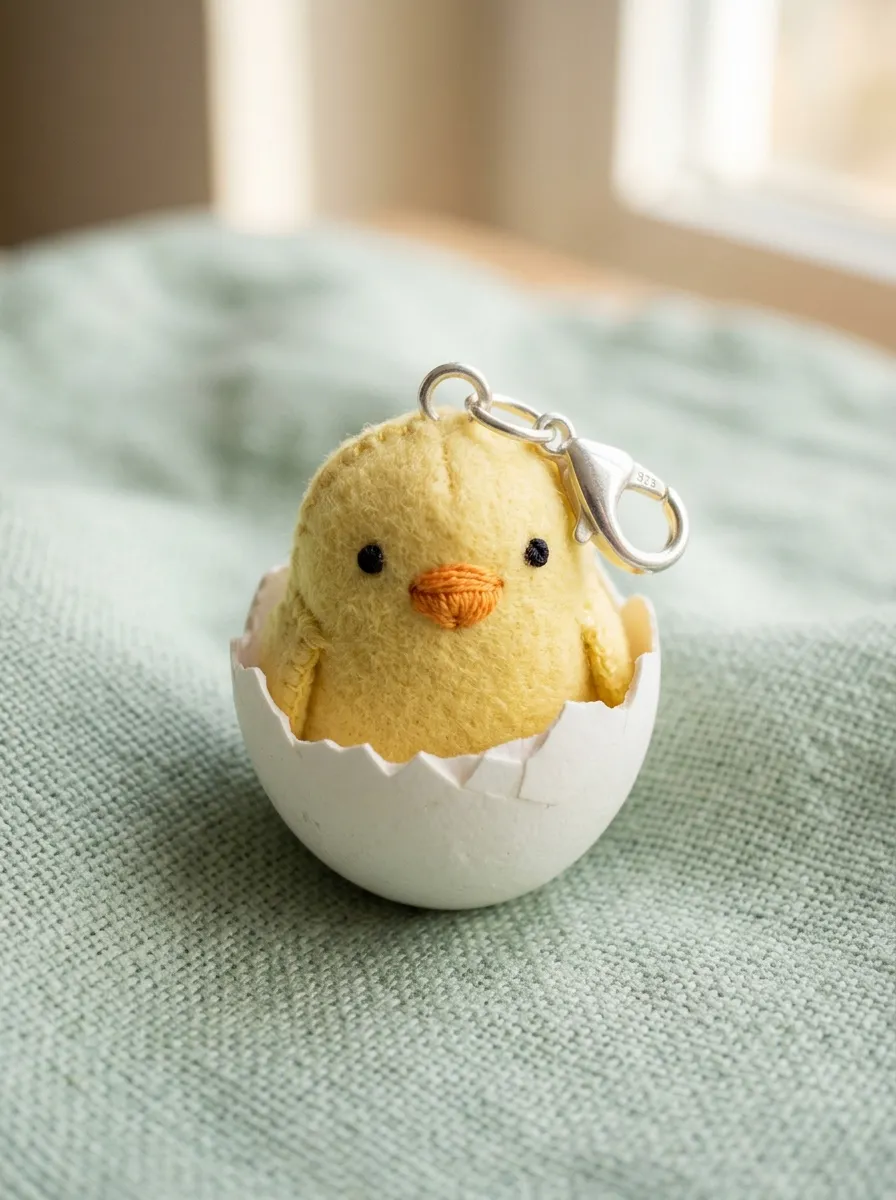
Springtime animal motifs capture youthful wonder and playful charm through rounded silhouettes and bright pastel color blocking. This design features a plump, spherical baby chick head in sunny buttercup yellow, sitting snugly inside a cracked white eggshell cup with jagged zigzag edges. Two tiny black embroidered bead eyes, pink blush marks, and an upturned miniature orange beak give the chick a curious, friendly personality that delights young children. The white eggshell cup wraps securely around the lower half of the yellow body, providing a double-thick foundation that reinforces the charm structurally. The contrast between the smooth yellow face and the crisp, angled white shell points creates delightful visual interest within a compact form. This cheerful charm makes a wonderful spring celebration gift, backpack accent, or coat zipper pull.
Begin by crocheting the chick body using bright buttercup-yellow cotton yarn, working six single crochets into a magic ring and expanding over four rounds to twenty-four stitches. Work four rounds even to build a smooth dome, embroidering two tiny black French knot eyes and a satin-stitched orange triangular beak across the front face. Pack the cavity firmly with polyester batting, then decrease gradually to twelve stitches and fasten off. To construct the cracked eggshell, join white cotton yarn in a six-stitch magic ring, increasing to twenty-four stitches to mirror the chick’s lower dimensions, and work two rounds even. Along the final shell round, create the jagged rim by alternating single crochets with chain-two picots and slip stitches around the perimeter. Insert the yellow chick body into the white shell cup, sewing the two layers together along the inner base with hidden stitches, and attach a silver lobster clasp to the top crown.
9. Smiling Red Amanita Mushroom Charm
How to Create
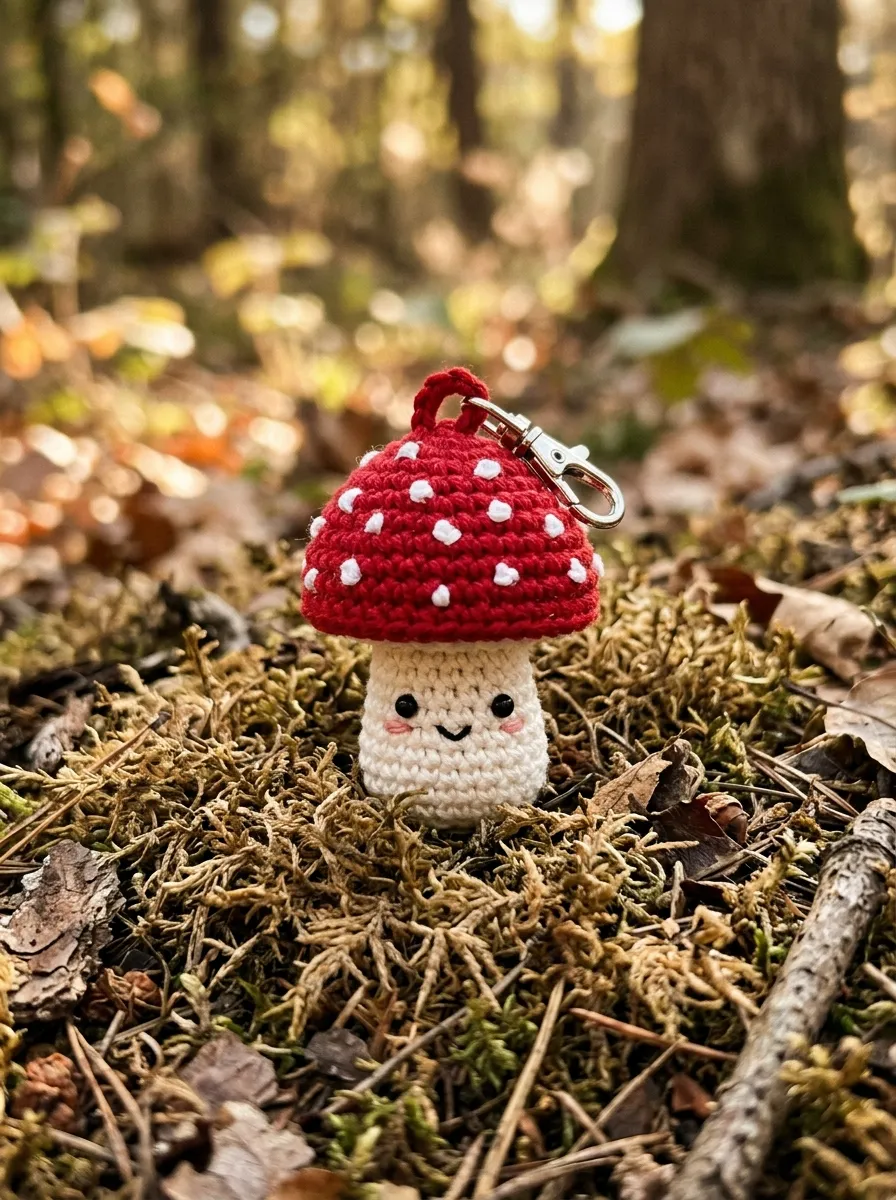
Storybook woodland flora brings folklore charm, rich nostalgic warmth, and bright color contrasts to children’s everyday accessories. This project features an upright forest mushroom with a creamy-white cylindrical stem and a plump, domed cap rendered in vibrant crimson or cherry-red cotton. The bright red cap is decorated with small, hand-embroidered white French knots that simulate natural toadstool spots, creating an iconic, instantly recognizable woodland design. A smiling kawaii face embroidered onto the white stem gives the mushroom a friendly, approachable character that children adore. The wide, flat base of the stem gives the charm structural stability, while the rounded red cap protects the internal stuffing from playground wear. This versatile piece looks delightful clipped to pencil cases, library book bags, or hung from children’s bedroom curtain cords.
To create the mushroom stem, work six single crochets into an adjustable magic ring using unbleached cream cotton, increasing across two rounds to twelve stitches. Work six rounds even in continuous single crochets, embroidering two tiny black eyes and a sweet curved smile onto the front wall before packing the stem firmly with dense polyester stuffing. For the red toadstool cap, start with bright red cotton yarn, expanding a six-stitch magic ring over four rounds to twenty-four stitches, then work two rounds even to produce a deep, rounded bowl. Surface-embroider eight to ten white French knots irregularly across the red dome using two strands of white embroidery floss. Fit the open rim of the red cap over the top of the stuffed white stem, joining the two components together with tight mattress stitches using a tapestry needle. Anchor a sturdy metal jump ring and swivel clasp securely through the center of the cap.
10. Floating Sea Turtle Charm with Textured Shell
Read This:
Step-by-Step Guide
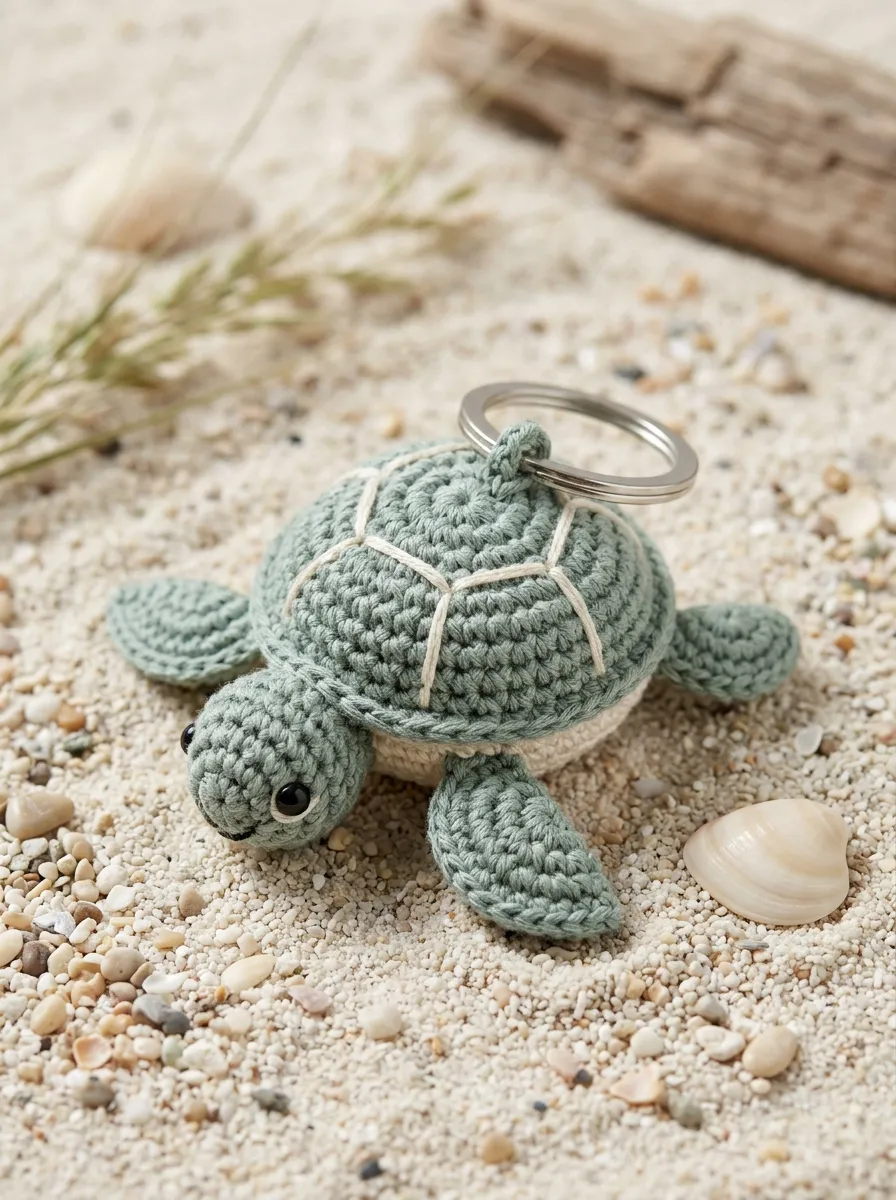
Ocean life motifs inspire curiosity about nature, bringing dynamic shapes and soothing coastal color palettes to children’s accessories. This sea turtle charm features a rounded, textured carapace shell worked in sage green or soft teal, paired with a cream underbelly and four protruding flippers. The shell displays a raised segmented pattern achieved through simple post stitches or embroidered dividing lines, mimicking the natural scutes of marine turtles. A tiny rounded head and small rear flippers extend from the shell margins, capturing the graceful posture of a gliding sea turtle. The low, flattened profile allows the charm to rest comfortably against bag fabrics without catching on surrounding items. Rendered in calming ocean tones, this design appeals to both boys and girls, serving as an encouraging talisman for school days and family trips.
To make the turtle shell, work six single crochets into a magic ring using sage-green cotton yarn, increasing over four rounds to twenty-four stitches, and work one round even in the back loops only to create a crisp shell rim. Embroider a hexagonal grid across the shell dome using dark olive thread to represent shell plates. For the underbelly, crochet an identical twenty-four-stitch flat disc in unbleached cream cotton. To create the limbs, crochet four small flippers by chaining four and working slip stitches and half-double crochets along each chain, along with a small three-round ball for the head. Sandwich the flippers and head between the green shell and cream underbelly, pinning them in place around the perimeter. Join the shell and underbelly edges using a round of single crochet worked through both layers, inserting a light pinch of polyester stuffing before completing the seam. Attach a split ring to the front nose to connect a backpack clip.
Common Beginner Mistakes and How to Avoid Them
The most critical technical error in miniature crochet charm crafting involves maintaining loose stitch tension, which causes the fabric to stretch and allows white polyester stuffing to show through the stitches. Prevent this by selecting a crochet hook that is a full millimeter smaller than the yarn manufacturer recommends, maintaining firm, consistent yarn wraps around your fingers throughout every round. Another frequent challenge is the appearance of jagged, stepped color shifts when working in continuous spirals; solve this by completing the final yarn-over of the previous stitch using the new color strand. Beginners also frequently understuff or overstuff small figures, resulting in either collapsing toys or distorted stitches that pull apart under stress. Stuff your charms progressively using small, pea-sized pinches of fiberfill, pushing the material toward the outer contours to establish a smooth, resilient shape. Additionally, never use fragile jewelry jump rings alone to anchor heavy backpack clips; always pass your hardware through reinforced crochet fabric or use heavy-duty split rings to prevent detachment. Finally, avoid using plastic safety eyes on accessories subject to schoolyard friction, opting instead for secure, hand-embroidered features using colorfast cotton embroidery floss.
Practical Tips for Better Results
Achieving professional, boutique-quality finishes on crochet charms relies on disciplined assembly habits and precise finishing techniques. Always utilize the invisible decrease method instead of standard decreases when shaping three-dimensional curves; inserting your hook exclusively through the front loops of two adjacent stitches produces an uninterrupted, smooth surface that mirrors a standard single crochet. Secure locking plastic stitch markers at the start of every round to avoid losing your stitch count during complex shaping sequences. When attaching limbs or decorative caps, pin all elements in place first using pearl-headed pins to evaluate symmetry and proportions from multiple angles before stitching. Use high-strength nylon thread or double-stranded cotton yarn when securing metal split rings and lobster clasps, anchoring the thread ends with internal square knots buried deep within the polyfill core. To give your finished figures a polished, professional look, lightly steam the completed cotton fabric using an iron held two inches away; this relaxes the fibers, sets the stitch tension, and creates a clean surface without flattening the three-dimensional volume.
Styling, Presentation, or Organization Ideas
Integrating handmade crochet charms into children’s daily routines enhances personal accessories while keeping gear organized, identifiable, and cheerful. Attach matching charm figures to school backpacks, gym duffels, and musical instrument cases using durable swivel clasps, turning everyday carry items into playful, personalized statements. For bedroom organization, install a row of minimalist wooden wall pegs or a wire memo board, hanging your child’s collection of charms by their metal rings to create an orderly decorative display. If presenting these handmade creations as thoughtful birthday party favors or classroom gifts, place each figure inside a small unbleached kraft paper box lined with shredded crinkle paper, tying the exterior with natural baker’s twine and a stamped wooden name tag. You can also color-code children’s belongings using different charm motifs—such as a strawberry for lunchboxes, a turtle for swim bags, and a sunshine for library totes—streamlining morning routines with handmade charm. When photographing your creations for digital portfolios or inspiration boards, use soft morning daylight, neutral linen backdrops, and raw wood surfaces to highlight the fine stitch definition and natural cotton textures.
Budget or Time Planning
Executing a collection of crochet charms for kids requires minimal financial investment and structured time management to maximize creative efficiency. Save on supply costs by purchasing multi-color value packs of sport-weight cotton yarn or using leftover remnants from larger projects, as a single two-ounce skein can yield up to a dozen individual charms. Organize your production schedule using a modular assembly-line workflow: dedicate an initial session to winding yarn scraps and prepping hardware; use a second session to crochet all foundational bodies, caps, and shells; and reserve a final block for embroidery, stuffing, and hardware attachment. Simple, flat designs like the citrus slice or smiling sunshine require approximately thirty to forty minutes of active stitching, making them ideal high-efficiency weekend projects. Keep your active materials organized by storing hooks, stitch markers, safety pins, and matching yarn tails together inside clear, zippered project pouches. Planning your handmade holiday stocking stuffers and birthday gifts several weeks in advance ensures a calm, enjoyable crafting experience, yielding beautifully detailed miniature sculptures without the pressure of rushed assembly sessions.
Creative Expansion and Advanced Inspiration
Once you have mastered foundational charm shaping and assembly techniques, explore creative variations to expand your fiber art designs across wider applications. Adapt your favorite charm figures into an overhead nursery mobile by suspending four or five modified figures from an untreated wooden embroidery hoop using natural waxed cotton cords. You can also translate these patterns into functional home decor by omitting the metal key hardware and inserting strong neodymium magnets inside the stuffing, turning the figures into decorative refrigerator accents or magnetic chore chart markers. Experiment with botanical, hand-dyed cotton yarns to achieve subtle, variegated color transitions across animal bodies and fruit rinds, introducing earthy regional authenticity to your collection. Consider designing themed seasonal variations—such as adding tiny winter scarves, spring flower crowns, or holiday wreaths—using the exact same base charm patterns. Document your custom color combinations, stitch counts, and hardware measurements in a dedicated studio journal, creating a personal design archive that streamlines future creative projects and ensures consistent, professional results across every handmade collection.