Crochet flower charm projects represent one of the most accessible and visually rewarding avenues for fiber artists looking to create functional handmade accessories. This comprehensive guide details how to construct ten distinct botanical charms using accessible techniques, transforming leftover yarn scraps into refined accents for personal items and interior spaces. Readers will learn the essential mechanical steps required to form petals, balance core structural tension, assemble multi-piece components, and fasten reliable hardware like key rings, lobster clasps, and cord loops. Understanding these foundation techniques allows crafters to customize personal belongings such as tote bags, keychains, backpacks, and journals while also producing sustainable handmade gifts. Because these small projects consume minimal yarn and require only fundamental stitches, they offer an ideal entry point for beginners seeking immediate tactile results without committing to the extensive timelines demanded by large garments or blankets. Mastering small floral motifs sharpens stitch consistency, introduces varied tension requirements, and establishes a practical vocabulary of dimensional crochet concepts. By exploring the step-by-step methods outlined throughout this guide, crafters will develop the creative confidence to adapt petal counts, integrate layered palettes, and implement professional finishing touches across all small-scale fiber craft designs.
The surging popularity of crochet flower charms across digital creative platforms stems from a broader cultural movement embracing bespoke personalization, tactile mindfulness, and zero-waste craft habits. Modern design enthusiasts frequently rely on small, interchangeable accents to refresh mass-produced everyday items, turning standard handbags, digital planners, and utility pouches into distinct style statements with elevated aesthetic charm. Furthermore, miniature fiber projects provide an accessible entry point for beginners who might otherwise feel intimidated by complex structural patterns or significant upfront resource investments. Crafting an entire botanical motif requires only a brief time commitment, delivering immediate creative satisfaction alongside practical functional value. This quick feedback loop promotes genuine skill development, as fundamental stitches such as single, half-double, and double crochet are practiced and mastered within compact rows. Additionally, these projects resonate strongly with environmentally conscious makers focused on sustainable crafting habits, as minute charms cleanly repurpose odd yarn remnants from past endeavors that would otherwise be discarded. The resulting handmade pieces blend contemporary design palettes with timeless artisan techniques, maintaining a prominent place in creative styling culture.
Successful charm construction requires proper preparation alongside the thoughtful selection of yarn weights, hook sizes, and complementary hardware fasteners. Mercerized sport-weight or lightweight cotton yarn serves as the industry benchmark for miniature floral designs because its tightly spun fibers resist fraying, define crisp stitch definition, and resist long-term surface abrasion. Pair this yarn with an ergonomic aluminum hook sized between 2.25 mm and 3.0 mm to ensure tight stitches that maintain dimensional shape without warping or drooping over time. In addition to fiber, gather sharp embroidery scissors, blunt metal tapestry needles, stitch markers, and brass or silver-plated hardware components like jump rings, swivel lobster clasps, and split rings. Before initiating your first stitch, map out your color scheme across the center core, petal layers, and leaf stems to secure cohesive visual contrast. Establish a comfortable working tension by working through a modest test swatch, verifying that your chosen hook yields stiff, compact fabric rather than loose loops. Organizing these materials on a flat surface beforehand establishes efficient workflow, eliminates mid-project disruptions, and ensures that every finished charm exhibits structural stability and clean craftsmanship.
1. Classic Daisy Keychain with Hanging Foliage
Step-by-Step Guide
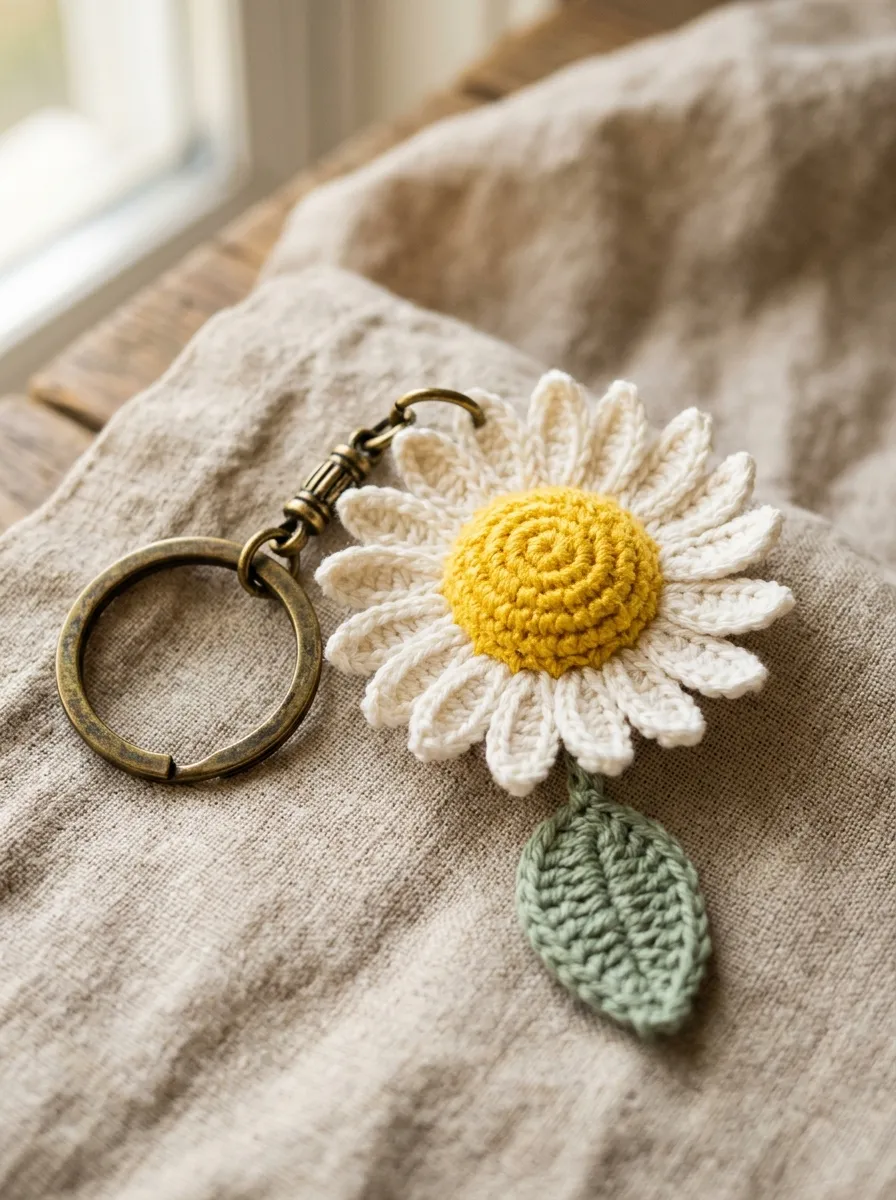
The traditional daisy motif provides an enduring aesthetic standard through its high-contrast color scheme, flat center disc, and radiant surrounding petals. This design pairs a rich golden-yellow circular core with crisp off-white oblong petals, completed by a pendant green leaf tail that anchors the entire assembly. The core foundation relies on working continuous single crochet stitches inside an adjustable ring, establishing a firm base that refuses to stretch out under the weight of metal hardware. Each perimeter petal emerges directly from the core edge using vertical chain runs linked with treble crochet clusters, generating narrow, defined petals that retain straight architectural lines. The contrast between the rigid, rounded central disc and the delicate radial petals produces a balanced silhouette suitable for utility keys and canvas bags. Adding a small pendant leaf dangling beneath the primary flower introduces gentle vertical motion, softening the geometric profile and lending an organic, garden-inspired character to the entire composition.
To construct this charm, initiate a magic ring using bright yellow sport-weight cotton yarn and work six single crochet stitches directly into the center loop. Pull the tail end firmly to eliminate any central void, then slip stitch into the starting stitch to close the foundational circle. Switch to cream yarn by pulling the new fiber through your live loop, chaining five stitches upward to define the petal height. Work two treble crochet stitches into the very next foundation stitch, chain five downward, and slip stitch back into the exact same base location to finish the petal. Repeat this mechanical sequence across all base stitches until you yield twelve identical petals surrounding the circle. To build the pendant foliage stem, anchor green yarn to the bottom edge, crochet a chain of fifteen stitches, and work three consecutive slip stitches, three single crochets, and one picot at the tip before weaving your tails cleanly into the flower back.
2. Dimensional Layered Rose Handbag Accent

Read This:
How to Make
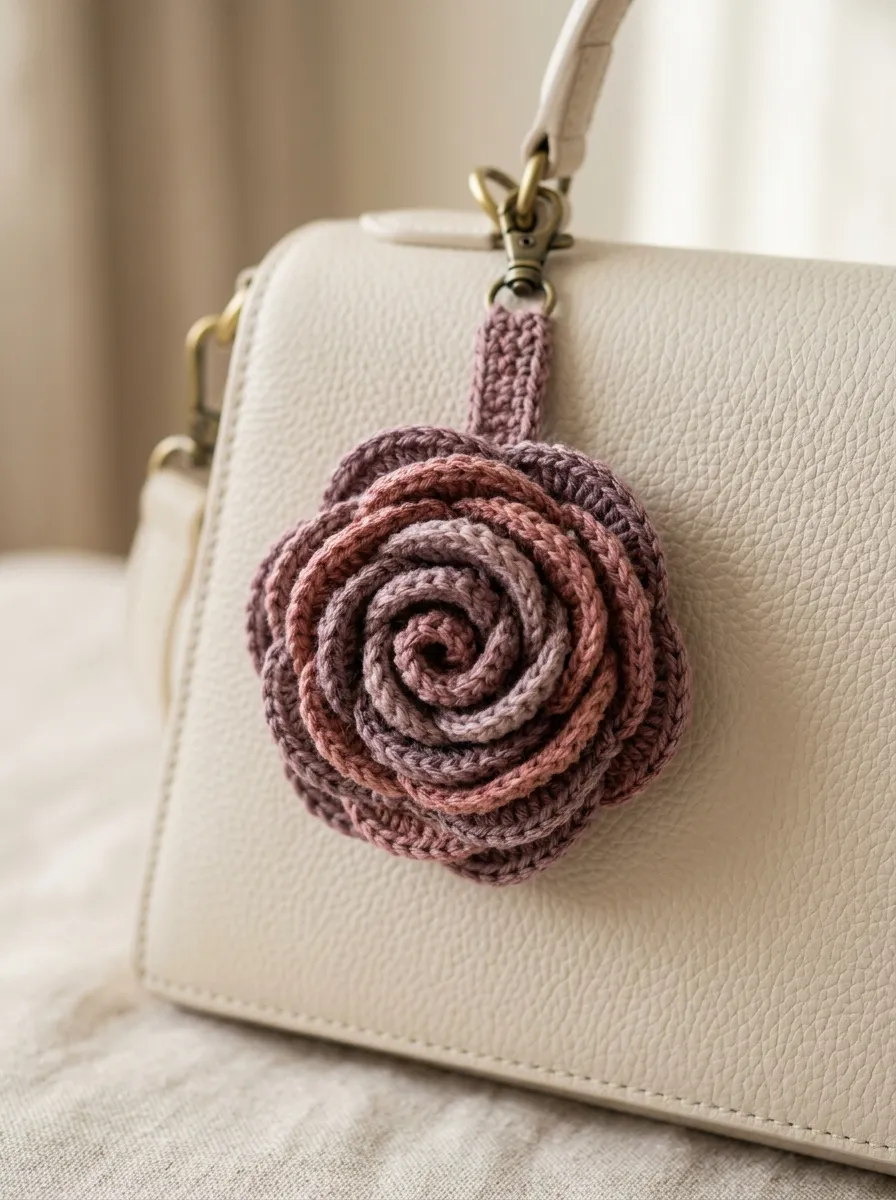
The layered rose motif brings tactile luxury to minimalist totes and woven summer bags through spiral petal construction and rich visual depth. Unlike flat circular motifs, the miniature rose relies on a graduated ribbon of stitches that coils inward, creating overlapping layers of delicate petals that mimic natural botanical folds. Deep tones such as dusty mauve, vintage terracotta, and antique cream enrich this dimensionality, catching natural ambient light within the sculpted crevices. The underside features a flattened, reinforced calyx base that prevents the flower from rolling sideways against exterior bag fabrics, keeping the petals oriented upright throughout daily handling. This structural design also provides internal space to anchor a strong split ring or leather cord without distorting the outer petals. The resulting charm displays a sophisticated balance of classic romance and modern artisan styling, serving as an elevated focal point across clean, understated accessories.
Begin construction by chaining thirty-one foundational stitches using a mercerized cotton yarn and a 2.5 mm crochet hook. In the second chain from the hook, execute a single crochet, then chain two, skip one underlying chain, and place a single crochet into the adjacent space, repeating across the row to create a light foundational lattice. Turn the work to begin the petal layer, placing one single crochet, one half double crochet, three double crochets, and one single crochet inside every open chain-two space along the first third of the strip. Expand the middle third by incorporating full treble stitches to yield taller petals, then return to standard double crochets along the outer third. Fasten off with a twelve-inch yarn tail, thread this tail onto a tapestry needle, and gently coil the crocheted strip tightly from the shorter end outward into a spiraled rose profile. Sew securely through the back foundation ridges to lock every layer in place, then attach a sturdy jump ring to the rear center.
3. Mini Sunflower Mirror Hanging Decor
Execution Process
Sunflowers carry bold, rustic charm, serving as striking visual accents when suspended from vehicle rearview mirrors, curtain holdbacks, or desktop organizers. This design relies on a prominent, textured dark brown center surrounded by two staggered rows of pointed, vibrant golden-yellow petals that capture an energetic, sunny presence. The textured core is achieved by working through the front loops only during the initial rounds, which leaves the back loops exposed to receive the secondary layer of offset petals. This dual-layer format eliminates flat gaps, yielding a dense, dimensional blossom that maintains its structural presence from all viewing angles. A slender twisted suspension cord attached to the top petal permits smooth, tangle-free hanging at any desired height. The pairing of earthy chocolate tones with luminous saffron yellows delivers a warm aesthetic that harmonizes effortlessly with wood grains, natural fibers, and contemporary interior textiles.
Create the central disc by working six single crochet stitches of espresso brown yarn into an adjustable loop, pulling the ring snug to close the center. Increase evenly across two subsequent rounds by working two single crochets into each stitch, followed by an alternating sequence of one single crochet and one increase, yielding eighteen base stitches. Fasten off the brown yarn cleanly, then introduce golden-yellow yarn through the front loop of any outer stitch. To build pointed petals, chain three, execute an extended double crochet into the same loop, form a three-chain picot at the crest to create a sharp petal tip, chain three downward, and slip stitch into the adjacent front loop. Continue this sequence across all eighteen front loops, then repeat the exact process inside the unused back loops, staggering the placement to fill the background gaps. Weave in all interior ends carefully, then attach a secure six-inch twisted loop to the upper reverse edge.
4. Cascading Lily of the Valley Bell Cluster
Read This:

Step-by-Step Guide
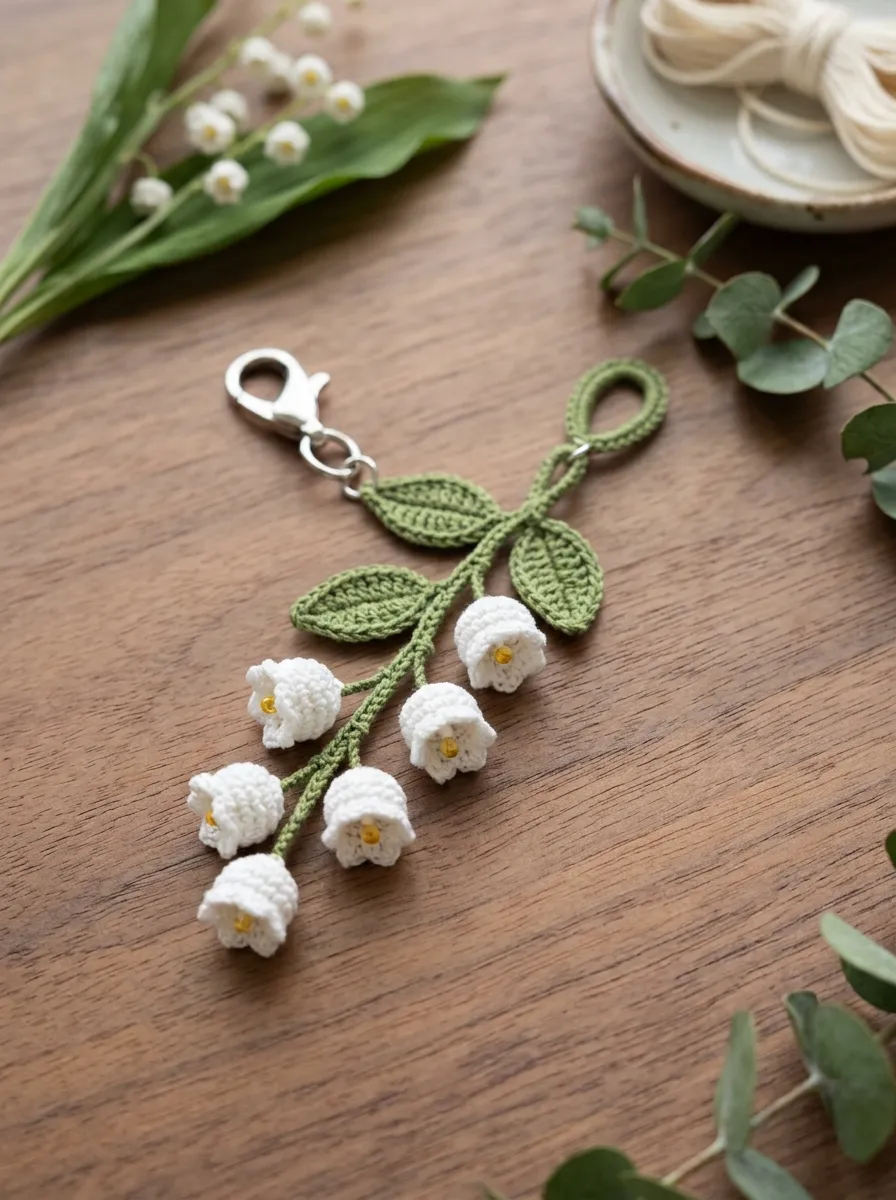
The lily of the valley charm adopts a dynamic cascading layout rather than a single blossom format, using three-dimensional bell florets attached to a central foliage vine. Each bell floret features a delicate hollow cup with scalloped, outward-flaring edges, capturing the gentle botanical grace of wild woodland flora. These small white blossoms hang at graduated intervals along an arched green stem, creating organic vertical movement that sways smoothly alongside everyday motion. The soft contrast between pristine white bell cups and deep moss-green foliage creates a calm, minimalist aesthetic that complements structured leather backpacks and understated key collections. Because each miniature bell is worked in continuous rounds using tight single crochet, the three-dimensional cups maintain their hollow, cupped form naturally without requiring stiffening sprays, wires, or synthetic fabric stabilizers.
Begin by crafting the individual florets using fine sport yarn, working six single crochet stitches into a magic ring. Work two rounds of even single crochet stitches without increasing to form the vertical walls of the small hollow cup. Along the third round, create the scalloped floret edge by cycling through a slip stitch, a half double crochet, and another slip stitch inside every available stitch around the rim, fastening off with a clean needle finish. Repeat this process to produce three or four separate bell florets. Next, pick up green yarn to generate the vine, chaining twenty-five stitches to establish the backbone. At designated points along the chain, branch outward with short five-chain spurs, slip stitching directly into the top crest of each prepared bell to anchor it to the stem. Finish the vine by adding two small elliptical leaves along the top loop using graduated stitches, then knot the excess yarn into a hardware mounting loop.
5. Petite Potted Succulent Plant Charm
Setup Method
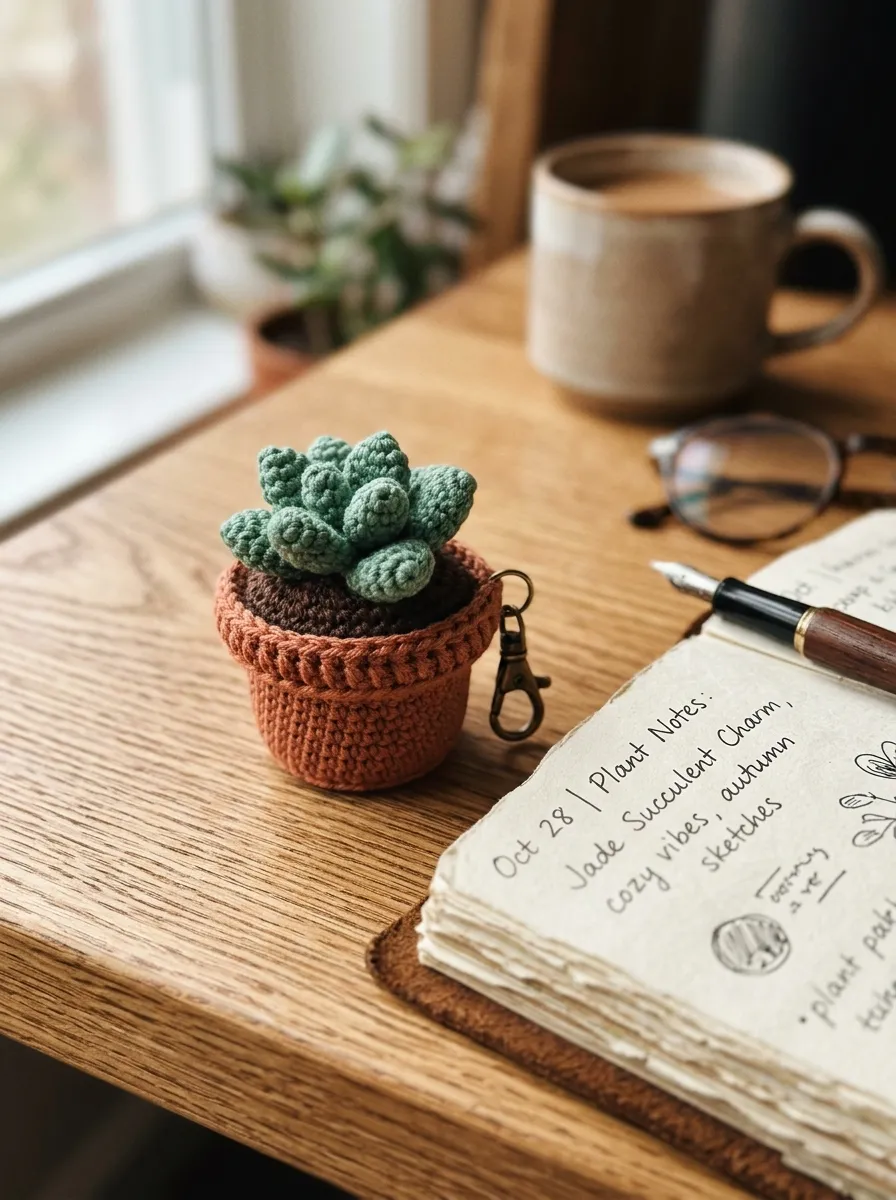
Miniature potted plant designs transform traditional botanical motifs into playful, three-dimensional micro-sculptures that bring garden-inspired character to everyday carry items. This charm incorporates three distinct structural components: a tapered terracotta-colored pot base, an inner dark soil mound, and a dense cluster of pointed succulent leaves bursting from the center. The container is worked tightly from the base upward using back-post single crochet to build crisp, structural corner edges that stand flat when resting on level desks or shelves. Inside, a dense hemisphere of dark fiber forms an anchoring core that firmly supports the fleshy green succulent leaves. The resulting balance between geometric pottery contours and soft organic foliage creates an eye-catching accent that charms plant enthusiasts and fiber crafters alike. Its compact footprint ensures it rests comfortably against keyrings without catching on nearby pocket linings.
Start the pot by working six single crochet stitches of terracotta yarn into a magic loop, increasing evenly until twelve stitches are established. Work one complete round into the back loops only to define the crisp bottom rim of the flower pot, then continue upward in continuous rounds for five levels, increasing two stitches along the final round to yield a subtle outward taper. Form the inner soil foundation using dark brown yarn, working a matching twelve-stitch dome lightly filled with raw wool or cotton scraps, then stitch this soil insert securely inside the pot rim. To form the succulent foliage, join jade green yarn to the soil surface, chaining four, executing a half double crochet and a double crochet back down the chain, and slip stitching back into the base. Repeat this leaf formula in tight concentric spirals, clustering eight to ten leaves tightly together so they arch outward naturally from the pot center.
6. Delicate Cherry Blossom Duo with Pearlescent Core

How to Create
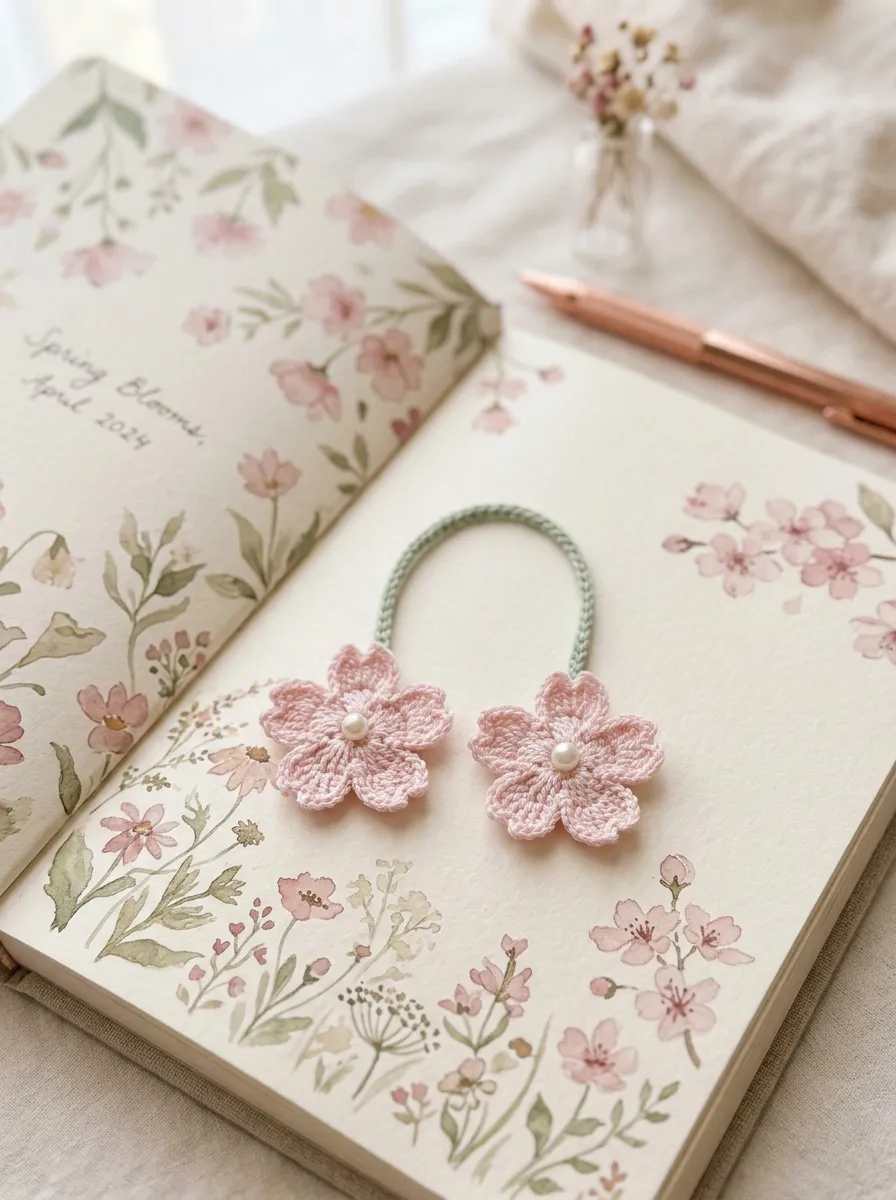
The cherry blossom charm draws inspiration from classic springtime blossoms, pairing gentle pink tones with subtle pearlescent centers to achieve an airy, romantic design. This construction features two linked blossoms of slightly varied diameters, joined by a soft woven stem and balanced by a petite leaf shoot. The petals are worked with smooth, rounded contours that dip inward at the center edge, creating the iconic notched petal silhouette found on natural flowering branches. Soft pastel pink fibers blend naturally against crisp white background tones, while the addition of a centered ivory bead or French knot detail adds dimension and catches the light. This charm makes an exquisite, lightweight companion for personal planners, cosmetic cases, and pastel tech accessories. The flat profile rests smoothly against flat surfaces, preventing snagging while highlighting subtle transitions in crochet stitch height.
Begin the primary blossom using baby pink yarn, working five single crochet stitches into an adjustable loop and joining with a slip stitch. In the first stitch, chain two, work two double crochet stitches, chain one, place a single slip stitch directly into the top of the second double crochet to carve a subtle petal notch, work two additional double crochet stitches, chain two, and slip stitch back into the starting foundation stitch. Complete this mechanical petal sequence inside each of the remaining four base stitches to produce a symmetrical five-petal blossom. Create a secondary blossom following the same sequence, but replace the double crochets with half double crochets to yield a noticeably smaller floret. Join both blossoms at their reverse side using pale green yarn, chaining twelve stitches between them to establish a connecting bridge, and sew a miniature pearl bead securely into the center of each floret using a fine tapestry needle.
7. Bohemian Fringe Wildflower with Wooden Beads
How to Make
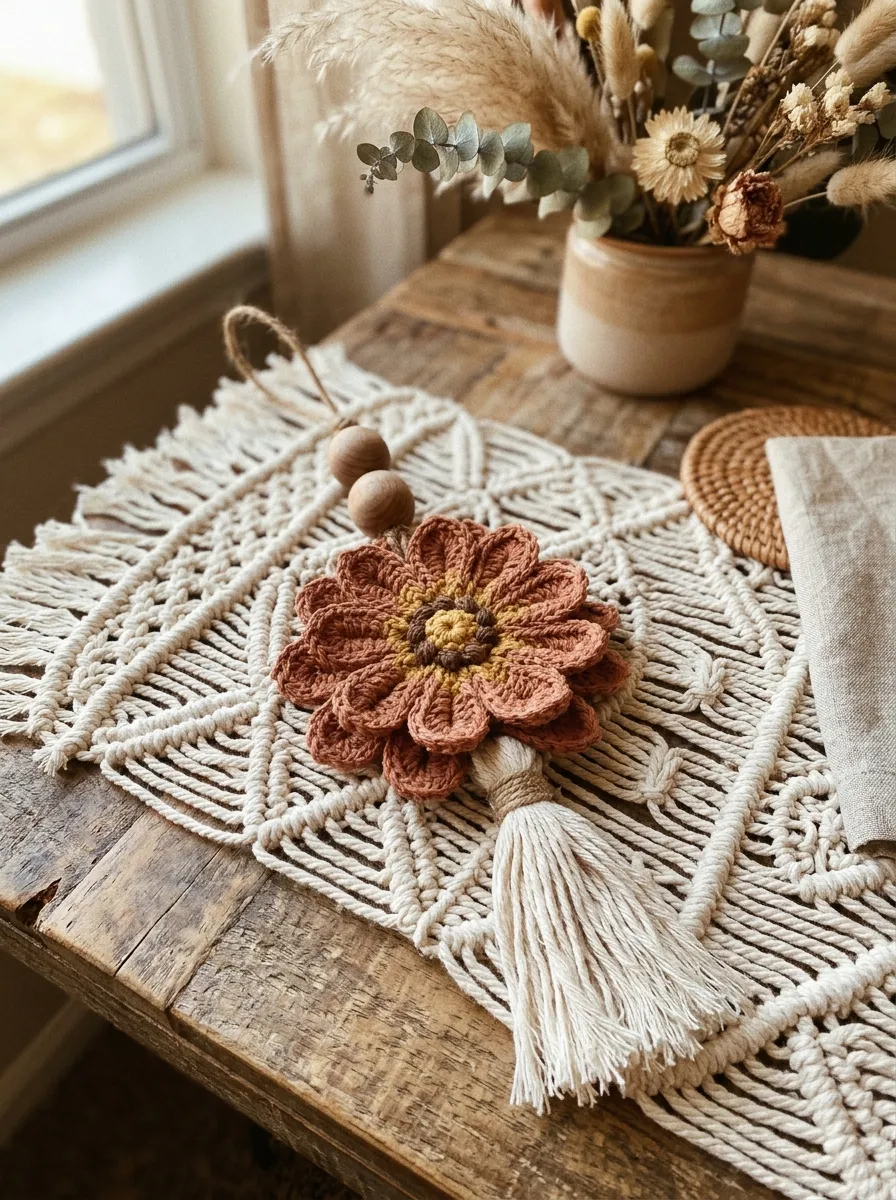
Bohemian-inspired wildflower charms blend soft fiber textures with raw natural wood accents to deliver an earthy, relaxed design profile. This charm centers on an open-petal wildflower stitched in muted earth tones, such as mustard, sage, or burnt sienna, anchored by a tail of raw cotton fringe along the lower base. The petal ring uses elongated triple-treble clusters separated by airy eyelets, establishing a light, breezy framework that drapes naturally against unstructured fabric surfaces. Threading untreated wooden beads along the upper loop introduces natural warmth, bridging the gap between delicate crochet craftsmanship and rustic decorative art. This hybrid approach makes the charm an exceptional pairing for canvas backpacks, macrame totes, and festival accessories. The unspun hanging fringe moves freely, lending fluid motion and casual, tactile beauty to the finished handmade accessory.
Create the central motif using neutral tan sport yarn by chaining six stitches and joining them with a slip stitch to form a wide internal eyelet. Chain four to represent the initial treble height, then work three incomplete treble crochets into the ring, pulling yarn through all remaining loops simultaneously to form a closed cluster. Chain three to create breathing space, then repeat this cluster technique five more times until six wide petals ring the central eyelet. Switch to an earthy terracotta yarn, working single crochets and tiny picots around the rim of each petal to produce an organic wildflower edge. Cut six four-inch strands of raw unmercerized cotton yarn, fold them in half, and loop them through the bottom two petals using a standard lark’s head knot to establish your fringe. Comb the fringe gently with a fine-toothed tool to separate the yarn plies, then thread two natural wooden beads onto the top suspension cord.
8. Plump Two-Tone Violet Posy Charm
Read This:

Step-by-Step Guide
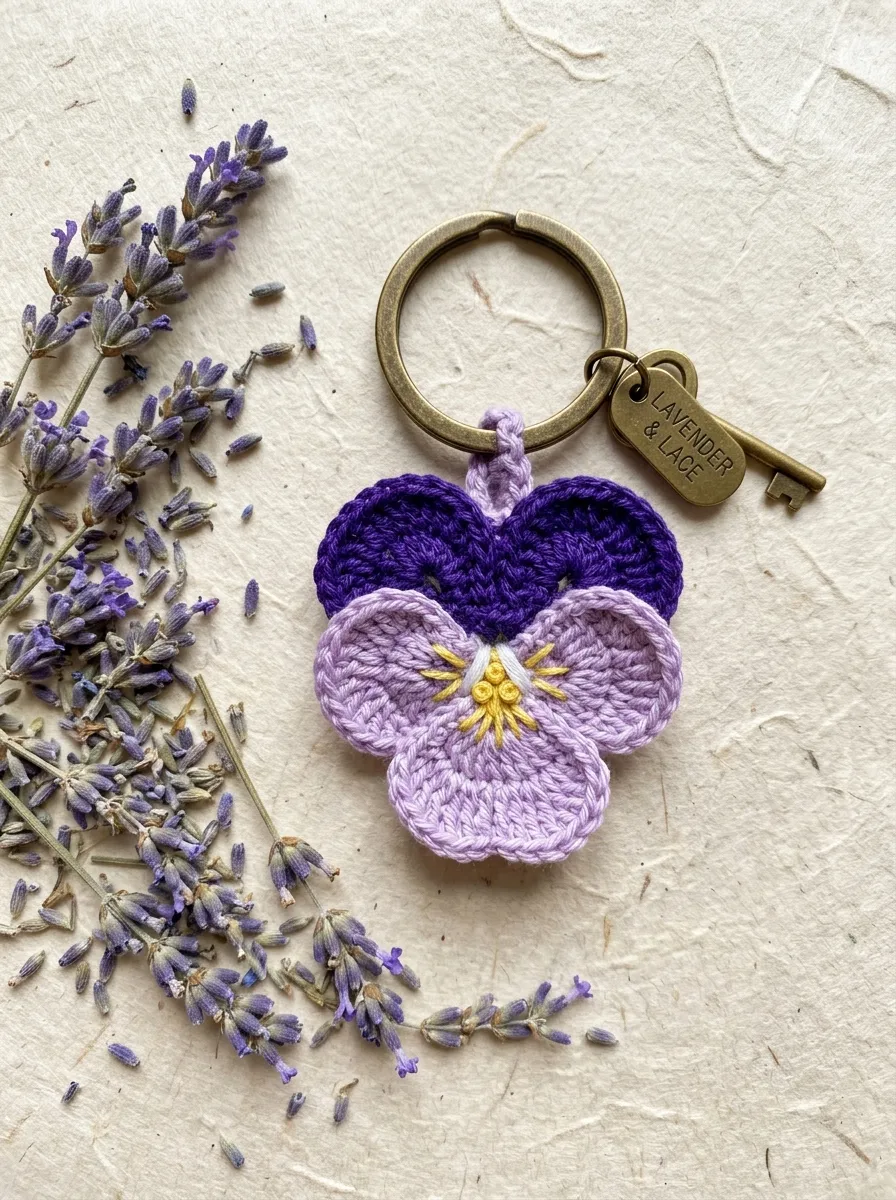
The traditional violet motif offers visual interest through asymmetric petal structure and deep, contrasting two-tone color blocking. Wild violets naturally display two dominant upper petals dressed in deep royal purple, paired with three broader lower petals finished in lavender, lilac, or soft periwinkle. This asymmetric arrangement sets the violet charm apart from standard radial circular flowers, giving the piece an organic, distinctive silhouette. The bottom petal also features a splash of vibrant yellow at its core, creating a bright central highlight that anchors the cooler purple tones. This compact design yields a dense, durable flower that keeps its shape remarkably well, making it ideal for daily keychain usage where accessories face constant movement inside pockets and bags. The finished posy looks like a pressed field bloom frozen in durable fiber art.
Begin by anchoring deep purple yarn into a magic loop, chaining three, and placing two double treble crochet stitches directly into the center loop. Chain three downward and slip stitch into the hub to finish the first large upper petal, then immediately repeat the exact sequence in the next space to build the second upper petal. Fasten off the deep purple fiber cleanly. Join a contrasting light lavender yarn into the adjacent space within the ring to begin the lower petal trio. For these three lower petals, chain two, work three double crochet stitches into the base, chain two, and slip stitch down, repeating this smaller sequence three times consecutively around the remaining ring opening. Pull the starting tail firmly to close the magic ring tightly, locking the asymmetric petals into place. Use a needle threaded with golden embroidery floss to stitch three straight accent rays outward from the center over the lavender petals.
9. Modernist Abstract Poppy Charm
Execution Process
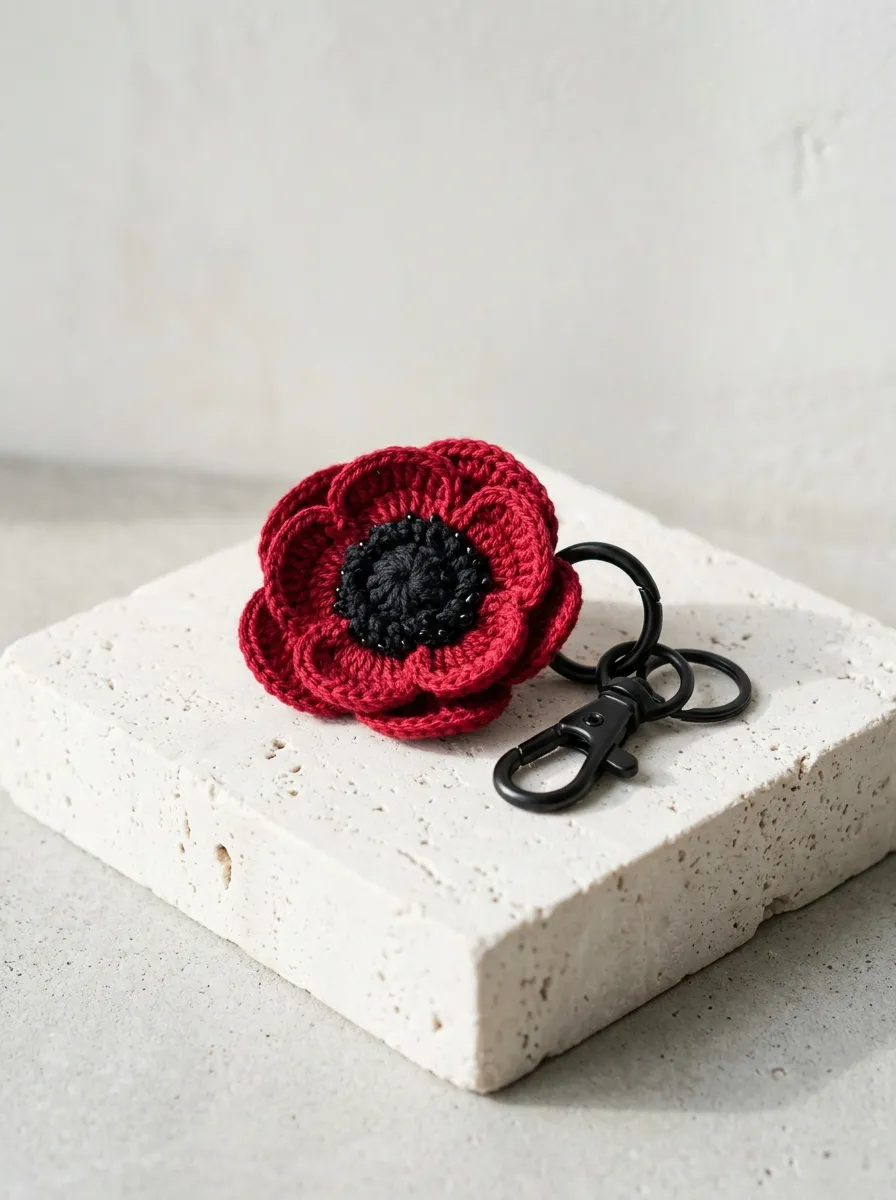
The modernist poppy charm reimagines classic floral forms through bold, graphic minimalism, featuring overlapping, curved petals and a striking black center. Moving away from intricate lace borders, this design prioritizes clean lines, broad curved surfaces, and saturated vermilion red fiber. The petals overlap distinctly, curving outward to build a shallow, sculptural bowl that holds its shape through firm, dense single crochet stitches. At the center, an elevated black and moss-green seed capsule creates strong architectural contrast, giving the piece a contemporary gallery aesthetic. This clean visual styling makes the poppy an ideal accent for structured leather goods, modern briefcases, and monochrome travel bags. Its simple geometry withstands regular daily friction without snagging, balancing artisanal warmth with polished, modern design principles.
Form the central poppy capsule using charcoal black yarn by working six single crochet stitches into a magic ring, working one subsequent round of six single crochets to build a raised central button, and switching to vibrant crimson yarn. To build the first broad petal, work two single crochets into the first two available stitches, chain one, turn, and double the stitch count across the next two rows by increasing in every stitch to create an outward fan. Work one round of slip stitches around the rounded perimeter of the fan to establish a firm, clean structural edge, then fasten off. Join the red yarn three stitches to the right of the completed petal to work the second wide petal, allowing its edge to overlap the first layer naturally. Once both petals are completed, fasten off all ends on the reverse side, attach a minimalist matte-black lobster clasp, and anchor it firmly behind the central capsule.
10. Whimsical Daisy Bell-Chime Bag Dangle
Setup Method
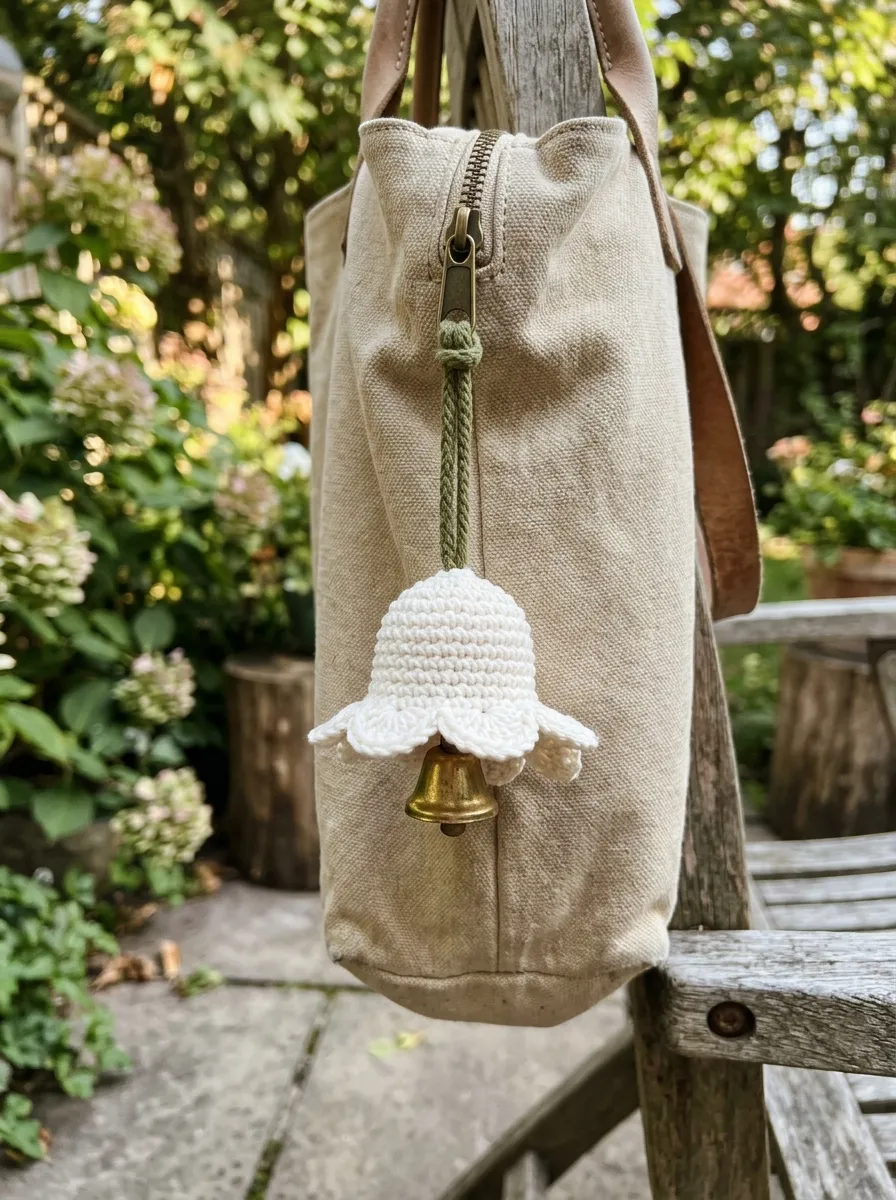
The bell-chime daisy dangle expands traditional floral crochet by incorporating auditory charm through a concealed miniature brass bell hidden beneath downward-curving petals. Shaped like a campanula or hanging bell-flower, this piece drapes downward, shielding an interior chime that produces a gentle, clear sound with movement. The petal exterior features clean white or soft buttercup tones, finished with a gently scalloped rim that flares outward like an open bell. A slender foliage cord runs downward through the hollow apex of the bloom, securing the metal chime internally while extending upward into a braided strap for attachment. This imaginative charm appeals to makers who enjoy multisensory accessories, bringing tactile fiber softness, graceful movement, and quiet sound to everyday bags and key bundles. The durable dome construction protects the inner hardware from direct exterior impacts, ensuring reliable longevity.
Begin at the crown of the bell using pale cream cotton yarn, working six single crochet stitches directly into a magic ring. Continue working in continuous rounds, increasing by two stitches per round across the next three rounds until a circumference of twelve stitches is established. Work four subsequent rounds evenly without increasing, allowing the fabric to naturally cup downward into a smooth, hollow bell shape. At the lower rim, expand the border by working a sequence of one single crochet, one half double crochet, two double crochets, and one slip stitch across each pair of stitches, yielding a gentle outward flare. Fasten off and weave in the exterior tail. Take an eight-inch length of green cord, thread a small brass bell onto the center point, tie a double knot directly above the bell loop, and thread the remaining cord upward through the central hole of the flower bell, securing it with an upper knot to lock the chime safely inside.
Beginner crafters frequently encounter structural issues when creating crochet flower charms, with uneven tension serving as the primary cause of loose, floppy petals. When tension runs too slack, delicate botanical designs lose their shape, curling inward irregularly or drooping under the weight of metal hardware rings. To resolve this, choose a hook size half a millimeter smaller than the yarn label suggests, creating firm, compact stitches that hold their shape naturally without synthetic stiffening sprays. Another frequent mistake involves leaving the central adjustable loop slightly open, which allows the core of the flower to stretch outward and unravel over time. Prevent this by pulling the magic ring tail firmly until the center closes completely, then knotting the tail securely on the reverse side with a blunt tapestry needle before trimming. Crafters also frequently struggle with improper hardware attachment, often sewing clasps directly onto single yarn plies that stretch and fray under stress. Always anchor split rings and lobster clasps through multiple structural loops or through the dense center disc to distribute pulling force evenly across the entire charm framework.
Elevating the visual quality of handmade crochet charms relies on implementing refined finishing techniques that mirror commercial design standards. Blocking remains an indispensable step; lightly steaming finished petals using a household iron held several inches away relaxes the cotton fibers, evening out stitch irregularities and setting a clean, professional profile. When weaving in remaining yarn ends, run the tail in three opposing directions through the back of dense stitch clusters, preventing friction from dislodging the ends during everyday movement. Experimenting with variegated or hand-dyed yarns also introduces organic depth to petal edges, mimicking the subtle color shifts found in living garden blooms. For layered designs, adding a tiny dot of fabric adhesive to the back anchoring knots locks the construction firmly in place without compromising the front fiber texture. Finally, pair your crochet work with high-grade brass, matte black, or antique bronze hardware rather than lightweight craft wire, as sturdy clasps elevate the perceived craftsmanship and overall durability of your finished accessories.
Presenting and styling finished botanical charms opens up diverse possibilities across personal accessories, gifting presentations, and home decor arrangements. Attach an individual blossom charm to the zipper pull of an everyday cosmetic bag, backpack, or tech pouch to add distinct personality and easy grip functionality. Cluster three coordinating charms of varied stem lengths along a single brass ring to create a dynamic, layered bouquet keychain that moves fluidly with handling. Beyond personal fashion, these miniature floral creations work beautifully as interior accents; wrap the hanging foliage cords around fabric curtain tiebacks, suspend them from cabinet handles, or loop them over the necks of decorative ceramic vases to introduce soft texture to living spaces. For craft fairs or handmade gifts, pin charms onto heavy cardstock cards printed with botanical illustrations or care instructions, wrapping the excess cord neatly behind the backing. This elevated, boutique-style packaging protects the petal shapes during storage while highlighting the intentional craftsmanship behind every stitch.
Completing small crochet charms efficiently requires intentional project planning and mindful allocation of working time and materials. A single floral charm typically requires between thirty and forty-five minutes from the initial loop to the final hardware fastening, making these designs ideal for focused, single-session crafting. To optimize your creative time, adopt an assembly-line workflow when producing multiple charms: crochet all the central discs first, follow with the petal rounds, and finish by joining hardware across the entire batch. In terms of budget, these miniature projects are exceptionally cost-effective, with a single fifty-gram ball of cotton yarn yielding upwards of eight to ten complete charms. Take advantage of leftover yarn scraps from past sweater, blanket, or scarf projects to minimize material costs to near zero. Setting up a dedicated notion tin with pre-cut hardware rings, tapestry needles, stitch markers, and small yarn balls keeps your supplies organized, allowing you to pick up projects effortlessly during quiet evenings or travel windows without unnecessary preparation delays.
Once foundational charm techniques feel natural, makers can explore advanced variations that push the boundaries of miniature fiber art. Try working with fine lace-weight threads and micro-hooks below 1.5 mm to shrink standard patterns down to delicate jewelry scales, producing dainty earrings, delicate charm bracelets, and pendant necklaces. Alternatively, introduce mixed-media components by weaving metallic embroidery floss alongside cotton yarn to catch the light, or incorporate small polished gemstones, glass beads, and vintage buttons into the flower centers. You can also connect multiple floral motifs horizontally along an extended chain cord to build lush botanical garlands, window valances, or bag straps that showcase complex artisan craftsmanship. Exploring dimensional embroidery techniques, such as adding bullion knots, satin stitching, or French knots directly onto finished crochet petals, brings further textural realism to your work. Documenting your evolving colorways, stitch variations, and hardware combinations in a dedicated project journal builds an enduring library of personal inspiration, fueling creative exploration across future handmade projects.