Crochet amigurumi charm patterns represent one of the most engaging ways to produce miniature fiber art, blending the Japanese tradition of sculpted yarn figures with portable accessory craftsmanship. This comprehensive guide details ten distinct amigurumi charm designs, providing makers with clear mechanical steps to construct durable, compact keepsakes for keyrings, bags, and nursery decor. Readers will learn the precise techniques for establishing consistent tension, forming clean spirals, executing invisible decreases, packing fiberfill without distortion, and securing durable metal hardware. Working on a miniature scale requires fine control over small hooks and lightweight fibers, helping crafters build foundational muscle memory that elevates larger projects. Because each charm consumes minimal yardage, these patterns offer an ideal way to repurpose leftover cotton remnants while producing practical, functional items. Exploring varied botanical, animal, and culinary motifs allows beginners to practice different dimensional silhouettes while mastering multi-piece assembly and clean facial embroidery. By following the step-by-step instructions and finishing principles detailed across this resource, fiber enthusiasts will develop the practical skills necessary to craft durable, professional amigurumi charms that hold their shape through regular daily handling.
Why This Idea Is Trending or Useful
Miniature amigurumi charms have become a staple of modern DIY inspiration across digital platforms because they combine rapid completion timelines with tactile, functional personalization. Modern lifestyle aesthetics increasingly celebrate small, handmade accents that soften mass-produced personal electronics, utility bags, backpacks, and keychains with warm artisanal charm. From a practical perspective, small amigurumi charms provide high creative value by requiring only a fraction of the time and financial investment demanded by full-sized plush toys or wearable garments. Crafters can complete an entire miniature design in an afternoon, experiencing the immediate satisfaction of finishing a project while practicing fundamental crochet techniques. The medium remains exceptionally beginner friendly, as standard amigurumi mechanics rely primarily on the continuous single crochet stitch worked in rounds, eliminating the need to track complex multi-row lace or cables. Additionally, these portable figures support sustainable crafting habits by turning tiny leftover yarn scraps into thoughtful gifts, party favors, or decorative nursery accents. The resulting handmade pieces blend contemporary color palettes with timeless craft traditions, providing an enduring creative outlet for makers of all skill levels.
Materials and Preparation
Executing clean, durable amigurumi charms requires selecting appropriate fibers, using fine-gauge tools, and setting up an organized workspace prior to beginning. Mercerized sport-weight or fine DK cotton yarn serves as the industry standard for miniature amigurumi because its tightly spun plies resist fuzzing, show crisp stitch definition, and withstand constant daily contact. Pair this fiber with an ergonomic aluminum hook sized between 2.0 mm and 2.75 mm, selecting a size noticeably smaller than indicated on the yarn label to produce dense, tight fabric that completely conceals the interior stuffing. Essential tools include sharp embroidery snips, blunt metal tapestry needles, locking stitch markers to track spiral rounds, dense polyester cluster stuffing, wooden stuffing dowels, and sturdy metal split rings, jump rings, or swivel lobster clasps. Thorough preparation involves working a small tension swatch to confirm that your stitches interlock without leaving gaps when bent. Pre-sorting yarn colors and gathering all assembly hardware on a flat, clean surface establishes an efficient workflow, prevents interruptions during construction, and ensures that every finished charm retains structural stability over time.
1. Petite Garden Strawberry Bag Charm

Step-by-Step Guide
The petite garden strawberry charm captures the charm of fresh fruit through a classic tapered cone silhouette, topped with a star-shaped calyx and delicate embroidered surface seeds. This design uses a rich scarlet red cotton base worked from the pointed tip upward, expanding gradually to build a rounded berry shoulder. The calyx features five pointed green leaves worked as a separate flat piece, creating a multi-layered botanical structure that rests cleanly atop the berry crown. Small, evenly spaced seed stitches worked with pale cream or golden-yellow embroidery floss introduce subtle surface texture and visual depth without cluttering the compact silhouette. This design serves as a practical, lightweight accent for canvas tote bags, straw market baskets, or summer key bundles. The dense cotton fabric resists flattening when tucked into pockets, ensuring the berry retains its plump, recognizable profile through months of daily handling.
Begin by working four single crochet stitches of scarlet cotton yarn into an adjustable magic ring using a 2.25 mm hook, pulling the tail firmly to close the center hole. Work in continuous spiral rounds, increasing by two stitches across every subsequent round until you reach a total circumference of eighteen stitches, establishing the smooth conical taper. Work three rounds evenly without increasing to form the rounded body, then complete six systematic invisible decreases around the final rim. Stuff the berry cavity firmly with small pinches of polyester fiberfill using a wooden dowel, working the stuffing into the lower tip before closing the remaining stitches with a needle finish. To make the calyx, join leaf-green yarn into a magic ring, chaining three and slip-stitching down five times to form five pointed leaves. Stitch the calyx to the top of the strawberry, embroider tiny seed flecks across the red surface using golden thread, and secure a silver jump ring through the central stem loop.
2. Miniature Sprout Seedling Desk Buddy
Read This:

How to Make
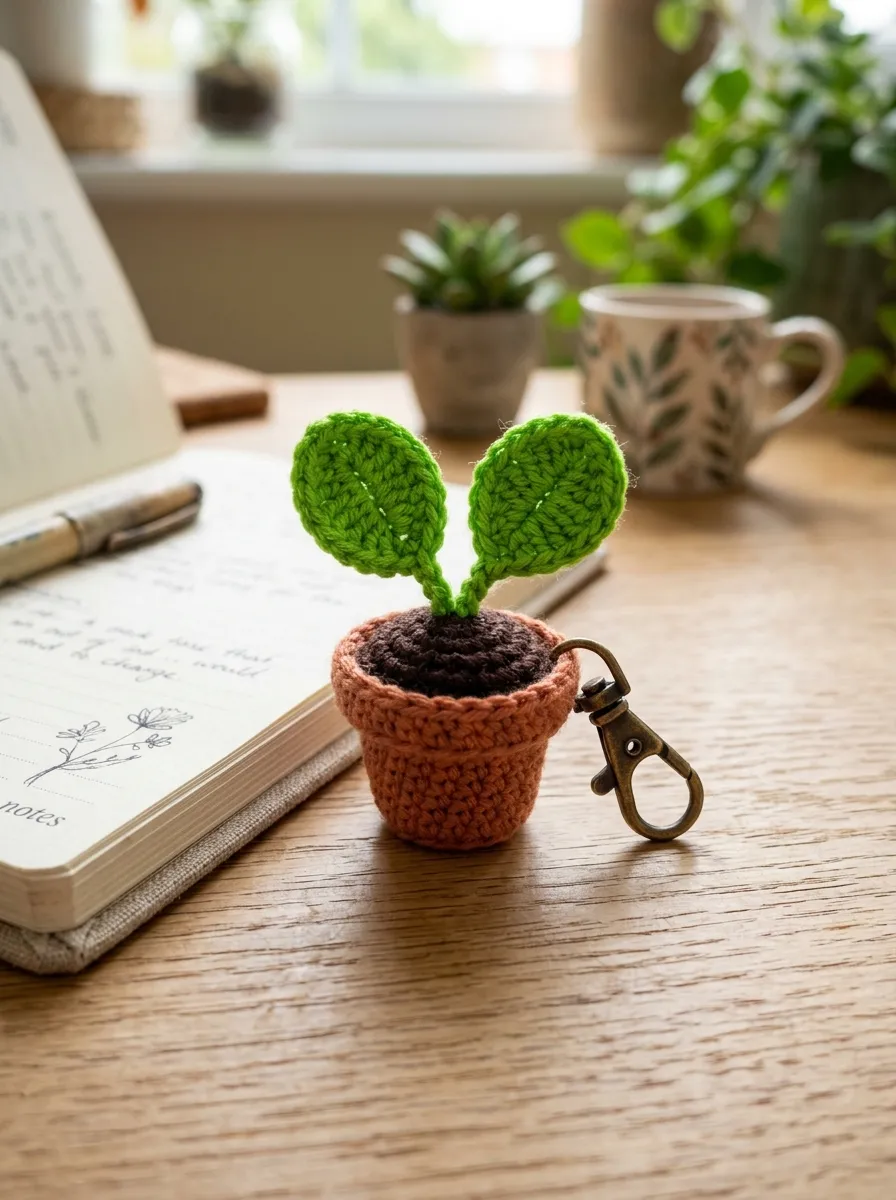
The miniature sprout seedling charm draws inspiration from botanical growth, pairing an earthy terracotta pot base with two vibrant green cotyledon leaves emerging from a dark soil core. The lower container is worked with crisp, right-angled stitches using back-loop single crochet, establishing a flat bottom that allows the charm to sit upright on flat surfaces when not attached to bags. The inner soil hemisphere is worked in deep espresso brown, providing a dense foundation that holds the leafy stem straight. Two curved, bright green oval leaves arch outward from a short central stalk, catching natural light and introducing a playful, organic touch to work desks, planners, and zipper pulls. This design combines the charm of miniature potted plants with portable functionality, making it a favorite for indoor gardeners and creative professionals who enjoy subtle, plant-inspired accents.
Start by working six single crochet stitches of terracotta yarn into a magic ring, increasing evenly across two rounds until twelve stitches form a flat disc. Work one round into the back loops only to create the sharp lower rim of the pot, then work four straight rounds of standard single crochet to build the vertical walls, finishing with a round of slip stitches around the rim to create a crisp pot lip. Form the soil dome using dark brown yarn, working an eight-stitch hemisphere lightly packed with fiberfill, and sew it directly into the inner rim of the pot. To make the sprout, join bright green yarn to the center of the soil, chaining four stitches to form the central stem. Branch out by chaining five stitches to the left, working slip stitches and half-double crochets along the chain to shape an oval leaf, and repeat on the right side to create a symmetrical pair of leaves. Secure all yarn tails internally, then attach an antique bronze lobster clasp to the back of the stem base.
3. Celestial Crescent Moon Pocket Talisman
Execution Process
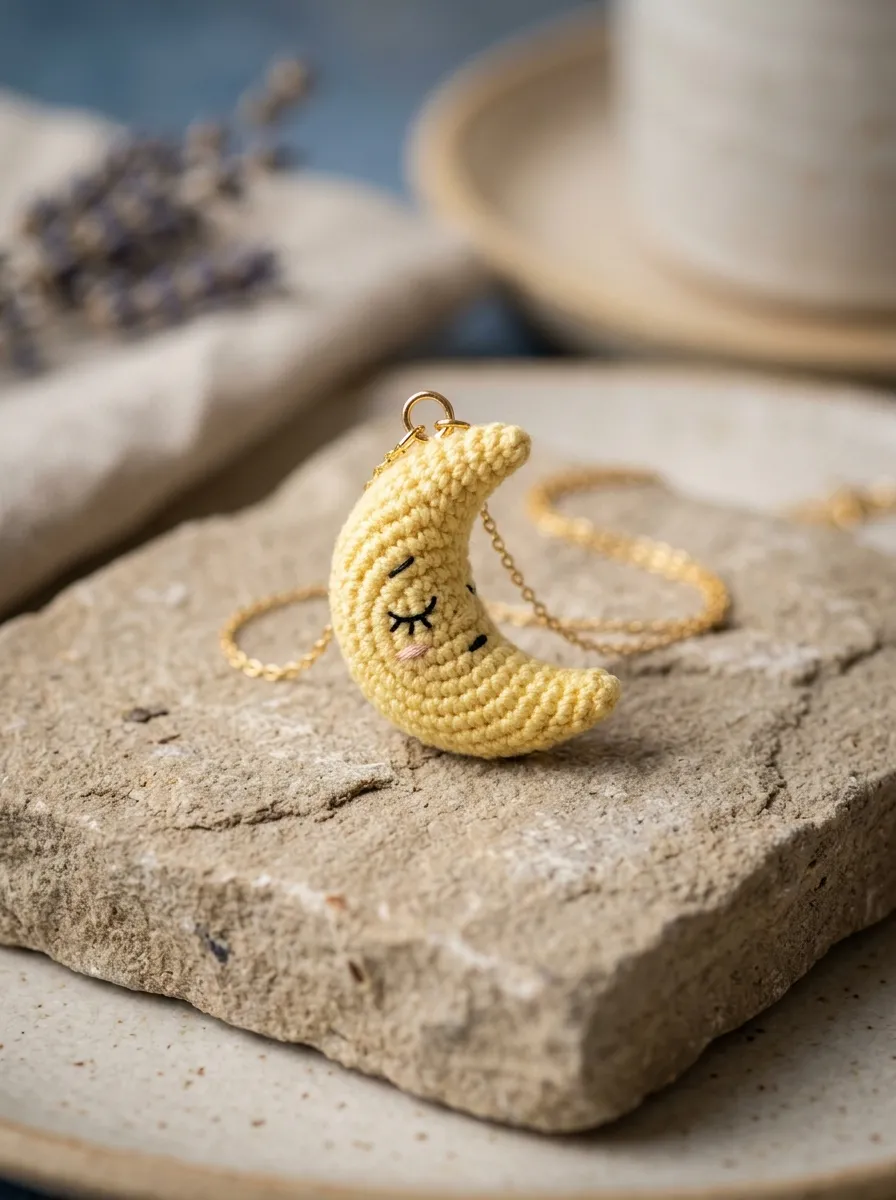
The celestial crescent moon talisman features a curved, tapered arc that narrows to delicate points at both ends while maintaining a plump, rounded center. This design relies on strategic stitch increases along the outer convex curve balanced by corresponding decreases along the inner concave margin, creating a natural sweep without requiring internal armature wire. Finishing the piece in soft buttery yellow or muted cream yarn gives it a gentle, celestial feel that complements minimalist bags, pastel backpacks, and nursery mobiles. Because the curve naturally wraps around fingers or bag straps, the talisman offers a pleasant tactile shape that fits comfortably in the palm or deep within a pocket. The smooth, unbroken surface provides a clean canvas for adding delicate embroidered sleeping facial features or small French knot stars, transforming simple yarn geometry into a whimsical, peaceful companion.
To create the moon, chain twenty-one stitches using pale buttercup cotton yarn, leaving a six-inch starting tail for later assembly. Begin the second row by working two slip stitches, three single crochets, six double crochets into the center section to build maximum width, three single crochets, and two slip stitches at the opposite end to establish the tapered crescent profile. Turn the piece and work back along the opposite side of the foundation chain, placing regular increases along the outer curve and slip stitches along the inner arc to form a hollow, curved tube. Lightly insert small amounts of polyester stuffing into the central chamber as the edges close, using the back of your hook to guide the fiber toward the narrow tips. Stitch the open seam closed using a blunt tapestry needle, shaping the curved points with your fingers as you secure the final knots. Fasten a fine gold-plated jump ring through the upper point of the crescent, attaching a smooth cable chain to complete the charm.
4. Kawaii Glazed Donut Backpack Accent

Read This:

Step-by-Step Guide
The kawaii glazed donut accent transforms a classic dessert silhouette into a durable, circular charm centered around an open interior void. The design uses a continuous tubular construction worked in the round, joining a warm golden-tan dough base with a wavy pastel frosting layer in strawberry pink or mint green. The central hole provides a natural anchor point for bag clasps, allowing the charm to lay flat against canvas or leather without rolling sideways. Tiny straight stitches in bright, contrasting colors mimic candy sprinkles across the frosted surface, introducing vibrant pops of color that catch the eye. The circular shape resists snagging on exterior pockets or notebook spirals, making it a reliable everyday accessory for school bags, craft cases, and travel pouches.
Begin by chaining sixteen stitches using golden-tan cotton yarn, joining the chain into a ring with a slip stitch while ensuring the loops lie flat without twisting. Work single crochet stitches in continuous spiral rounds around the ring, increasing evenly across two rounds to twenty-four stitches to build the outer curvature of the dough. Work three rounds evenly, then switch to soft pink yarn to begin the frosting layer. Work three additional rounds in pink, alternating single crochets with occasional slip stitches to mimic the irregular drips of melted sugar glaze. Fasten off with a long tail, use fine embroidery floss to sew multi-colored sprinkle dashes onto the pink surface, and lightly pack the hollow tube with polyester fiberfill as you join the live stitches to the starting chain. Sew the inner seam closed using a tapestry needle, then attach a sturdy swivel clasp directly through the central opening.
5. Forest Mushroom Woodland Dangle

Setup Method
The forest mushroom woodland dangle brings fairy-tale charm to personal accessories with a bright, domed cap and a sturdy, tapered white stem. The design features a rounded scarlet cap speckled with embroidered white spots, resting atop a dense cream-colored stem that widens at the base to suggest roots. The contrast between the saturated red cap and the neutral stem creates a classic woodland aesthetic that pairs naturally with outdoor packs, keys, and nature journals. The wide, flat underside of the cap forms a distinct structural shelf that holds the stem upright, preventing the mushroom from wobbling or losing its defined silhouette. This compact piece is fast to crochet, making it an excellent beginner project for practicing clean color changes, three-dimensional shaping, and surface embroidery on curved amigurumi pieces.
Start by working the red mushroom cap, placing six single crochet stitches into an adjustable magic ring using red cotton yarn. Increase by six stitches per round across three successive rounds until reaching twenty-four stitches, then work two rounds straight to form the curved dome of the mushroom cap. Switch to white yarn and work one round into the back loops only, executing six invisible decreases to establish the flat underside of the cap. Stuff the cap firmly with fiberfill, then continue working the stem downward using twelve single crochets for four rounds before increasing to sixteen stitches along the base to create a stable, flared bottom. Stuff the stem firmly, weave the final yarn tail through the front loops of the bottom round, and pull the opening closed. Use white embroidery floss to stitch five to seven French knots across the red cap, and anchor a brass split ring through the center top.
6. Playful Little Acorn Zipper Pull
Read This:
How to Make
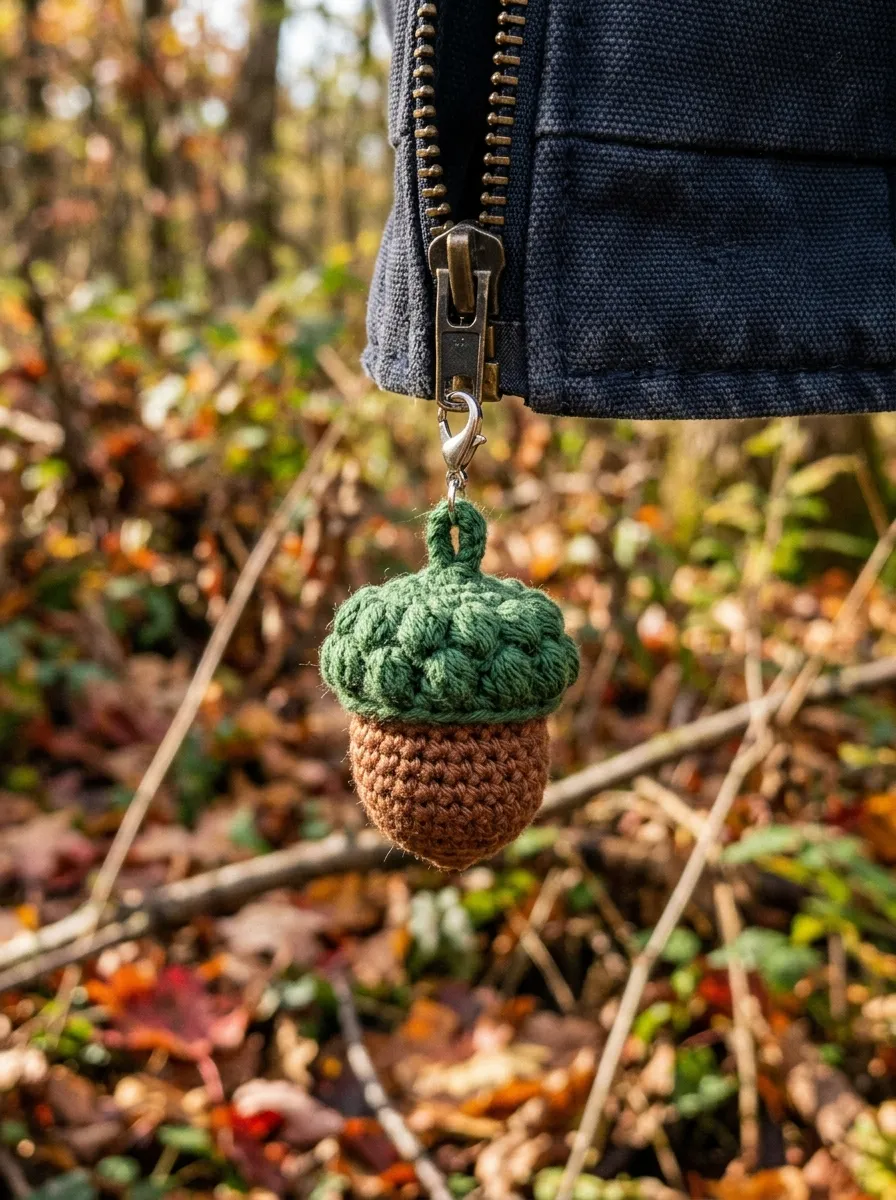
The playful little acorn zipper pull pairs smooth botanical curves with raised textural stitches, creating an earthy accessory that adds grip to stubborn jacket and bag zippers. The charm comprises a smooth, egg-shaped chestnut brown nut nestled beneath an olive-green textured cup worked in raised bobble or puff stitches. This pairing of slick single crochet with bumpy surface textures provides an engaging tactile finish that is easy to locate and pull by touch alone. The muted, forest-inspired palette complements utility outerwear, wool coats, and canvas daypacks, bringing an understated touch of nature to utilitarian gear. Its small size ensures it stays lightweight, preventing strain on delicate zipper tracks while adding distinct handmade character to everyday outerwear.
Begin the nut portion using rich brown cotton yarn, placing six single crochet stitches into a magic ring and increasing evenly to twelve stitches on the second round. Work three rounds evenly to build the rounded body, then work three invisible decreases, lightly stuffing the cavity with wool scraps or fiberfill before pulling the top opening closed with a needle. To build the textured cap, join olive-green yarn into a separate magic ring, working one round of single crochets followed by a round that alternates single crochets with three-loop puff stitches to establish a bumpy, cup-like shell. Place the textured cap directly over the upper half of the brown nut, securing the edge with hidden slip stitches using a tapestry needle. Chain five stitches at the crown of the cap using green yarn to form a sturdy stem loop, knot the loop securely, and attach a small steel lobster clasp designed specifically for zipper sliders.
7. Cheerful Citrus Lemon Slice Wedge
Execution Process
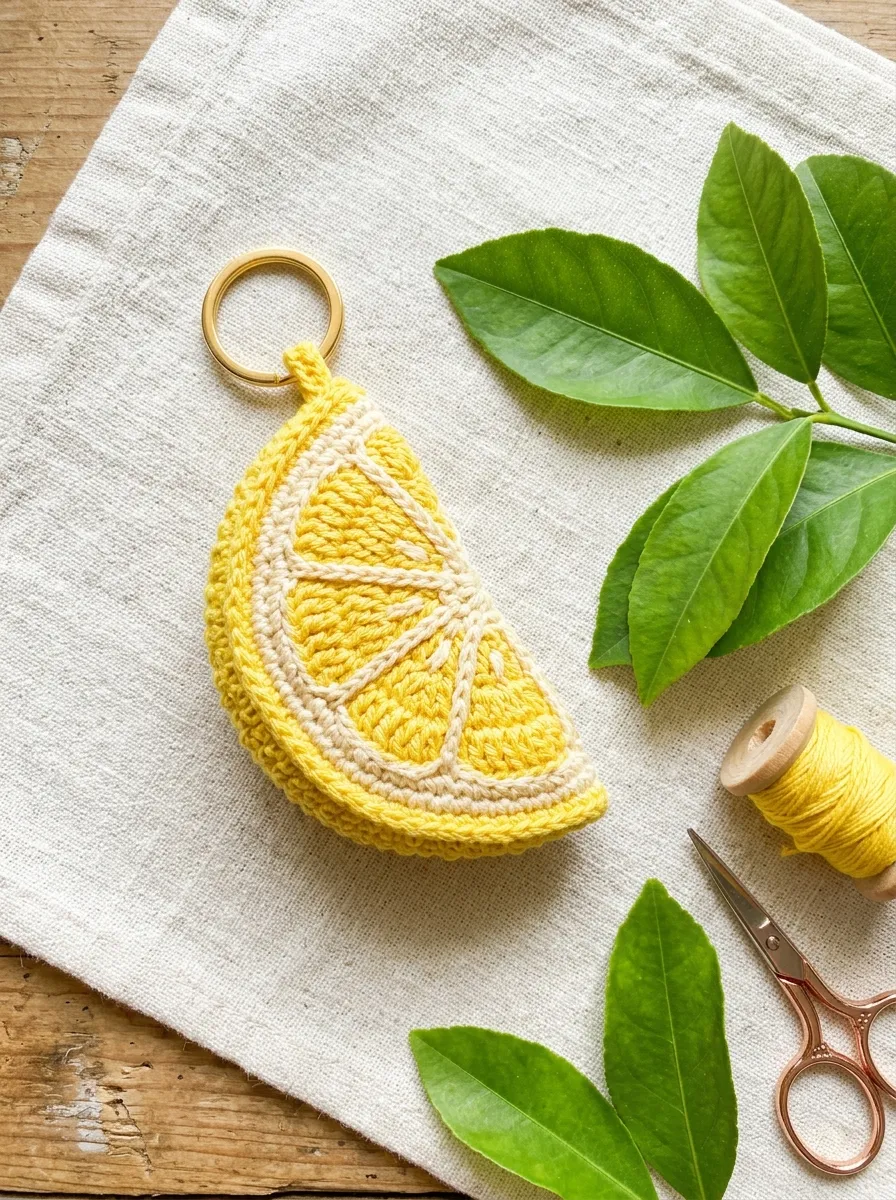
The cheerful citrus lemon slice wedge uses geometric bisection to create a bright, semi-circular fruit charm that brings an energetic pop of color to personal belongings. The design begins as a flat circular medallion featuring a pale cream pith center divided into triangular segments with golden yellow yarn, bordered by a textured yellow rind. The flat disc is then folded in half and stitched along the curved perimeter, creating a thick, wedge-shaped slice that retains its structure through double-layered fabric. This folded method eliminates the need for loose interior stuffing, yielding a flat, pocket-friendly accessory that will not burst or shed fibers when subjected to friction inside crowded bags. The bright, sunny aesthetic makes it an ideal pairing for summer beach bags, key bundles, and sunglasses cases.
Using pale cream cotton yarn, work six single crochet stitches into a magic ring, increasing evenly across three rounds to eighteen stitches to establish the inner fruit pulp disc. Switch to bright lemon-yellow yarn and work one round of single crochet, followed by a final round of slip stitches worked into the back loops to define the firm outer rind of the lemon. Fasten off with a long tail, then use cream yarn threaded on a tapestry needle to stitch six straight radial lines from the center outward to the rind, creating the segmented fruit sections. Fold the circular piece in half so the segments show on both outer faces, and sew the straight edges together using a whipstitch through both thicknesses. Work a neat slip stitch border along the outer curved rim to lock the layers together, and fasten a gold key ring through the top corner of the citrus wedge.
8. Cozy Honeybee Pendant with Translucent Wings

Read This:

Step-by-Step Guide
The cozy honeybee pendant combines bold graphic stripes with delicate, flat wings to create a charming, nature-inspired companion for backpacks, lanyards, and vehicle mirrors. The bee’s body is worked as a smooth, rounded oblong cylinder, featuring alternating stripes of golden-yellow and dark charcoal-black cotton yarn. Two delicate, tear-shaped wings worked in fine white or iridescent lace-weight cotton are sewn to the upper back, arching slightly outward to give the impression of flight. Adding simple embroidered eyes using black thread gives the bee a friendly, approachable face without requiring plastic safety eyes that can scratch nearby items. The sturdy, compact body holds up well to regular handling, while the flat wings remain flexible, bending naturally without tearing or losing their shape when stored inside pockets.
Using golden-yellow cotton yarn, work six single crochet stitches into a magic ring, increasing to twelve stitches across the next round. Work two rounds in yellow, then join charcoal-black yarn to work two rounds of straight single crochet, repeating this two-round color sequence until you have completed three yellow stripes and two black stripes. Stuff the cylindrical body firmly with polyester stuffing, then work systematic invisible decreases across the final black round to close the body neatly. To make the wings, use fine white cotton thread on a 1.75 mm hook, chaining six stitches and working slip stitches, single crochets, and double crochets along the chain to form two small, flat teardrop shapes. Stitch the bases of the wings securely to the upper black stripe on the bee’s back, embroider two tiny horizontal sleepy eyes on the yellow face using black thread, and attach a swivel lobster clasp to the center back.
9. Minimalist Sleeping Fox Head Medallion

Setup Method
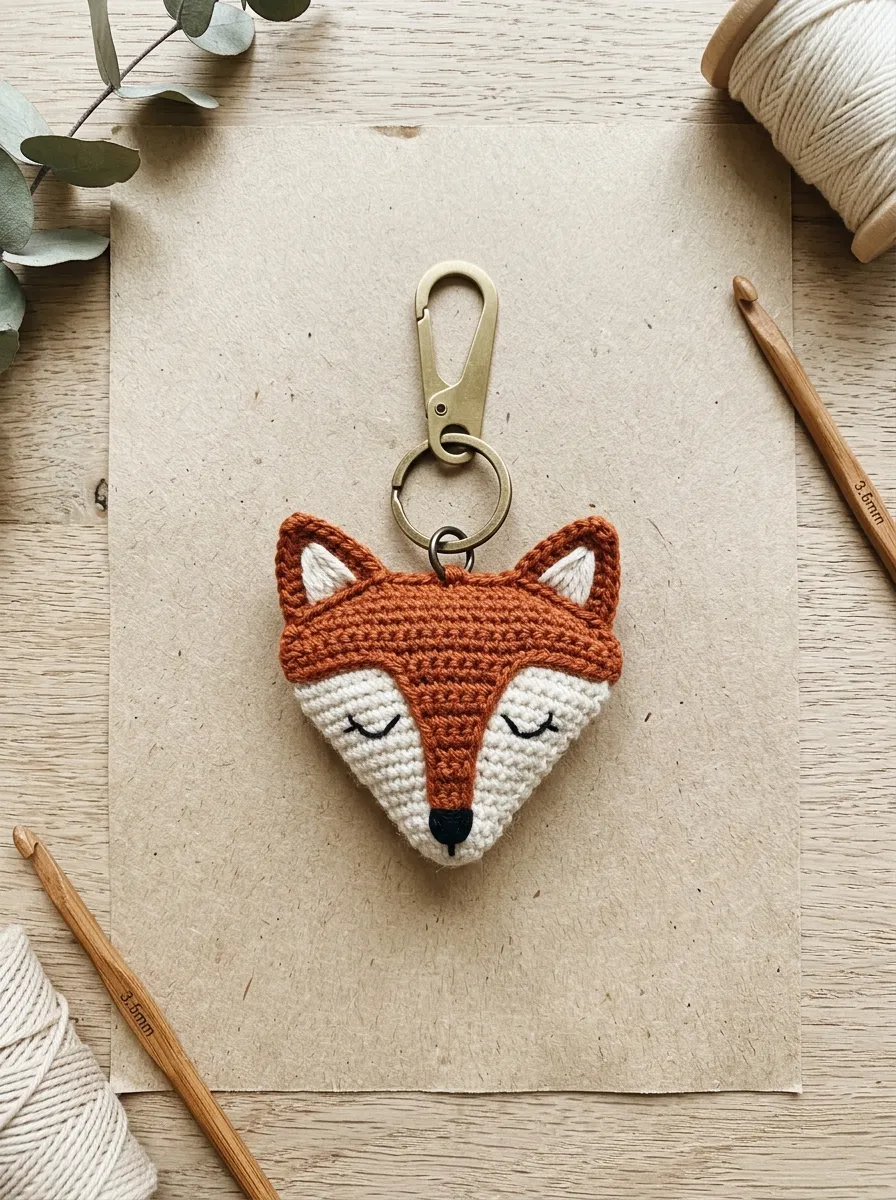
The minimalist sleeping fox head medallion uses clean triangular geometry and sharp color blocking to capture woodland elegance in a flat, pocket-friendly design. The face forms a broad, inverted triangle featuring a rich rust-orange upper brow and two clean white lower cheek wedges that meet at a pointed black nose. The ears are worked directly into the upper edge as small pointed crests, establishing a continuous silhouette that avoids fragile separate seams. Simple embroidered crescent eyes and a tiny nose give the fox a serene, sleeping expression, celebrating minimalist design principles where a few simple lines create a recognizable character. The flat, double-layered profile slides easily into tight jeans pockets without creating uncomfortable bulk, making it an exceptional everyday carry fob for minimalist key collections.
Begin with rust-orange cotton yarn, working six single crochet stitches into a magic ring and increasing over four rounds to form an oval base measuring twenty stitches in circumference. On the fifth round, switch to clean white yarn across the lower half of the stitches, dropping the orange yarn to create a sharp, distinct color split between the upper brow and lower cheeks. Work two decrease rounds to taper the lower face into a sharp triangular chin, lightly packing the interior with flat fiberfill before stitching the bottom tip closed. Form the ears directly along the top orange edge by working three single crochets, chaining one, and turning to decrease into a sharp point on both sides. Embroider two curved downward crescents for sleeping eyes using fine black thread, add a small satin-stitched triangle for the black nose at the chin, and attach a flat brass key clip to the top edge between the ears.
10. Floating Oceanic Jellyfish Tassel Dangle
Read This:
How to Make
The floating oceanic jellyfish tassel dangle combines a hollow, rounded amigurumi dome with a cascading cluster of textured tentacles, creating an airy accessory filled with graceful, dynamic motion. The upper bell features a smooth, semi-spherical cap worked in pastel shades like seafoam green, soft lavender, or pale aqua, finished with a gently rippled lower rim. Multiple coiled, spiraled tentacle cords hang downward from the interior base of the dome, twisting and bouncing naturally as the charm moves. This combination of a firm, three-dimensional head and flowing fiber ribbons makes it an eye-catching accent for beach bags, backpacks, and bedroom wall hooks. The open underside keeps the charm remarkably lightweight despite its visual length, allowing the tentacles to move freely without dragging down delicate zipper sliders.
To form the jellyfish dome, work six single crochet stitches of soft lavender cotton yarn into a magic ring, increasing evenly across three rounds to eighteen stitches. Work four rounds straight to build the curved walls of the bell, then work a final decorative rim by alternating slip stitches and two half-double crochets in each stitch around to create a ruffled edge. Fasten off and set the bell aside. To create the hanging tentacles, join seafoam-green yarn to a flat six-stitch circular base plate, chaining fifteen stitches for the first tentacle and working two single crochets into each chain space, which causes the cord to twist into a springy corkscrew spiral. Repeat this process to produce four distinct curly tentacles, alongside two straight braided cords of contrasting white thread. Sew the tentacle base plate firmly inside the lower rim of the lavender bell, and attach a split ring to the center top of the dome.
Common Beginner Mistakes and How to Avoid Them
Beginner crafters often face distinct challenges when transitioning to small-scale amigurumi charms, with inconsistent tension being the most common issue. Loose stitches create visible gaps in the fabric, allowing bright white polyester stuffing to show through and compromising the clean appearance of the finished piece. Prevent this by using a hook at least half a millimeter smaller than the yarn band recommends, keeping your tension firm and steady throughout the project. Another frequent mistake is using standard decreases, which leave bulky, raised ridges and loose gaps on curved surfaces. Always use the invisible decrease technique, inserting your hook only through the front loops of the two target stitches before completing the stitch to maintain a smooth, uninterrupted fabric texture. Finally, beginners often attach metal key rings directly to single yarn plies, which quickly wear down and snap under daily friction. Avoid this by anchoring hardware through reinforced fabric loops or passing jump rings through multiple interior stitch bars, ensuring the connection withstands the pulling force of everyday handling.
Practical Tips for Better Results
Achieving a clean, professional finish on handmade amigurumi charms depends on disciplined assembly techniques, proper fiber preparation, and careful hardware installation. When packing small figures, use tiny tufts of polyester cluster stuffing rather than large clumps, using the blunt end of a wooden dowel to push the fiber firmly into every corner without stretching the outer stitches. When embroidering facial details like eyes or smiles, use fine stranded embroidery floss rather than thick yarn, securing the starting and ending knots deep inside the stuffed cavity to keep the exterior clean and seamless. To ensure multi-piece projects like stems, ears, and leaves remain balanced, pin all components in place with ball-headed sewing pins and check their alignment from multiple angles before stitching them down. If you need to wash cotton charms that have gathered lint or pocket debris, hand wash them in lukewarm water with a drop of gentle detergent, reshape them with your fingers, and allow them to air-dry fully. Finally, choosing sturdy, high-grade brass or stainless steel hardware instead of thin craft wire ensures your finished accessories remain secure and durable through long-term daily use.
Styling, Presentation, or Organization Ideas
Presenting and organizing miniature amigurumi charms thoughtfully highlights their artisanal quality, whether you are staging personal accessories or preparing gifts for craft sales. When styling these charms for everyday carry, pair colorful, textured pieces with simple, neutral backgrounds—hang a vibrant strawberry or lemon charm from an unbleached canvas tote or minimalist leather backpack to let the fiber art serve as the main accent. At home, store your charm collection on an entryway wooden pegboard fitted with brass hooks, creating a clean, organized display that doubles as cheerful wall decor. If you are preparing charms for craft markets or thoughtful gifts, mount each piece on heavy kraft cardstock backer cards stamped with simple line art, securing the metal clasp through a clean punched hole at the top. For open-air market tables, display your charms inside shallow wooden trays lined with neutral linen fabric, grouping items by theme—such as woodland creatures, garden fruits, or marine motifs—to create an organized, boutique-style shopping experience that invites customers to touch and appreciate the handmade details.
Budget or Time Planning
Crochet amigurumi charms are exceptionally economical to produce, making them some of the most budget-friendly and time-efficient projects in fiber arts. A single fifty-gram ball of mercerized sport cotton can produce five to eight small charms, keeping direct material expenses remarkably low compared to larger garments or blankets. Crafters can minimize costs even further by saving yarn tails from larger projects, as small parts like leaves, stems, and embroidered details require only a few yards of thread. Most miniature charms take between forty-five and seventy-five minutes to complete from the starting loop to the final hardware connection, making them ideal for quick, single-evening crafting sessions. When making charms in larger quantities for gifts or craft markets, adopt an assembly-line approach: crochet all identical base shapes first, complete any surface embroidery or small parts in a second session, and assemble the pieces and hardware in a final pass. This structured workflow reduces frequent tool changes, speeds up production, and ensures consistent sizing and stitch tension across every finished piece.
Creative Expansion and Advanced Inspiration
Once you feel comfortable with foundational amigurumi charm mechanics, explore advanced design techniques that expand the creative possibilities of miniature fiber art. Try working with fine lace-weight cotton threads and micro-hooks below 1.5 mm, shrinking standard patterns down to delicate jewelry scales to make matching earrings, delicate pendant necklaces, or dainty planner charms. Experiment with mixed-media elements by adding natural unfinished wood beads, polished semi-precious stones, or small brass bells into your hanging cords to introduce contrasting textures and gentle sounds. You can also explore subtle surface tinting by using soft dry pastels or fabric powders applied with a small makeup brush, adding soft blush to the cheeks of animal figures or realistic shading to botanical fruit designs. For functional upgrades, sew tiny metal lobster clasps into the base of charms so different seasonal motifs can be swapped out on a single primary key ring. Keeping a dedicated sketchbook for pattern modifications, color palettes, and hardware ideas will provide ongoing inspiration, helping you continuously evolve your personal style across every handmade project.